The advent of the Large Language Model (LLM) is in full swing within the tech community since the debut of ChatGPT by openAI. Platforms such as Google Colab, and similar variants from Amazon and Facebook allows software developer to experiment with LLM’s. The hosted model of the data center based GPU’s makes training and refinement of LLM’s tolerable.
What about using LLM on a local computer away from the cloud?
Projects such as llama.cpp by Georgi Gerganov makes it possible to run the Facebook open sourced Llama 2 model on a single MacBook. The existence of llama.cpp gives hope on creating a desktop that is powerful enough to some local development with LLM’s away from the cloud. This post documents an experimental procedure in building a desktop machine using parts readily available from the Internet to see if we can do some AI development with LLM’s.
Below is a list of sourced parts from EBay, Amazon and CanadaComputers, a local computer store. All prices are in Canadian dollars and includes relevant taxes.
| Items | Price |
|---|---|
| NVIDIA Tesla P40 24GB GDDR5 Graphics Card (sourced from EBay) | $275.70 |
| Lian-Li Case O11D Mini -X Mid Tower Black (sourced from Amazon) | $168.49 |
| GDSTIME 7530 75mm x 30mm 7cm 3in 12V DC Brushless Small Mini Blower Cooling Fan for Projector, Sleeve Bearing 2PIN (sourced from Amazon) | $16.94 |
| CORSAIR Vengeance LPX 64GB (4 x 32GB) DDR4 3200 (PC4-25600) C16 1.35V Desktop Memory – Black (sourced from Amazon) | $350.28 |
| AMD Ryzen 7 5700G 8-Core, 16-Thread Unlocked Desktop Processor with Radeon Graphics (sourced from Amazon) | $281.35 |
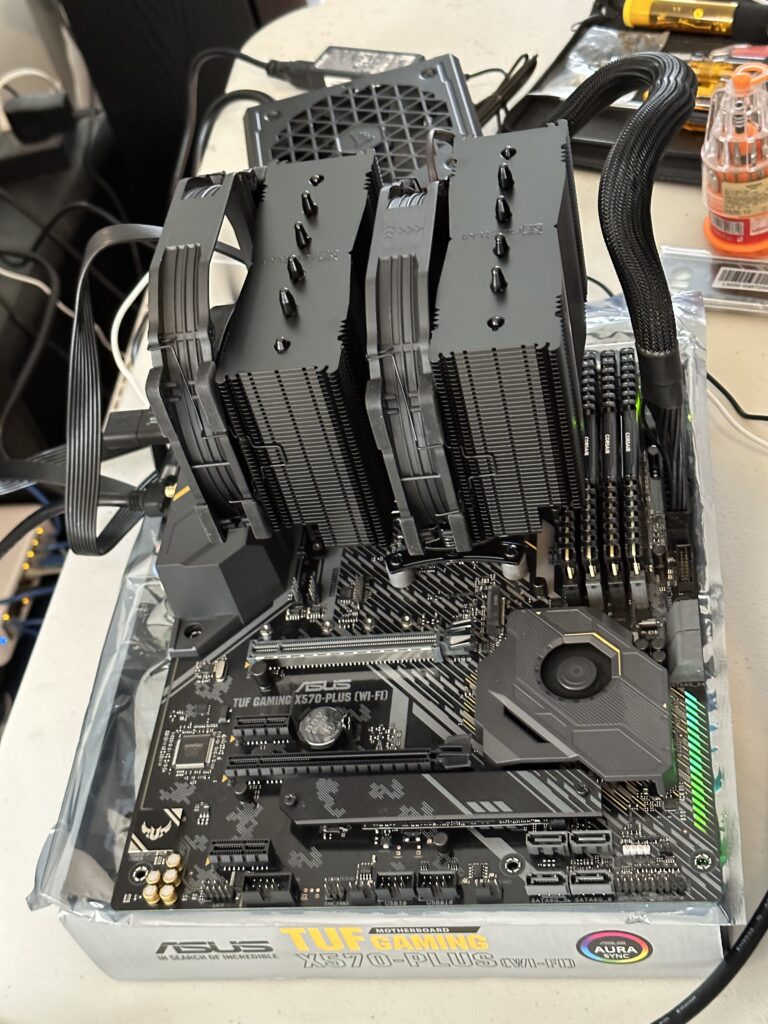
| Noctua NH-D15 chromax.Black, Dual-Tower CPU Cooler (140mm, Black) (sourced from Amazon) | $158.14 |
| Asus AM4 TUF Gaming X570-Plus (Wi-Fi) ATX motherboard with PCIe 4.0, dual M.2, 12+2 with Dr. MOS power stage, HDMI, DP, SATA 6Gb/s, USB 3.2 Gen 2 and Aura Sync RGB lighting (sourced from Amazon) | $305.09 |
| Samsung 970 EVO Plus 2TB NVMe M.2 Internal SSD (MZ-V7S2T0B/AM) (sourced from Amazon) | $217.72 |
| Lian Li PS SP850 850W APFC 80+ GOLD Full modular SFX Power Supply, Black (sourced from CanadaComputers) | $225.99 |
| Miscellaneous 120mm case fans and cables purchased from CanadaComputers | $63.17 |
The total cost of the above materials is $2,062.87 CAD.
The Nvidia Tesla P40 (Pascal Architecture) specializes for Inferencing limited to INT8 based operations and does not support any FP related operations, so it may not be optimal for machine learning. However recent claims have been made that INT8 / Q8_0 quantization can yield some promising results. Let us see what our experimentation will yield once the machine is built.
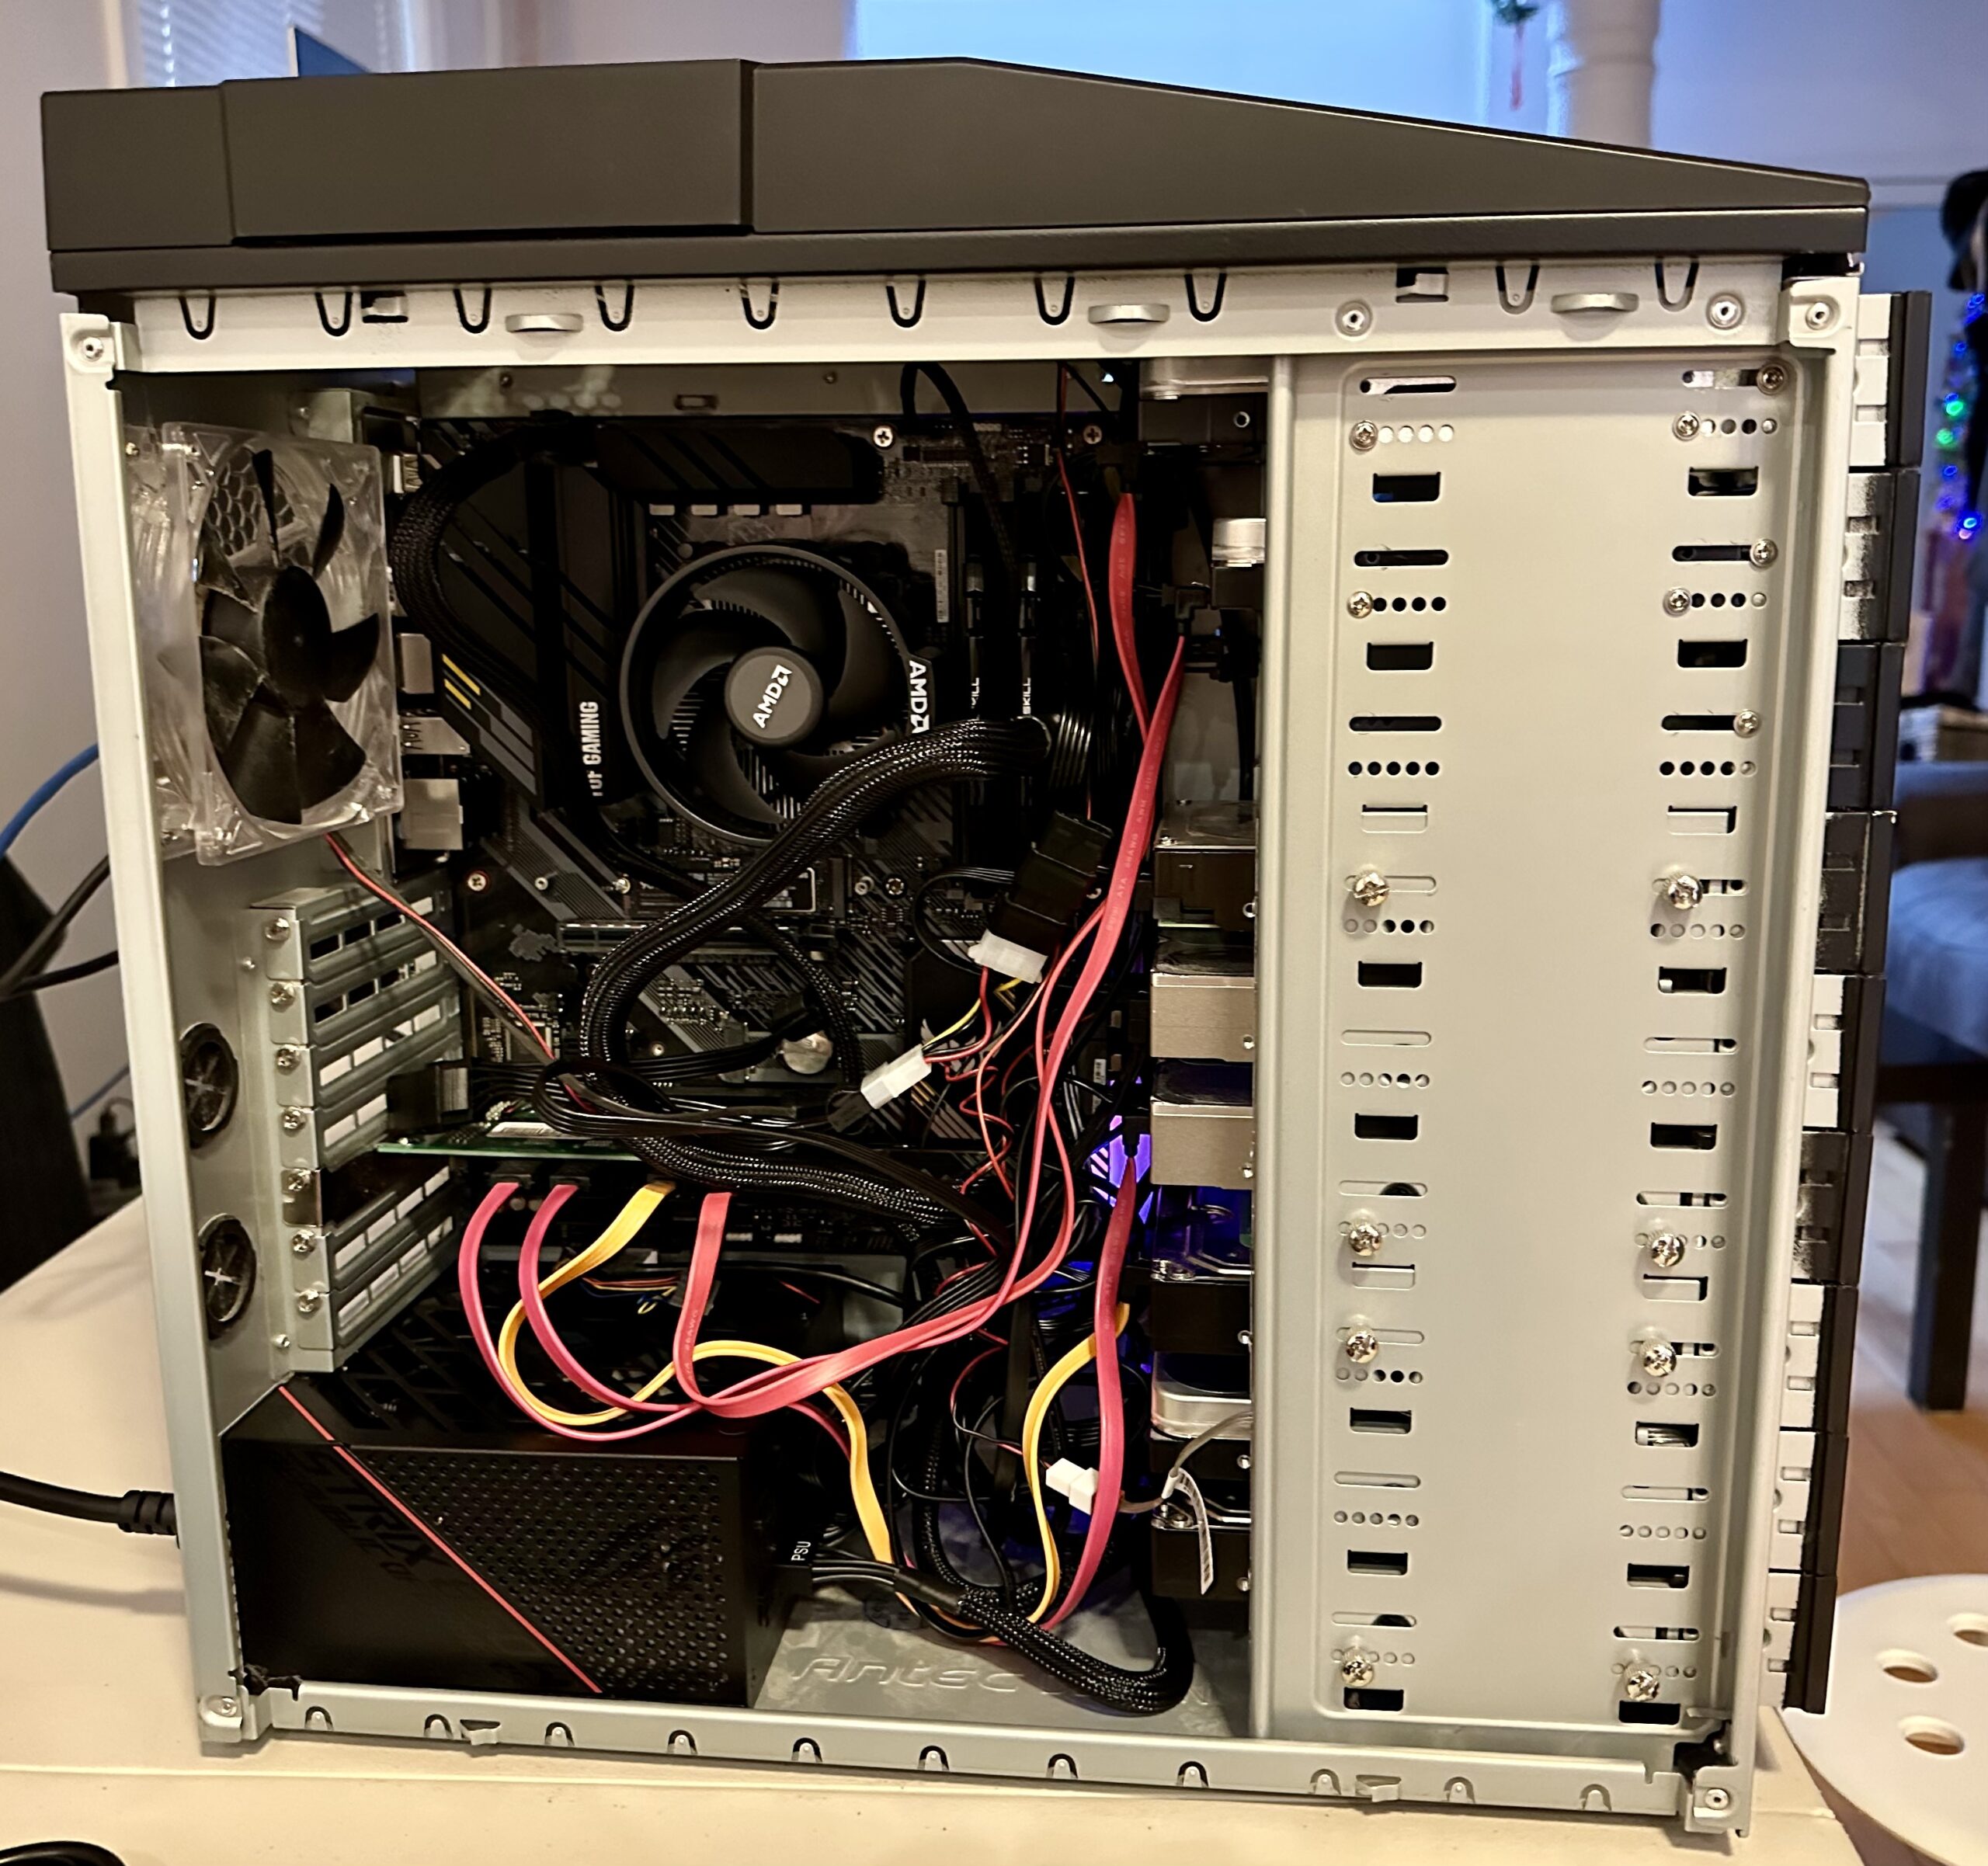
A custom design 3D fan shroud has to be designed and 3D printed because the P40 does not natively come with active cooling. The P40 is originally designed to operate in a data center so cooling is provided by the server chassis. The custom shroud design is posted on Thingiverse and some photos of the finished shroud is shown below.
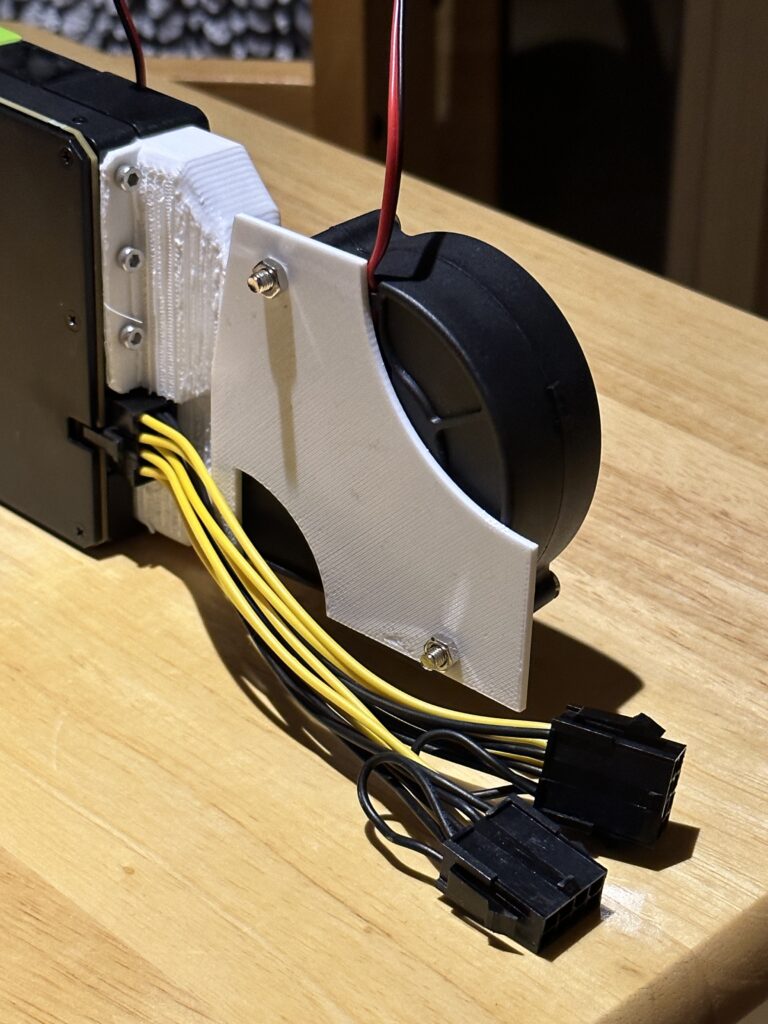
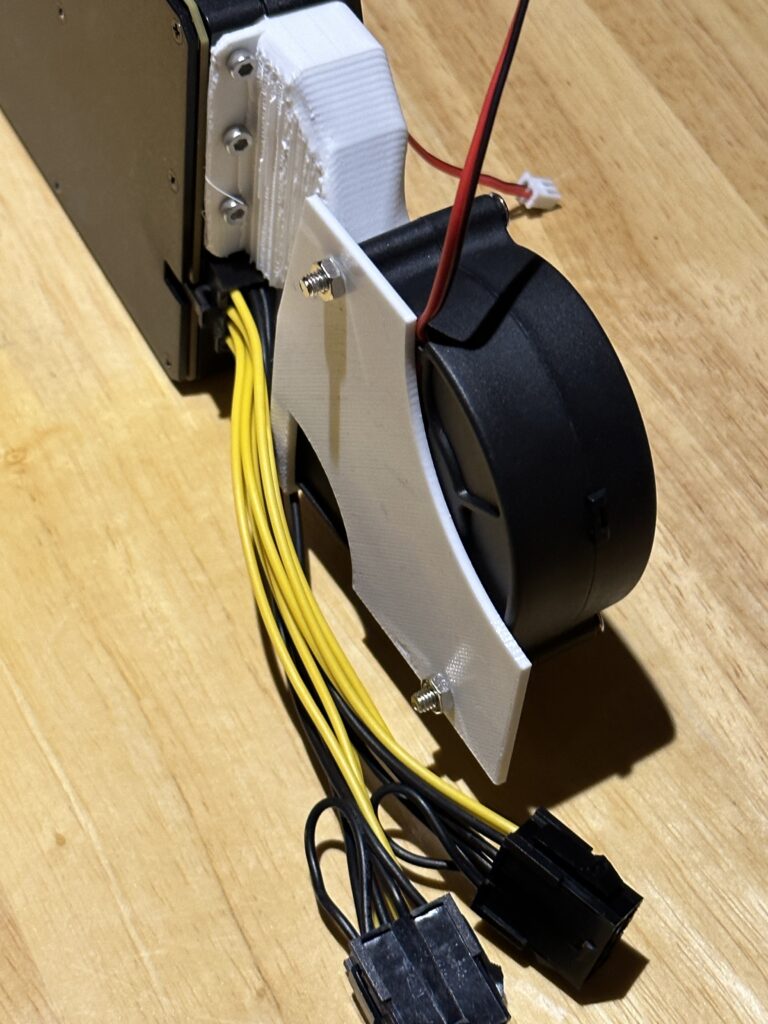

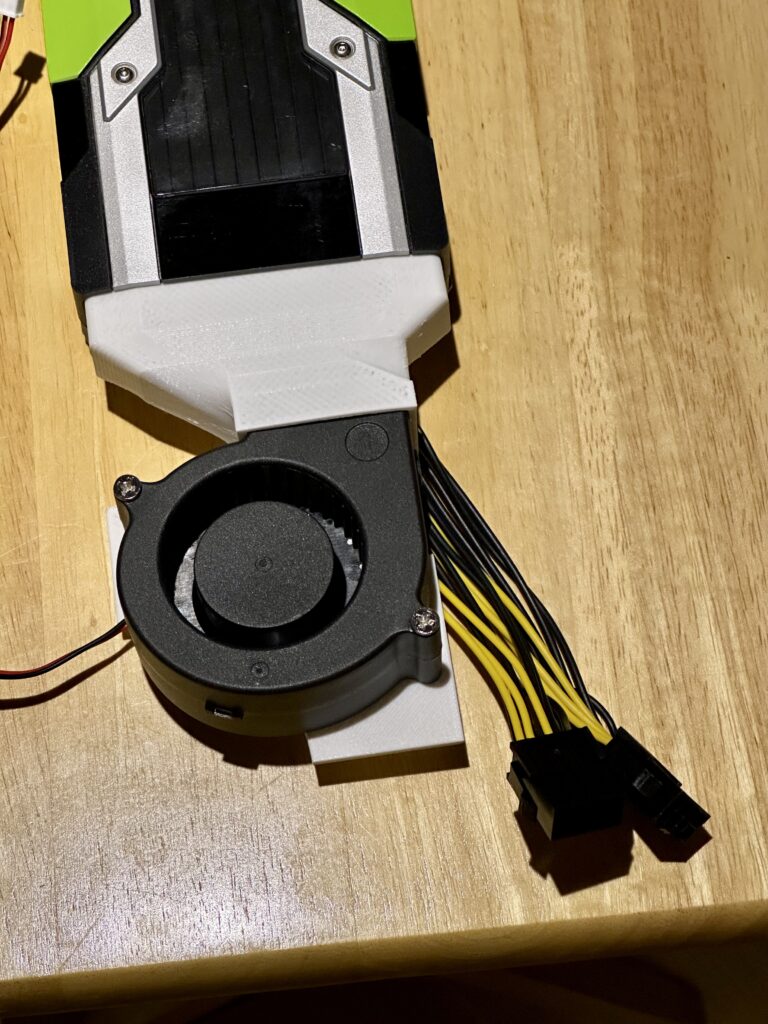
Note that M3 screws were used to secure the shroud to the P40 GPU card. The GDSTIME fan came with the screws.
I also made a mistake by initially getting a 1000W ATX power supply that ended not fitting the case, because the case is built for SFX and SFX-L power supplies. Lesson learned!
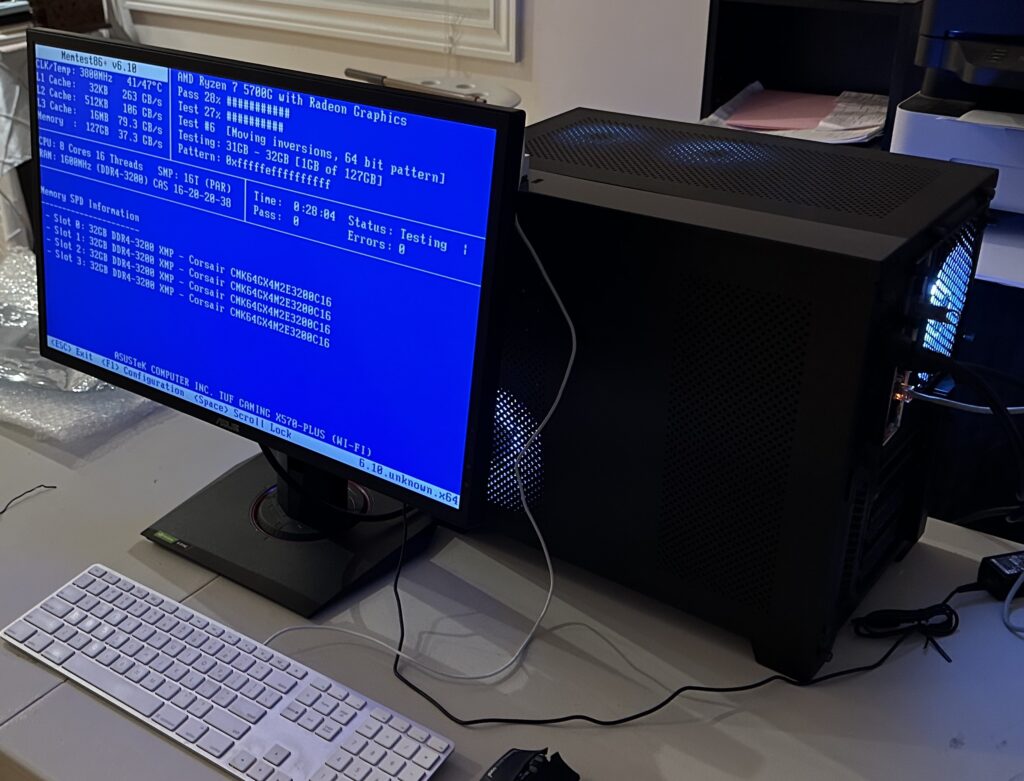
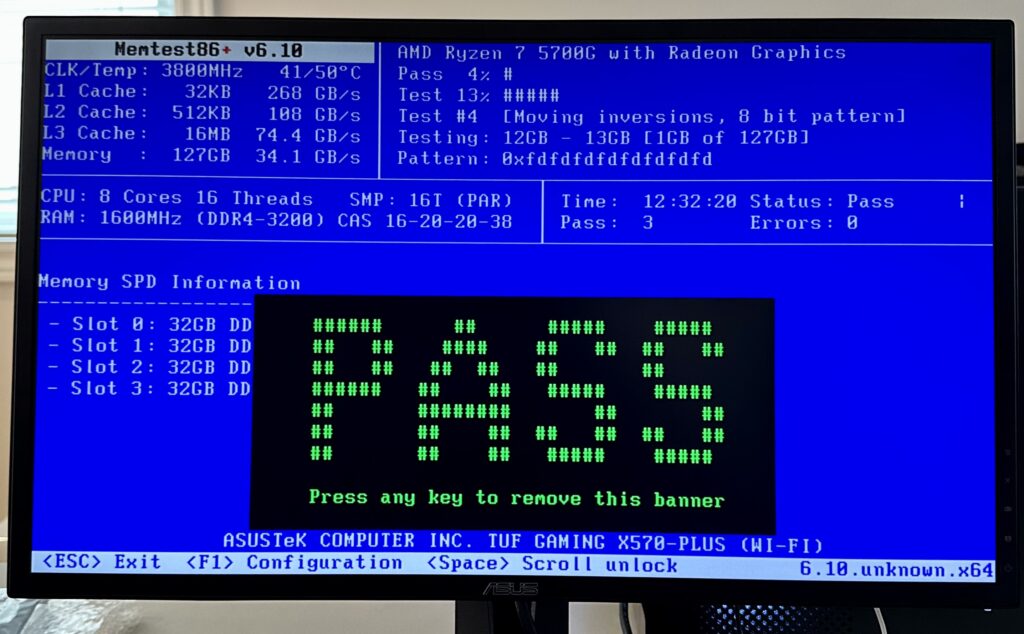
Once the machine is built I performed a 12 hours MemTest86+. It turned out that running the memory at the XMP profile was a bit unstable. I had to clock the memory back from its 3200MHz rating to 3000MHz.
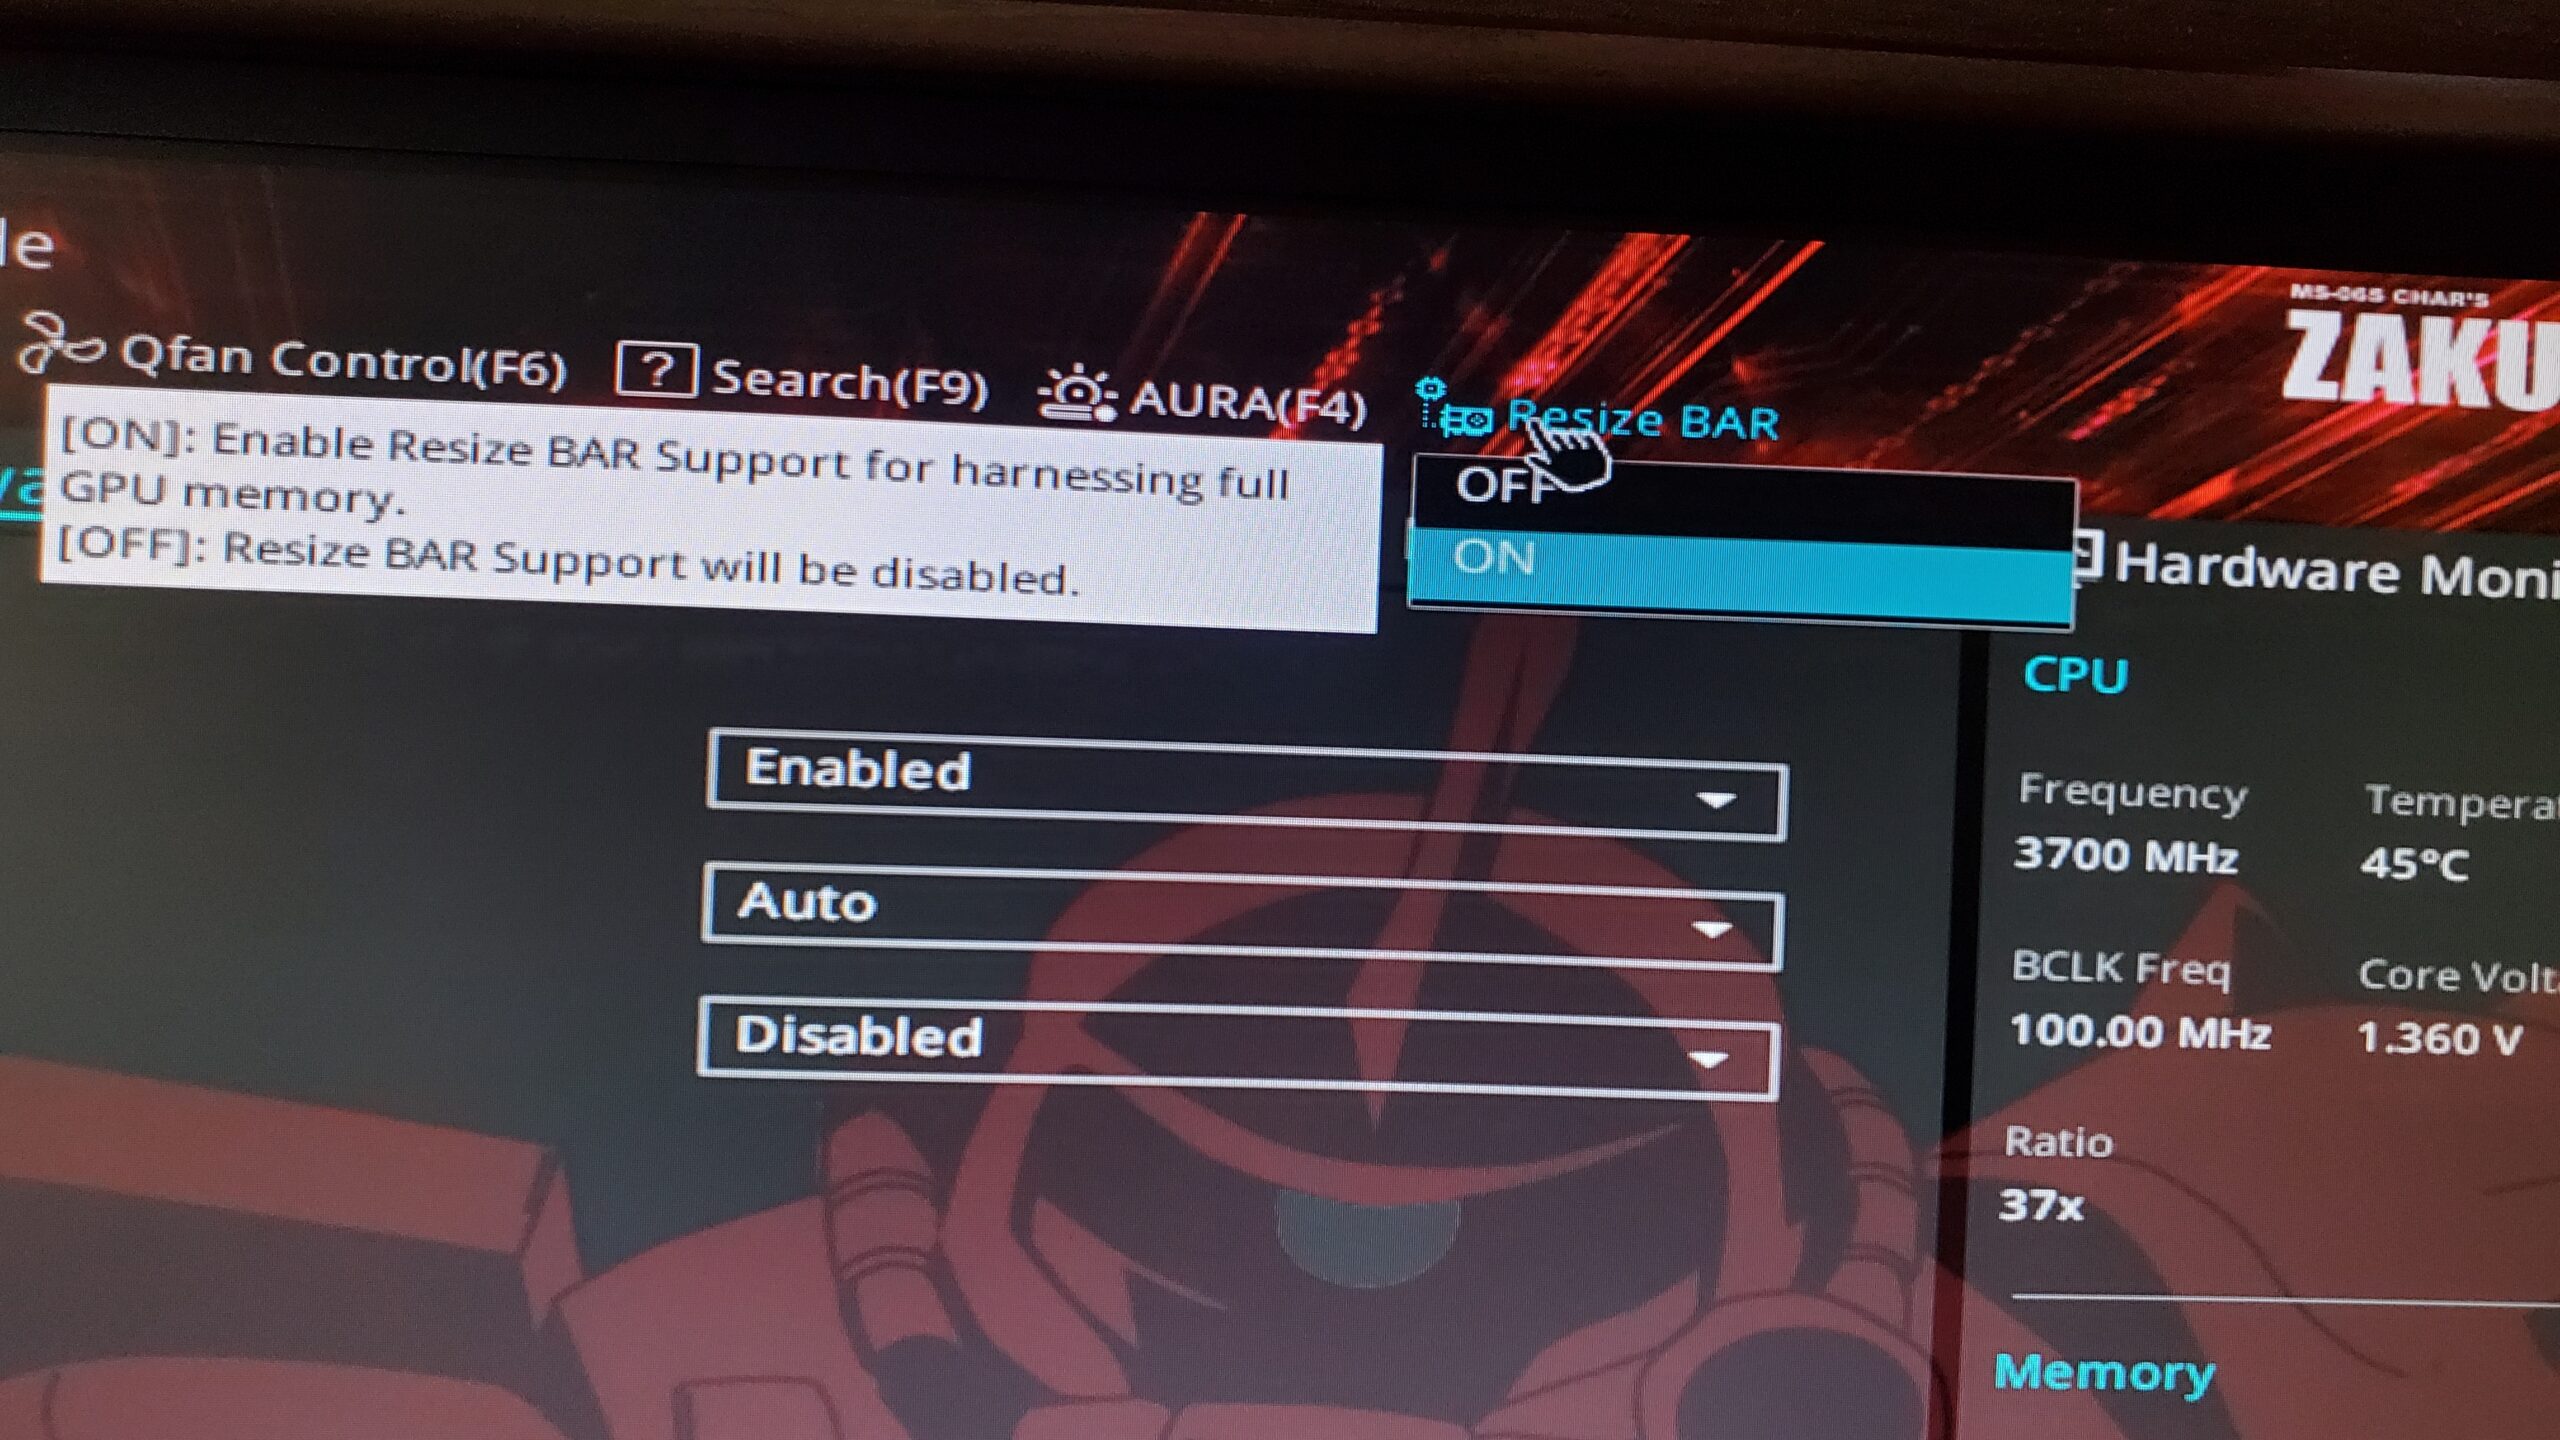
The BIOS settings had to be configured so that Resize BAR is ON. This is required for the P40 to function properly.
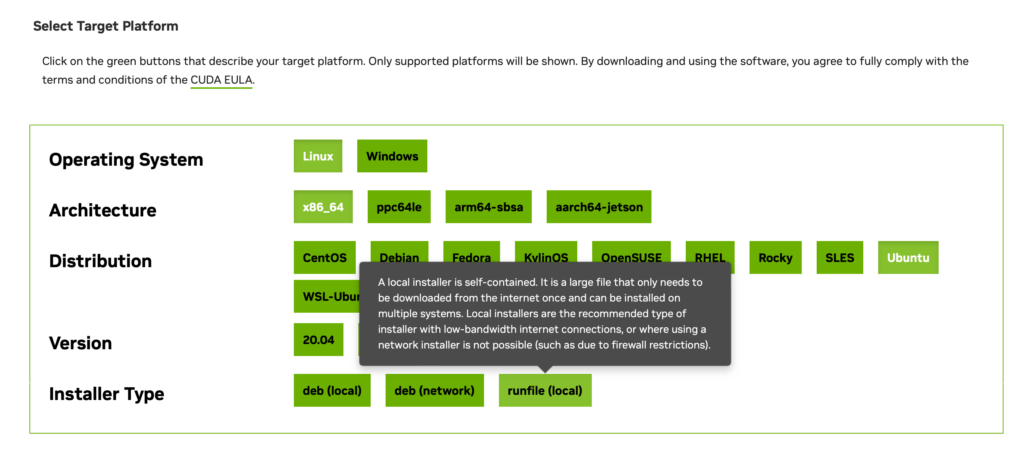
The next step is to install Ubuntu 22.04.3 LTS with Nvidia GPU and CUDA drivers. The latter was quite challenging. The traditional way of installing using the package manager did not work. The best way is to goto this site, and pick the run file like below:
The run file had to be run in recovery mode using the console because the installation will fail if an X11 window manager is running. Also all previous Nvidia drivers had to be removed and purged. The Ubuntu default installation process may have installed them.
A detail that was left out of the instructions is to set the appropriate shell paths once the installation is completed. The following changes were made with /etc/profile.d so that all users can benefit. If the login shell is using zsh, then /etc/zsh/zshenv has to be changed. Without this change, commands such as nvcc and other CUDA toolkit commands will not be found. The same is true for CUDA related share libraries.
$cat /etc/profile.d/cuda-path.sh

export CUDA_HOME="/usr/local/cuda"

if [[ ! ${PATH} =~ .*cuda/bin.* ]]
then
    export PATH="${PATH}:/usr/local/cuda/bin"
fi

if [[ ! ${LD_LIBRARY_PATH} =~ .*cuda/lib64.* ]]
then
    export LD_LIBRARY_PATH="${LD_LIBRARY_PATH}:/usr/local/cuda/lib64"
fi

if [[ ! ${LD_LIBRARY_PATH} =~ .*/usr/local/lib.* ]]
then
    export LD_LIBRARY_PATH="${LD_LIBRARY_PATH}:/usr/local/lib"
fi
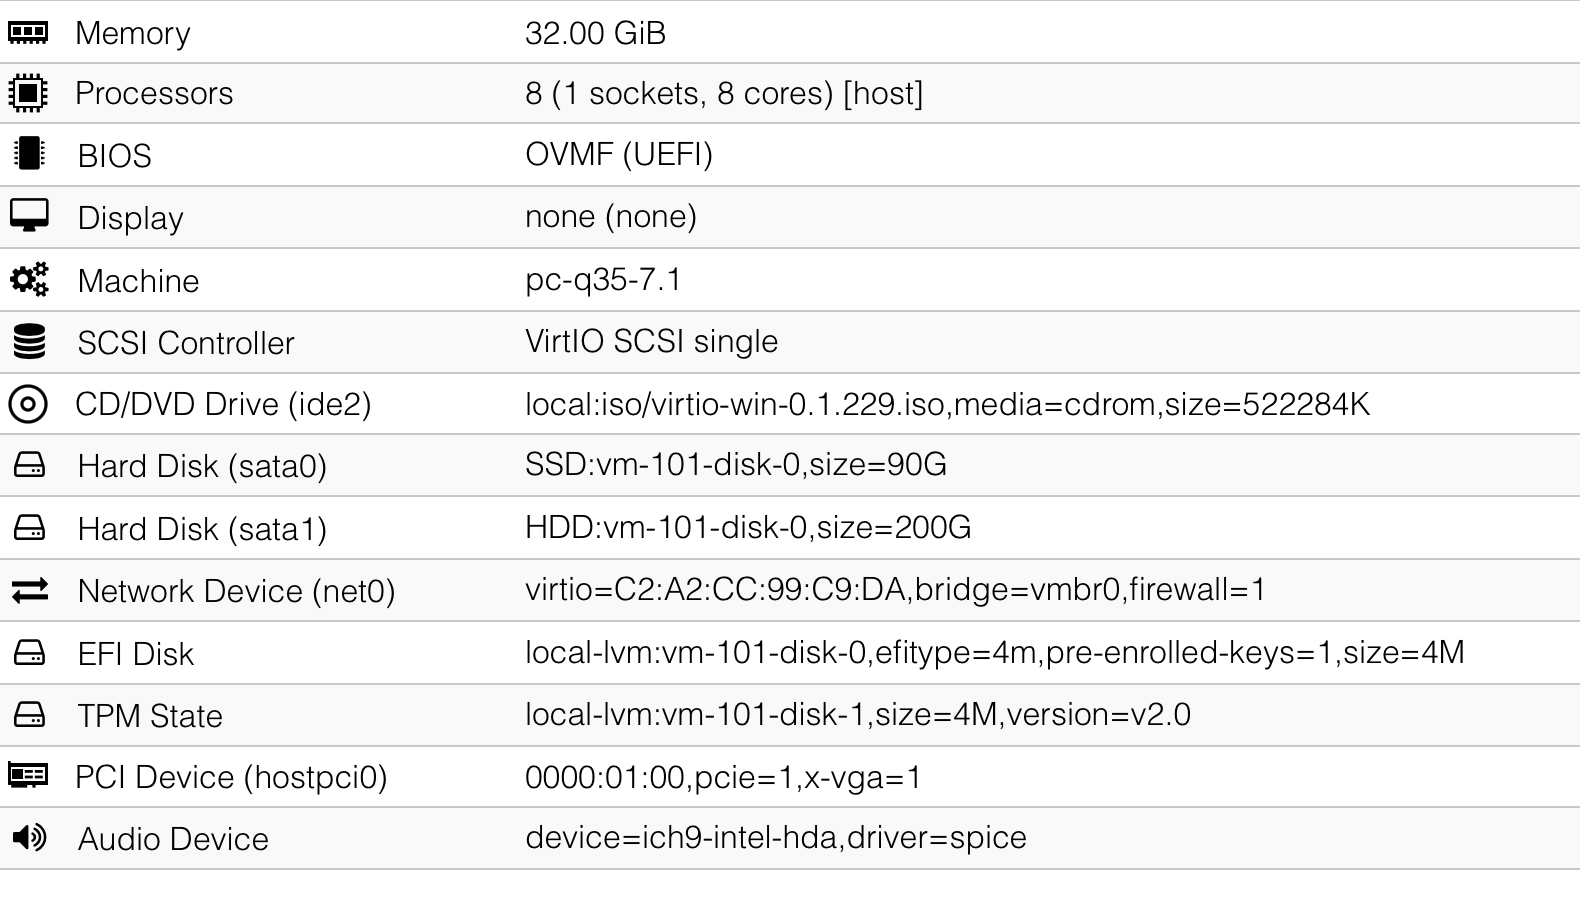
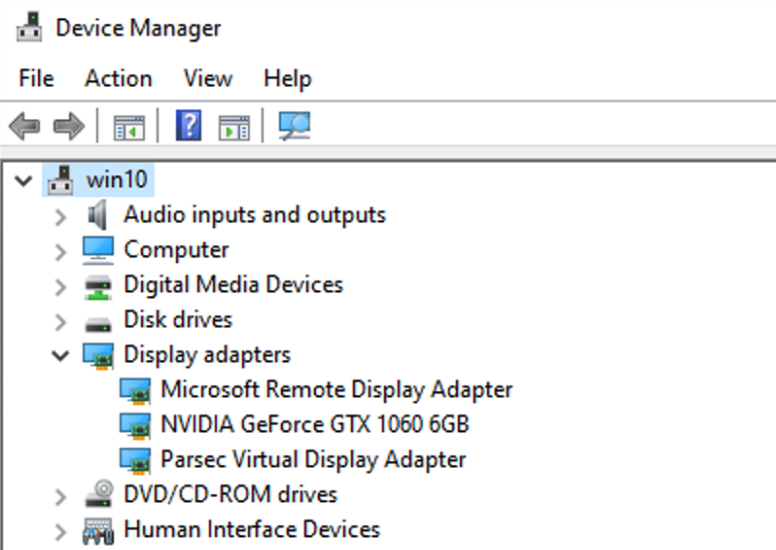
In this hardware configuration the AMD CPU has integrated graphics, and the P40 does not have any HDMI or DisplayPort connections. We need to change the X11 configuration so that it will only use the AMD CPU while dedicating the P40 GPU for CUDA based computation. The following configurations have to be made in /etc/X11/xorg.conf:
$cat /etc/X11/xorg.conf

Section "Device"
    Identifier      "AMD"
    Driver          "amdgpu"
    BusId           "PCI:10:0:0"
EndSection

Section "Screen"
    Identifier      "AMD"
    Device          "AMD"
EndSection
The BusId can be obtained using the lspci command and be sure to change any hexadecimal notations to decimal in the configuration file. Without this xorg.conf configuration, the Ubuntu desktop will not start properly.
When everything is done properly, the command nvidia-smi should show the following:
Fri Aug 25 17:33:31 2023
+---------------------------------------------------------------------------------------+
| NVIDIA-SMI 535.86.10              Driver Version: 535.86.10    CUDA Version: 12.2     |
|-----------------------------------------+----------------------+----------------------+
| GPU  Name                 Persistence-M | Bus-Id        Disp.A | Volatile Uncorr. ECC |
| Fan  Temp   Perf          Pwr:Usage/Cap |         Memory-Usage | GPU-Util  Compute M. |
|                                         |                      |               MIG M. |
|=========================================+======================+======================|
|   0  Tesla P40                      Off | 00000000:01:00.0 Off |                  Off |
| N/A   22C    P8               9W / 250W |      0MiB / 24576MiB |      0%      Default |
|                                         |                      |                  N/A |
+-----------------------------------------+----------------------+----------------------+

+---------------------------------------------------------------------------------------+
| Processes:                                                                            |
|  GPU   GI   CI        PID   Type   Process name                            GPU Memory |
|        ID   ID                                                             Usage      |
|=======================================================================================|
|  No running processes found                                                           |
+---------------------------------------------------------------------------------------+
The machine is now ready for user account configurations.
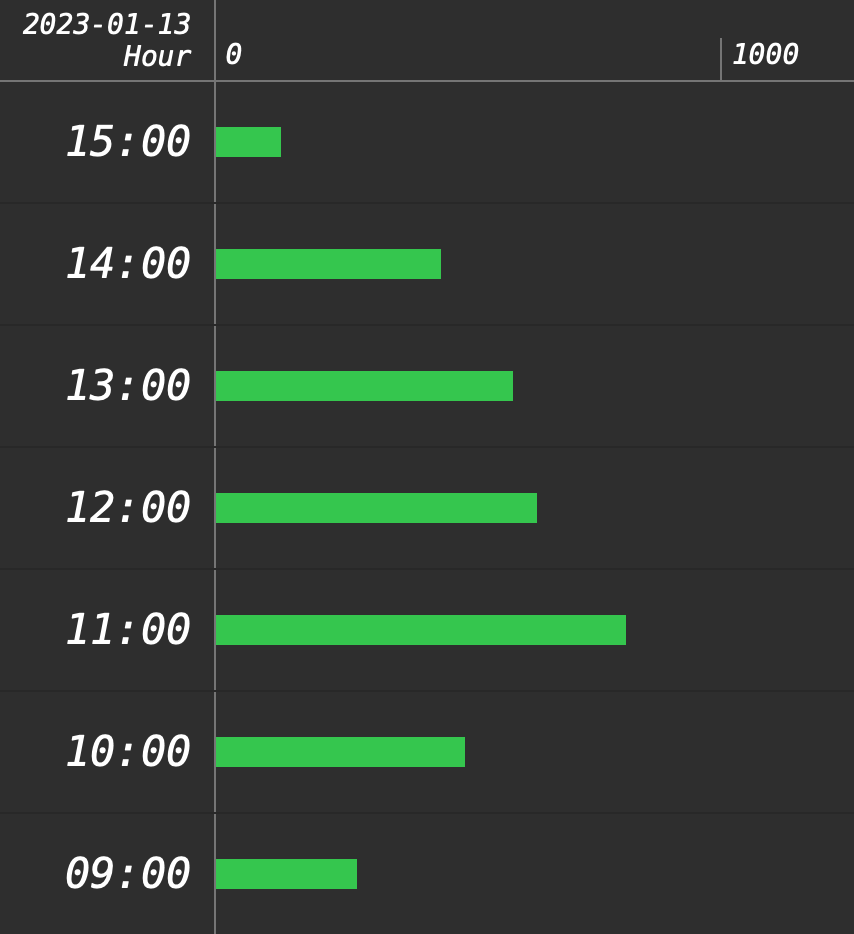
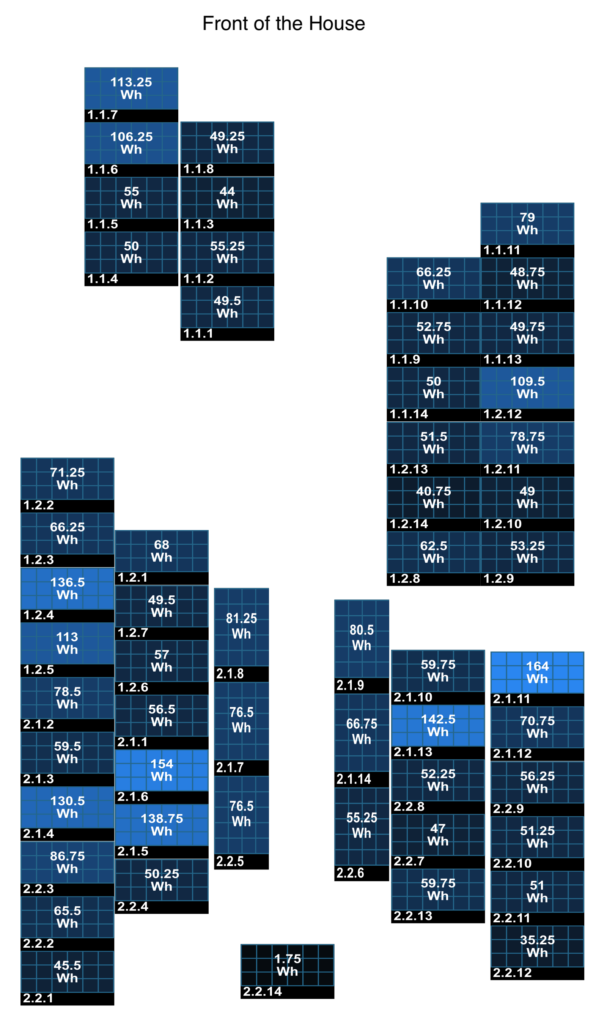
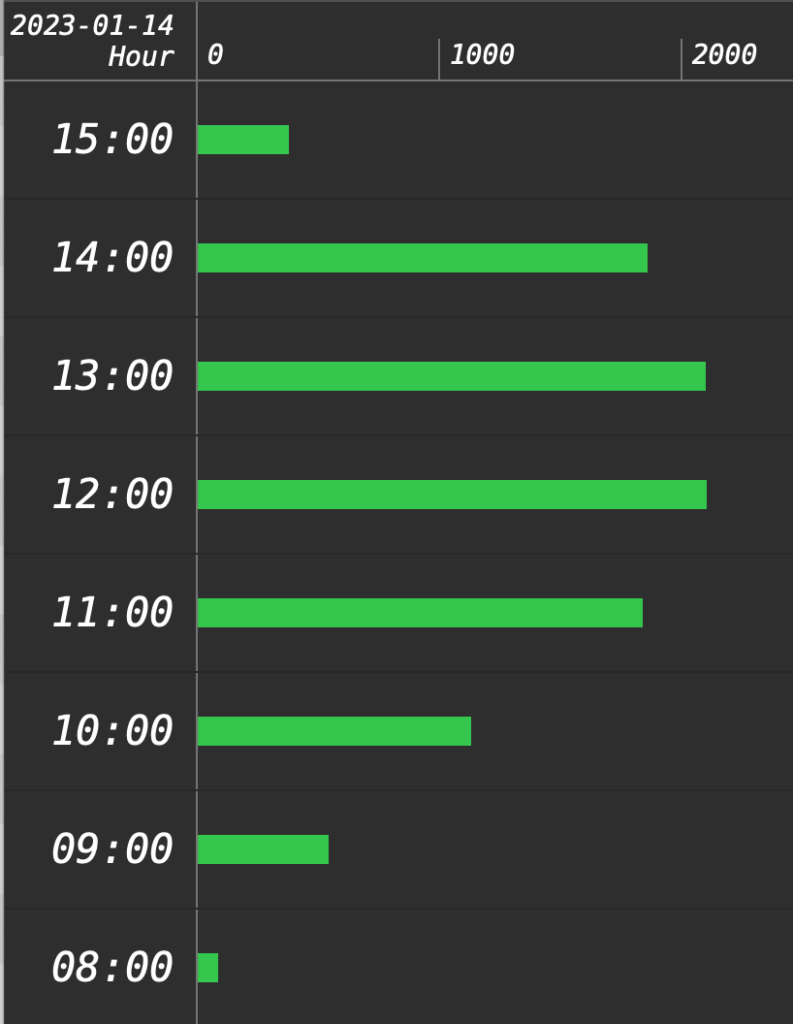
A quick video encoding using ffmpeg with hardware acceleration and CUDA was performed to test the GPU usage. It was a bit of a challenge to compile ffmpeg with CUDA support. This is when I found out that I was missing the PATH configurations made above.
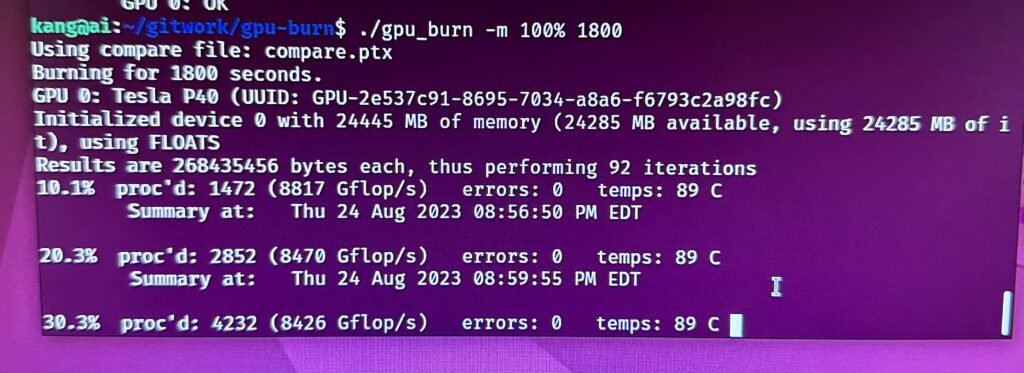
For good measure, gpu-burn was run for an hour to ensure that the GPU is functioning correctly.
Next step is to download and setup the tool chain for LLM development. We will save that for another posting.
Update: The runfile (local) method did not preserve through a system update using apt. I had to re-perform the installation with deb (local) methodology. I guess after not using the GPU for the desktop, we no longer have to run the operating system in recovery mode to install using the deb (local) method.