My NAS is currently running Ubuntu 22.04.5 LTS. I have tried in the past to perform a do-release-upgrade, and ended up with a system that will not boot.
Since then, I have moved many services away from the NAS. I thought I should give it one more try, and I did just that yesterday. Unfortunately the result ended up the same, resulting another rescue.
I thought I should document the rescue process here again.
# Wipe the root fs
mkfs.ext4 /dev/nvme1n1p2

# Restore from backup
mount /dev/nvme1n1p2 /mnt
mount /dev/backup_partition /mntb
rsync -aAXv /mntb/ /mnt/

# Ensure the root file system new UUID is the same in /etc/fstab
vi /mnt/etc/fstab

# chroot to install the boot partition
mount /dev/nvme1n1p1 /mnt/boot/efi
for i in /dev /dev/pts /proc /sys /run; do mount -B $i /mnt$i; done
mount -t efivarfs efivarfs /mnt/sys/firmware/efi/efivars
chroot /mnt

# Identify your EFI partition again just in case (e.g., /boot/efi)
sudo grub-install

# Below is more forceful but mostly optional and unnecessary
# grub-install --target=x86_64-efi --efi-directory=/boot/efi --bootloader-id=GRUB --removable --recheck

sudo update-grub
exit

# Exit and reboot
umount -l /mnt
reboot
By now I have become an expert in rescuing failed upgrades with Ubuntu.
I have upgraded my TUF GAMING B550-PLUS motherboard to version 3636. This is a recently released BIOS from ASUS in January of 2026. My previous version of the BIOS was from 2024.
I will give myself another breather, say about a week, before attempting to try again.
Since I had difficulties in upgrading my NAS, as I detailed here on this post. I decided that I need to move my NAS services to another server called, workervm. The first service that I decided to move is this web site, my blog, which is a WordPress site hosted by an Apache2 instance with a MySQL database backend.
I decided that instead of installing all the required components on workervm, I will use run WordPress inside a podman container. I already have podman installed and configured for rootless quadlet deployment.
The first step is to backup my entire WordPress document root directory and moved the contents to the target server. I placed the contents on /mnt/hdd/backup on workervm. I also need to perform a dump of the SQL database. On the old blog server, I had to do the following:
I then proceeded to create the following network, volume, and container files on workervm in ${HOME}/.config/containers/systemd:
I wanted a private network for all WordPress related containers to share and also ensure that DNS requests are resolved properly. Contents of wordpress.network:
[Unit]
Description=Network for WordPress and MariaDB
After=podman-user-wait-network-online.service

[Network]
Label=app=wordpress
NetworkName=wordpress
Subnet=10.100.0.0/16
Gateway=10.100.0.1
DNS=192.168.168.198

[Install]
WantedBy=default.target
I also create three podman volumes. The first is where the database contents will be stored. Contents of wordpress-db.volume:
[Unit]
Description=Volume for WordPress Database

[Volume]
Label=app=wordpress
Contents of wordpress.volume:
[Unit]
Description=Volume for WordPress Site itself

[Volume]
Label=app=wordpress
We also needed a volume to store Apache2 related configurations for WordPress. Contents of wordpress-config.volume:
[Unit]
Description=Volume for WordPress configurations

[Volume]
Label=app=wordpress
Now with the network and volumes configured, lets create our database container with wordpress-db.container:
[Unit]
Description=MariaDB for WordPress

[Container]
Image=docker.io/library/mariadb:10
ContainerName=wordpress-db
Network=wordpress.network
Volume=wordpress-db.volume:/var/lib/mysql:U
# Customize configuration via environment
Environment=MARIADB_DATABASE=wordpress
Environment=MARIADB_USER=wordpressuser
Environment=MARIADB_PASSWORD=################
Environment=MARIADB_RANDOM_ROOT_PASSWORD=1

[Install]
WantedBy=default.target
Note that the above container refers database volume that we configured earlier as well as the network. We are also using the community forked version of MySQL (MariaDB).
Finally we come to the configuration of the WordPress container, wordpress.container:
[Unit]
Description=WordPress Application
# Ensures the DB starts first
Requires=wordpress-db.service
After=wordpress-db.service

[Container]
Image=docker.io/library/wordpress:latest
ContainerName=wordpress-app
Network=wordpress.network
PublishPort=8168:80
Volume=wordpress.volume:/var/www/html:z
Volume=wordpress-config.volume:/etc/apache2:Z
# Customize via Environment
Environment=WORDPRESS_DB_HOST=wordpress-db
Environment=WORDPRESS_DB_USER=wordpressuser
Environment=WORDPRESS_DB_PASSWORD=################
Environment=WORDPRESS_DB_NAME=wordpress

[Install]
WantedBy=default.target
Notice the requirement for the database container to be started first, and this container also uses the same network but the two volumes are different.
We have to refresh the system since we changed the container configurations.
systemctl --user daemon-reload
We can then start the WordPress container with:
systemctl --user start wordpress
Once the container is started, we can check both the WordPress and its database container status with:
The copy will take some time, and once it is completed, we have to fix the permissions and ownerships. Note that both of these have to be performed with podman unshare command so that proper uid and gid mapping can be performed.
Lastly I needed to modify my main/old Apache server where the port forwarding is directed to so that blog.lufamily.ca requests are forwarded to this new server and port.
Define BlogHostName blog.lufamily.ca
Define DestBlogHostName workervm.localdomain:8168

<VirtualHost *:443>
    ServerName ${BlogHostName}
    ServerAdmin kangclu@gmail.com
    DocumentRoot /mnt/airvideo/Sites/blogFallback
    Include /home/kang/gitwork/apache2config/ssl.lufamily.ca

    SSLProxyEngine  on

    ProxyPreserveHost On
    ProxyRequests Off

    ProxyPass / http://${DestBlogHostName}/
    ProxyPassReverse / http://${DestBlogHostName}/

    # Specifically map the vaultAuth.php to avoid reverse proxy
    RewriteEngine On
    RewriteRule /vaultAuth.php(.*)$ /vaultAuth.php$1 [L]

    ErrorLog ${APACHE_LOG_DIR}/blog-error.log
    CustomLog ${APACHE_LOG_DIR}/blog-access.log combined
</VirtualHost>
Note that on the old server I still have the document root pointed to a fallback directory. In this fallback directory I have php files that I needed to be served directly without being passed to WordPress but the requested path shares the same domain name as my WordPress site. The rewrite rule performs this short circuit processing. When vaultAuth.php is requested, we skip the reverse proxy all together.
This is working quite well. I am actually using the new location of this blog site to write this post. I plan to migrate the other services on my NAS in a similar manner with podman.
The idea is that once the majority of the services have been ported to workervm, then I can reinstall my NAS with a fresh install of Ubuntu 24.04 LTS without doing a migration.
Update 2026-02-28:
I had to move my blog to a different virtual machine because the current one had a network stack corruption. What I found was that the podman volume concept was super handy. I was able to use podman import/export commands to easily move my blog storage and database without having to worry about permissions and other file system nuances.
Last Saturday, I decided it was time to switch my NAS server from 22.04 LTS to 24.04 LTS. I’ve been putting it off for ages, worried that the upgrade might not go as planned and something could go wrong. Since 24.04 is already in its fourth point release, I figured the risks should be manageable and it’s time to take the plunge.
I backup my system nightly so the insurance was in place. After performing a final regular update to the system, I started with the following:
After answering a few questions to save my custom configuration files for different services, it said the upgrade was done. I then rebooted the system, but BOOM! It won’t boot.
The BIOS knows the bootable drive, but when I tried to boot it, it just went back into the BIOS. It didn’t even give me a GRUB prompt or menu.
I figured this wasn’t a big deal, so I booted up the system with the 24.04 LTS Live USB. The plan is to just reinstall GRUB, and hopefully, that will fix the system.
Once I’ve booted into the Live USB and picked English as my language, I can jump into a command shell by pressing ALT-F2. Alternatively, you can press F1 and choose the shell option from the help menu. But, I found that the first method opens up a shell with command line completion, so I went with that.
The boot disk had the following layout (output from both fdisk and parted):
sudo fdisk -l /dev/nvme1n1
Disk /dev/nvme1n1: 931.51 GiB, 1000204886016 bytes, 1953525168 sectors
Disk model: Samsung SSD 980 PRO 1TB
Units: sectors of 1 * 512 = 512 bytes
Sector size (logical/physical): 512 bytes / 512 bytes
I/O size (minimum/optimal): 512 bytes / 512 bytes
Disklabel type: gpt
Disk identifier: 90B9F208-2D05-484D-8C8C-B3AE71475167

Device              Start        End    Sectors   Size Type
/dev/nvme1n1p1       2048    2203647    2201600     1G EFI System
/dev/nvme1n1p2    2203648 1921875000 1919671353 915.4G Linux filesystem
/dev/nvme1n1p3 1921875968 1953523711   31647744  15.1G Linux swap

sudo parted /dev/nvme1n1
GNU Parted 3.4
Using /dev/nvme1n1
Welcome to GNU Parted! Type 'help' to view a list of commands.
(parted) p
Model: Samsung SSD 980 PRO 1TB (nvme)
Disk /dev/nvme1n1: 1000GB
Sector size (logical/physical): 512B/512B
Partition Table: gpt
Disk Flags:

Number  Start   End     Size    File system     Name  Flags
 1      1049kB  1128MB  1127MB  fat32                 boot, esp
 2      1128MB  984GB   983GB   ext4
 3      984GB   1000GB  16.2GB  linux-swap(v1)  swap  swap
As I described in this post, we want to make sure that the first partition is marked for EFI boot. This can be done in parted with:
set 1 boot on
set 1 esp on
I didn’t have to perform the above since the first partition (/dev/nvme1n1p1) is already recognized as EFI System. We also need to ensure that this partition is formatted with FAT32. This can be done with:
sudo mkfs.vfat -F 32 /dev/nvme1n1p1
Since this was already the case, I also did not have to perform this formatting step.
The next step is to mount the root directory and the boot partition.
mount /dev/nvme1n1p2 /mnt
mount /dev/nvme1n1p1 /mnt/boot/efi
We now need to bind certain directories under /mnt in preparation for us to change our root directory to /mnt.
for i in /dev /dev/pts /proc /run; do sudo mount --bind $i /mnt$i; done
mount --rbind /dev /mnt/dev
mount --rbind /sys /mnt/sys
mount --rbind /run /mnt/run
mount -t proc /proc /mnt/proc
chroot /mnt
grub-install --efi-directory=/boot/efi /dev/nvme1n1
update-grub

mount --make-rslave /mnt/dev
umount -R /mnt
exit
If we do not use the –rbind option for /sys, then we may get an EFI error when running grub-install. There are two alternatives that solves the same issue, although used less often, you can also choose one of the following (but not BOTH):
mount --bind /sys/firmware/efi/efivars /mnt/sys/firmware/efi/efivars
mount -t efivarfs none /sys/firmware/efi/efivars
The reinstallation of GRUB did not solve the problem. I had to perform a full system restore using my backup. The backup was created using rsync as described on this post. However, I learned that this backup was done incorrectly! I excluded certain directories using the name instead of /name. This caused more exclusion than intended. The correct method of the backup should be:
After the restore, double check that /var/run is soft-linked to /run.
Once the restoration is completed, I follow the above instructions again to re-install GRUB, and I was able to boot back into my boot disk.
Since this upgrade attempt has failed, I now have to figure out a way to move my system forward. I think what I will do is to port all of my services on my NAS as podman root-less quadlets, and then just move the services into a brand new Ubuntu clean installation. This is probably easier to manage in the future.
Several months ago I had an old 3TB hard drive (HDD) crashed on me. Luckily it was a hard drive that is primarily used for backup purposes, so the data lost can quickly be duplicated from source by performing another backup. Since it was not critical that I replace the damaged drive immediately, it was kind of left to fester until today.
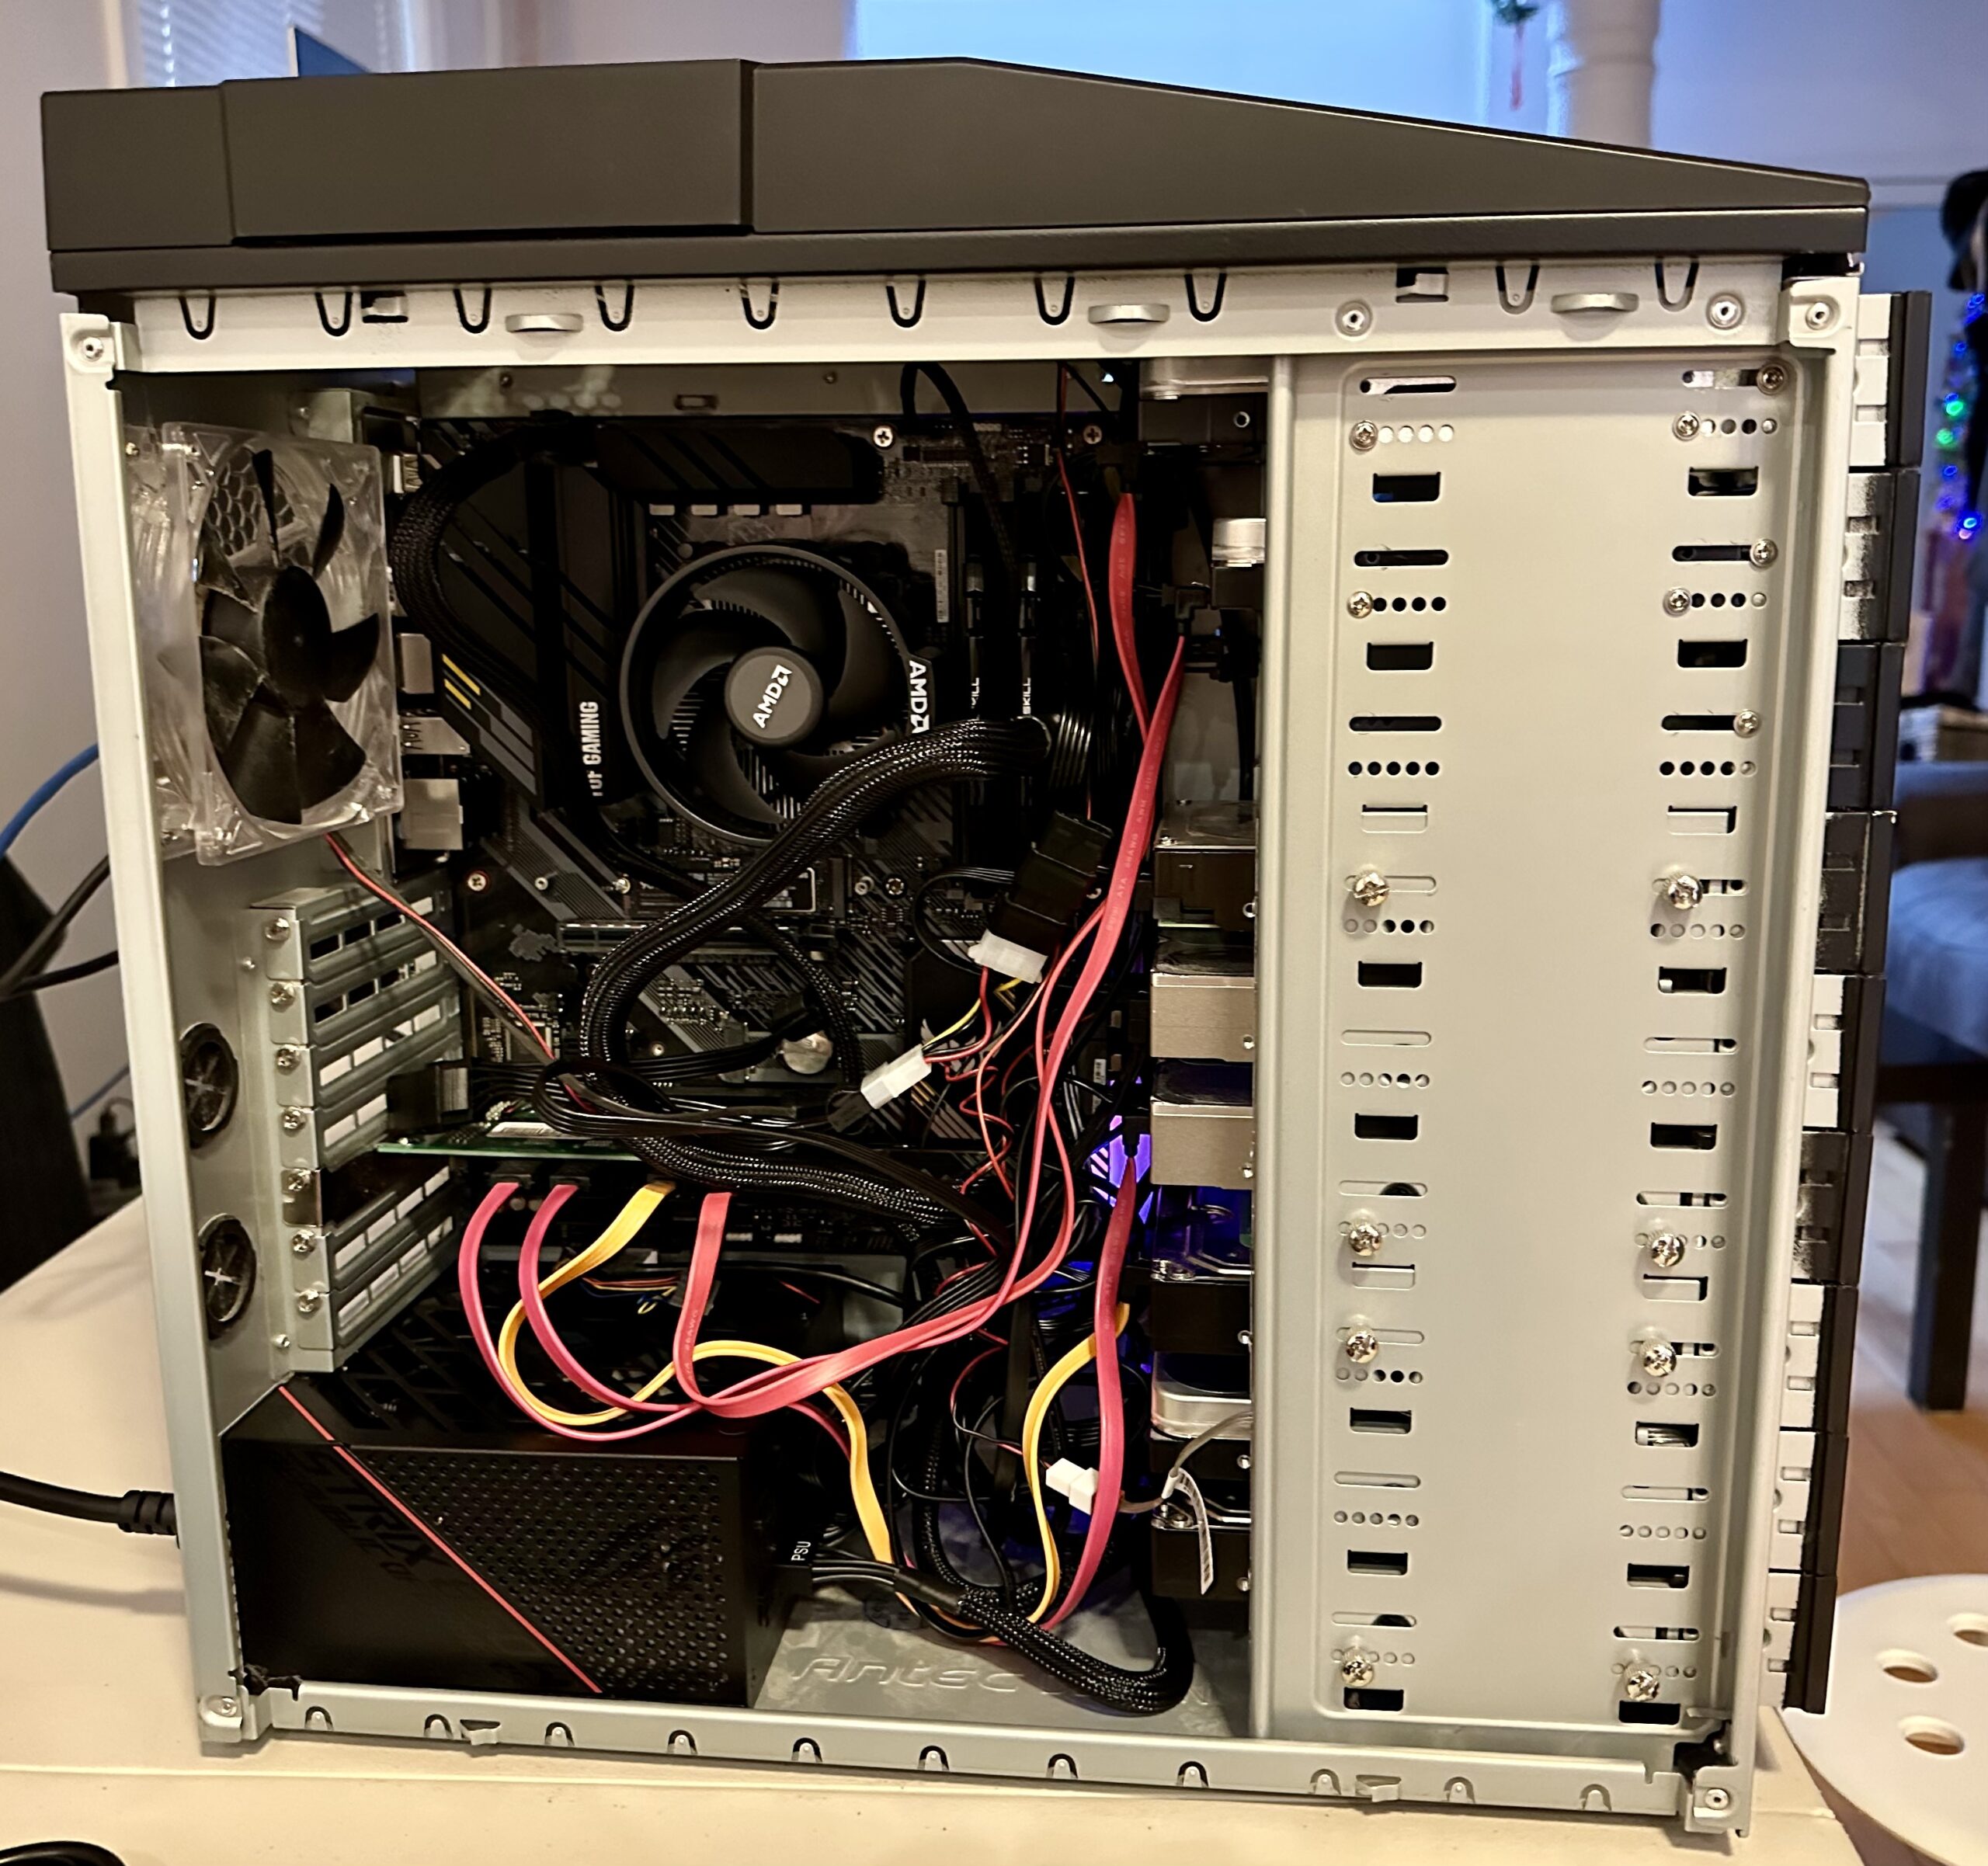
Recently I acquired four additional WD Red 6TB HDD, and I wanted to install these new drives into my NAS chassis. Since I am opening the chassis, I will irradicate the damaged drive, and also take this opportunity to swap some old drives out of the ZFS pool that I created earlier and add these new drives into the pool.
I first use the following command to add two additional mirror vdev’s each composed of the two new WD Red drives.
The drive id’s is located in the following path: /dev/disk/by-id and is typically prefixed with ata or wwn.
This created two vdev’s into the pool, and I can remove an existing vdev. Doing so will automatically start redistributing the data on the removing vdev to the other vdev’s in the pool. All of this is performed while the pool is still online and running to service the NAS. To remove the old vdev, I execute the following command:
sudo zpool remove vault {vdev_name}
In my case, the old vdev’s name is mirror-5.
Once the remove command is given, the copying of data from the old vdev to the other vdev’s begins. You can check the status with:
sudo zpool status -v vault
The above will show the copying status and the approximate time it will take to complete the job.
Once the removal is completed, the old HDD of mirror-5 is still labeled for ZFS use. I had to use the labelclear command to clean the drive so that I could repurpose the drives for backup duty. Below is an example of the command.
The above indirect-5 can be safely ignored. It is just a reference to the old mirror-5.
This time we replaced the entire vdev, another technique is to replace the actual drives within the vdev. To do this, we will have to use the zpool replace command. We may also have to perform a zpool offline first before the replace command. This can be successively done on all the old drives in the mirror with newer drives with larger capacities to increase an existing vdev’s size.
In a previous post, I described the hardware changes that I made to facilitate additional drive slots on my NAS Media Server.
We now need to migrate from an LVM system consisting of 40TB of redundant mirrored storage using mdadm to a ZFS system consisting of a single pool and a dataset. Below is a diagram depicting the logical layout of the old and the intended new system.
Before the migration, we must backup all the data from the LVM system. I cobbled together a collection of old hard drives and then proceeded to create another LVM volume as the temporary storage of the content. This temporary volume will not have any redundancy capability, so if any one of the old hard drives fails, then out goes all the content. The original LVM system is mounted on /mnt/airvideo and the temporary LVM volume is mounted on /mnt/av2.
I used the command below to proceed with the backup.
I can then monitor the progress of the backup with:
tail -f ~/nohup.avs.rsync.out
The backup took a little more than 7 days to copy around 32 TB of data from our NAS server. During this entire process, all of the NAS services continued to run, so that downtime was almost non-existent.
Once the backup is completed, I wanted to move all the services to the backup before I started to dismantle the old LVM volume. The following steps were done:
Stop all services on other machines that were using the NAS;
Stop all services on the NAS that were using the /mnt/airvideo LVM volume;
Remove or comment out the entry in the /etc/fstab file that automatically mounts the old LVM volume on boot. This is no longer necessary because ZFS is remounted by default;
Now that the services are all up and running, we can then start destroying the old LVM volume (airvideovg2/airvideo) and volume group (airvideovg2). We can obtain a list of all the physical volumes that make up the volume group.
The /dev/mdX devices are the mdadm mirror devices, each consisting of a pair of hard drives.
sudo lvremove airvideovg2/airvideo
Do you really want to remove and DISCARD active logical volume airvideovg2/airvideo? [y/n]: y
  Flushing 0 blocks for cache airvideovg2/airvideo.
Do you really want to remove and DISCARD logical volume airvideovg2/lv_cache_cpool? [y/n]: y
  Logical volume "lv_cache_cpool" successfully removed
  Logical volume "airvideo" successfully removed

sudo vgremove airvideovg2
  Volume group "airvideovg2" successfully removed
At this point, both the logical volume and the volume group are removed. We say a little prayer to ensure nothing happens with our temporary volume (/mnt/av2), that is currently in operation.
We now have to disassociate the mdadm devices from LVM.
sudo pvremove /dev/md1
Labels on physical volume "/dev/md1" successfully wiped.
sudo pvremove /dev/md2
Labels on physical volume "/dev/md2" successfully wiped.
sudo pvremove /dev/md3
Labels on physical volume "/dev/md3" successfully wiped.
sudo pvremove /dev/md4
Labels on physical volume "/dev/md4" successfully wiped.
sudo pvremove /dev/nvme0n1p1
Labels on physical volume "/dev/nvme0n1p1" successfully wiped.
You can find the physical hard drives associated with each mdadm device using the following:
We then have to stop all the mdadm devices and zero their superblock so that we can reuse the hard drives to set up our ZFS pool.
sudo mdadm --stop /dev/md1
mdadm: stopped /dev/md1
sudo mdadm --stop /dev/md2
mdadm: stopped /dev/md2
sudo mdadm --stop /dev/md3
mdadm: stopped /dev/md3
sudo mdadm --stop /dev/md4
mdadm: stopped /dev/md4

# Normally you also need to do a --remove after the --stop,
# but it looks like the 6.5 kernel did the remove automatically.
#
# For all partitions used in the md device

for i in sdb1 sdc1 sdp1 sda1 sdo1 sdd1 sdg1 sdn1
do
	sudo mdadm --zero-superblock /dev/${i}
done
Now with all of the old hard drives freed up, we can repurpose them to create our ZFS pool. Instead of using the /dev/sdX reference of the physical device, it is recommended to use /dev/disk/by-id with the manufacturer’s model and serial number so that the ZFS pool can be moved to another machine in the future. We also used the -f switch to let ZFS know that it is okay to erase the existing content on those devices. The command to create the pool we named vault is this:
zpool create -f vault mirror /dev/disk/by-id/ata-ST10000VN0008-2JJ101_ZHZ1KMA0-part1 /dev/disk/by-id/ata-WDC_WD101EFAX-68LDBN0_VCG6VRWN-part1 mirror /dev/disk/by-id/ata-ST8000VN0022-2EL112_ZA1E8GW4-part1 /dev/disk/by-id/ata-ST8000VN0022-2EL112_ZA1E8S0V-part1 mirror /dev/disk/by-id/ata-ST10000VN0004-1ZD101_ZA2C69FN-part1 /dev/disk/by-id/ata-ST10000VN0004-1ZD101_ZA2964KD-part1 mirror /dev/disk/by-id/ata-ST12000VN0008-2YS101_ZRT008SC-part1 /dev/disk/by-id/ata-ST12000VN0008-2YS101_ZV701XQV-part1

# The above created the pool with the old drives from the old LVM volume group
# We then added 4 more drives, 2 x 6TB, and 2 x 4TB drives to the pool

# Adding another 6TB mirror:

sudo zpool add -f vault mirror /dev/disk/by-id/ata-WDC_WD60EFRX-68L0BN1_WD-WX31D87HDU09-part1 /dev/disk/by-id/ata-WDC_WD60EZRZ-00GZ5B1_WD-WX11D374490J-part1

# Adding another 4TB mirror:

sudo zpool add -f vault mirror /dev/disk/by-id/ata-ST4000DM004-2CV104_ZFN0GTAK-part1 /dev/disk/by-id/ata-WDC_WD40EZRX-00SPEB0_WD-WCC4E0354579-part1
We also want to add the old NVMe as ZFS L2ARC cache.
ls -lh /dev/disk/by-id/nvme-Samsung_SSD_970_EVO_Plus_500GB_S4P2NF0M419555D

lrwxrwxrwx 1 root root 13 Mar  2 16:02 /dev/disk/by-id/nvme-Samsung_SSD_970_EVO_Plus_500GB_S4P2NF0M419555D -> ../../nvme0n1

sudo zpool add vault cache /dev/disk/by-id/nvme-Samsung_SSD_970_EVO_Plus_500GB_S4P2NF0M419555D
Once the pool is created, we wanted to set some pool properties so that in the future when we replace these drives with bigger drives, the pool will automatically expand.
zpool set autoexpand=on vault
With the pool created, we can then create our dataset or filesystem and its associated mount point. We also want to ensure that the filesystem also supports posixacl.
zfs create vault/airvideo
zfs set mountpoint=/mnt/av vault/airvideo
zfs set acltype=posixacl vault
zfs set acltype=posixacl vault/airvideo
We mount the new ZFS filesystem on /mnt/av because the /mnt/airvideo is soft-linked to the temporary /mnt/av2 volume that is still in operation. We first have to re-copy all our content from the temporary volume to the new ZFS filesystem.
This took around 4 days to complete. We can all breathe easy again because all the data now have redundancy again! We can now bring the new ZFS filesystem live.
sudo systemctl stop apache2.service smbd nmbd plexmediaserver.service
sudo rm /mnt/airvideo
sudo zfs set mountpoint=/mnt/airvideo vault/airvideo
sudo systemctl start apache2.service smbd nmbd plexmediaserver.service

zfs list

NAME             USED  AVAIL     REFER  MOUNTPOINT
vault           31.0T  14.2T       96K  /vault
vault/airvideo  31.0T  14.2T     31.0T  /mnt/airvideo
The above did not take long and the migration is completed!
df -h /mnt/airvideo

Filesystem      Size  Used Avail Use% Mounted on
vault/airvideo   46T   32T   15T  69% /mnt/airvideo
Getting the capacity of our new ZFS filesystem shows that we now have 46TB to work with! This should last for at least a couple of years I hope.
I also did a quick reboot of the system to ensure it can come back up with the ZFS filesystem in tack and without issues. It has now been running for 2 days. I have not collected any performance statistics, but the services all feel faster.
My sons upgraded their gaming computers last Christmas, and I ended up using their old parts to build a couple of Linux servers running Ubuntu servers. The idea is to use these extra servers as video encoders since they will have dedicated GPUs. However, the GPUs are also pretty power-hungry. Since they don’t need to be up 24 hours a day, I thought keeping these servers asleep until they are required would be good. At the same time, it would be pretty inconvenient to go to the servers to physically power them up when I needed them. The thought of configuring their Wake-on-LAN came to mind.
I found this helpful article online. I first found out that the Network Interface on the old motherboards supports Wake-on-LAN (WOL). Below is a series of commands that I executed to find out whether WOL is supported or not, and if so, then enable the support.
% sudo nmcli connection show
NAME                UUID                                  TYPE      DEVICE
Wired connection 1  d46c707a-307b-3cb2-8976-f127168f80e6  ethernet  enp2s0

% sudo ethtool enp2s0 | grep -i wake
	Supports Wake-on: pumbg
	Wake-on: d
The line that reads,
Supports Wake-on: pumbg
indicates the WOL capabilities, and the line that reads,
Wake-on: d
indicates its current status. Each letter has a meaning:
d (disabled), or
triggered by
p (PHY activity),
u (unicast activity),
m (multicast activity),
b (broadcast activity),
a (ARP activity),
g (magic packet activity)
We will use the magic packet method. Below are the commands used to enable WOL based on the magic packet trigger.
% sudo nmcli connection modify d46c707a-307b-3cb2-8976-f127168f80e6 802-3-ethernet.wake-on-lan magic

% sudo nmcli connection up d46c707a-307b-3cb2-8976-f127168f80e6
Connection successfully activated (D-Bus active path: /org/freedesktop/NetworkManager/ActiveConnection/2)

% sudo ethtool enp2s0 | grep -i wake
	Supports Wake-on: pumbg
	Wake-on: g
The above changes will persist even after the machine reboots. We put the machine to sleep by using the following command:
% sudo systemctl suspend
We need the IP address and the MAC address of the machine to wake the computer up using the wakeonlan utility.
We use the above ifconfig to find the addresses highlighted in bold. Once we have the required information, we can then wake the computer up remotely by executing the wakeonlan command from another computer.
% wakeonlan -i 192.168.168.255 -p 4343 1c:1b:0d:70:80:84
Sending magic packet to 192.168.168.185:4343 with 1c:1b:0d:70:80:84
Note that the above IP address used is the broadcast address and not the machine’s direct IP address. Now I can place these servers to sleep and only turn them on remotely when I need them.
In my previous post, I replaced my NVME boot disk on our media server thinking that the disk was defective because the file system (EXT4-fs) was reporting numerous htree_dirblock_to_tree:1080 errors.
The errors continue to persist with the new disk, so I can eliminate the possibility of hardware as the cause of the issue.
I noticed that the htree_dirblock_to_tree:1080 errors were caused by the tar command and the time in which these errors occur coincided when the media server is being backed up. Apparently, the backup process is causing these errors with the tar command.
This backup process has remained unchanged for quite some time and has worked really well for us. I guess for some reason there is a bug in the kernel or in the tar command that is not quite compatible with NVME devices.
I had to resort to finding an alternative backup methodology. I ended up using the rsync method instead.
It looks like this method is faster and can perform incremental backup. However, instead of backing up to an archive file, which I later need to extract and prepare during the restoration process, I have to back it up to a dedicated backup device. Since the old NVME disk is perfectly fine, I reused it as my backup device. I have partitioned this backup device in the same layout as the current boot disk.
Device          Start        End    Sectors   Size Type
/dev/sdi1        2048    2203647    2201600     1G Microsoft basic data
/dev/sdi2     2203648 1921875967 1919672320 915.4G Linux filesystem
/dev/sdi3  1921875968 1953523711   31647744  15.1G Linux swap
The only exception is that the first partition is not marked as boot and esp, so during the restoration process I will have to mark that partition accordingly with the parted command by using the following commands:
set 1 boot on
set 1 esp on
The idea is that at 3am every night/morning, I will backup the root filesystem to the second partition of the backup drive. If anything happens with the current boot disk, the backup drive can act as an immediately available replacement, after a grub-install preparation as mentioned in the previous article.
Let us see how this new backup process works and hopefully, we can bid a final farewell to the htree_dirblock_to_tree:1080 errors!
Update: 2023-12-22
It looks like even with the rsync command, the htree_dirblock_to_tree:1080 errors still came back during the backup process. I decided to upgrade the kernel from vmlinuz-5.15.0-91-generic to vmlinuz-6.2.0-39-generic. Last night (2023-12-23 early morning) was the first backup after the kernel upgrade, and no errors were recorded. I hope this behavior persists and it is not a one-off.
A few months ago, the boot disk of our media server begin to incur some errors, such as the ones below:
Dec 17 03:01:35 avs kernel: [32515.068669] EXT4-fs error (device nvme1n1p2): htree_dirblock_to_tree:1080: inode #10354778: comm tar: Directory block failed checksum
Dec 17 03:02:35 avs kernel: [32575.183005] EXT4-fs error (device nvme1n1p2): htree_dirblock_to_tree:1080: inode #13500463: comm tar: Directory block failed checksum
Dec 17 03:02:35 avs kernel: [32575.183438] EXT4-fs error (device nvme1n1p2): htree_dirblock_to_tree:1080: inode #13500427: comm tar: Directory block failed checksum
The boot disk is a NVME device and I thought it may be due to over heating, so I purchased a heat sink and installed it. Unfortunately the errors persisted after the heat sink.
I decided to replace the boot disk with the exact same model which was the Samsung 980Pro 1TB. This should have been a pretty easy maintenance task. We clone the drive, and swap in the new drive. However, Murphy is sure to strike!
My usual goto cloning utility is Clonezilla, unfortunately this utility did not like cloning NVME drives. The utility resulted in a kernel panic after trying multiple versions. I am not sure what is the problem here. It could be Clonezilla or the USB 3.0 NVME enclosure that I was using for the new disk.
I resigned to using the dd command:
dd if=/dev/source of=/dev/target status=progress
Unfortunately this would have taken way too long something like 20+ hours, so I gave up with this approach.
I decided to do a good old restore of the nightly backup. I started by cloning the partition table:
sfdisk -d /dev/olddisk | sfdisk /dev/newdisk
I then proceeded with the restore of the nightly backup. Murphy strikes twice! The nightly backup was corrupted! I guess it is not surprising when the root directory’s integrity is in question. The whole reason why we are doing this exercise.
Without the nightly backup, I had to resort to a live backup. I booted system again, and performed:
sudo su -
mount /dev/new_disk_root_partition /mnt/newboot
cd /
tar -cvpf - --exclude=/tmp --exclude=/home/kang/log --exclude=/span --exclude="/var/lib/plexmediaserver/Library/Application Support/Plex Media Server/Cache" --one-file-system / | tar xvpzf - -C /mnt/newboot --numeric-owner
The above took about an hour. I then copy the /span directory manually, because this directory tends to change while the server is up and running.
With all the contents copied, I forgot how to install grub and had to re-teach myself again. I had to use a live copy Ubuntu USB and use that to boot up the machine, and then mount both the root and efi partitions respectively.
nvme1n1                              259:0    0 931.5G  0 disk
├─nvme1n1p1                          259:1    0     1G  0 part  /boot/efi
├─nvme1n1p2                          259:2    0 915.4G  0 part  /
└─nvme1n1p3                          259:3    0  15.1G  0 part  [SWAP]
And install GRUB.
sudo su -
mkdir /efi
mount /dev/nvme1n1p1 /efi
mount /dev/nvme1n1p2 /mnt
grub-install --efi-directory /efi --root-directory /mnt
I also have fix the /etc/fstab to ensure the root partition and /boot/efi partition are properly referenced by their corresponding, correct UUID. The blkid command came in handy to find the UUID. For the swap partition, I had to use the mkswap command before I get the UUID.
After I rebooted, I reinstalled GRUB one more time with the following as super user:
grub-install /dev/nvme1n1
I also updated the initramfs using:
update-initramfs -c -k all
For something that should have taken less than an hour, it took the majority of the day. The server is now running with the new NVME replacement disk. Hopefully this resolves the file system corruptions. We have to wait and see!
Update: The Day After
The same errors occurred again! I noticed that these corruptions occur when we do a system backup. How ironic! I later confirmed that performing the tar command on the root directory during the backup process can cause such an error. I now have to see why this is. I will disable the system backup for the next few days to see if the errors come back or not.
In the first part of this post, I talked about making sure all the new hardware that I recently purchased works. Yesterday, upgrading from Ubuntu 20.04 LTS to 22.04 LTS was super simple. Unfortunately, that was the end of the easy part.
I thought I could just image by old boot drive and make a carbon copy of it on my new boot drive. My old boot drive is a simple SATA 512GB SSD, and my new boot drive is an NVMe M.2 1TB SSD plugged directly to the motherboard. The copying was pretty simple, but because the drives differ in size, I had to relayout the partition table with the new drive once the copy is completed. I did this with the parted command.
Unfortunately the new boot drive did not want to boot. At this point I had to do some research. The most helpful articles were:
Both of the above articles were an excellent refresher on how GRUB works. I have used GRUB since the beginning, but one gets super rusty when these types of tasks are only performed once every three or six years!
Instead of detailing what went wrong, I will just explain what I should have done. This way if I need it again in the future, it is here for my reference.
Step 1: Perform a backup of the old boot drive from a Live USB in shell mode. This is done on my server on a nightly basis. This method is clearly described on the Ubuntu Community Help Wiki.
Following this method I will end up with a compressed tar archive for my entire root directory, skipping some runtime and other unwanted directories.
Step 2: After installing a fresh install of the new Ubuntu LTS Server operating system on the new server and boot drive, I proceeded to backup the new boot with the same technique used in Step 1. I stored the backup of the new install on another external SSD drive that I have lying around. Also it is important that new boot drive partition layout of the new install contains a swap partition.
Step 3: I then restore the most recent backup (done in Step 1) of the old boot drive to the new boot drive. I then replaced the /boot/grub directory with the new contents from the new install which was backed up in Step 2. The new GRUB is already installed when we performed a brand new installation on the drive. We just want to make sure the boot partition matches the /boot/grub contents.
Step 4: We also need to fix up the /etc/fstab file because it contains references to drive devices from the old hardware. Paid special attention the main data partition and the swap partition. It should look something like this:
# /etc/fstab: static file system information.
#
# Use 'blkid' to print the universally unique identifier for a
# device; this may be used with UUID= as a more robust way to name devices
# that works even if disks are added and removed. See fstab(5).
#
# <file system> <mount point>   <type>  <options>       <dump>  <pass>
# / was on /dev/nvme1n1p2 during curtin installation
UUID=fc939be4-5292-4252-8120-7ef59b177e5b / ext4 defaults 0 1

# /boot/efi was on /dev/nvme0n1p1 during curtin installation
UUID=5187-A8C6 /boot/efi vfat defaults 0 1

# Swap partition
UUID=512d611e-6944-4a57-9748-ea68e9ec3fad	none	swap	sw	0	0

# /dev/mapper/airvideovg2-airvideo /mnt/airvideo ext4 rw,noatime 0 0
UUID=9e78425c-c1f3-4285-9fa1-96cac9114c55 /mnt/airvideo ext4 rw,noatime 0 0
Noticed that I also added the LVM logical volume for /mnt/airvideo, which is my RAID-1 array. The UUID can be obtained by the blkid command. Below is a sample output:
Step 4B (Potentially): If the system boots in the “grub>” prompt, then we will have persuade grub to manually boot by providing the following at the prompt:
grub> set root=(hd9,gpt2)
grub> linux /boot/vmlinuz root=/dev/nvme1n1p2
grub> initrd /boot/initrd.img
grub> boot
To find the root value on the first line, you have use the ls command which is explained in this article. The root parameter on the linux line references the partition which the root directory is mounted. In my case, it was /dev/nvme1n1p2.
After I rebooted, I reinstalled GRUB with the following as super user:
grub-install /dev/nvme1n1
It may also be required to update our initramfs using:
update-initramfs -c -k all
Step 5: At this point the system should reboot and all of the old server’s content should now be on the old hardware. Unfortunately we will need to fix the network interface.
First obtain the MAC address of the network interface using:
% sudo lshw -C network | grep serial
    serial: 04:42:1a:05:d3:c4
And then we will have to edit the /etc/netplan/00-installer-config.yaml file.
% cat /etc/netplan/00-installer-config.yaml
# This is the network config written by 'subiquity'
network:
  ethernets:
    enp6s0:
      dhcp4: true
      match:
        macaddress: 04:42:1a:05:d3:c4
      set-name: enp6s0
  version: 2
Ensuring the MAC address matches from lshw and that the name is the same as the old system. The name in this example is enp6s0. We then need to execute the following commands to generate the interface.
netplan generate
netplan apply
We need to ensure the name matches because many services on the server have configurations that references the interface name, such as:
Configurations in /var/network/interfaces
Samba (SMB) (/etc/samba/smb.conf)
Pihole (/etc/pihole/setupVars.conf)
Homebridge (/var/lib/homebridge/config.json)
Step 6: Fix the router provisioning DHCP IP addresses so that the new server has the same fixed IP address as the old server. This is important because there may be firewall rules referencing this IP address directly. The hostname should have been automatically restored when we restored the partition in Step 3.
Step 7: Our final step is to test the various services and ensure they are working properly. These include: