Last year we engaged with Four Seasons Sunrooms to add a sunroom at the back of our house. It took about a year for us to finalize the engineering drawings, pass the Community of Adjust process with the city of Richmond Hill, and finally obtaining the permit.
Today we finally broke ground!
Below is a short video to remember this event.
Our backyard security video captured the event nicely.
YouTube viewing has been one of our favourite pass times during the lock down nature of the Covid-19 pandemic. I personally have been watching quite a few channels on how to use LiPO4 cells to build rechargeable battery banks for solar applications, primarily for off grid purposes.
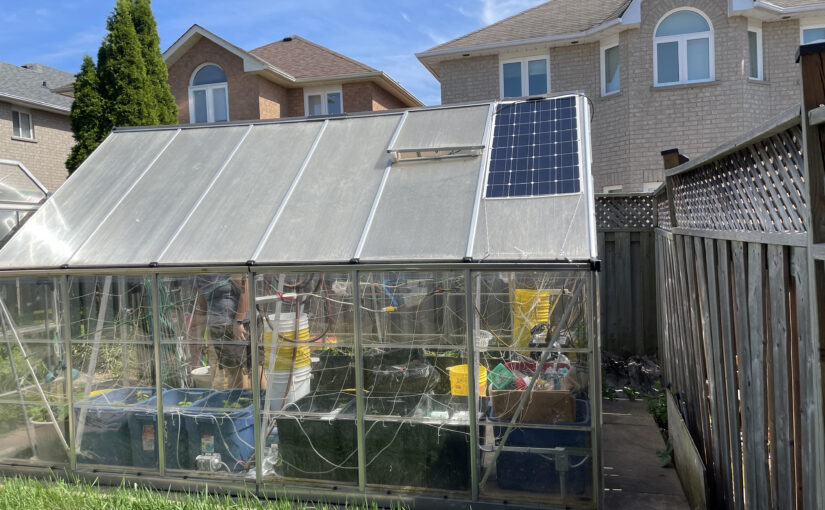
We have a sunroom in our back yard that we used during the summer to grow some vegetables. It has some electrical needs such as water pumps, a temperature sensor, and a fan. Currently there is an electrical socket, fed from the house, that we plug these devices into. We thought it would be a good project to try to get our sunroom off grid. This would be a good learning project.
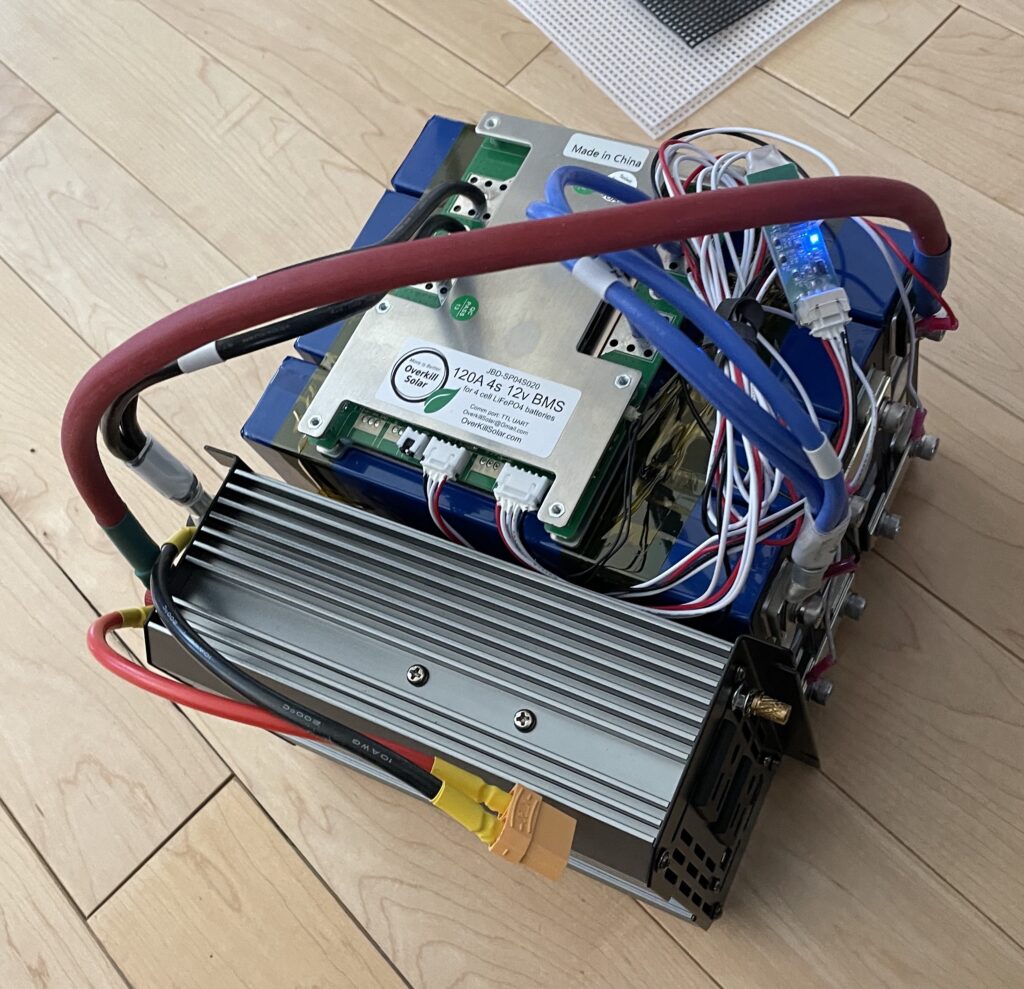
The first task is to build a 12V LiFePO4 prismatic cells battery bank. I purchased 4 3.2V 100Ah battery cells from AliExpress. The cells came with bus bars so I did not have to purchase those. However, I did have to buy a battery management system (BMS) to balance and manage the charging and discharging of the battery cells. It was very tempting to buy a BMS from AliExpress, but I decided to be cautious and purchased one from a US vendor with the accompanying and preferred quality control. The company Overkill provides a 12V BMS specifically for four LiFePO4 battery cells in series.
It took a very long time for the batteries to arrive from China. I suppose the pandemic could be one of the many reasons for the delay. Once they arrived, I connected in parallel and proceeded to perform a top balance procedure with my voltage limiting desktop power supply. This step is required because each cell will have a different voltage potential from each other. We want all the cells to have the same voltage potential to maximize the capacity that we will get from the aggregated 12V battery bank.
Cells in parallel being topped balanced at 3.65V until zero current
To top balance all the cells, first I hook up the cells in parallel and charge them at a constant voltage of 3.65V. The charge will continue until my desktop power supply shows zero amp going into the battery. This process took a very long time, almost 2 days.
Once the cells are balanced, I reconfigured the cells in series and proceeded to hookup the BMS and the pure sine wave 600W inverter I purchased from Amazon. I had to buy 4 AWG wire, once again from Amazon, because the 10 AWG wire that I purchased earlier was not going to be enough if I want to discharge the battery at 600W which is going to result in more than 50A of current at 12V. I used the remaining 10 AWG wire for solar controller and panel hookups. I also got some XT90 connectors so that I can easily plug/unplug the solar charge controller, solar panels, and potentially plugin charger. I will talk about the solar side some more later on.
All wired up. The yellow XT90 connector is to either a solar charge controller or an external DC charger
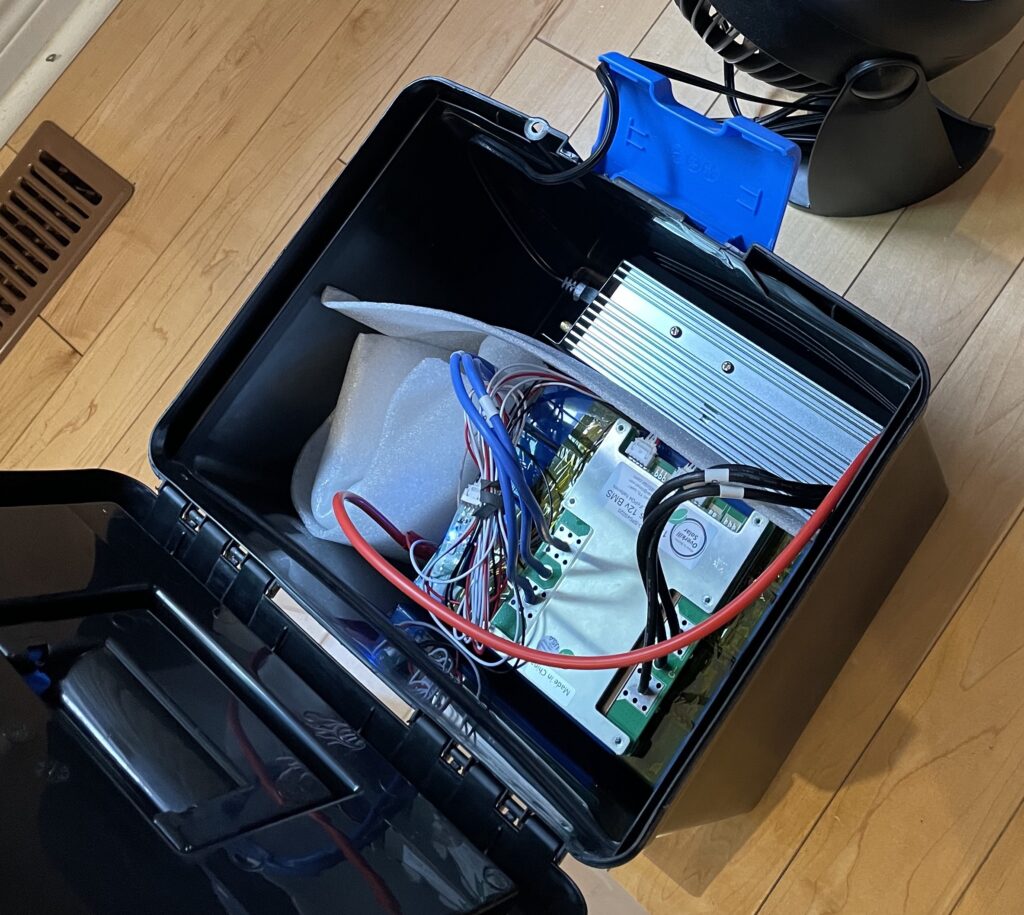
So now that we have the guts of our 12V LiFePO4 battery pack, we need to find a suitable home for this thing. My wife had an extra plastic filing box hanging around which is perfect for this.
A filing box is perfect to fit everything
Custom grommets and added a PC fan
I needed to drill some holes to fit a 12V 120mm PC fan for ventilation, and a couple of 2″ grommets so that we can pass plugs and connectors through the box. The fan will be powered by the inverter.
At this point we have ourselves a 1200Wh portable super battery pack that can power up to 600W of electronics, which will be great for road trips. If you plug a 20W iPhone fast charger and charge your phone, it can continuously charge for 60 hours (2.5 days). That is a lot of phones. If your MacBook Air ran out of juice on the road, then this battery pack can power a 45W charger for your MacBook Air for more than a day, and also charge your computer fully. Quite a handy thing to have for emergencies.
Doubles as a 1200Wh portable battery bank
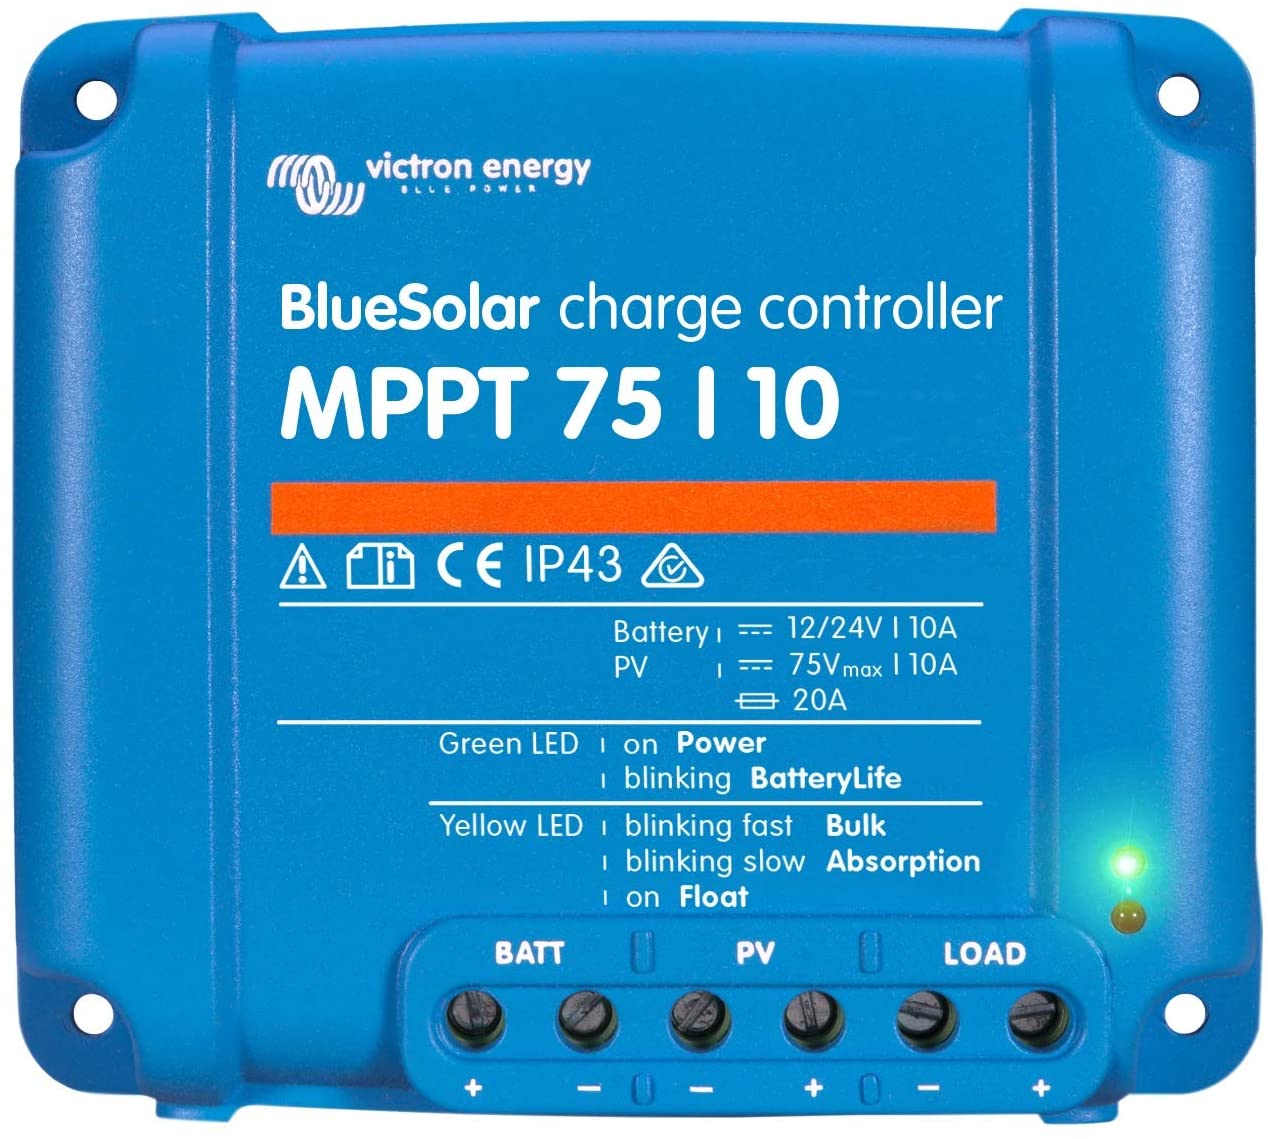
For the solar panels, I purchased two Xinpuguang 100 W flexible solar panels from Aliexpress. They were about $1 / Watt, a pretty good deal. I hook the two panels together in series and got a Victron BlueSolar MPPT 75/10 solar charger to manage the charging of the batteries. The charge controller can accept a maximum of 75V and outputs a maximum of 10A.
The charge controller will automatically adjust the amperage and voltage to the battery bank as required ensuring optimal charging scenario. During a sunny day, it will run the sunroom load from the panels and any remaining current will goto charge the battery. At night, the battery will run the sunroom.
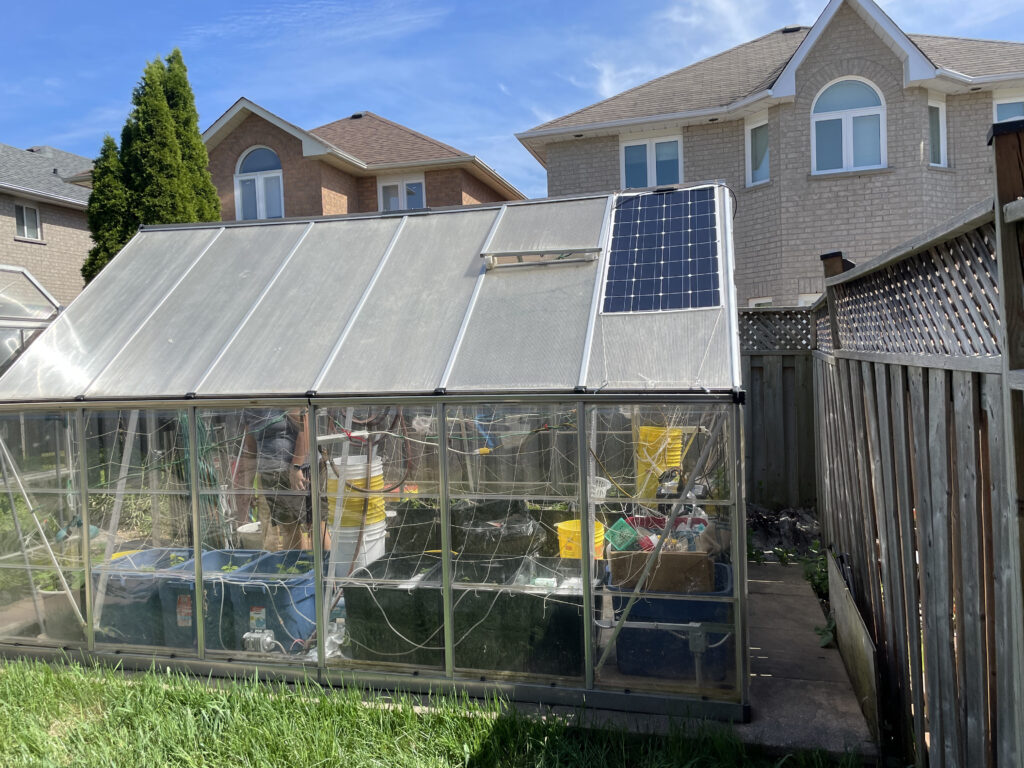
Today, we installed the entire setup. The battery is placed inside the green house to give it some precipitation protection.
The panels are latched to the roof of the green house, one on each side.
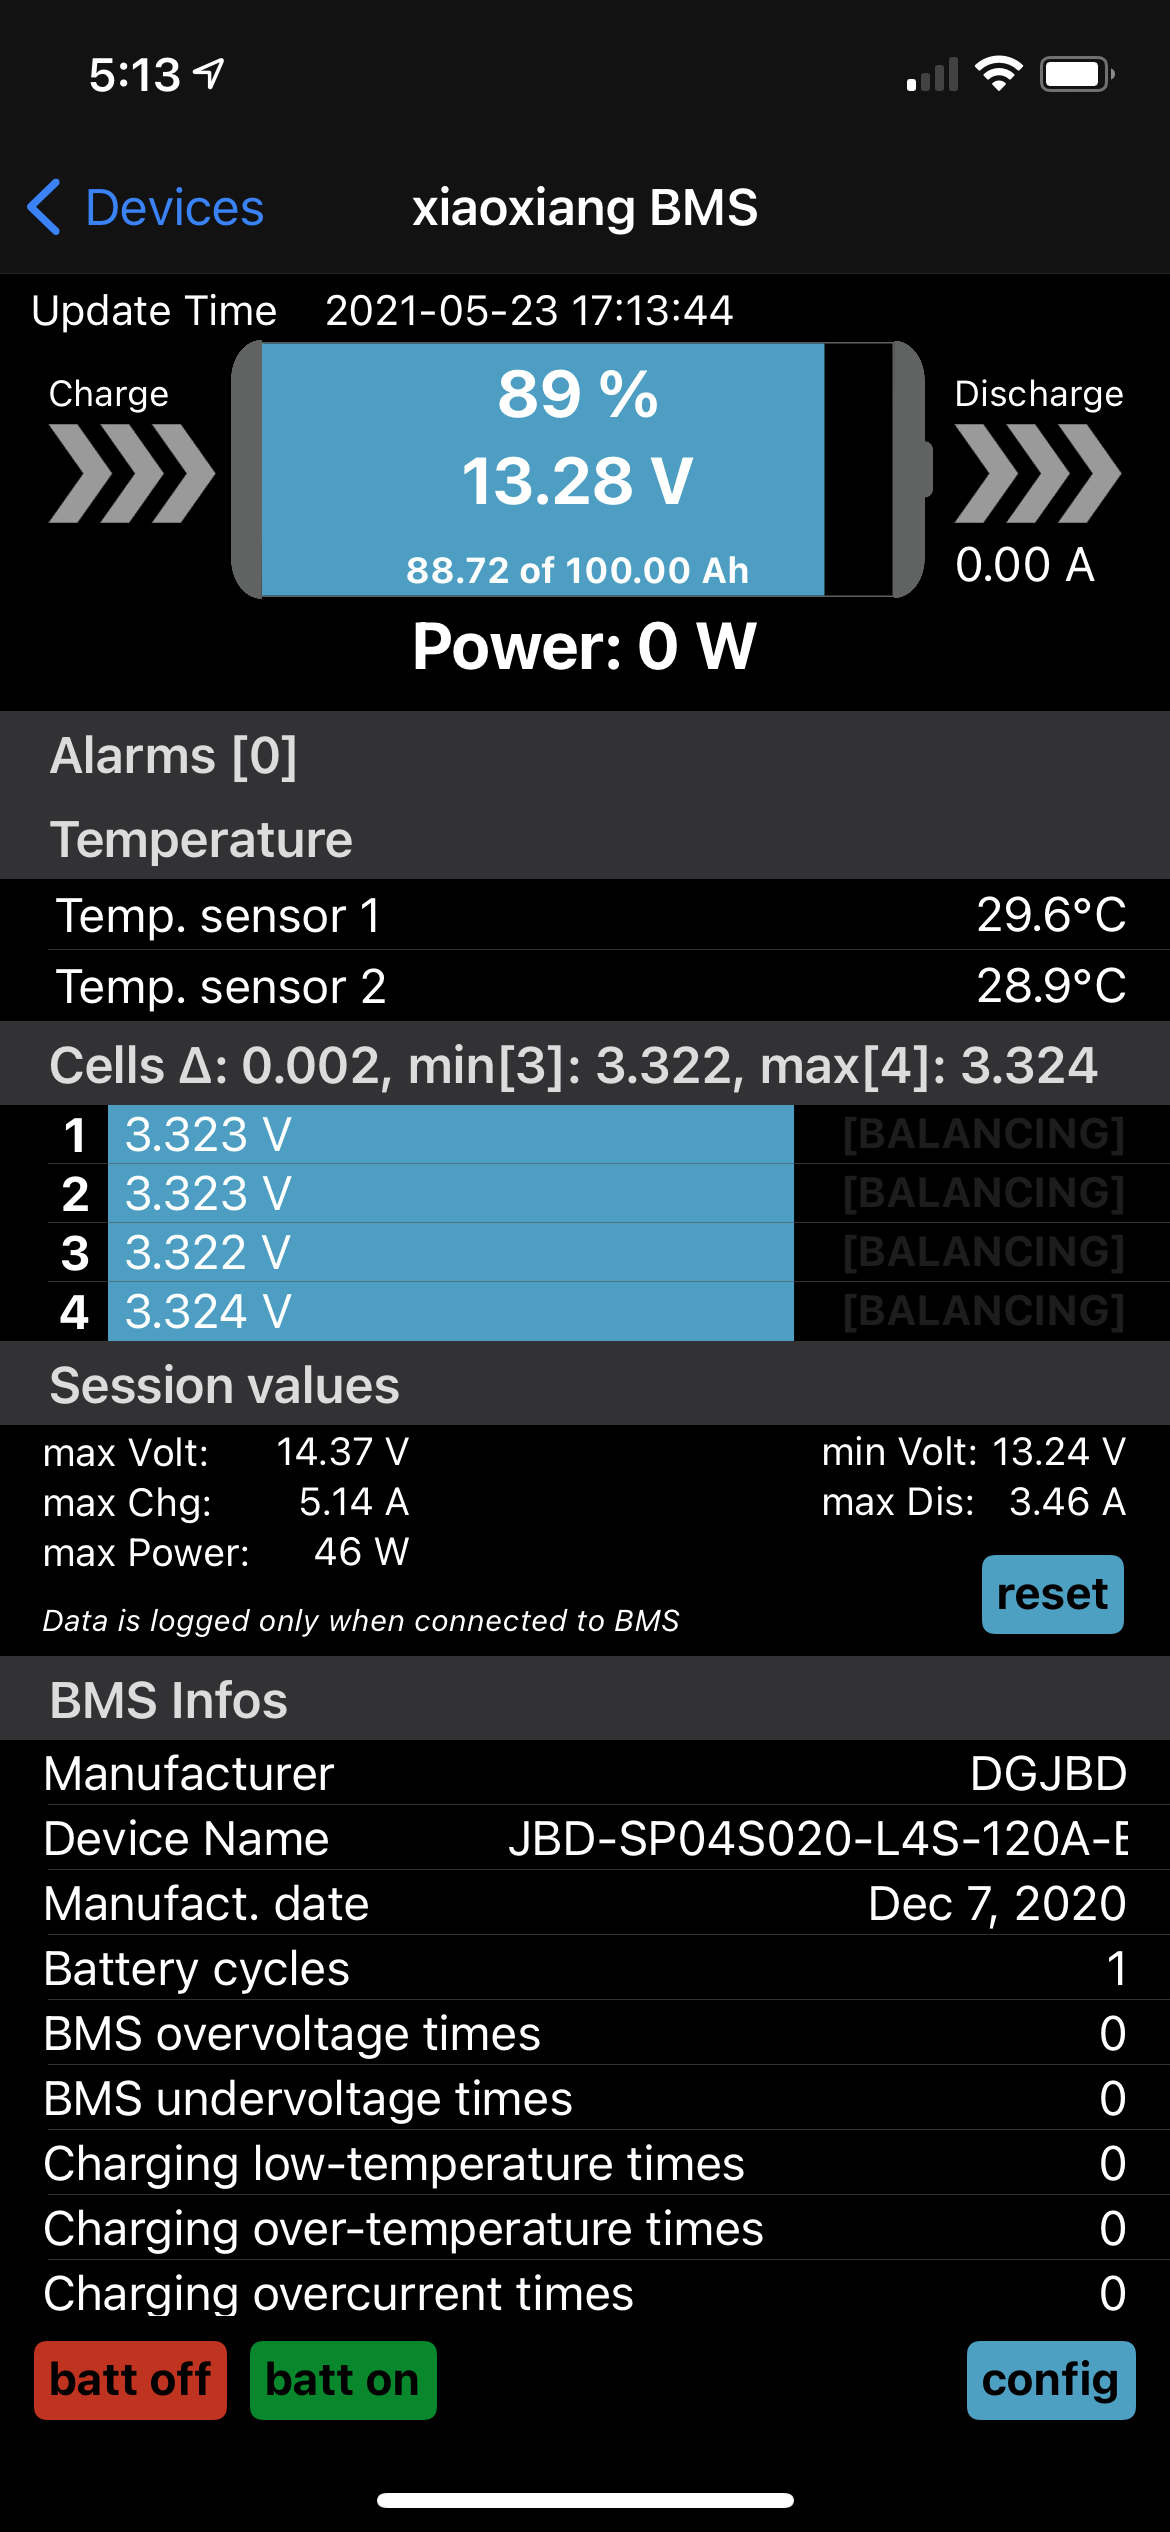
The BMS unit has a bluetooth connection and an iOS App. I can use my iPhone when in bluetooth range of the battery to see if the battery is being charged or discharged.
I took the following screen shot of the app today at around 5pm EDT. You can see that there is no current going into the battery and no current going out of the battery. This means the sun is powerful enough to run all the pumps and other electrical appliances in the sunroom. Pretty cool!
It is still too early to tell yet whether there is enough sun power to charge the battery and run the electrical devices in the sunroom in a sustainable manner. My current suspicion is that the two panels are just enough even on a full, bright, sunny day and at peak hours, to power devices and also provide surplus current to charge the batteries.
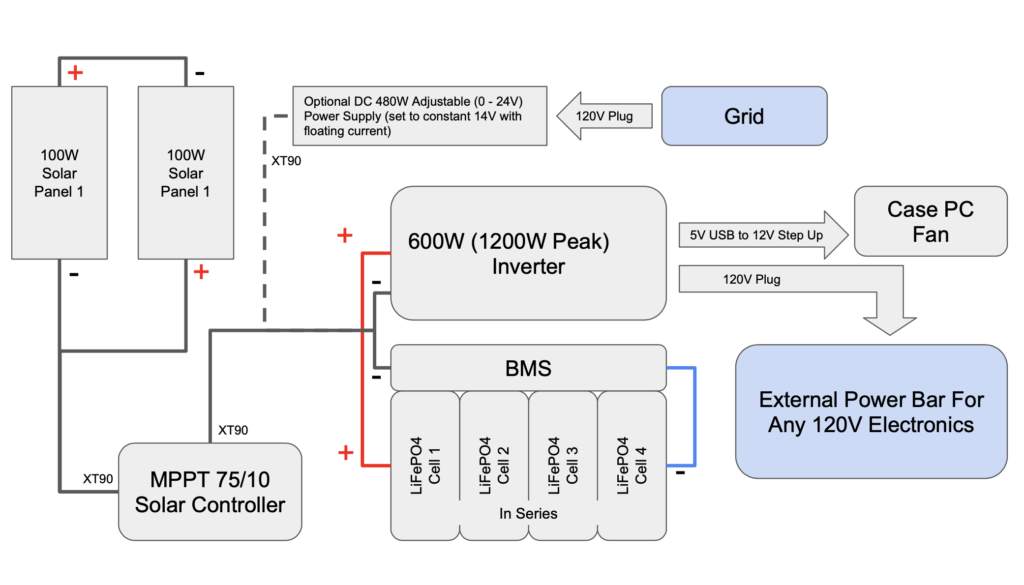
Here is my overall connectivity diagram:
We will let the system run for about a week to see if this is sustainable during the summer months or not. If not, then I will have to create an automatic transfer switch so that we can intermittently recharge the batteries during the evening with an optional 480W DC charger, which I also got from Aliexpress. This charger can operate between 0-24V and 0-20A. To charge the battery bank, I have set it to a constant voltage of 14.0V and allow the output current to flow unrestricted. This should charge the battery fully in a little over 4 hours from scratch.
Overall, I learned a lot from this project and what a great way to spend the pandemic indoors. This could be a precursor to a DIY Tesla Powerwall Project. We’ll see.