Home Automation Garage Door Opener on Life Support

More than nine years ago, I created a remote garage door opener that connected to my HomeKit setup. This has proven to be a budget-friendly and super handy device, as I am able to control my garage door from anywhere in the world. I came up with this solution before WiFi-based remote garage door openers were commercialized.

However, recently the Raspberry Pi Zero W started to randomly lose WiFi network connection, and I have to reboot it all the time. Of course, this is very frustrating. Since the device is plugged into a ceiling plug, the same socket that is used for the actual garage door opener, it is quite inconvenient to cycle the device. I typically had to restart the whole garage by resetting the breaker on the main electrical panel.

I have some extra ESP32-S3 SuperMini boards on the side that I was going to replace the PiZero W with. I bought these from Pinduoduo (拼多多) when I was in China last year. Due to my laziness, I did not get around to it. Something else happened that allowed me to find another workaround.

About three and a half years ago, I purchased the VOCOlinc HomeKit Smart Plugs from Amazon. I used these to remotely control some fans in the house. One of these was recently freed up. I can then plug the adapter used to power the Pi Zero into the Smart Plug. Now I have a remote way to remotely power cycle the Pi Zero. A remote device to control the power of another remote device! Not only can I cycle the Pi Zero remotely, I can also programmatically determine when to cycle the device.

The Smart Plug is setup with my HomeKit environment and I recently learned that on a Mac, you can use the Shortcut App to toggle an accessory or scene with HomeKit.

I also found out that once I have a Shortcut, I can invoke it using the shortcuts command line command.
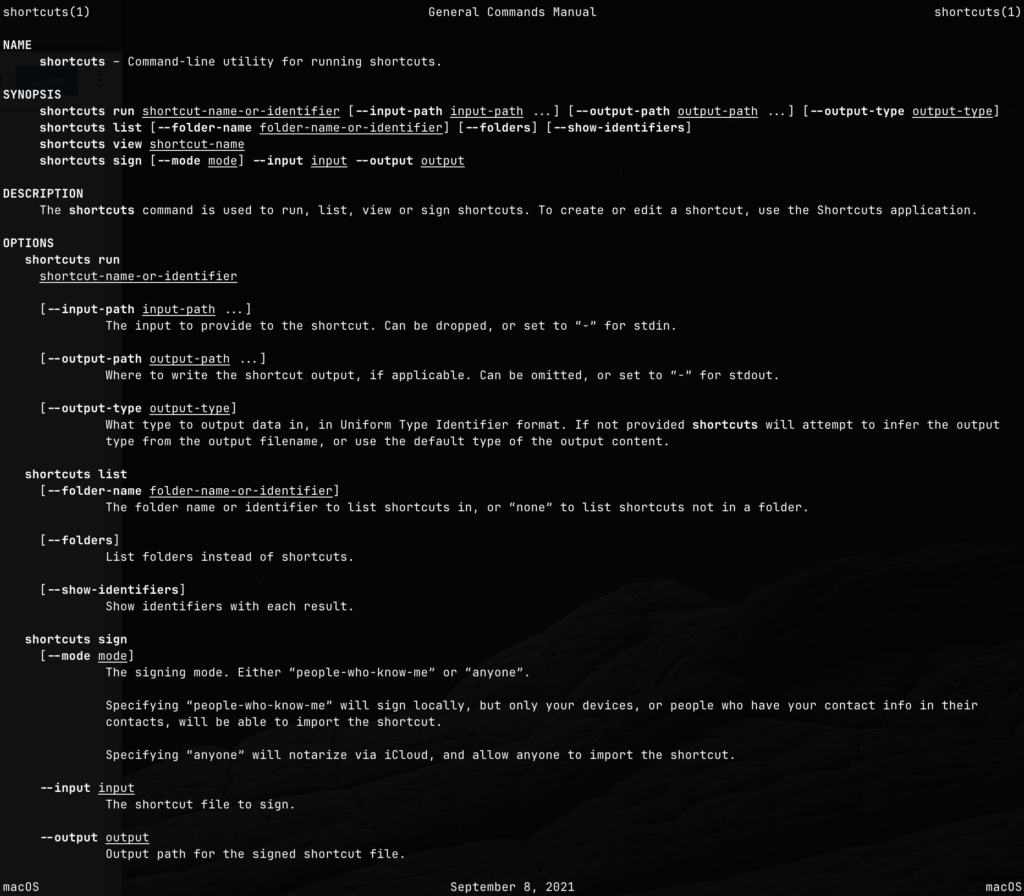
Using this shortcut concept, I can create a periodic cron job that effectively check the connectivity of the Pi Zero every 15 minutes. If I am unable to connect, I can effectively remote restart the Pi Zero. The script is listed below:

#!/usr/bin/env zsh
#
# This script is meant to be run as root

logger "cyclePizero.sh: INFO test connectivity to pizero.localdomain"
if ! ping -q -c 1 pizero.localdomain >/dev/null; then
        logger "cyclePizero.sh: ERROR unable to ping pizero.localdomain"
        logger "cyclePizero.sh: INFO restarting the resolved daemon"
        systemctl restart systemd-resolved.service
        logger "cyclePizero.sh: INFO cycling pizero.localdomain"
        ssh bigbird -n 'shortcuts run "Toggle Garage Opener"'
        sleep 3
        ssh bigbird -n 'shortcuts run "Toggle Garage Opener"'
        logger "cyclePizero.sh: INFO cycling completed"
else
        logger "cyclePizero.sh: INFO pizero.localdomain ping successfully"
fi

Note that I also sometimes have to restart the name resolution service, system-resolved. This is another reason sometimes HomeKit fails to communicate with the Pi Zero.

Hopefully this patch will work until I finally have time to replace it with the ESP32.

Wi-Fi 6 Upgrade with HomeKit Headaches

I recently upgraded all my WiFi access points to the Unifi UAP-U6-LR and UAP-U6-Lite. This will elevate my home to Wi-Fi 6 capable.

This was extremely exciting as my 802.11ax capable devices can now get between 100Mbps to 400Mbps depending on where we are in the house. It seems even the 802.11ac devices got about a 30% speed bump.

As a result of this upgrade, two UAP-AC-M mesh and one UAP-AC-Pro access points were retired from my house. I don’t recommend buying these devices any more since the Wi-Fi 6 devices from Ubiquiti are way more capable with higher performance and increase range than their 802.11ac access points.

However, the honeymoon period did not last long. After about a week, HomeKit devices started to show the dreaded “No Response” labels. Specifically, I had connectivity problems with Leviton Smart Decora Dimmers. In the past, all I had to do was recycle the HomeKit device and it was all good. Another episode of HomeKit and Leviton dimmer switch nightmare was experienced and documented by my previous blog post.

In this particular instance, the Leviton dimmers were able to join the Wi-Fi network and I can validate that with the Unifi Controller software. However, our HomeKit App was not able to connect to the dimmer switches. It took me sometime to figure out that the dimmers were unreachable by other Wi-Fi clients, but was reachable by computers that were physically wired to our network.

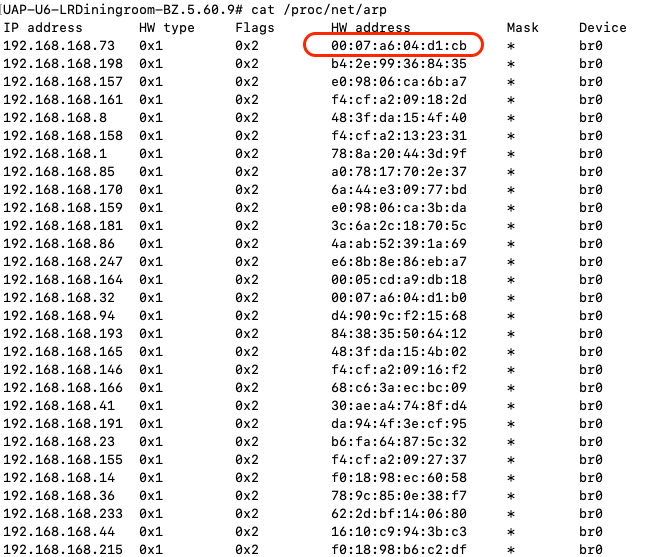
I found out which access point the dimmer switches were connected to and ssh into the access point to see if I can ping those devices, and sure enough they were unreachable. Below is a screen capture of the ARP listing from the access point.

Normal ARP listing from the Wi-Fi Access Point

When the dimmers were unreachable, the HW address was set to 00:00:00:00:00:00. After rebooting the culprit access point, I was able to access the offline dimmer switches again from the HomeKit App.

In summary, when HomeKit devices are offline with the dreaded “No Response” labels, here are the following things to try:

  • Ensure that local DNS is working properly and caches are emptied so that the latest data are available;
  • Ensure the device itself has acquired a valid IP address that is from your network;
  • Ensure that the device is reachable from the HomeKit App, typically from your iPhone or iPad;
  • Back trace the physical upstream networking equipment that is connected to your HomeKit device such as switches and access points and see which requires rebooting;

Apple could improve the HomeKit experience by allowing users to perform a full backup of the HomeKit configuration and reset the Home and perform a restore. Unfortunately, the closest thing that I found was from the Home+ App, but they do not restore device connectivity just their configurations.

When HomeKit works, you are literally like god, able to command light and switches with your voice in your home. When it does not work, it is extremely difficult to debug, due to a lack of diagnostics and logging.

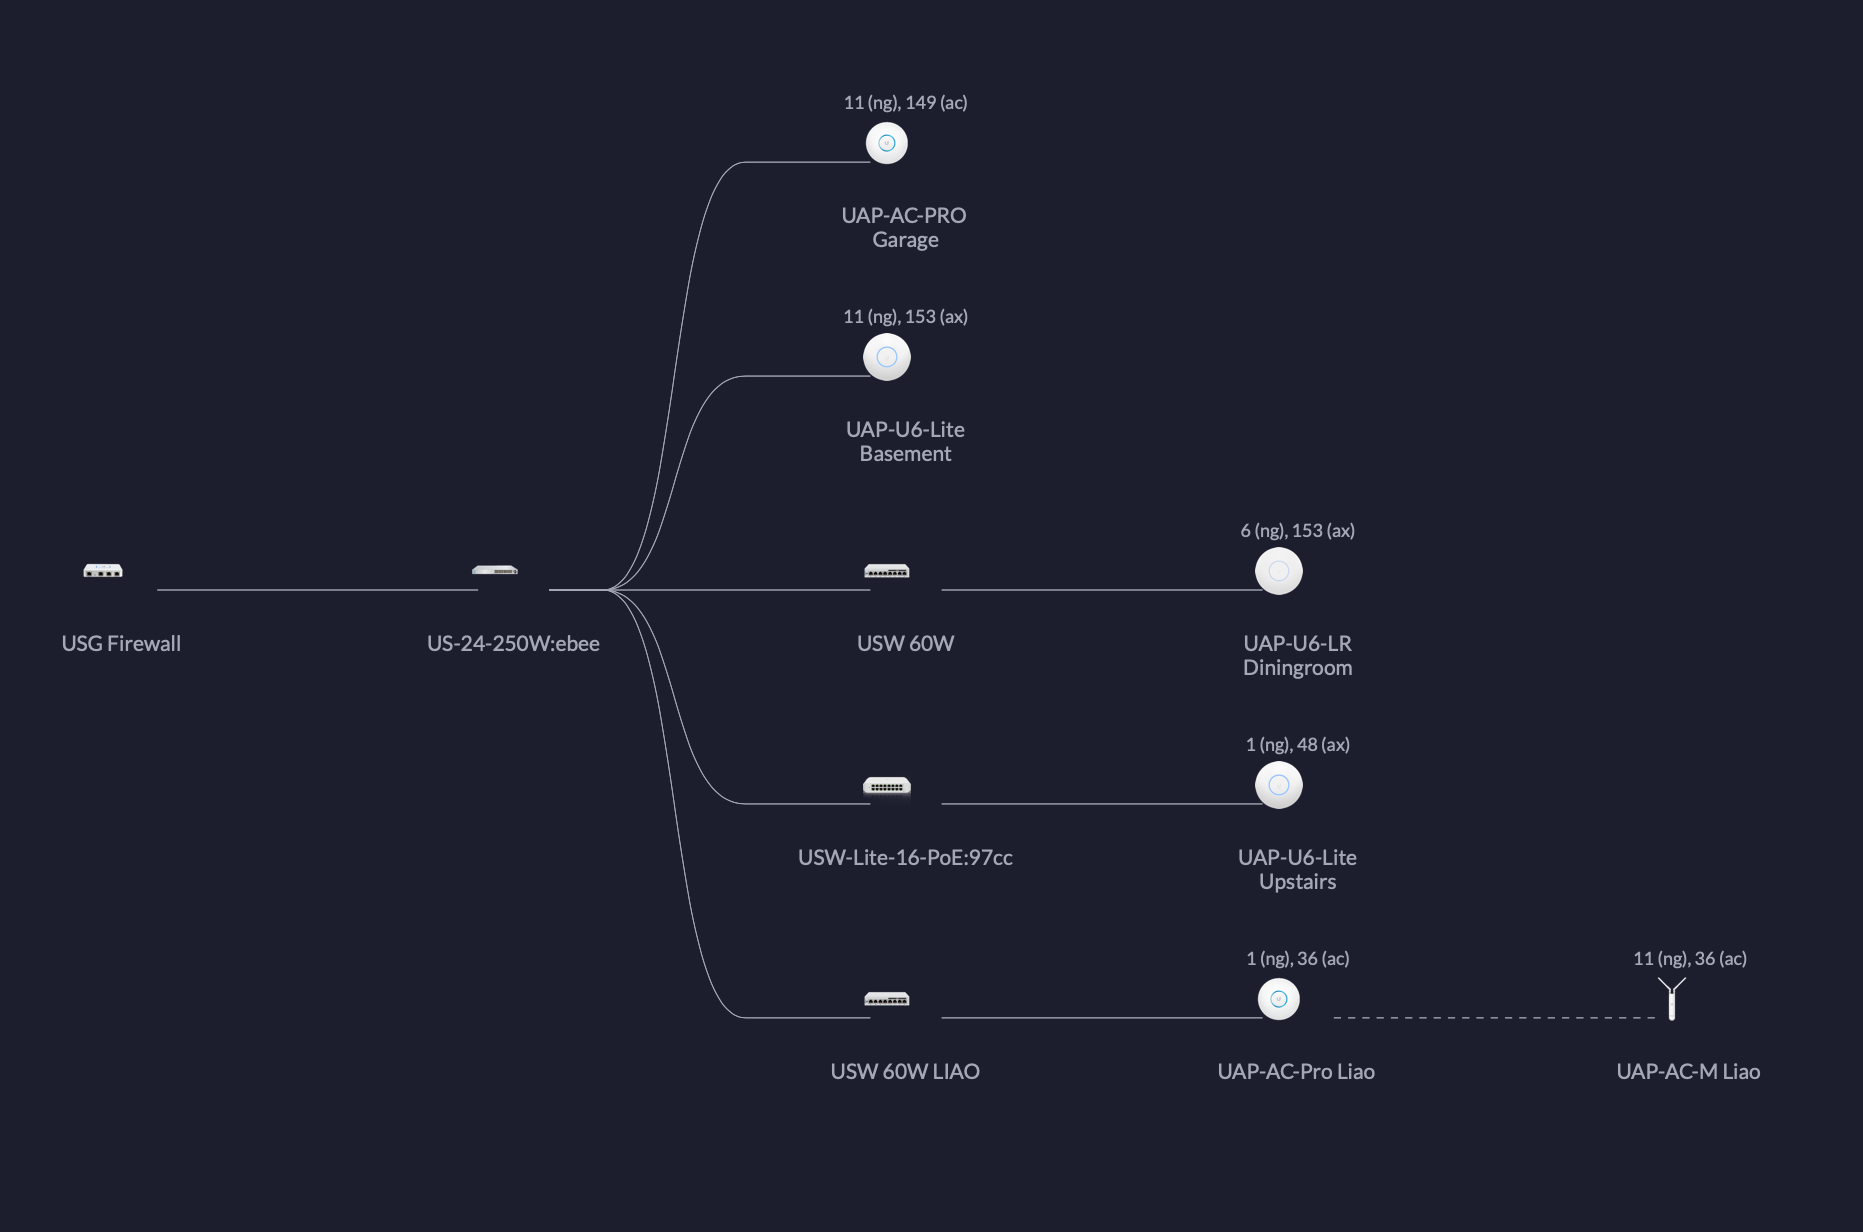
After this update, my current networking layout now looks like this:

2021 October Network Layout (Click to Enlarge)

Darci Door Bell

We have a cat named Darci. During the summer time she likes to take strolls through our backyard, checking out other frequent visitors like rabbits, chipmunks, squirrels, birds, and the like. She does this on an extended leash so to avoid her chasing these visitors and get lost into the wild. If you are curious, then visit her on Instagram.

We of course turn on the air conditioner on most days of the summer, so when Darci wants to come back into the house, she sits by the backyard sliding door and await one of us to open the door for her. If we are busy, she waits patiently for quite some time. My wife came up with the door bell idea. Instead of scratching the glass pane of the sliding door, which is mostly silent, we will train her to hit a door bell, which will alert us to let her in.

This is how I was assigned the Darci Door Bell project. This is another excellent opportunity to create a gadget. My first thought is to create a Raspberry Pi with a camera that uses an AI image classifier on the backend. I thought this would be a good opportunity to get my feet wet in AI. However, when dealing with a camera, and a Raspberry Pi, we are now talking about power and the need to be “plugged in”. We wanted a gadget that is wireless and battery operated. A battery based solution will severely restrict the power budget, so back to a WiFi based remote door bell idea.

After more research, I decided to use an ESP8266 MCU with WiFi and a simple step-down buck converter to convert 9V to 3.3V. I had worked with the ESP8266 before when I was attempting to use it to create my garage door opener. That was over six years ago. ESP8266 just came out and has yet to be integrated into the Arduino platform. Today, it is now much easier to work with the ESP8266. Using the Arduino IDE, one can simply program the ESP8266 natively as an MCU without even requiring an Arduino board.

From a previous project, I built a small circuit using an USB FTDI interface that will accept the ESP8266 ESP-01 board. This way I can plug the ESP8266 using USB to my computer and program it with the Arduino IDE. I wrote the following sketch, and programmed the ESP8266 ESP-01 board.

 #include <ESP8266WiFi.h>
 #include <ESP8266HTTPClient.h>

 #define SERVER_IP "192.168.1.111"
 
 #ifndef STASSID
 #define STASSID "myssid"
 #define STAPSK  "adsjfkdajfioeujfngjhf"
 #endif
 
 void setup() {
 
   WiFi.begin(STASSID, STAPSK);
 
   while (WiFi.status() != WL_CONNECTED) {
     delay(250);
   }
 
   WiFiClient client;
   HTTPClient http;

   // configure traged server and url
   http.begin(client, "http://" SERVER_IP "/IOTHandler.php"); //HTTP
   http.addHeader("Content-Type", "application/x-www-form-urlencoded");
 
   // start connection and send HTTP header and body
   http.POST("id=darciButton");
 
   http.end();
 
   ESP.deepSleep(0);
 }
 
 void loop() {
   ESP.deepSleep(0);
 }
 

The above program is pretty simple. When the board wakes up, it connects to my WiFi and then send an HTTP-POST request to my server that will handle the request based on the id, which in this case, it will be darciButton. As soon as the request is sent, the MCU will go into a deep sleep.

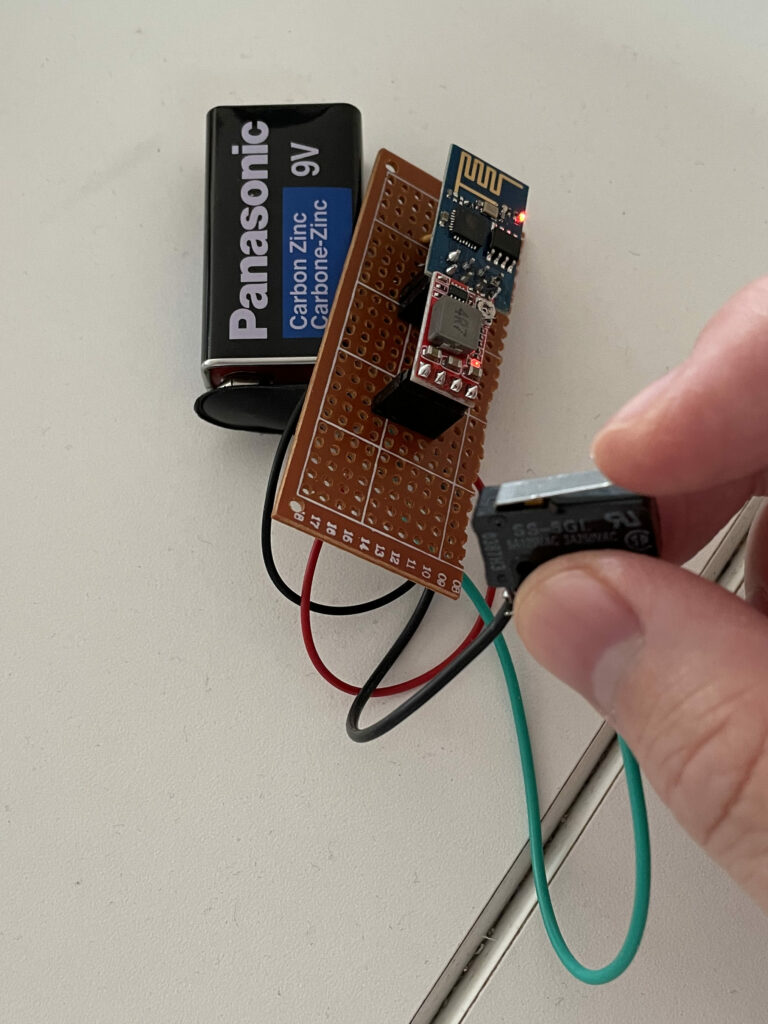
Completed Circuit

This way, the door bell will be a physical button that is hooked to the RST pin of the ESP8266 causing the ESP8266 to boot and send this POST request and immediately goes to sleep. The deep sleep is important, because while the device is in this deep sleep mode, the current draw from the 9V battery is negligible (<< 1mA). The only time the battery is used is when the button is pressed and released, and the ESP8266 is sending out the POST request. Using this power conservation approach, it is my hope that the 9V battery will last for the entire year of operation.

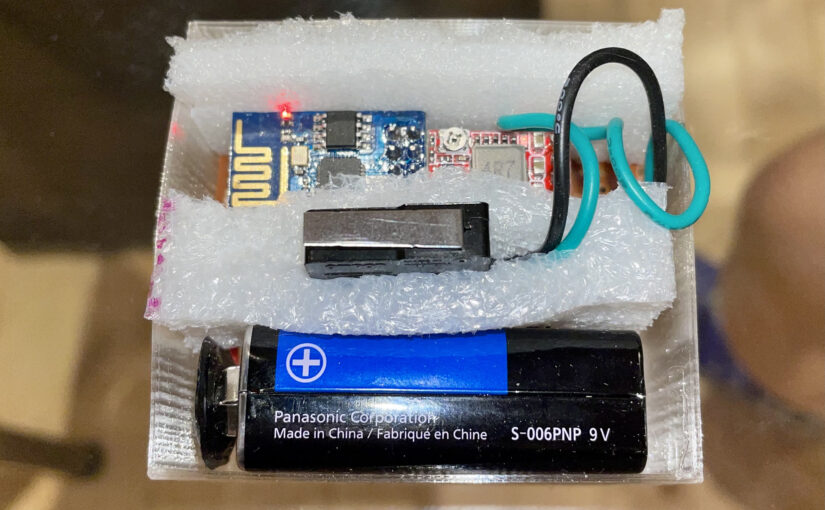
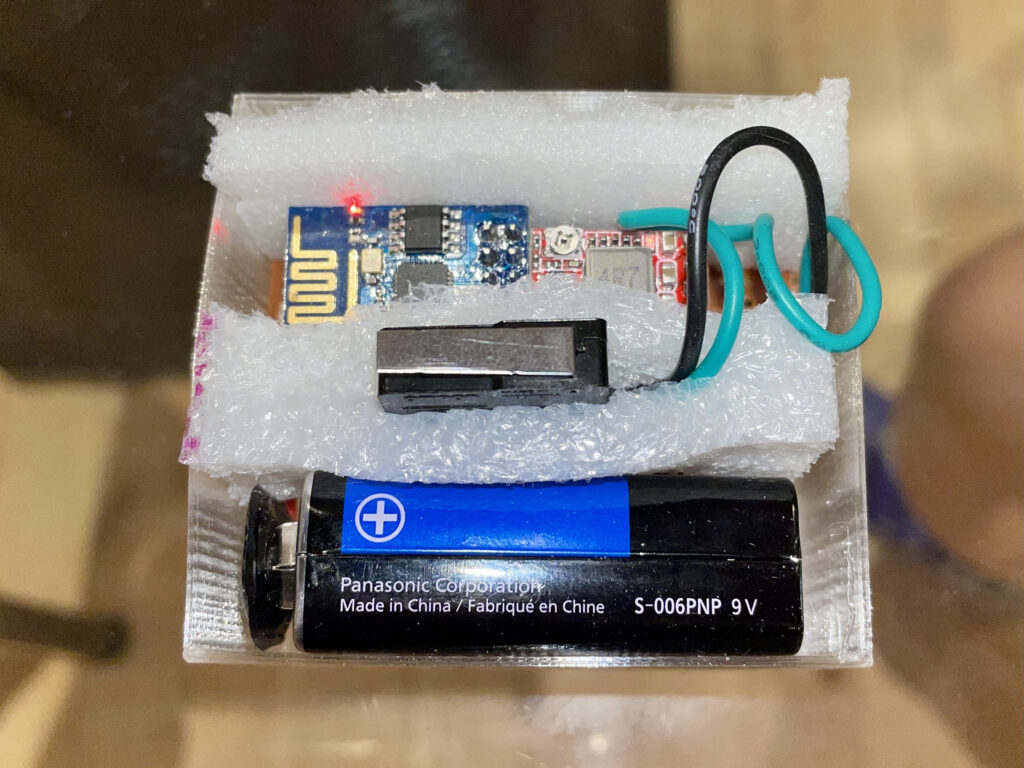
I used my 3D printer to print a little box for the whole thing and gave it some packaging padding, making sure the switch is on the top and properly supported. The final result looks something like this.

Packaged in a box

We then created a cardboard top cover that snugly fit the box, so that the top cover can freely move up and down the containing, plastic box. The switch itself has a little spring to it that allows the top cover to return back to its original position after being pressed. The finished product looks like this:

Finished Product

The top cover has a nickel on there so that Darci has a good target to train on.

Remember the server receiving the POST request? Well, I did some simple php programming on the server so that once the POST is received, I send out another HTTP request. This time to the Homebridge server with the homebridge-button-platform plugin installed. Homebridge is something that I already have and use to connect all non-compliant HomeKit accessories so that I can use those accessories via Siri. With this new plugin, I can connect this custom WiFi button to the HomeKit ecosystem within the house.

In effect, whenever this button is pressed, my HomeKit service will register an accessory button being pressed, and I can program a HomeKit scene that gets executed. I programmed a scene to play an audio file on all of my HomePods in the house. The audio file plays an audible door bell twice which I previously added to my Music library.

The final reward as shown by Darci herself. Watch the video below:

Darci Approves!

Of course with the button hooked up to HomeKit, we can now use this wireless button to do whatever HomeKit can do, unlock doors, turn lights on or off, etc. We will explore those possibilities in the future.

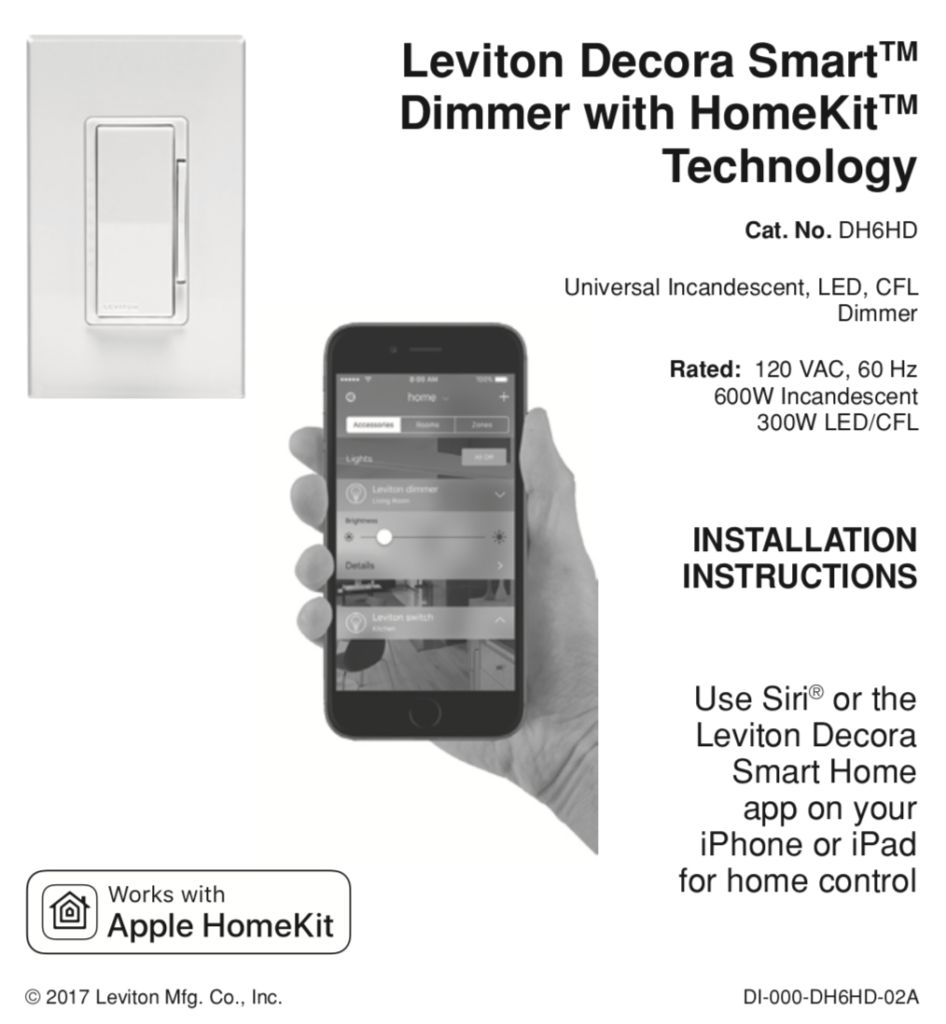
Leviton Decora Smart Dimmer with HomeKit

I purchased these DH6HD HomeKit compatible dimmer switches from Leviton from February of 2018 (over 1 1/2 years now).

When they work, they are great. BUT! My HomeKit app frequently report these switches with “Not Responding”. The only remedy that I know of is to remove the accessory and then re-add it again.

The process of adding the accessory is extremely frustrating and time consuming. Adding the accessory to the WiFi network is a hit and miss affair. It really is a crapshoot.

Today after three tries adding the Leviton without success, I almost gave up. Finally I discovered the following process in this reddit article. Even the technique outlined by the article did not work until I restarted the avahi-daemon.service on my Linux server, figuring that it may interfere with the Bonjour discovery process when adding the accessory.

Using the WiFi setup of the iPhone to add the Leviton device to the WiFi network definitely works smoother than using the Home app. Here are the steps:

  1. Reset the light switch by pressing and holding the on position of the switch until its LED light switches rapidly from red and amber. This can take more than 10 seconds.
  2. Set the iPhone to the appropriate WiFi network.
  3. Goto the iPhone WiFi menu, and you will the Leviton switch available for adding to the WiFi network. Add this device to the network.
  4. If an error is encountered when adding to the network, then restart the avahi-daemon service (or other mDNS service that may be competing).
  5. Once the switch is added to the network, proceed to add the switch with the Home app.

Apparently there is a firmware update for these switches. However, the update from 1.4.13 to 1.4.32 fail with the Leviton iOS app.

If you are thinking of getting a light switch for your home automation project, I would steer away from these switches!