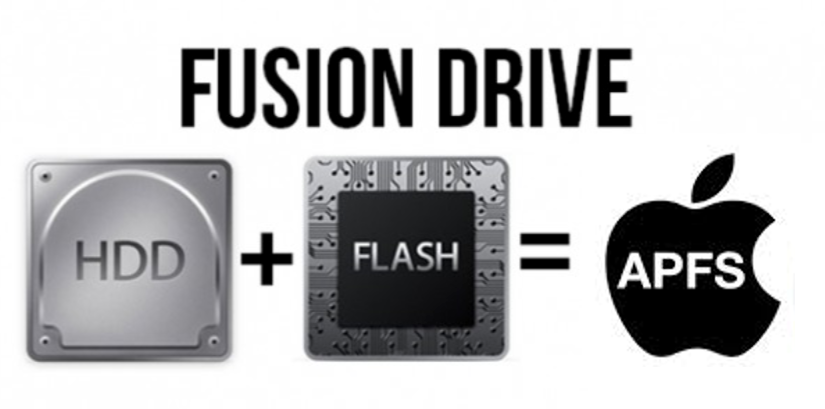
Earlier this year and on a previous post, I explained how I constructed and configured an external fusion drive using Apple’s CoreStorage via the diskutil utility. Since I upgraded to macOS Mojave and it has the Apple File System (APFS) with Fusion Drive support, I decided that I want to convert my old external Fusion Drive setup to APFS. Always being an early adopter!
I tried to find online instructions on how to accomplish this, but there were just bits and pieces. So in case I forget in the future and also someone else may find this useful, I decided to place the instructions here.
First, I did try to convert my old external fusion named, MediaFusion, with the diskutil application. Unfortunately that was unsuccessful and it returned an error. Therefore, I had to backup all the contents in MediaFusion, split the old fusion drive and create a brand new APFS container with multiple drives and partitions. Following are all the command line steps that I executed via the Terminal application.
First, let me show you what I had to begin with:
$ diskutil cs list

CoreStorage logical volume groups (1 found)
|
+-- Logical Volume Group 33383C9C-0CE7-4361-8A72-0DD606CDB079
    =========================================================
    Name:         mediafusion
    Status:       Online
    Size:         4500172365824 B (4.5 TB)
    Free Space:   40960 B (41.0 KB)
    |
    +-< Physical Volume 42A28BA6-0C40-4650-BE03-23FF7F377E58
    |   ----------------------------------------------------
    |   Index:    0
    |   Disk:     disk4s2
    |   Status:   Online
    |   Size:     499762860032 B (499.8 GB)
    |
    +-< Physical Volume E7E51D4E-B65A-44C9-961C-B1ACB70ACF92
    |   ----------------------------------------------------
    |   Index:    1
    |   Disk:     disk3s2
    |   Status:   Online
    |   Size:     4000409505792 B (4.0 TB)
    |
    +-> Logical Volume Family C1F85922-A4C2-42B2-A8FF-BF46ED8B2641
        ----------------------------------------------------------
        Encryption Type:         None
        |
        +-> Logical Volume 6C87BA11-AC3D-449B-B591-D53C99C98078
            ---------------------------------------------------
            Disk:                  disk5
            Status:                Online
            Size (Total):          4499551551488 B (4.5 TB)
            Revertible:            No
            LV Name:               MediaFusion
            Volume Name:           MediaFusion
            Content Hint:          Apple_HFS
            LVG Type:              Sparse
Next, I have to split the two drives, the disk4s2 (SSD 500GB) and the disk3s2 (HDD 4TB) mechanical drive.
$ diskutil cs deleteVolume 6C87BA11-AC3D-449B-B591-D53C99C98078

The Core Storage Logical Volume UUID is 6C87BA11-AC3D-449B-B591-D53C99C98078
Started CoreStorage operation on disk5 MediaFusion
Unmounting disk5
Removing Logical Volume from Logical Volume Group
Finished CoreStorage operation on disk5 MediaFusion

$ diskutil cs delete 33383C9C-0CE7-4361-8A72-0DD606CDB079

Started CoreStorage operation
Destroying Logical Volume Group
Erasing disk4s2
Initialized /dev/rdisk4s2 as a 465 GB case-insensitive HFS Plus volume with a 40960k journal
Mounting disk
Erasing disk3s2
Initialized /dev/rdisk3s2 as a 4 TB case-insensitive HFS Plus volume with a 311296k journal
Mounting disk
Finished CoreStorage operation

$ diskutil list

/dev/disk3 (external, physical):
   #:                       TYPE NAME                    SIZE       IDENTIFIER
   0:      GUID_partition_scheme                        *4.0 TB     disk3
   1:                        EFI EFI                     209.7 MB   disk3s1
   2:                  Apple_HFS Untitled                4.0 TB     disk3s2

/dev/disk4 (external, physical):
   #:                       TYPE NAME                    SIZE       IDENTIFIER
   0:      GUID_partition_scheme                        *500.1 GB   disk4
   1:                        EFI EFI                     209.7 MB   disk4s1
   2:                  Apple_HFS Untitled                499.8 GB   disk4s2
Once the drives are properly split and reverted back to their original partition maps, I can then create my multi-device APFS Container.
$ diskutil ap createContainer disk4s2 disk3s2

Creating container with disk4s2 disk3s2
Started APFS operation on disk4s2 Untitled
Creating a new empty APFS Container
Unmounting Volumes
Switching disk4s2 to APFS
Switching disk3s2 to APFS
Creating APFS Container
FusionLC autodetect: regular Fusion
Created new APFS Container disk5
Disk from APFS operation: disk5
Finished APFS operation on disk4s2 Untitled

$ diskutil ap addVolume disk5 APFS MediaFusion

Exporting new APFS Volume "MediaFusion" from APFS Container Reference disk5
Started APFS operation on disk5
Preparing to add APFS Volume to APFS Container disk5
Creating APFS Volume
Created new APFS Volume disk5s1
Mounting APFS Volume
Setting volume permissions
Disk from APFS operation: disk5s1
Finished APFS operation on disk5
Be sure to specify the faster drive (disk4s2) as the first device! Once both the container and volume is completed I now have two APFS based fusion drives.
$ diskutil ap list

APFS Containers (2 found)
|
+-- Container disk2 1D566DF6-F26A-4E92-BE2F-5C38B62C579B
|   ====================================================
|   APFS Container Reference:     disk2 (Fusion)
|   Size (Capacity Ceiling):      3121506295808 B (3.1 TB)
|   Capacity In Use By Volumes:   1924724002816 B (1.9 TB) (61.7% used)
|   Capacity Not Allocated:       1196782292992 B (1.2 TB) (38.3% free)
|   |
|   +-< Physical Store disk0s2 123F0CDD-E154-4CC6-8F2D-D344166F04E8
|   |   -----------------------------------------------------------
|   |   APFS Physical Store Disk:   disk0s2 (Main)
|   |   Size:                       121123069952 B (121.1 GB)
|   |
|   +-< Physical Store disk1s2 9A6CCF8F-D0A1-4791-9F1C-DBFB1BB38461
|   |   -----------------------------------------------------------
|   |   APFS Physical Store Disk:   disk1s2 (Secondary, Designated Aux Use)
|   |   Size:                       3000383225856 B (3.0 TB)
|   |
|   +-> Volume disk2s1 0C36C0CE-B273-3626-A17C-E04BC605FA25
|   |   ---------------------------------------------------
|   |   APFS Volume Disk (Role):   disk2s1 (No specific role)
|   |   Name:                      Macintosh HD (Case-insensitive)
|   |   Mount Point:               /
|   |   Capacity Consumed:         1913007661056 B (1.9 TB)
|   |   FileVault:                 No
|   |
|   +-> Volume disk2s2 58E58B2A-7F7E-4E02-944B-5F1FF84B0BAF
|   |   ---------------------------------------------------
|   |   APFS Volume Disk (Role):   disk2s2 (Preboot)
|   |   Name:                      Preboot (Case-insensitive)
|   |   Mount Point:               Not Mounted
|   |   Capacity Consumed:         30584832 B (30.6 MB)
|   |   FileVault:                 No
|   |
|   +-> Volume disk2s3 EEF4C40B-75B8-4D86-90A4-85AD764F3BD4
|   |   ---------------------------------------------------
|   |   APFS Volume Disk (Role):   disk2s3 (Recovery)
|   |   Name:                      Recovery (Case-insensitive)
|   |   Mount Point:               Not Mounted
|   |   Capacity Consumed:         509845504 B (509.8 MB)
|   |   FileVault:                 No
|   |
|   +-> Volume disk2s4 CC23597C-9267-4F93-8DE3-73892FEA6ABF
|       ---------------------------------------------------
|       APFS Volume Disk (Role):   disk2s4 (VM)
|       Name:                      VM (Case-insensitive)
|       Mount Point:               /private/var/vm
|       Capacity Consumed:         2147516416 B (2.1 GB)
|       FileVault:                 No
|
+-- Container disk5 2A73D327-63D2-4BFA-973C-B62B00CA5B70
    ====================================================
    APFS Container Reference:     disk5 (Fusion)
    Size (Capacity Ceiling):      4500440801280 B (4.5 TB)
    Capacity In Use By Volumes:   9130835968 B (9.1 GB) (0.2% used)
    Capacity Not Allocated:       4491309965312 B (4.5 TB) (99.8% free)
    |
    +-< Physical Store disk3s2 851807A7-E19E-47CD-85E7-5A6EC82FBFD1
    |   -----------------------------------------------------------
    |   APFS Physical Store Disk:   disk3s2 (Secondary, Designated Aux Use)
    |   Size:                       4000543723520 B (4.0 TB)
    |
    +-< Physical Store disk4s2 1811B401-B8B7-4C49-802F-91F24F535962
    |   -----------------------------------------------------------
    |   APFS Physical Store Disk:   disk4s2 (Main)
    |   Size:                       499897077760 B (499.9 GB)
    |
    +-> Volume disk5s1 AF4C9AE1-1236-4171-8C73-F4BB4387CC8A
        ---------------------------------------------------
        APFS Volume Disk (Role):   disk5s1 (No specific role)
        Name:                      MediaFusion (Case-insensitive)
        Mount Point:               /Volumes/MediaFusion
        Capacity Consumed:         839680 B (839.7 KB)
        FileVault:                 No
The first (disk2) is the internal fusion drive converted by the Mojave installation process. The second (disk5) is the newly created drive.
That is it! After I recopy my original contents back onto the newly created APFS, I am good to go.
Another benefit for knowing how to do this is that new Apple hardware configuration is becoming more limiting, only offering internal SSD configurations. This is great for performance but not so great for one’s pocket books. Knowing that we can create an external APFS fusion drive using USB 3 or Thunderbolt 3 is very reassuring that we can still have this frugal compromise, while keeping up with Apple’s latest file system advancements.
I hope you find this useful.