MacBook with Windows on External SSD

All of this started with one of my neighbour whose laptop broke down. The laptop stopped recognizing its internal SATA connection, so it will not boot. My neighbour ended up booting Windows from an external SSD using a Windows to Go solution to continue to use his laptop.

MacBook Air (13-inch, Mid 2013) running Windows 10 Home

This somehow got me thinking whether it is possible to boot Windows from an external SSD using a Mac. I knew Bootcamp allows you to create a dual boot scenario on the Mac, but the default procedure requires you to repartition your internal drive space to do so.

With external SSD drives coming down in price, for example you can get a 500GB Samsung T5 now for less than $130 CAD, it would seem a pretty sweet deal to have Windows on the side with your MacBook.

After doing some research, it seems like others have similar ideas. I am not going to detail all the steps, since you can find YouTube videos and other forums that have already done the deed. Instead, the high level process goes something like this:

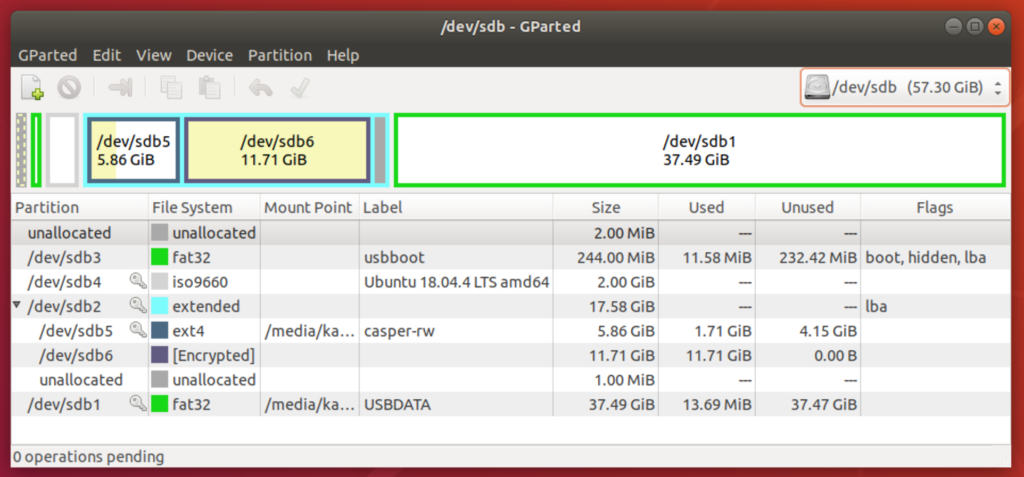
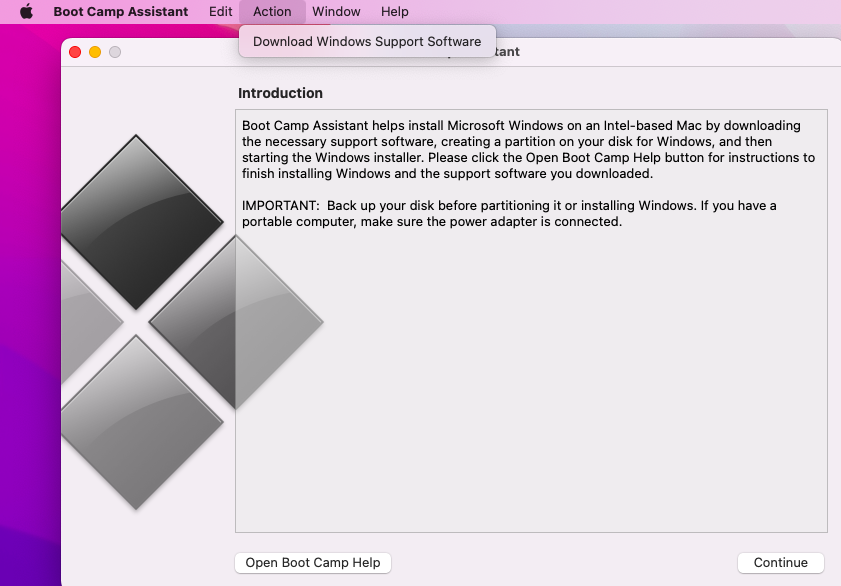
  1. Use the Bootcamp Assistant App on the Mac to collect all the drivers on a USB stick or a local folder on your Mac. Do not use the wizard. You will need to use the Action menu. See Figure 1 below.
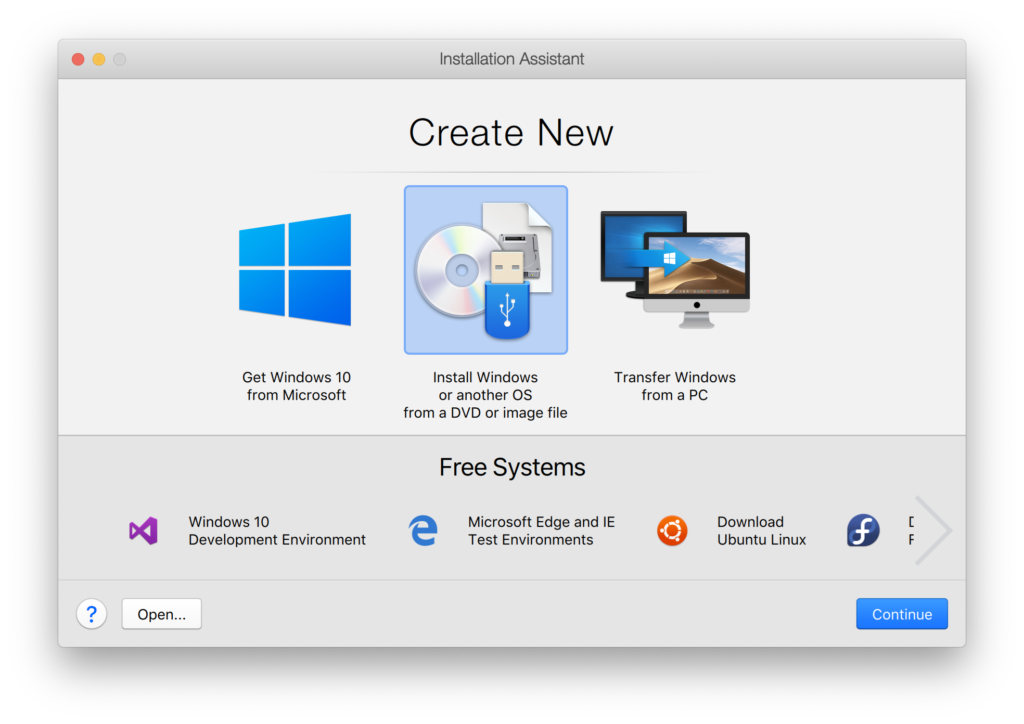
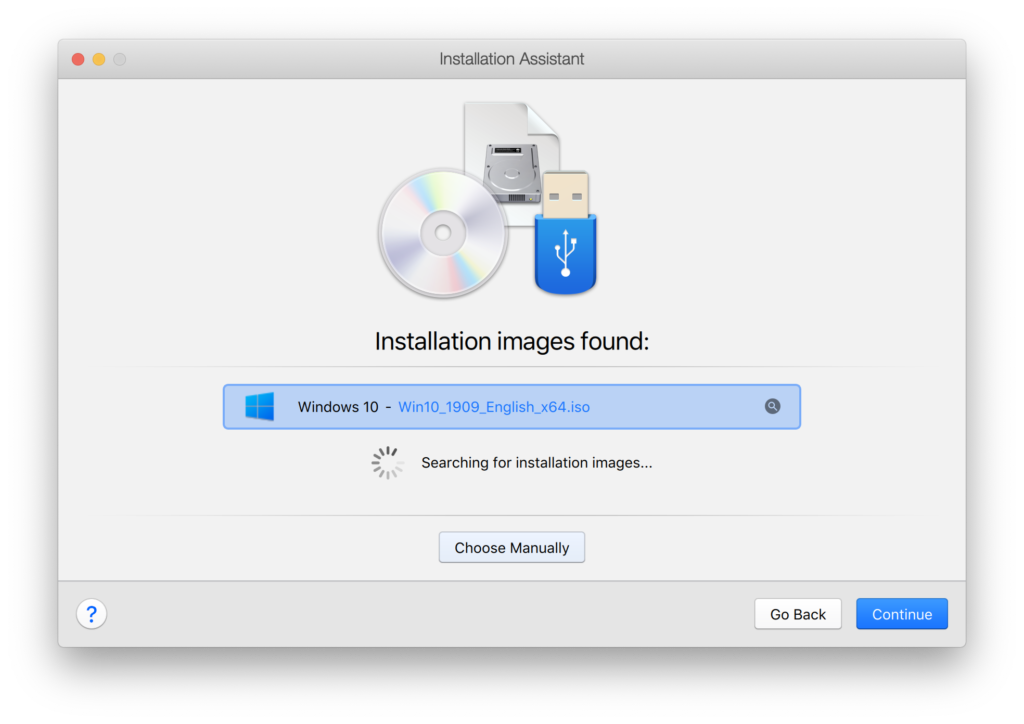
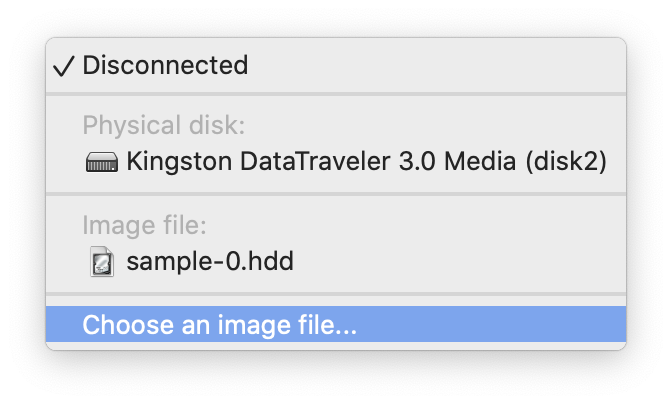
  2. Download a Windows ISO and use a Virtual Machine (e.g. Parallels, VirtualBox, etc.) to install the Windows ISO onto an external SSD drive. I first tried VirtualBox but ran into Catalina permission issues that I could not circumvent. I ended up doing it with Parallels which I will go into details later.
  3. Copy the drivers from the USB stick created in 1 into the desktop of the recently installed Windows on the SSD drive.
  4. Reboot your Mac and hold the option key down before the Apple logo shows and boot into the EFI portion that contains Windows.
  5. Make sure you have an external keyboard and mouse handy because the default Windows install may not recognize the native hardware yet. On my MacBook Air, I had no issues.
  6. Once Windows come up, login and run the Bootcamp setup from the desktop that was originally copied from the USB stick.
  7. Once this is all done, you can dual boot into Windows on the Mac as long as you have that SSD drive handy.
Figure 1: Remember to use the Action menu

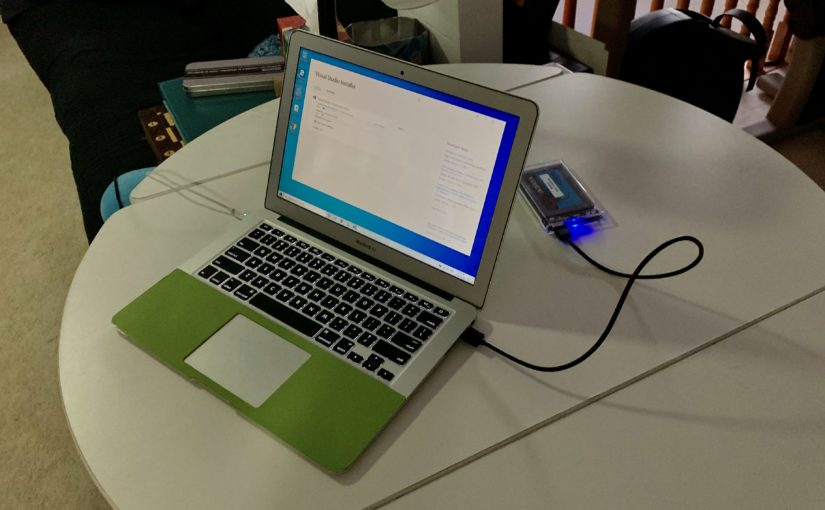
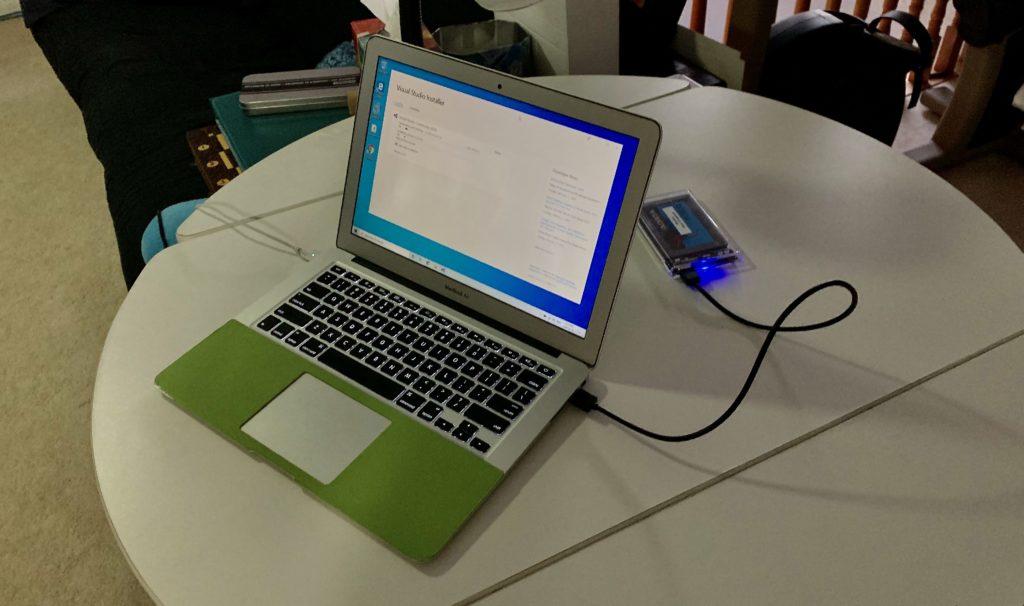
So far everything works, and it is happily installing Visual Studio 2019. I even tried Cortana and the mic and speakers are working well. I did a quick Skype test call and the webcam is working well too.

I do want to document the steps that I performed with Parallels when installing Windows 10 onto the SSD. Those steps were not intuitive.

Step 1: Choose the Install Windows or another OS
Step 2: Choose Manually
Step 3: Don’t choose anything, but check the “Continue without a source” box at the bottom left hand corner

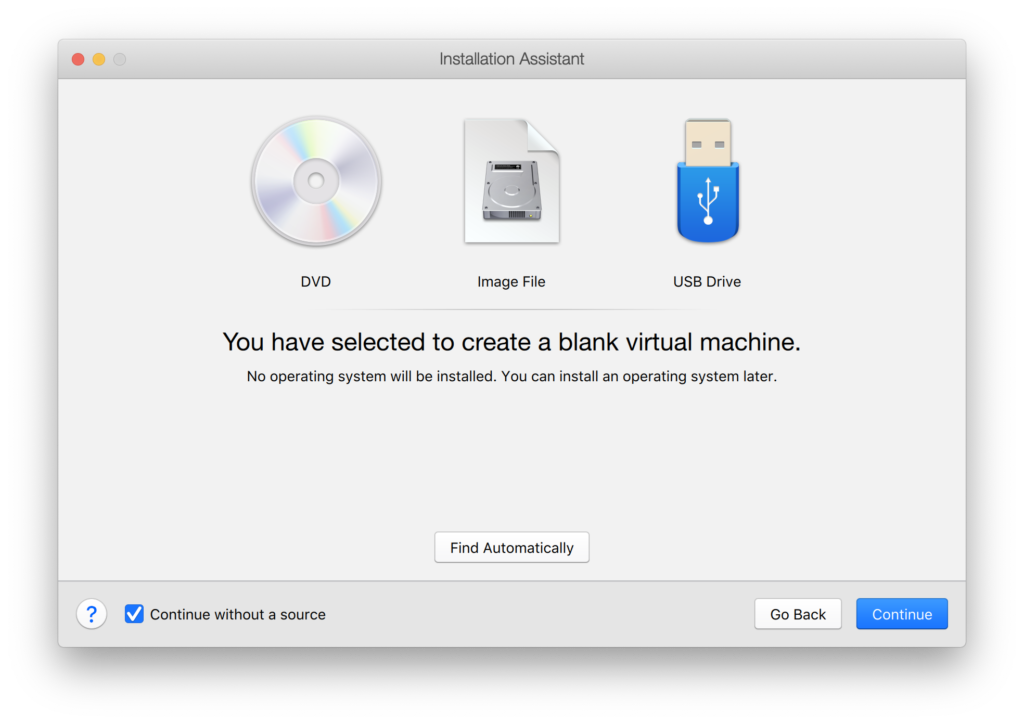
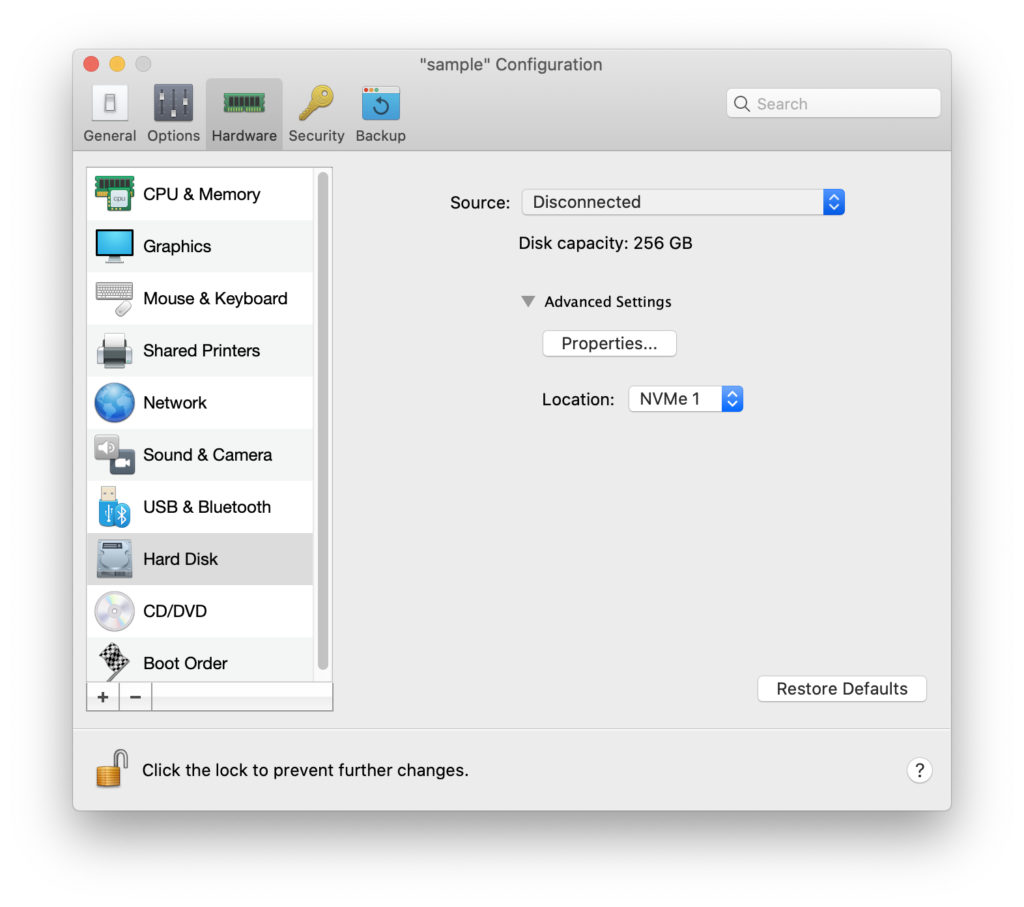
After this, stop the virtual machine and make the following custom configurations:

Step 4a: Select Hardware and configure the Hard Disk
Step 4b: Make sure your external media is plugged in, and select it in the Source. For example, Physical disk: Kingston DataTraveler 3.0 Media (disk2)
Step 5a: Change the boot order so that you can boot from CD, and connect the CD to your Windows ISO (not shown)

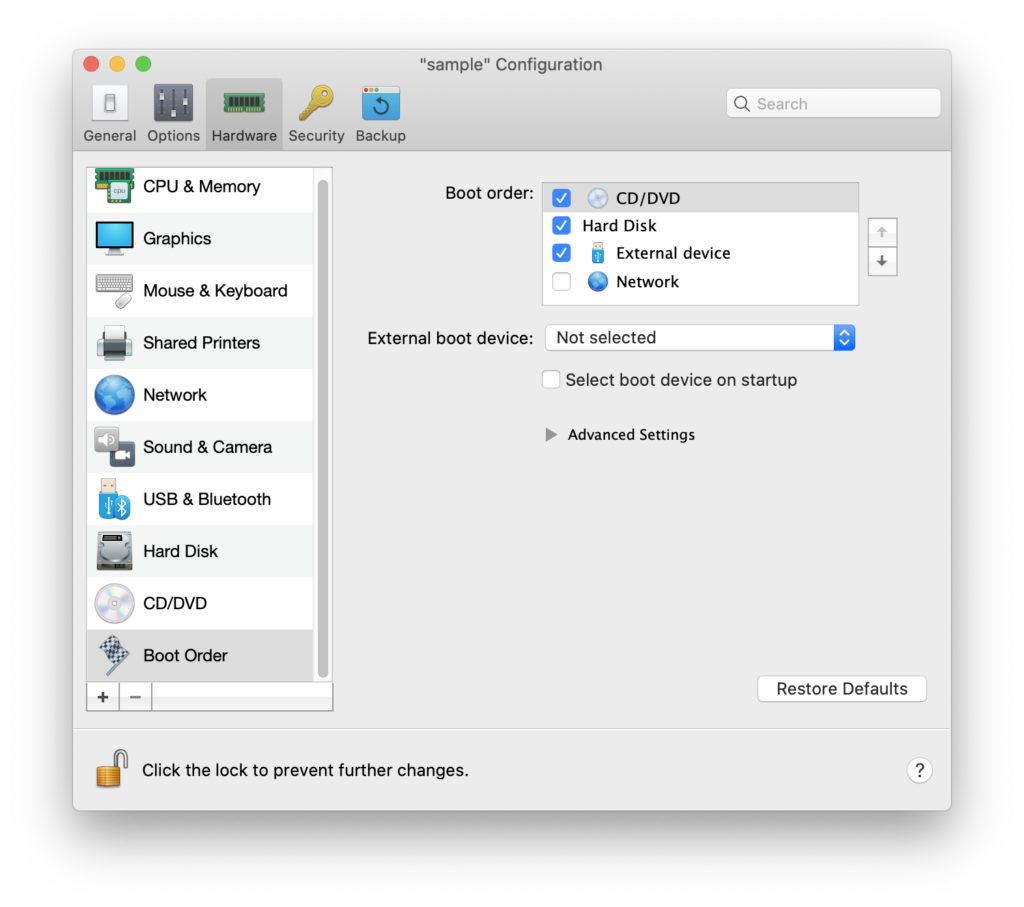
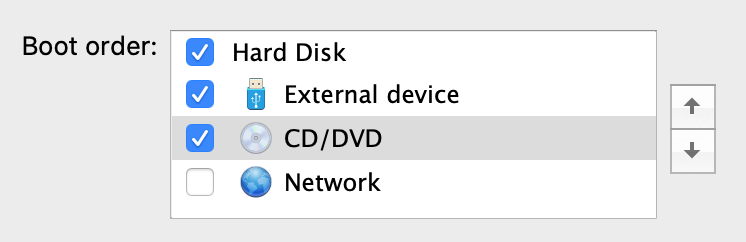
Start the Virtual Machine and it will go through the first part of the Windows installation. Once it is completed, it will reboot. Instead of booting from the external media, it will boot from the CD ISO image again. Simply shutdown the VM again and change the boot order again.

Step 5b: Change the boot order again to Hard Disk first, and restart the VM to complete its second part of the install

Once Windows 10 complete its installation, it will go through a user account setup process. If you are connected to the Internet during this stage, Windows 10 will force you to either use an existing Microsoft account or create one. This is unfortunate, but go ahead and create a temporary one. Remember to create a local administrator account and remove this temporary Microsoft account as the final step of the Windows setup.

Remember to copy the Bootcamp drivers from the USB stick to the Windows desktop before completing and shutting down the virtual machine.

Now you are ready to restart the Mac and dual boot into the external drive by holding the Option key while the machine restarts. The final step is run the Bootcamp Setup.exe program, which should be located inside the Bootcamp folder that your previously copied on the desktop. This is the last step of the Windows configuration on the SSD drive, and you can restart your Mac and dual boot into Windows one final time.

You are now running Windows natively to the Mac’s metal, without any simulators or Virtual Machines. This process is great to revitalize old MacBook’s lying around especially for students who need a Windows computer for their curriculum, but still want to retain their macOS. For more contemporary Mac’s, the small form factor and the speed of the Samsung T5 drive is a great fit for this type of situation. This is very cool!

Update: Potential Trouble with Major Windows Update

I have been told that a major Windows Update could encounter an error and a registry setting is required to fix this. The following page has more information on this. In summary, you have to set the following registry key PortableOperatingSystem from 1 to 0. This key can be found at registry location HKEY_LOCAL_MACHINE\SYSTEM\CurrentControlSet\Control. Thanks to Martin Little for this very helpful information.

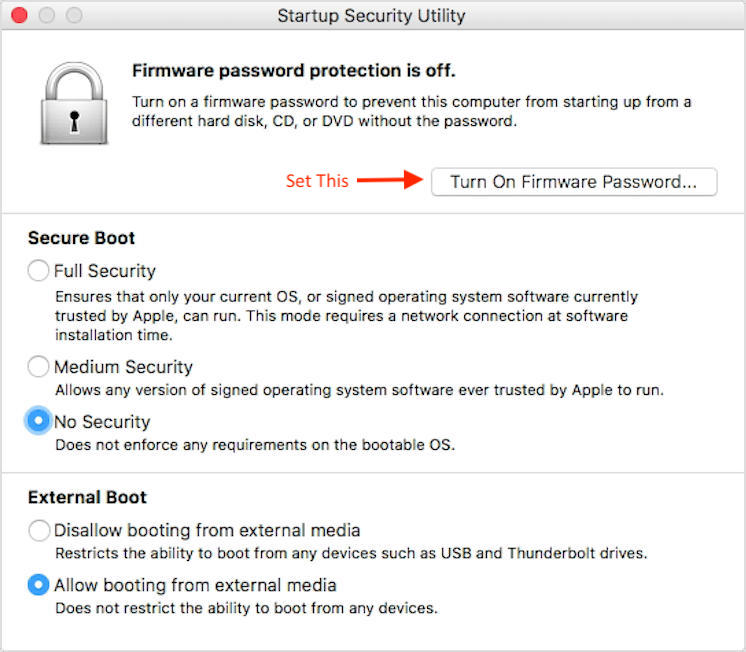
Update: Mac’s with Secure Boot using the T2 Chip

To allow a Mac with the T2 chip to boot from an external drive certain settings have to be made with the Startup Security Utility. This utility can be accessed via the Mac’s recovery mode, under the Utilities menu. You want to disable secure boot and allow for external drive. Since the secure boot is disabled, set a firmware password to prevent a bad actor booting their own operating system with their own Live USB key.

Encrypted Live USB Stick

The goal is to create a USB key that contains a Linux based operating system. Any Linux compatible computer can then be booted with this USB key, temporarily borrowing the host computer. The hosted Linux OS can then access an encrypted partition that houses important private information that may be helpful in an emergency. This technique offers the maximum portability of accessible, private information such as your will, financial data, credentials, etc.

I previously had an USB key formatted with an encrypted Mac filesystem storing the same information. However, this is inconvenient because you will need to find a Mac in an emergency situation.

In the Linux community, you can create a Live USB key. The concept is to create an operating system that will run off of the USB key with any computer that you can plug the USB key to. However, many of these Live USB distributions does not remember any changes that you make while using the operating system. The next time you boot from the Live key, all your previous changes are gone, and the Linux environment reverts back to its original, pristine state. To remember the changes during uses, these changes have to be “persisted”.

I started to find the best methodology for creating a Live Linux USB that operates with an encrypted persistent partition.

All the commands in this article has been performed within the Ubuntu 18.04 LTS Desktop install. I installed this version on both VirtualBox and Parallels on the Mac. Both worked beautifully but Parallels has smoother integration with Mac.

I tried first the Kali distribution, using the instructions in this USB Persistence & Encrypted Persistence article (Article 1). However, the USB stick that I was using which was a Kingston DTSE9 G2 USB 3.0 32GB, was simply way too slow on writes causing the Live USB almost unusable.

I searched for an alternative USB stick and settled for the SanDisk 64GB Ultra Fit USB 3.1 Flash Drive. This new USB stick’s write performance was 4x faster than the Kingston.

After learning more about initramfs hooks, boot loaders, and a refresher on UEFI and BIOS booting process and partition layout strategies for USB storage devices, I decided to roll my own Live USB using the Ubuntu Desktop as a base along with the mkusb tool for the initial layout. The reason for the change is that I already have Ubuntu else where in the house so standardization is probably a better bet.

To improve performance further, I decided that it is not necessary to encrypt the persistent partition where the system configuration updates will be stored. Instead, I will create my own private encrypted partition to store only the private data that requires protection. Article 1, also provided details on how to use the LUKS technology to encrypt any Linux partition, so my exercise with Kali Linux was not a total waste of time.

Before I run mkusb, I needed to install it first by doing the following:

sudo add-apt-repository universe
sudo add-apt-repository ppa:mkusb/ppa
sudo apt-get update
sudo apt-get install mkusb mkusb-nox usb-pack-efi

I ran the mkusb tool (after sudo su - )1, with the following options:

We also chose msdos so that more computers will be compatible for booting. Once mkusb is completed, we will need to perform some custom partition layout. We will use the gparted program for this purpose so that the completed partition layout will look something like this:

Final MBR Partition Table

We first deleted the original usbdata partition and grew the extended partition (/dev/sdb2) to about 18 GB, approximately 6 GB for casper-rw, which the system will store any custom configurations or upgrades since this Live USB key is created. We create another logical partition called Personal that is around 12 GB in size, which will be encrypted and this is where we will store private, sensitive data for emergency use.

The remaining space will be allocated to USBDATA, a last primary partition for normal USB data sharing, the typical use case for a USB stick. We also want to make sure that the other FAT32 (usbboot) partition is not visible in Windows by setting the hidden partition flag. We did that with the gparted program as well.

Once the partition table is completed, we can now encrypt the Personal (/dev/sdb6) partition. For this, we went back to Article 1, which gave us the following instructions.

~# cryptsetup --verbose --verify-passphrase luksFormat /dev/sdb6
 WARNING!
 This will overwrite data on /dev/sdb6 irrevocably.
 Are you sure? (Type uppercase yes): YES
 Enter passphrase for /dev/sdb6: 
 Verify passphrase: 
 Key slot 0 created.
 Command successful.

~# cryptsetup luksOpen /dev/sdb6 myusb
Enter passphrase for /dev/sdb6:

~# mkfs.ext4 -L Personal /dev/mapper/myusb

~# cryptsetup luksClose /dev/mapper/myusb

All Done! Now we have a bootable USB stick that can be booted from any Ubuntu compatible computer. I can store my own personal data in a very safe and private way within the encrypted Personal partition, while any changes I make to the system will be preserved in between the uses of the USB stick. On top of it all, the USB still has 40+ GB (~37.5 GiB) of storage for normal USB transfer usage.

I spent sometime copying some confidential information which I think I will need in an emergency into the Personal partition. I want to duplicate the finished Live USB key, so that both my wife and I will have a copy always available to us on our physical keychain.

I did this on my Mac, and the command to duplicate the USB drive is:

sudo dd if=/dev/rdisk2 of=/dev/rdisk3 bs=4m conv=notrunc

If the USB key ended up to be lost, then whoever picks it up will need to:

  • Recognize that this is a bootable USB, otherwise it will just seem like 40GB USB Flash Drive;
  • Get the password needed to login to Linux; I thought about installing two factor authentication but decided not to, because any good hacker can simply access the partition from another Live Key;
  • If they do mount the partition manually, then they still need to obtain the LUKS key to decrypt the partition; I made the LUKS key to be different than the OS password and is twice as long.

I think the risk is worth the benefit of having critical info around in case of an emergency.

Update: WiFi on MacBooks

It looks like MacBooks uses Broadcom WiFi chips and most Linux distributions do not ship with these drivers. This can be easily solved by loading the following software:

sudo apt update
sudo apt install bcmwl-kernel-source

Even with the above software installed, there is still a little ritual:

  1. Launch the “Software and Updates” application;
  2. Select the “Additional Drivers” tab;
  3. Select “do not use this driver” and allow the process to go through and reboot the system;
  4. Re-enter the system and repeat steps 1 & 2, and then select the Broadcom drivers;
  5. Without rebooting, WiFi networks should be available for use

Unfortunately the above ritual will have to be performed every time the Live USB stick is powered off.

Update: Tried Linux Live Kit

I wanted to further customize my Live USB key. Instead of keeping a persistent partition, I thought I would keep a Linux VM at home and ensure that it is up to date and customized. At certain intervals, I would then create a Live USB key from the VM install.

I tried Linux Live Kit, but the results were disappointing. I was able to create a bootable USB key that worked, but the OS did not recognize the MacBook’s keyboard or trackpad. For some reasons, the drivers required did not get bundled during the process. I’ll have to read up on how I can create a Live USB key from scratch rather than depending on these tools, but it is more complicated than I thought, so for now this idea will have to be shelved until I have more time.

1For some reason mkusb will not work with the live persistence if I simply do a sudo mkusb or under a non-root account. The only way that I can get it to work is to run it within a root login session.

Custom Counter

Circular Knitting Machine

This all started when my wife started to use a circular knitting machine that she purchased recently. These machines can be used to quickly knit hats, scarfs, slippers, etc. I have seen her creating yarn goodness within a matter of minutes. The machine certainly decreases the time to produce goods when compared to traditional hand knitting by several folds. As a toy, literally, it has proven its worth several times over.

Microswitch placement

While using the machine, she has found that keeping count on the number of times the machine has revolved can be somewhat challenging. Of course this situation created a need for an electronic counter.

The idea is to use a microswitch to detect the notches on the machine, and use an ATMEGA328P microcontroller (MCU), running at 16MHz, to keep track of the count. The MCU is the same used by the famous Arduino hobby board.

Installing the Boot Loader to an ATMEGA328P

I setup a Raspberry Pi workstation and installed the Arduino IDE on Raspbian. Using a simple circuit described here. I was able to install the boot loader and program a generic ATMEGA328P chip using an Arduino Uno board.

The next step is to create a simple Arduino sketch that keeps count on the number of times the microswitch has been pressed. I also enhanced the sketch to track each press as a “tick” and have the ability to remember how many ticks make a single revolution of the knitting machine. In this fashion, the counter can be used on different sizes of circular knitting machines. The goal is to count both the number of ticks and the number of revolutions knitted so far.

Prototype the circuit
Perfboard example

The circuit is then prototyped on a breadboard with an LCD display (LCD 1602). This was the easy part. The hardest part is to solder everything on a perfboard and then design a suitable 3D printed case.

It took many tries on the 3D printer to get certain tolerance right. Finally, putting everything together we get this:

Working counter integrated with the knitting machine!

I have to say that this work was super satisfying. As a bonus, the counter can work with any type of sensors or switches that act as Normally Open (NO) and closes when it detects or closed respectively.

As a learning process and an experiment, I would like to create a simple PCB with JCLPCB. However, I have yet to start on that yet.