SolarEdge Inverter Error 3x9A

Today, I found it strange that with a clear, blue, sunny sky, our solar generation is half of what I expected. I then noticed that one of our two SolarEdge inverters was showing a fault.

I followed the instructions on the Verifying Inverter Status web page on SolarEdge’s website.

I was able to get the details of the Error Log:

This is an extract from the Error Log from the iOS app.

I did a quick search for 3x9A System Lock Inverter ARC on Google and discovered on Reddit that it was an issue that many people were experiencing.

I then followed these instructions to reset the inverter on YouTube:

After about 5 minutes, the inverter is now generating power! Hurray all fixed so far.

New Camera – Sony A6700

On March 15th, 2025, I decided to restart my photography hobby by purchasing a brand-new A6700 Sony camera suitable for taking photos and videos.

Right after unboxing with its kit lens 18-135mm f3.5-5.6 OSS

Kalen purchased it from Aden Camera at Pacific Mall with a small discount. The total cost, including taxes, amounted to $2,487.10. The photo of it on the right is with my iPhone 16 Pro.

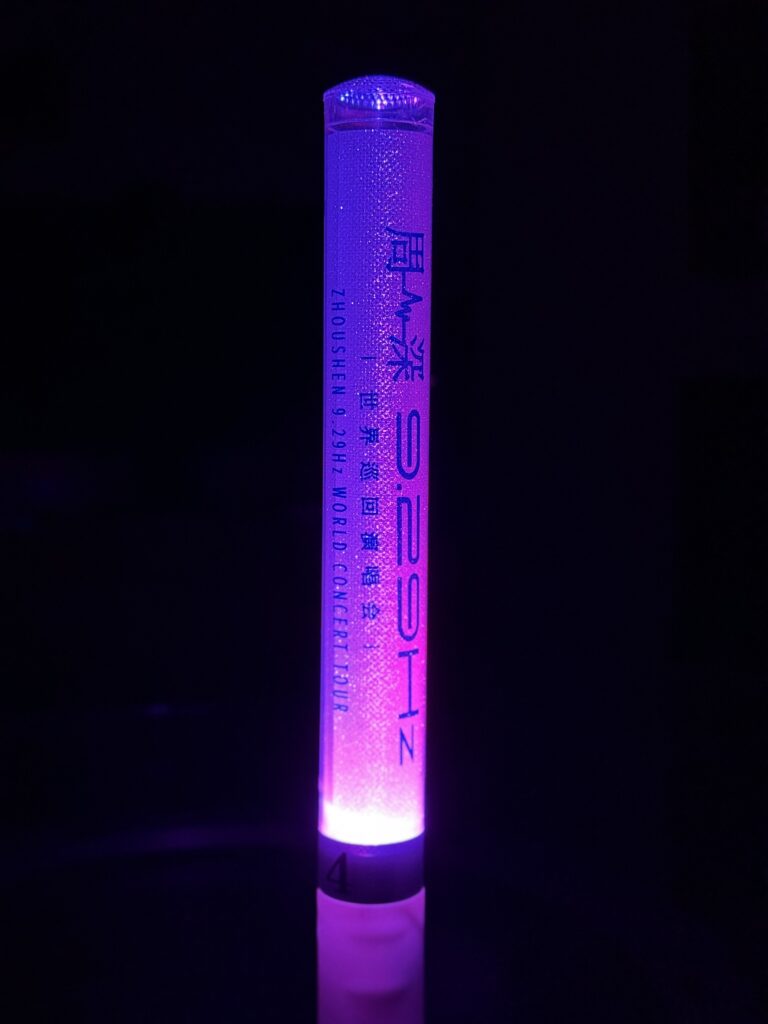
Zhou Shen Light Baton

This is not going to be a review of the product. Others have already done an exhaustive review of this camera. No point for me to duplicate their work. I doubt I will be able to add anything new. I will, however, share some of the photos that I took with this camera. These first batches were with the 18-135mm f3.5-5.6 OSS Sony Kit Lens.

The first photo is of my wife busy with cooking dinner while I just completed my unboxing. The others were taken in a dark bedroom using a light baton that was a Zhou Shen (周深) concert souvenir.

I then supplement the original kit with a few lens purchases:

  • VILTROX 28mm F4.5 FE Lens 28mm f4.5 Pancake
  • VILTROX 23mm f/1.4 F1.4 E Lens
  • Tamron 17-70mm f/2.8 Di III-A VC RXD Lens

The new camera can also reuse my old Sony NEX5-N lenses, which are:

  • Sony E 18-55mm F3.5-5.6 OSS
  • Sony E 55–210 mm F4.5-6.3 OSS

For the above lens, some Auto Focus modes do not work, such as continuous AF. This is no big deal; I just switch it to single-shot AF mode.

With the above lenses to play with, I started to take some photos. The first batch is from the recent ice storm that we had.

The next set of photos is of our cat, Darci.

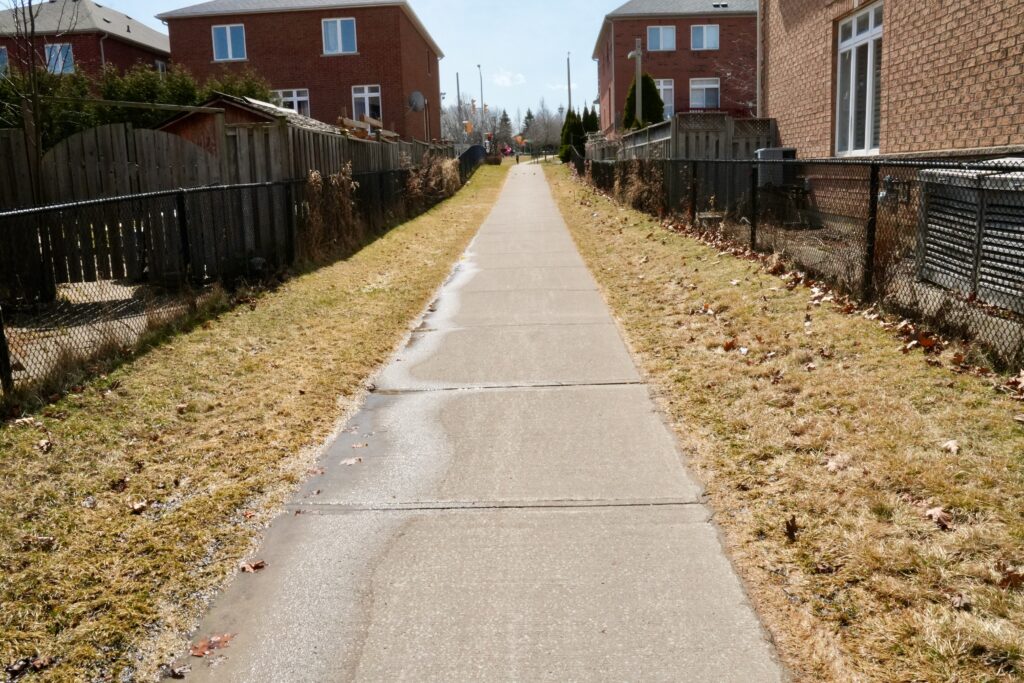
Finally, the next set is a collection of photos taken during my neighbourly walk just 2 days after the ice storm.

I will do a separate post on videos.

Zhou Shen 周深 Concert

On Friday, Carol and I, along with our neighbours, attended the Zhou Shen concert at the Coca Cola Coliseum in downtown Toronto inside the Exhibition Place.

It was really exciting to see Zhou Shen in person. We all enjoyed his heavenly vocals. The three-hour concerts started at 8 pm without any intermissions. Time flew by really fast.

Below is a video of our experience.

Click on image to play the video

I would go to another Zhou Zhen concert again.

Processing Graphical Subtitles

In the past, when I got hold of a video that has hdmv_pgs_subtitle subtitle streams, I have always ignored it. Instead I tried to find a compatible subtitle in .srt format on the opensubtitles.org website. Today I came across a video that I am trying to archive that does not have the appropriate subtitles that I wanted. All of this would not have been an issue if my preferred mp4 format actually supports the hdmv_pgs_subtitle format.
I know an OCR (Optical Character Recognition) technique for extracting the subtitles from the hdmv_pgs_subtitle stream, but I am always in a hurry. This time, I bit the bullet and went down on this path.

Below are the steps that I had to go through.

First I had to download and install ffmpeg and mkvtoolnix packages on my Linux machine, and then execute the following commands to extract the Chinese subtitles that I wanted.

ffmpeg -y -i archive.mkv -map 0:s:1 -c:s dvdsub -f matroska chi.mkv
mkvextract chi.mkv tracks 0:mysub

After the above commands, I will have mysub.idx and mysub.sup files. The first are the time index codes and the latter are the subtitle images.

On a Windows virtual machine, I had to download Subtitle Edit, a subtitle editor tool that has the OCR functionality, and convert the mysub.idx and mysub.sup into mysub.srt, which I can then later use to re-incorporate back into the archive video file.

After the OCR is completed.

Above is a screenshot of the application after the OCR is completed. I found that the engine mode of Tesseract + LSTM worked the best. Of course, I had to select the matching language that is befitting of the subtitle. Once I saved the finished product as mysub.srt I can then use this file to create archive.mp4 using ffmpeg.

ffmpeg -i archive.mkv -i mysub.srt -map 0:v -map 0:a -map 1:s -c copy -c:s mov_text -metadata:s:s:0 language=chi archive.mp4

Video file successfully archived!

Amazon No More eBooks Downloads

In February of this year, I came across this article from The Verge, called: “Amazon’s killing a feature that let you download and backup Kindle books“.

Effectively, this article reports that after February 26th, you can only download books from the Kindle store to your Kindle device over Wi-Fi. This means that ebooks you purchased can no longer be downloaded and converted into an epub format to be consumed by another e-reader like Apple’s Books.app, which I normally do on my iPad or iPhone.

Of course, this policy change poses an immediate problem for me when consuming or reading my ebooks. However, it also in my view crosses an ethical boundary. Digital media such as ebooks, which you have paid full prices for, is no longer yours. The buyer of such content is at the mercy of the distribution platform, in this case Amazon. This simply does not sit well with me. In the past, Amazon has also been known to remove purchased content due to changes in distribution rights, which is normally outside of the buyer’s control.

I now have to adopt a new process that I will use whenever I buy ebooks from the Kindle platform. I will describe this process in detail below so that in the future should I need to refer to it, it is here.

This process will remove the Digital Rights Management from the ebook that you just purchased and allows us to store a DRM-free ebook in Calibre, an ebook management software. This process will only work on Windows, so I had to spin up a Windows virtual machine for this purpose.

Software required:

Figure 1 (Click image to enlarge)
  • Calibre (use the link to download the software for Windows);
    • DeDRM plugin (use the link to download the zip file);
    • KFX Input plugin (use the Calibre Preferences & Plugins to search);
  • Install the above Calibre plugins with the Preferences –> Plugins management;
  • Kindle for PC (must be version 2.4.0 (70904));

Use Kindle for PC to browse and access the ebooks that have been purchased from Amazon, and download the ebook you would like to convert.

Use Calibre and its Add books functionality to import the azw file from the My Kindle Content. See Figure 1 for details.

Once the book has been imported, Calibre should have a KFX format of the book. We need to convert it to the epub format for other reader devices using Calibre’s Convert books functionality.

I then move the epub formatted ebook onto my macOS Calibre version for long term storage and management.

Linux Boot with No Networking

GLOTRENDS PA09-HS M.2 NVMe to PCIe 4.0 X4 Adapter

I recently wanted to install an M.2 NVMe to PCIe 4.0 X4 Adapter on an existing server. The idea was to install a new NVMe SSD drive, and the motherboard had no more M.2 sockets available.

The server is running Proxmox with Linux Kernel 6.8.12. I thought this should be a 15-minute exercise. How wrong I was. After installing all the hardware, the system booted up but there was no networking access. This was especially painful because I could no longer remote into the server. I had to go pull out an old monitor and keyboard and perform diagnostics.

I used the journalctl command to diagnose the issue, and found the following entry:

Feb 01 13:36:21 pvproxmox networking[1338]: error: vmbr0: bridge port enp6s0 does not exist
Feb 01 13:36:21 pvproxmox networking[1338]: warning: vmbr0: apply bridge ports settings: bridge configuration failed (missing ports)
Feb 01 13:36:21 pvproxmox /usr/sbin/ifup[1338]: error: vmbr0: bridge port enp6s0 does not exist
Feb 01 13:36:21 pvproxmox /usr/sbin/ifup[1338]: warning: vmbr0: apply bridge ports settings: bridge configuration failed (missing ports)

The above error message indicates that enp6s0 no longer exists. When I looked at earlier messages, I noticed this one:

Feb 01 13:36:15 pvproxmox kernel: r8169 0000:07:00.0 enp7s0: renamed from eth0

It looks like the interface name has been changed from enp6s0 to enp7s0. Therefore the correct remedy is to edit the /etc/network/interfaces to reflect the name change. Below is the new content of the file.

# cat /etc/network/interfaces
auto lo
iface lo inet loopback

iface enp7s0 inet manual

auto vmbr0
iface vmbr0 inet static
        address 192.168.188.2/24
        gateway 192.168.188.1
        bridge-ports enp7s0
        bridge-stp off
        bridge-fd 0

iface wlp5s0 inet manual

This would be very annoying if the old interface name was used in many other configuration files. There is one other reference that I found on the Internet (https://www.baeldung.com/linux/rename-network-interface) detailing a way to change the network interface name using the udev rules. I did not try this, but something to keep in mind in the future.

In a previous post and on another home server, I did fix the name using netplan, but Proxmox is not using it.

Simple File Transfer – NOT

Recently I needed to transfer a private binary file from one household to my server. We wanted this transfer to remain private because the file contains sensitive content.

In the past, I set up a WebDAV server using Apache2.4:

First I had to enable the DAV modules using the following command line on my Ubuntu server:

sudo a2enmod dav
sudo a2enmod dav_fs

I already had a directory set up on my file system called: /mnt/Sites/public_share. I made the following changes to my Apache2 configuration files.

<VirtualHost *:80>
    ServerName share.lufamily.ca
    RewriteEngine On
    RewriteCond %{HTTPS} off
    RewriteRule (.*) https://share.lufamily.ca
</VirtualHost>

<VirtualHost *:443>
    ServerName share.lufamily.ca
    ServerAdmin xxxxxxxx@gmail.com
    DocumentRoot /mnt/Sites/public_share

    <Directory /mnt/Sites/public_share>
        AllowOverride All
    </Directory>

    <Location />
        AuthType None
        DAV On
        Options +Indexes
        RewriteEngine off
    </Location>

    Include /home/xxxxx....xxxxxxx/ssl.lufamily.ca
</VirtualHost>

I did not have any authentication, because I restricted access to this directory with an override .htaccess file which contains the following:

<IfModule mod_headers.c>
    Header set X-XSS-Protection "1; mode=block"
    Header always append X-Frame-Options SAMEORIGIN
    Header set X-Content-Type-Options nosniff
    Header set X-Robots-Tag "noindex, nofollow"
</IfModule>

<Files ".htaccess">
  Order Allow,Deny
  Deny from all
</Files>

<RequireAny>
    Require ip 192.168.0.0/16
    Require ip 172.16.0.0/12
    Require ip 10.0.0.0/8

    # Sending computer external IP
    Require ip AAA.BBB.CCC.DDD
</RequireAny>

With the above setup, the other party just needs to open up a Finder on macOS or a Files Explorer on Windows with the above URL of https://share.lufamily.ca, and copy, delete, and open files like they normally would. The access will be private because it is restricted by their external IP address. With macOS, copying many gigabytes via WebDAV posed no issues.

Unfortunately, Windows is another matter. This worked for small files. For large files in the gigabytes range, Windows seemed to be stuck on 99% complete. This is because Windows locally caches the large transfer and reports it is 99% completed in a very short time, as the physical transfer catches up. But the actual time needed for the copying across the Internet is so long that Windows became confused thinking that we are copying a file that already exists yielding an unwanted error.

I had to come up with an alternative. We briefly dabbled with the idea of using FTP, but after a few minutes, this was simply a non-starter. The FTP passive mode requires ports to be opened on my firewall which is unrealistic for a long-term solution.

SFTP is a very secure protocol that uses OpenSSH. I also like this technique because the usage is more secure and will be governed by a pair of SSH Keys. The private key on the remote user side and the public key will be used to configure SSH on my server. I set up a ssh user called sftpuser. To prepare for this user to only have sftp access I made the following changes to the sshd configuration file /etc/ssh/sshd_config.

# Added the internal-sftp
Subsystem sftp /usr/lib/openssh/sftp-server internal-sftp

# Configure the local user scpuser to only do sftp
Match User sftpuser
    ChrootDirectory /home/sftpuser
    PasswordAuthentication no
    ForceCommand internal-sftp
    AllowTcpForwarding no
    X11Forwarding no
    AllowAgentForwarding no

I then created the sftpuser using the following command:

sudo adduser sftpuser                                                                                                                  sudo chown root:root /home/sftpuser                                                                                                    
sudo mkdir /home/sftpuser/uploads                                                                                                      sudo chown sftpuser:sftpuser /home/sftpuser/uploads                                                                                    
sudo chmod -R 0755 /home/sftpuser/uploads

This user will not be able to login into a shell and can only use sftp. I also disable the password authentication just in case. For the remote party to upload the file, they will need to provide a public ssh key which needs to be stored in the .ssh/authorized_keys file. The contents of which look something like this:

ssh-rsa AAAAB3NzaC1yc2EAAAADAQABAAACAQCliK6NZx6JJBcK0+1GtEe8H6QpN1BHDRgq/vtiEAfwzcjN1dBtQhfplyDxEXXXXXXXXXXXXXXXXXXXXXXXXXXXXXXXXXXXXXXXXXXXXXXXXXF+OLV9qWMsE/g+1H4oyLRqzQnD8w7S4RBUJzrrZIpLEzYRf43pWSW9Y3220swlIEYxIOIcJIc8prgzDbECt3CR/BsRDYNZA5uxdPYLwh1YtTX8GEqoctJifLrC4OomKkczDek9k/MHdFbWZ0LdK3AB287nr/Q4Lb8GgfU3bEhF+AMSWM8r/OHC1QBPYYYYYYYYYYYYYYYYYYYYYYYYYYYYYYYYYbH8npyFsC3rADnjfFsB4VkkiNDDIZbZkV2vBf3sJ49Q1Y3uHugWxITWImKjfl+YUdGMalbSfP8UueKSx3sDGQQDXZjzrwnX3KPie0Qiz2rQtrppB7dA5CvOb86Q== guest

The above is just a single line in the file.

With the above setup, a Linux user can simply do the following to transfer a file to my server in a very secure way.

sftp -P55522 sftpuser@lufamily.ca <<< 'put /usr/bin/bash uploads/sample.bin'

The above command will upload the bash binary to my server.

An attacker trying to login using ssh will get the following:

❯ ssh -p 55522 sftpuser@lufamily.ca
This service allows sftp connections only.
Connection to lufamily.ca closed.

On Linux or macOS, the remote user can use ssh-keygen to create the public key which by default resides in ~/.ssh/id_dsa.pub. All I need to do is copy the contents of the public key and add it to my .ssh/authorized_keys.

For Windows users, they can generate the key using Windows PowerShell. Below is an example:

> ssh-keygen -t rsa -b 4096
Generating public/private rsa key pair.
Enter file in which to save the key (C:\Users\kang/.ssh/id_rsa):
Enter passphrase (empty for no passphrase):
Enter same passphrase again:
Your identification has been saved in C:\Users\kang/.ssh/id_rsa
Your public key has been saved in C:\Users\kang/.ssh/id_rsa.pub
The key fingerprint is:
SHA256:hV6vcChUwpxXXXXXXXXXXXXXXXXXXXXXXXXXX0aTkJZ2M kang@win10
The key's randomart image is:
+---[RSA 4096]----+
|  . Eo.==..      |
|   * *+++=+      |
|  . @ oo.=+* .   |
| . = o..B+=.* .  |
|  .   .oSO.o..   |
|       ..oo.     |
|          .      |
|                 |
|                 |
+----[SHA256]-----+

> cat .\.ssh\id_rsa.pub
ssh-rsa AAAAB3NzaC1yc2EZZZZZZZZZZZZZZZZZZZZZZZZZZZZZZZZZZZZZZZZZZZZZZZZZZZZZZZZQQWgIVShifqFxq78MWQEJrM2xrVQXlPHUncNosEm6P/l0LdWu1nRbIccKMNsmpPK7JOv9XF+CsrtlltnhwDqiuflCGftzhrlmBz8BOJRiwD0Fl1IfQ+Qg7Z1nvIo6+kpkBw7SGPN7fbJxDPPHmc9iPB4RnlG46v6ymd4KM0h1cGlReCly2PTxTG1dcPuDbrBIIdEHoN/40hojrooQf+cQNprvYZY59EjvC0NoZsfiKGDHHq3S7HRPGns9Oo4y8vFl1DrJZFIvBVdjjL28JsmIdeKbMhCynkzIkPLPvsiplxkEF0RQ9fFcIsucuD8leJmMDNPas+8EdueQ== kang@win10

To copy a binary you can do the following:

> sftp -P55522 sftpuser@lufamily.ca
Connected to lufamily.ca.
sftp> put "C:\Windows\System32\tar.exe" uploads/junk.exe
Uploading C:/Windows/System32/tar.exe to /uploads/junk.exe
tar.exe                                                                               100%   54KB  13.1MB/s   00:00
sftp> ls
uploads
sftp> cd uploads
sftp> ls
junk.exe    sample.bin
sftp>

The above is very similar to Linux and the Mac. Windows and its PowerShell have come a long way in terms of adopting Posix-like capabilities.

For those who want to use WinSCP, a much nicer GUI on Windows, you will need to convert the .ssh/id_rsa private key into ppk format. Use the command below to achieve this.

"c:\Program Files (x86)\WinSCP\WinSCP.com" /keygen id_rsa /output=id_rsa.ppk

You can then set up WinSCP authentication and load the ppk file.

So what I thought would be a simple matter turned out to be quite a deep rabbit hole. Hopefully with this in place, future transfers can be done quite quickly and securely.