External Fusion Drive

Our iMac (27-inch, Late 2012) is running out of space. We have a little over 150GB  free space left from 3.11TB. Even though our iMac is over 5 years old, it is still serving the family without much fuss.

Our collections of photos, videos, and recently burning our CD music into non-lossy format such as FLAC or ALAC, really has increased our disk space usage tremendously. We now want to give it more space.

I really like Apple’s Fusion Drive solution. It is a nice solution to achieve SSD speeds and also have lots of storage without the accompanying stiff price tag. This lead to some experimentation on how one can create an external fusion drive.

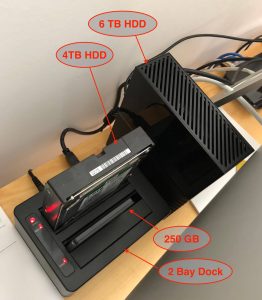
I purchased a 2 bay USB 3.0 Hard Drive Dock that support UASP so that we can take advantage of the full 5Gbps bandwidth of USB 3.0. On one of the bays, I attached a 4TB Hard Drive that I have laying around, and the other bay I placed a Samsung 850 EVO 250GB SSD drive.

I then use the Mac utility Disk Utility program to erase and partition both drives with GUID Partition Map using the Mac OS Extended (Journaled) format. After the format is completed, the command line

diskutil list

will show

/dev/disk4 (external, physical):
   #:                       TYPE NAME                    SIZE       IDENTIFIER
   0:      GUID_partition_scheme                        *4.0 TB     disk4
   1:                        EFI EFI                     209.7 MB   disk4s1
   2:                  Apple_HFS 4TB                     4.0 TB     disk4s2

/dev/disk5 (external, physical):
   #:                       TYPE NAME                    SIZE       IDENTIFIER
   0:      GUID_partition_scheme                        *250.1 GB   disk5
   1:                        EFI EFI                     209.7 MB   disk5s1
   2:                  Apple_HFS 250GB                   249.7 GB   disk5s2

I then proceed to create the Logical Volume Group using the command line:

sudo diskutil cs create mediafusion /dev/disk5s2 /dev/disk4s2

I want to make sure that I specify the SSD drive as the first parameter, since it is the faster drive with ~400MB/s read and write throughput. Once the volume group is created, you’ll get the following output:

Started CoreStorage operation
Unmounting disk5s2
Touching partition type on disk5s2
Adding disk5s2 to Logical Volume Group
Unmounting disk4s2
Touching partition type on disk4s2
Adding disk4s2 to Logical Volume Group
Creating Core Storage Logical Volume Group
Switching disk5s2 to Core Storage
Switching disk4s2 to Core Storage
Waiting for Logical Volume Group to appear
Discovered new Logical Volume Group "2CD5F422-95AA-4BA8-8158-F076494977E7"
Core Storage LVG UUID: 2CD5F422-95AA-4BA8-8158-F076494977E7
Finished CoreStorage operation

We finish the setup by creating a logical volume within the logical volume group by using the following command line:

sudo diskutil cs createVolume 2CD5F422-95AA-4BA8-8158-F076494977E7 jhfs+ MediaFusion 100%

I made sure that I use the LVG UUID from the previous output. I also found out that you can list all the fusion drives and their make up by executing:

sudo diskutil cs list

In the end, I now have a 4.25TB MediaFusion drive mounted on one the USB 3.0 ports of my iMac. I plan to move all my iTunes and Photos library on to that drive so that I can free up my main drive on my iMac.

There is another issue. Now that I have a total of 7.25TB on my iMac, my old 4TB Time Machine drive is insufficient. Luckily Costco has a 6TB external drive on sale for $188 CAD. I ended up purchasing two. One for onsite Time Machine, and the other for offsite storage in our safety deposit box.

Home IT upgrade completed!

Total cost for the upgrade is:

Item Cost Purchased From
Samsung 850 EVO 250GB SSD 109.99 Canada Computers
Vantec Storage Accessory NexStar TX Dual Bay USB 3.0 HDD Dock Black 34.99 Canada Computers
WD My Book 6TB HDD 188.99 Costco

The total is $333.97 CAD + tax.

I did not include the extra 6TB drive for offsite storage, because that is my personal preference. I also omitted the 4TB HDD that I used because I repurposed my old Time Machine drive for that.

This is a fraction of the cost of a 2TB USB 3.0 SSD Drive, such as the 2TB Samsung T5 Portable External SSD with USB 3.1, which costs $879.99 CAD at the time of this writing. I get more than double the storage for a little more than a third of the cost. Okay, raw performance may not match the Samsung T5 drive, but I’m just using it for storing my iTunes library and other infrequently used media.

Redstone Public School Educamp

Last Friday I had the privilege of participating in my son’s school event called Educamp. The concept is to provide students from grades four to six a taste of modern skills that we are seeing more and more of as a necessity in today’s world. Students were split into groups of twenty or less, and they attended rotating hour long workshops. Each workshop covered one of the following topics:

  • Coding
  • 3D Printing
  • Robotics
  • Stop Motion Video

There may have been more topics, so sorry if I missed them here.

The day ran like a mini conference format with a total of four rotating sessions. Each session giving students an introduction to one of the above topics. Educamp also gave opportunities to selected grade seven students to run the sessions. My son Kalen was one of those students. You can read about his account here. Although the day was supervised by the teachers, but the sessions were largely presented by the students. I found the idea of students teaching other students in a day long mini conference such a brilliant concept!

I personally participated in four coding sessions with different groups of students. It was wonderful to see them excited and engaged with the MIT Scratch programming platform. The looks on the kids’ faces when they discovered what they can create with Scratch were priceless. The inquisitive nature of students chomping at the bit was fascinating. The sessions also made me appreciate the hard work that teachers face on a daily basis when coping with a group of excited kids. I really wanted to thank my grade seven helpers and the supervising teachers to ensure the sessions were focused, and made it so much more easier for me to present.

Kudos to all the staff at Redstone Public School for initiating such an event. I want to give a special shoutout to Mr. Grey who introduced the event to me and allowing me to participate and introduce coding to the kids at the event. It was extremely productive, and rewarding. I think the appetite for these types of topics are insatiable for the kids at these ages, and the future can definitely use more of these creative events!


Chinese Ambassador Sun Gongyi (孙功谊) to Mauritius Visits Mr. Claude Ng Thow Hing (吳松光)

On October 24th, 2017, Chinese Ambassador Sun Gongyi (孙功谊) paid a celebratory visit to the home of Claude Ng Thow Hing (吳松光), wishing him a happy and healthy eightieth birthday.

Ambassador Sun expressed that Mr. Claude Ng Thow Hing’s father Mr. Wu Tao Xing (吳桃興), amongst many Chinese Mauritians helped to forge the Sino-
Mauritian relationship as we see today, and the formal establishment of the Chinese Embassy in Mauritius. These efforts and contributions are deeply appreciated, and the People of China will not forget these “old friends”. The Chinese Mauritians have consistently promoted the value of a healthy and strong friendship between China and Mauritius, expressing their deep connection to the motherland. The development of China will always be in the hearts and minds of the Chinese Mauritians.

Mr. Claude Ng Thow Hing and his family greatly appreciated the Ambassador Sun’s special visit. The Ng Thow Hing family together with other Chinese Mauritians are honoured to continue the heritage and legacy of  Mr. Wu Tao Xing, and will redouble their efforts to strengthen the Sino-Mauritian relationship.

Update: 2023-07-06

I found the official page from the Chinese embassy web site (http://mu.china-embassy.gov.cn/tpxw/201710/t20171025_6320015.htm). Just in case the URL changes in the future, I also provided a screenshot of the page below.

Click above to go directly to enlarge. Click on the URL to go direct to the page.

Richmond Green S.S. School Council Meeting

This evening I hesitantly attended my first School Council meeting at Richmond Green Secondary School, where my son is currently attending grade 9. My reluctance is sourced from an unknown level of commitment as a member of the council. However, tonight I was in an exploratory mood.

I was really impressed on the first day of school when almost all levels of the York Regional District School Board from the superintendent, trustee, and the administrative staff of the school were all in attendance to give a united, warm welcome to both new students and parents. The school continues to exceed my expectations with very informative weekly news letters sent via email to registered parents with email addresses.

One of these news letters mentioned a School Council meeting, and I recall a short conversation I had with Carol Chan, our school trustee. She encouraged us to participate and stay involved. One way of establishing better parent, board, and student communication is to be involved with the Student Council.

Suspecting that my son, belonging to a generation of young adults who will face very challenging times ahead, I wanted to explore and see what this open and accepting council can offer as opportunities for me to contribute in any way. Tonight’s meeting was largely filled with parents whose children are in grade 9 or 10 and there was one parent who has a child in grade 12. The principal and two vice-principals were all very friendly and facilitated the meeting. The meeting was largely introductory, and I look forward to our next meeting as more information will be shared. Certainly an hour a month is not too much to ask of a parent to stay involved.

Possible Future of the Connected Watch

On Tuesday of this week, Apple announced the Apple Watch Series 3 with the ability to connect to the LTE data network, allowing the watch to stay connected to the Internet without an accompanying iPhone. This greatly enhances its functionality and removes its original handicap and its requirement to always be tethered to the phone. You can now get notifications and listen to the plethora of songs on Apple Music while on the go without your phone. The future is here.

Ever since the Apple Watch was released in the spring of 2015, it has been thought of as a companion device to the phone. However, I always thought it should be the other way around. The phone and tablet should be the companion devices to the watch!

The watch should be the only device that has the mobile networking radios and should operate in an always on manner, while sharing a personal hotspot via its WiFi radios. The phone and tablets can then function as displays with WiFi connectivity to your watch. This will also simplify your cellular data plans. I just see this as a more convenient setup, and hopefully a cheaper way to go with your mobile carrier.

As memory capacity increases with the watch, personal identity, application data, and other confidential information can be stored on the watch akin to the secure enclave on the iPhone today. This way display centric devices slaved to the watch can restore your last working state from the watch. Imagine a world where display slates are near commodity devices sans your personal information. You can be working with a shared slate in the office. All the while, your data is being centralized and stored securely on the watch. When you travel offsite at the airport or in the hotel, you pickup another shared slate, and you continue to work where you left off.

It is also more difficult to lose your watch than your phone. When you do misplace your phone and cannot find it, then just pickup another, because your personal data is stored on your watch.

Power consumption is probably going to be a major challenge for the watch in this scenario. But if the power challenge can be solved, then imagine having only WiFi display slates of any size of your choosing, and your watch has the only mobile data radio you will need. Instead of the phone being your most personalized information device, it will be your watch. I hope Apple has this vision in mind. Do you believe this to be a better future?

First Full Day at Whistler

Today was the first full day at Whistler and it was packed full of activities. We woke up early, had a light breakfast and headed towards the RZR Tour.

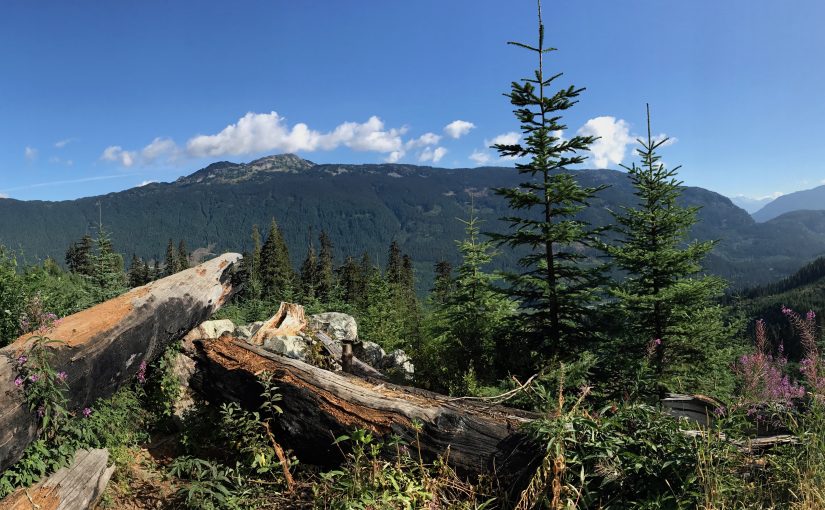
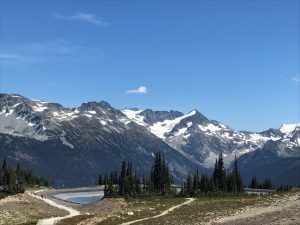
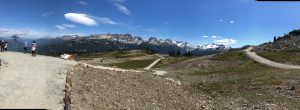
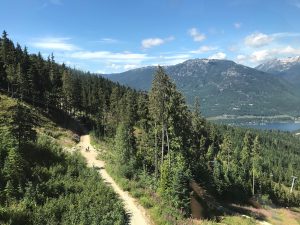
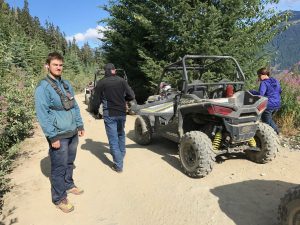
I’ve never done any off roading before so I looked forward to the bumpy and dusty trails. The tour did not disappoint. I had a blast. The duration was not too short and not too long. I really enjoyed driving the RZR. The trail was thrilling but not dangerously so. Everything was tempered just right. The guide and the organization was super nice as well. During the tour, we caught some beautiful scenery of the Whistler area. I would highly recommend this, but make sure you are okay with driving the RZR though. If you are not fond of driving, then you should probably be a passenger instead.

The tour was extremely dusty, so we had to get back to the hotel for a quick shower and a quick lunch. Afterwards, we proceeded to take the Gondola from the Whistler Village to the top of the mountain. At first I thought the price of $58 CAD per adult was quite expensive, but let me tell you, it is worth every dollar and you should not let this amount deter you from having a wonderful experience at the peaks.

We really took advantage of the beautiful weather we had and took almost all the lifts that were opened to us as well as hiking many of trails up top. Instead of my bland words, I’ll let the pictures do the depicting.

Overall a fulfilling and tiring day. Really enjoyed it!

Rogers Ignite 500u

This week I received a promotional message on my iPhone from Rogers indicating that Rogers Ignite 500u is now available in my area. As of today, our household was using Rogers Ignite 250u. I called Rogers to have the upgrade, but a modem upgrade is required.

I did not really want to visit a Rogers Centre to pickup the modem, so the support person on the phone was very helpful and arranged to have a service person to make a house call to exchange the modem. The service person came on time and the modem was switched out without any issues.

I demanded that the modem be placed in bridge mode because I have my own firewall and WiFi routers. The service person told me that the Hitron CODA-4582 is a better WiFi router. I told him that I do not want a Rogers employee at their network operations centre to gain access to my internal and WiFi network. He was really accommodating and helpful but did not know how to place the new Hitron modem into bridge mode until I showed him this page.

He finally called it in and a person performed the configuration remotely. I also noticed the Hitron stored the WiFi admin password in clear text.

This means any one who is running a Hitron in non-bridge mode and is also functioning as your firewall, then any Rogers employee who is working in the network operations centre or their support team has access to your devices connected to your modem.  Just beware! I’ve enlightened the service person to this exposure as well. He was a fine gentleman and I thanked him for his prompt service.

Now our house has higher speed Internet access with 500Mbps down and 20Mbps up!

My New Mistress

In January of this year, I decided to purchase a Titanium bike and decided on the No. 22 Great Divide. I went from Aluminum to Carbon and thought I should give Titanium a try. The solid space age material has a long lasting appeal and the metal finish is super cool.

Yesterday it was finally ready, and we went to La Bicicletta to pick up my brand new road bike. Henry and Davide were excellent help from the store and together we customized the bike with:

  • SRAM Red eTap Shifters
  • SRAM Red front and rear brakes
  • SRAM Red DZero Power Meter
  • SRAM Red 50/34 crank set with 172.5 crank length
  • SRAM Red 11-28 cassette
  • 3T cockpit with ARX II Team Stem
  • 3T Ionic Seat Post with Prologo Saddle and TiroX rails
  • Reynolds Assault Wheelset
  • Continental Grand Prix 4000 S II 25mm tires
  • Chris King ThreadFit T47 bottom bracket and headset
  • Stock carbon forks from No. 22

Here she is:

My No.22 Great Divide with SRAM Red eTap

It was effortless to pair my old Garmin Edge 500 to the DZero power meter. I did have to 3D print an extra Garmin holder. I pulled the file from Thingiverse . It fit like a charm. Took it out for a test ride to make sure that all the gears are working and nothing is loose.

This morning, did a 49km ride with friends:

This is my first time riding with a compact gear ratio. There were many thing that I had to get use to, first the new eTap shifting; I came from Shimano Di2 shifting. The 50/34 ratio allowed me to stay on the big ring for the majority of the ride, but I had to get use to when to switch between the big and small rings up front. The new bike is about 0.5 lb heavier than my old Cervelo R5, but I did not notice the weight gain on the road this morning. When I made the decision to buy a Titanium bike I had some reservations. The biggest one was will it be more bumpy on pot-hole filled roads? The answer is not at all! I was very surprised how smooth the bike was on both bumpy and smooth roads. The power transfer was excellent when I stood up to power through some of the short hills this morning. My knees thanked me for the switch to compact gear ratios.

I am really grateful for the attention to detail and the service that I have received from Henry and Davide at La Bicicletta. Davide did a superb job in the bike fitting process, and the bike felt really natural this morning. I think the new dimensions work so well, that I’ll be copying them to my old R5. I would recommend any one to go there if they are seeking to purchase a bicycle for any purpose. They were super professional and friendly, and they delivered an excellent bike with a quality purchasing experience. Even if you have issues with bike fitting, they can help you out with that.

All in all I am super happy with my new mistress, and I’ll be riding her a lot this summer.

3D Printing to the Rescue!

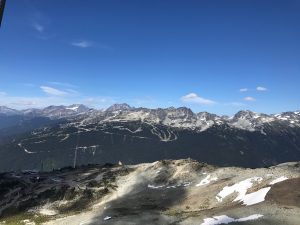
Today is another fun filled day with new found 3D printing experience. I printed more 3D things from www.thingiverse.com. The AA battery holder is a pretty good one. This print was actually in two parts and after printing, there was some assembly required. The two parts fitted perfectly, and now I have a AA battery dispenser. The picture shows the resulted print. It is a bit rough because I used the fast mode.

As luck would have it, the stars and planets came together and an end cap with one of our dining chairs cracked. It went from this:

to this:

This gave me an excellent opportunity to create my first 3D model for the very first time. No longer do I need to print someone else’s work. I spent the morning learning SketchUp, triple take the required measurements, and designed my custom end cap.

The one on the left is mine, and the one on the right is from Home Depot. I even added a little round ridge so that it is a better fit. Here is the result:

It worked really well! I even surprised myself.

Into 3D Printing I Go

I purchased a 3D printer last week, and did not have an opportunity to open it until today!

I purchased the Wanhao Duplicator i3 Plus. It was super easy to install. After 
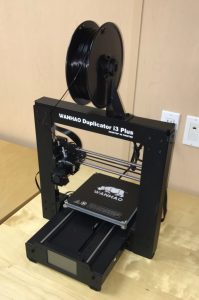
numerous YouTube videos on reviews of different printers and how to operate them,
I decided on this one. I didn’t want a DIY kit, so I settled for this preassembled one.

The YouTube videos really helped to prepare me to avoid the gotcha’s, and before long I was doing my first print, which was this Okay hand signal.

I wanted to test the printer with something more challenging. I opted for the Comura Articulatum from www.thingiverse.com. I found out about this object from the Maker’s Muse YouTube review of the 3D printer that I purchased. As you can see from the video below, the print was pretty successful and it came with articulating joints! I’ll be learning more about 3D modelling and printing this long weekend. Fun times ahead.