Our media server has reached 89% utilization and needs storage expansion. The storage makeup on the server uses Logical Volume Manager (LVM) and software RAID called mdadm. I can expand the storage by swapping out the hard drives with the least capacity with new hard drives with a larger capacity like I have previously done.
I thought I try something different this time around. I would like to switch from LVM to ZFS, an LVM alternative that is very popular with modern mass storage systems, especially with TrueNAS.
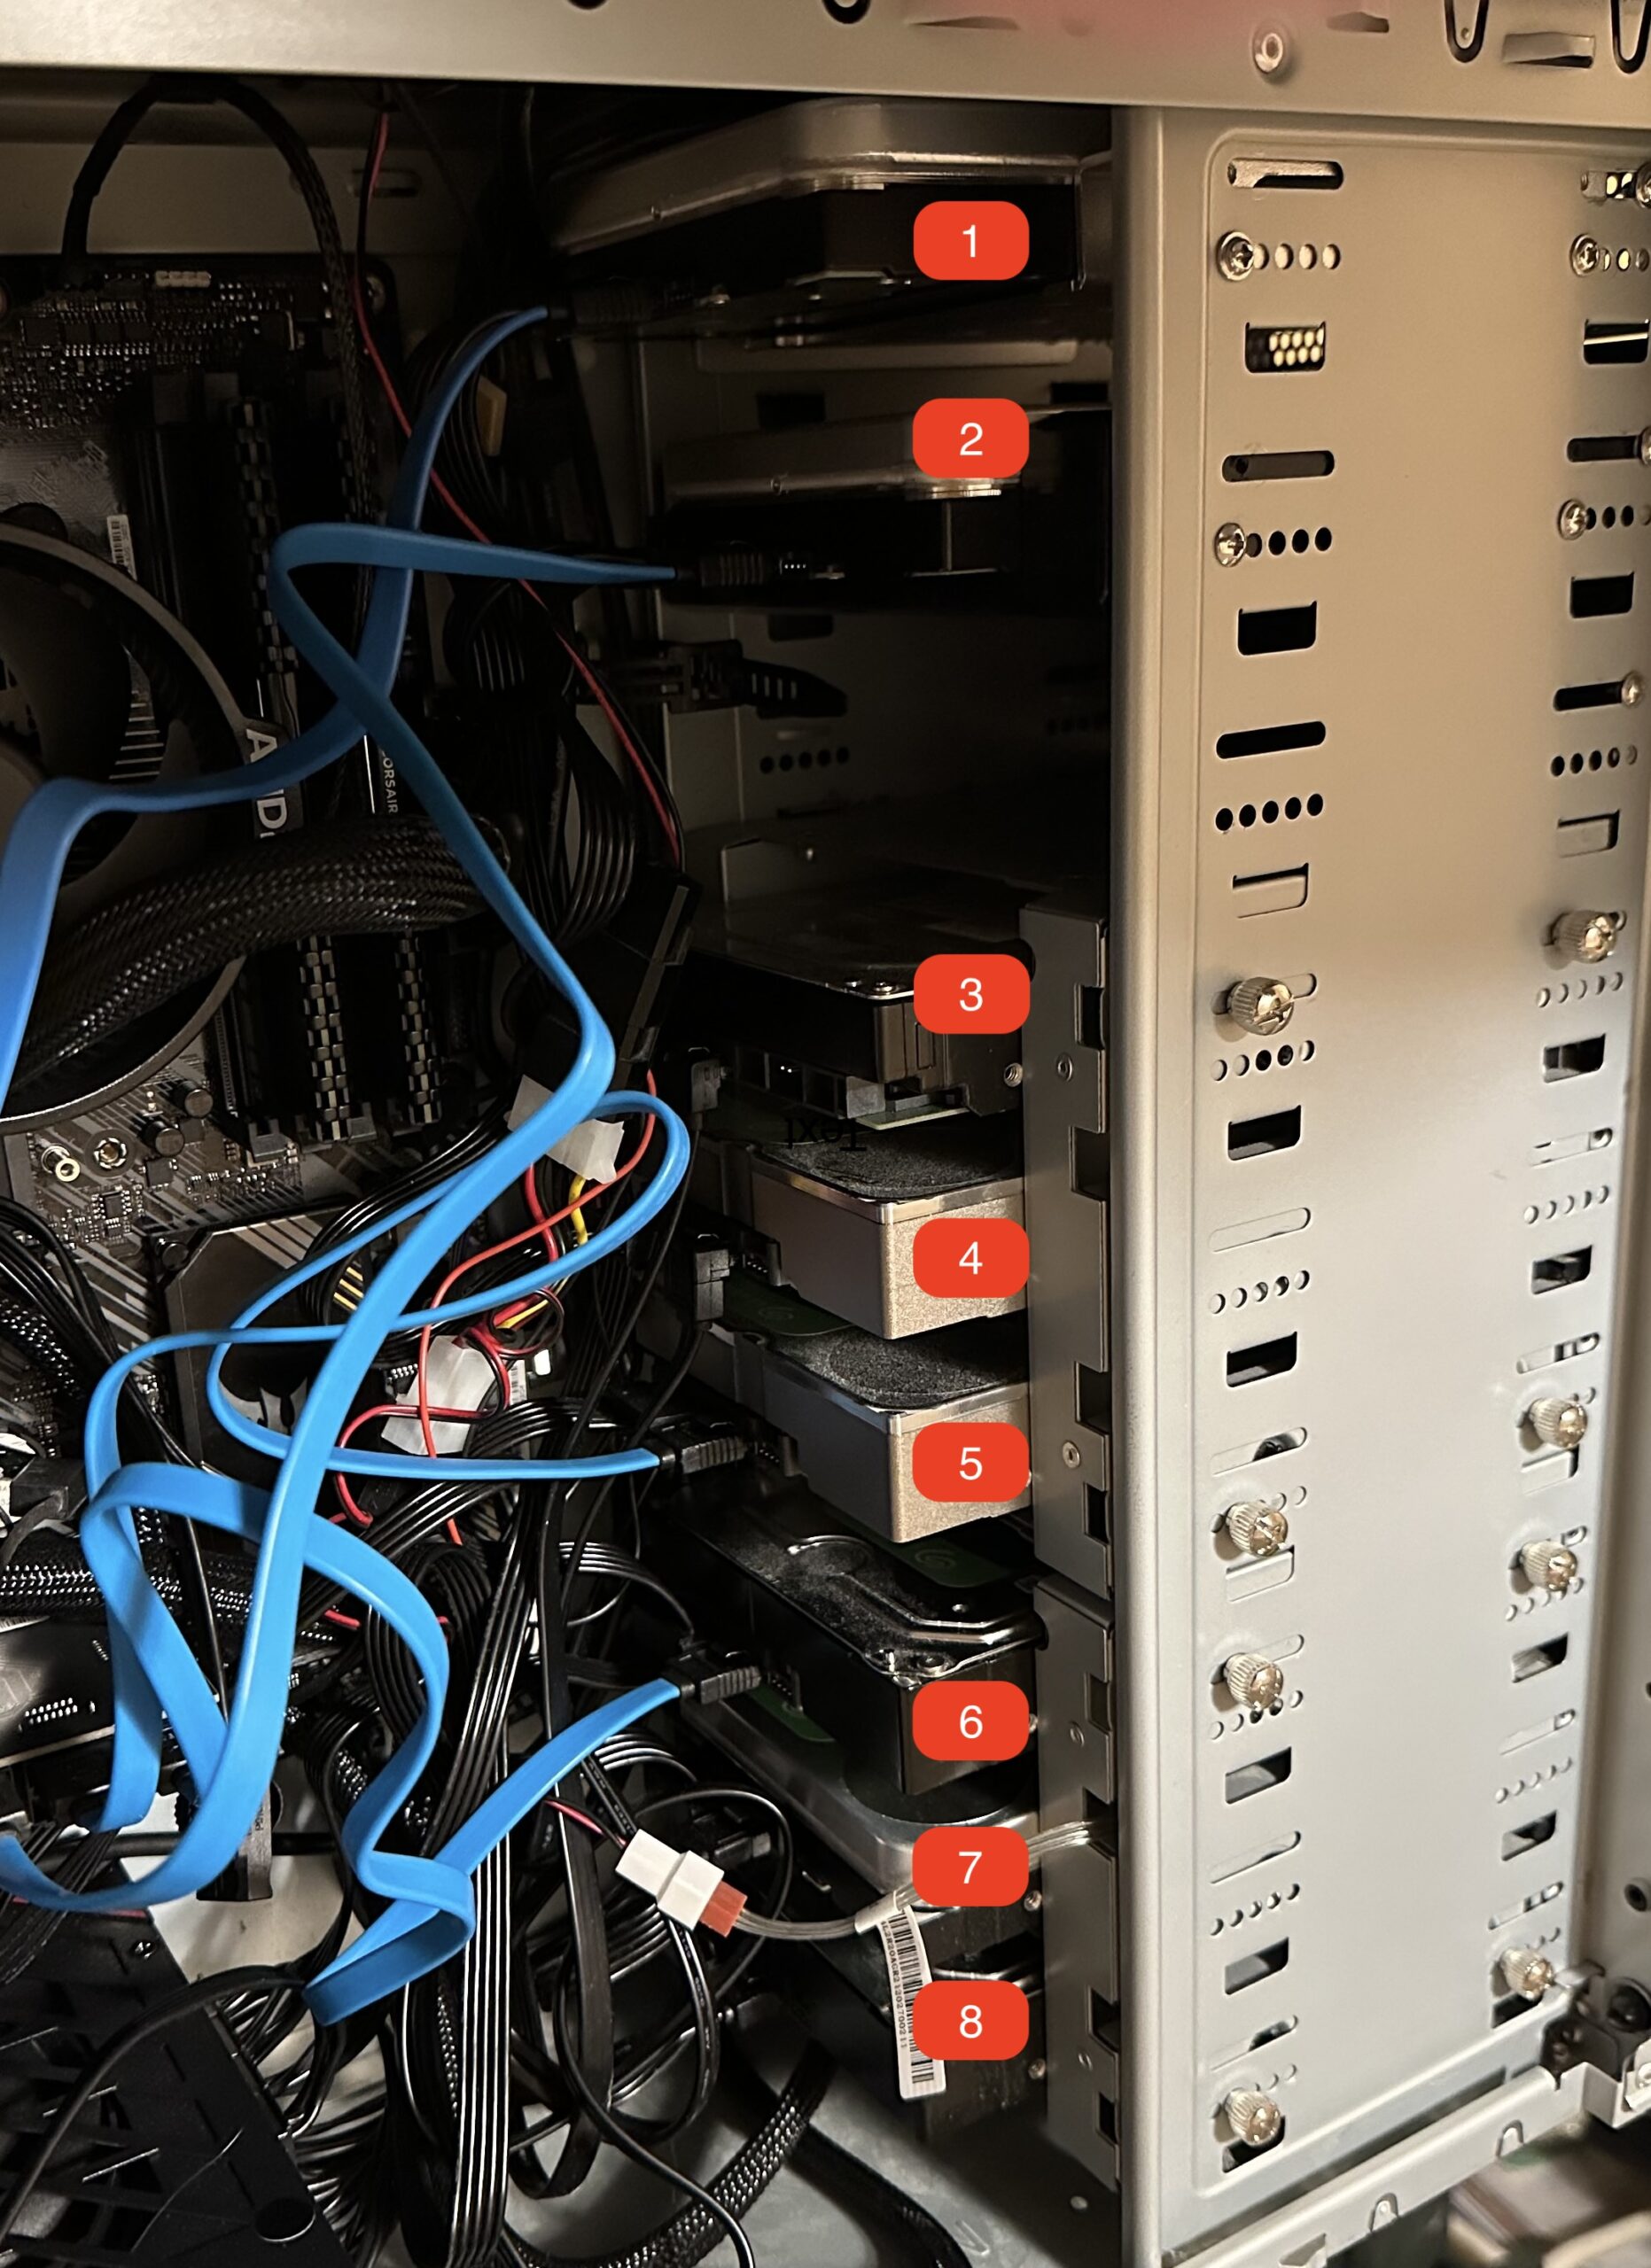
All filled with 8 drives
Before I can attempt the conversion, I will first need to backup all of the content from the media server. The second issue is that I needed more physical expansion space on the server to house more hard drives. The existing housings are all filled except for a single slot, which is going to be insufficient.
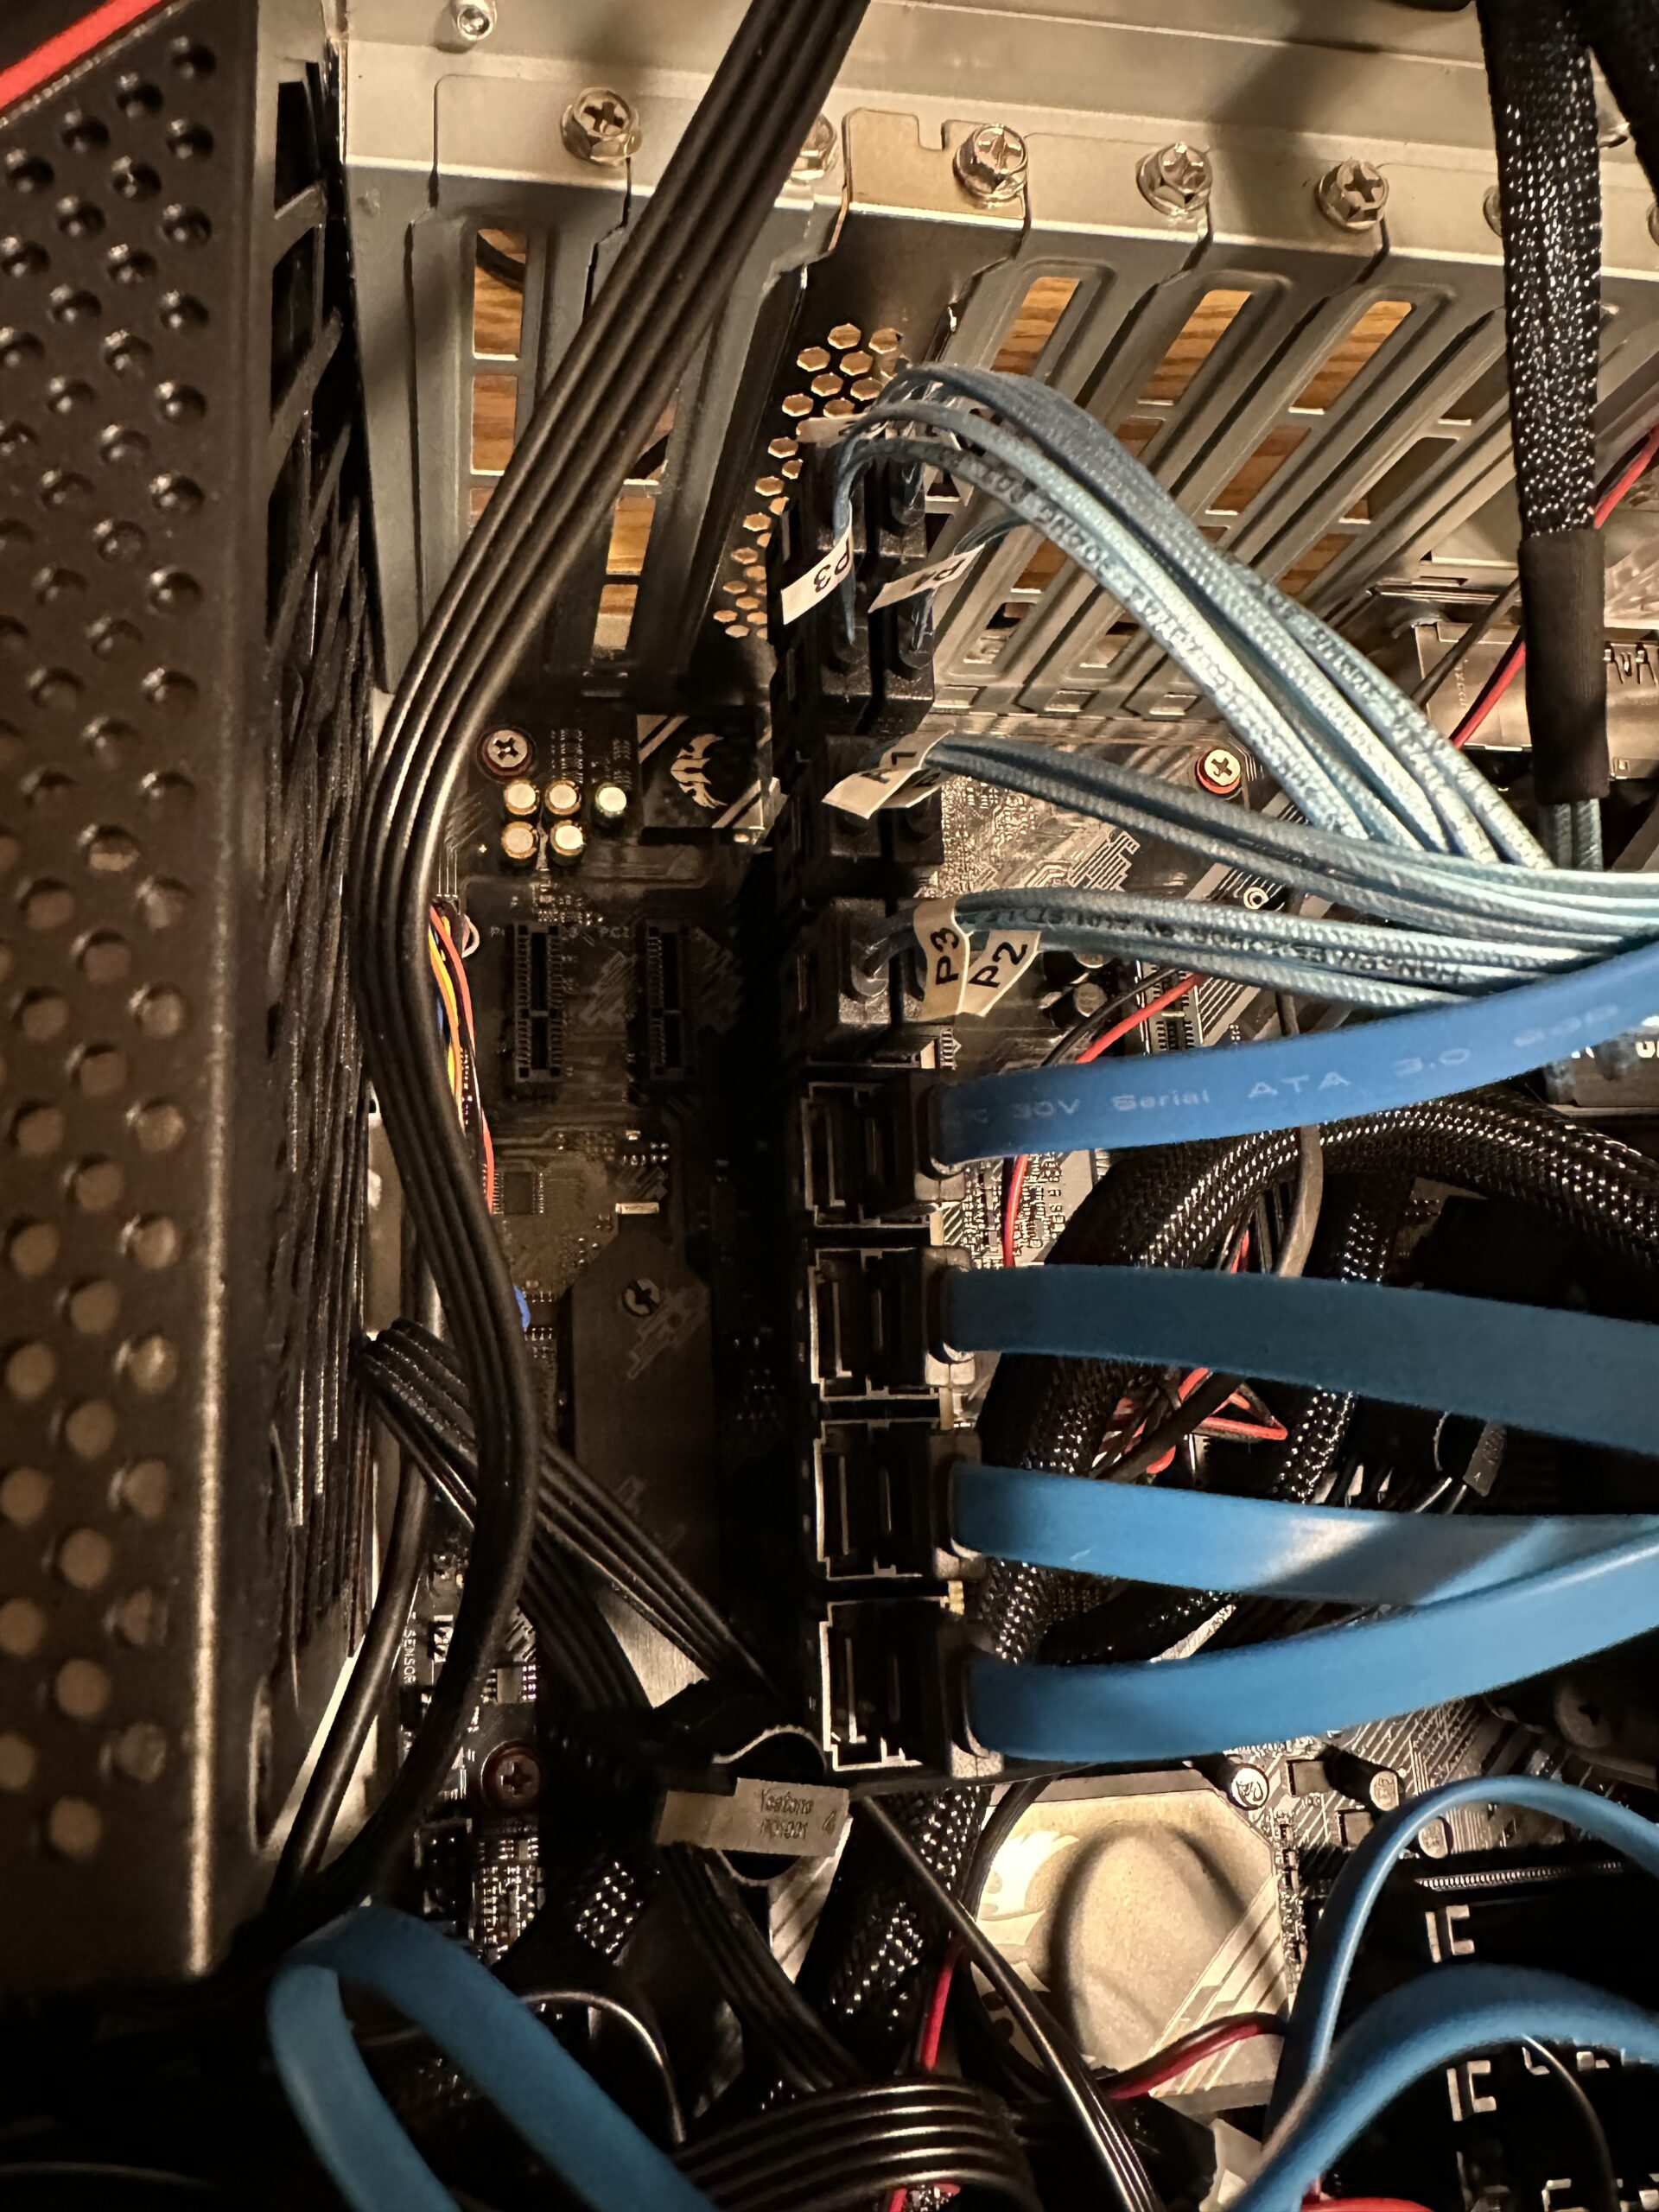
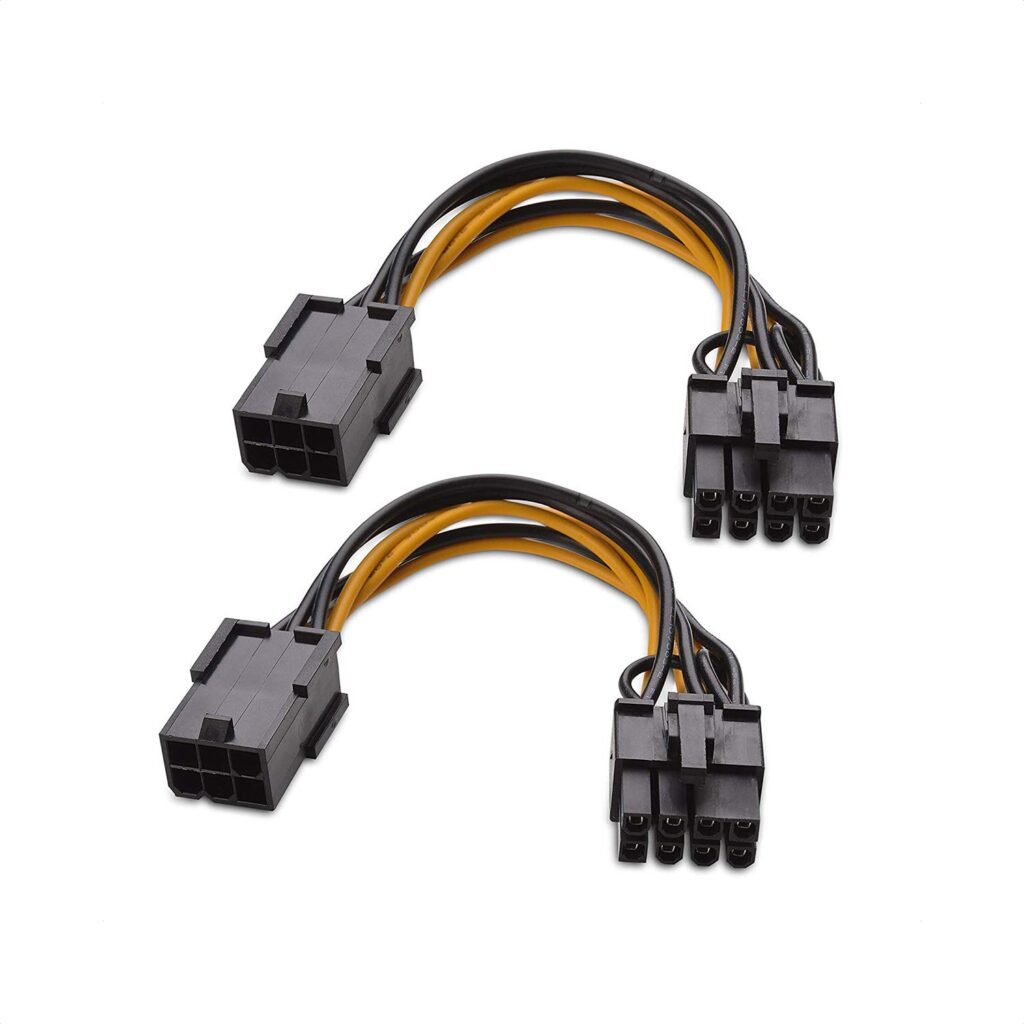
A related issue is that I no longer have any free SATA slots available for the new hard drives, so I purchased GLOTRENDS SA3116J PCIe SATA Adapter Card with 16 SATA Ports. Once this is installed, I have more than enough SATA ports for additional storage.
PCIe SATA Card Installed
One downside of the SATA card is that it is limited to PCIe 3.0 x1 speed. This means data transfer is limited to a theoretical maximum of 1GB/s. Given that the physical hard drives top out at 200MB/s, I don’t think we need to be too concerned about this bottleneck. We will see in terms of practical usage in the future.
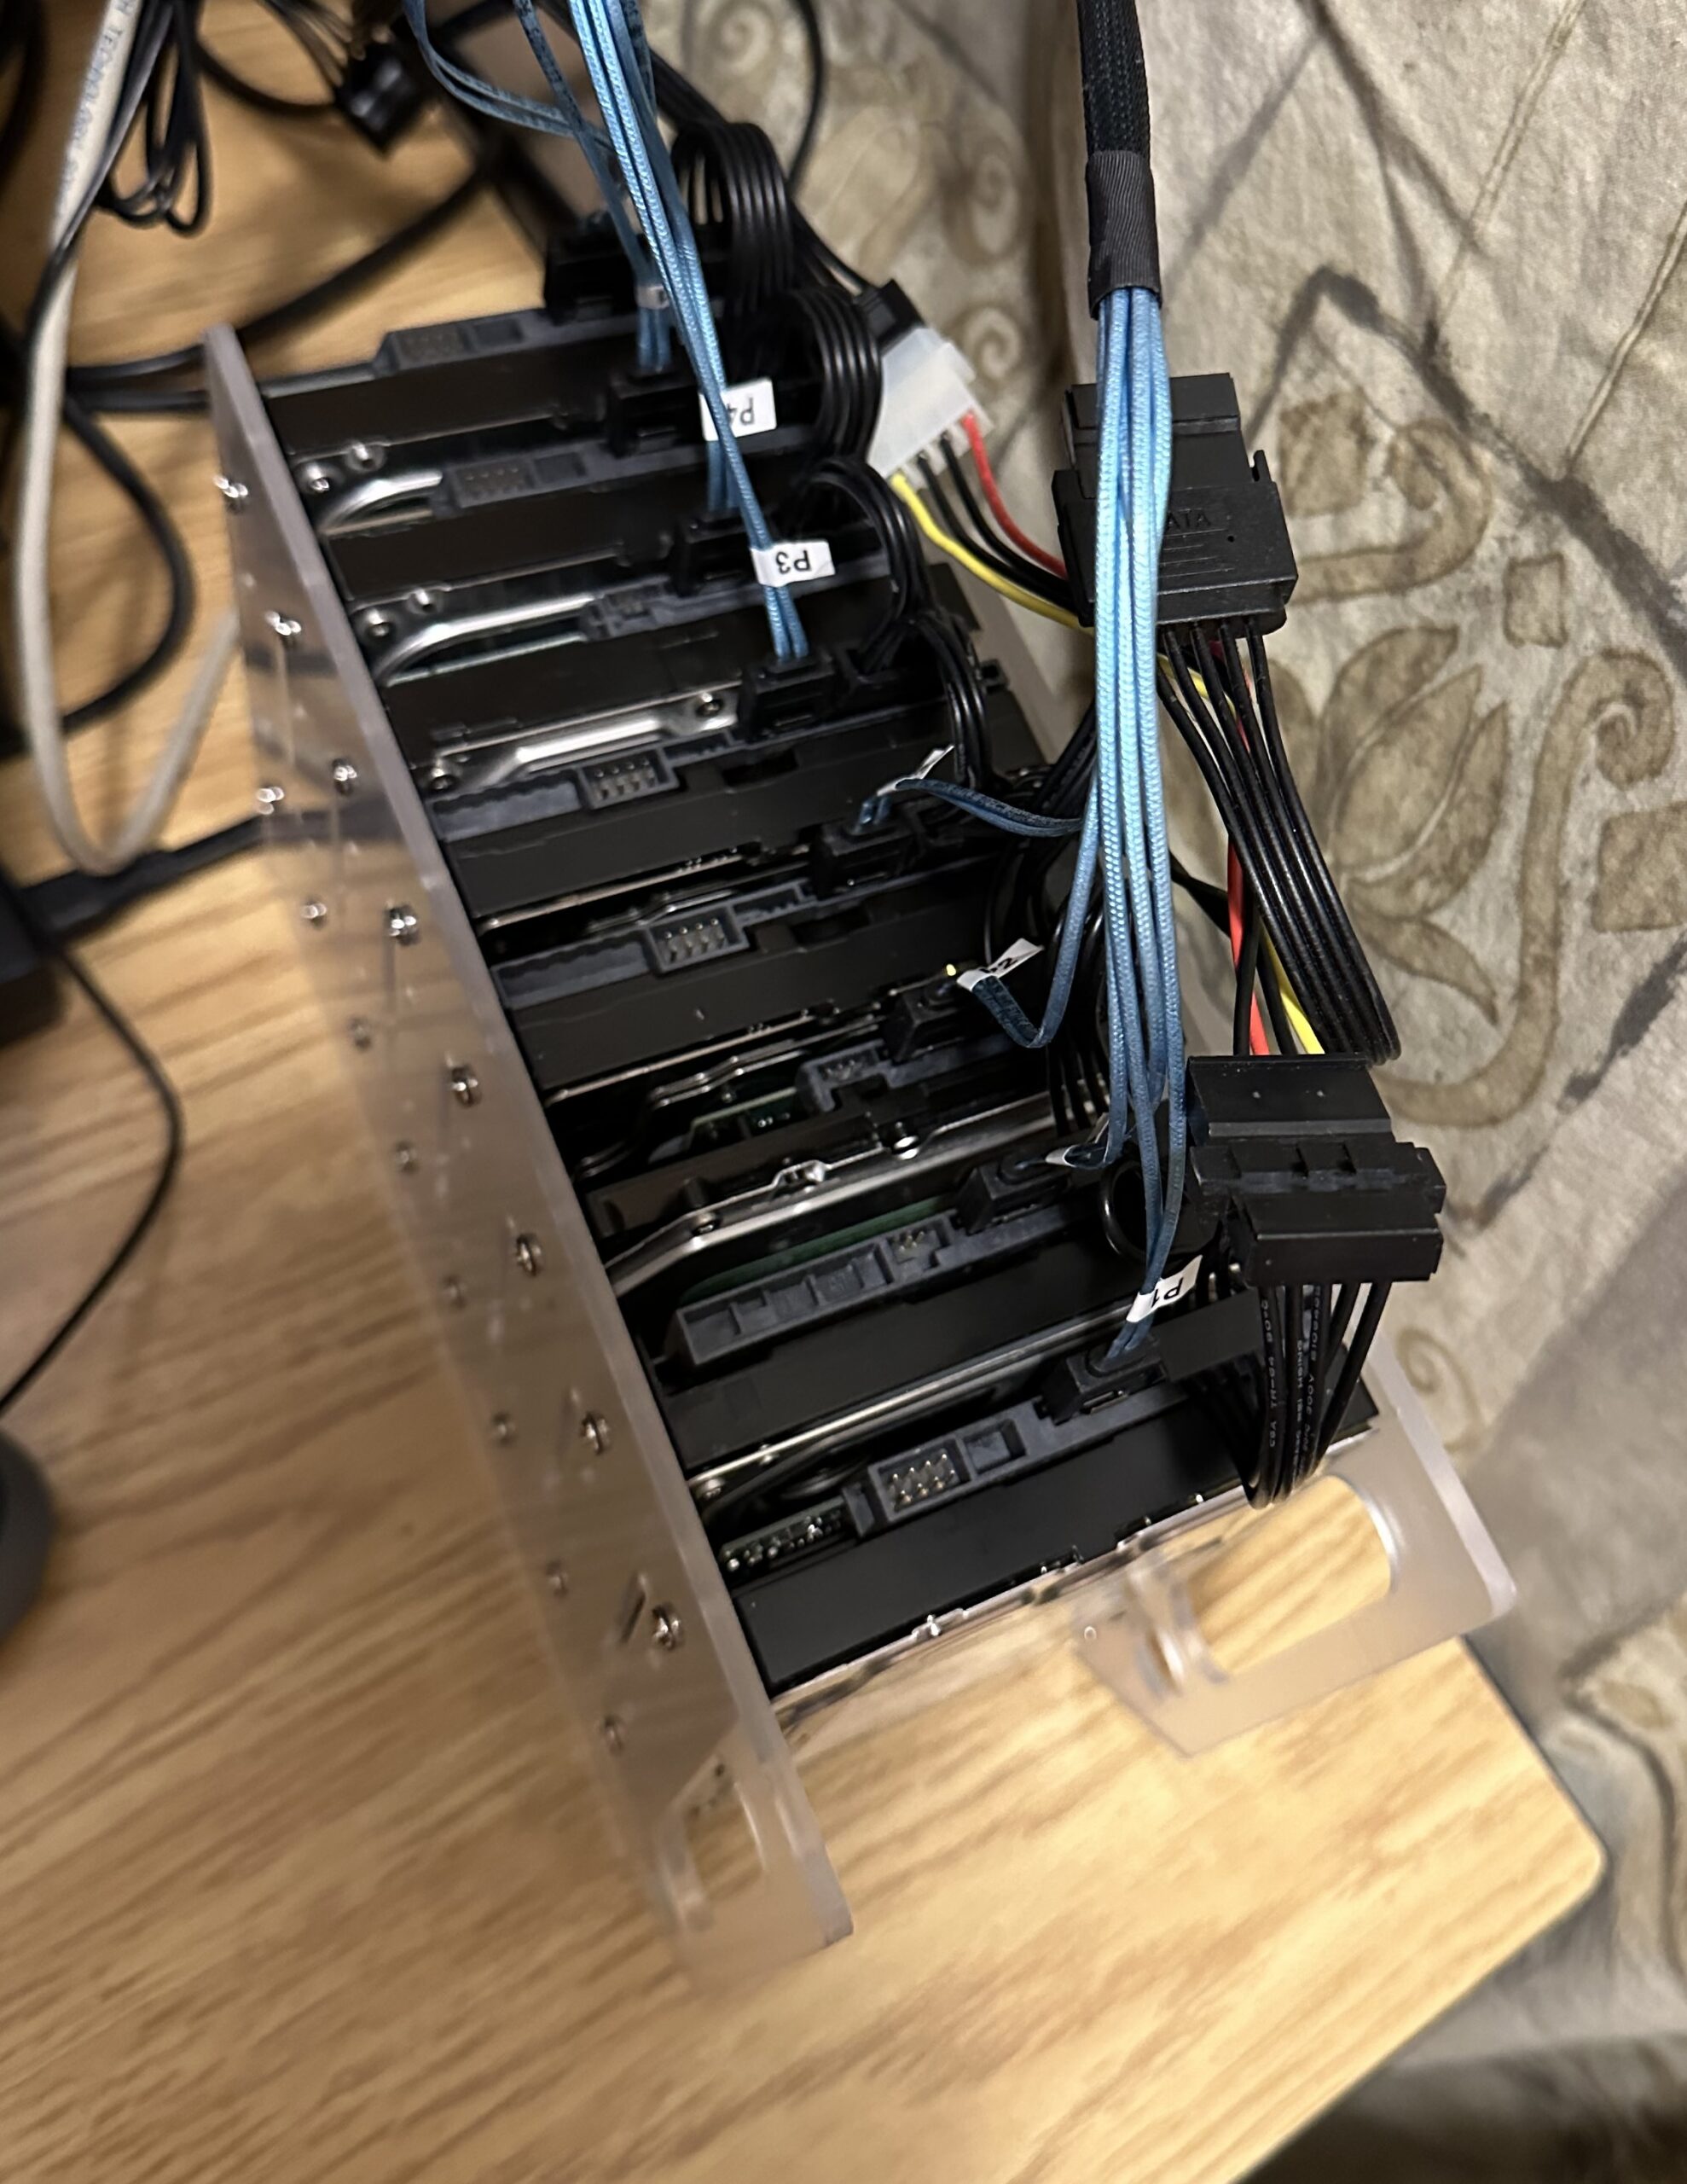
I am so lucky to have extra SATA power cables and extension cables laying around and my 850W existing power supply has ample power for the additional hard drives.
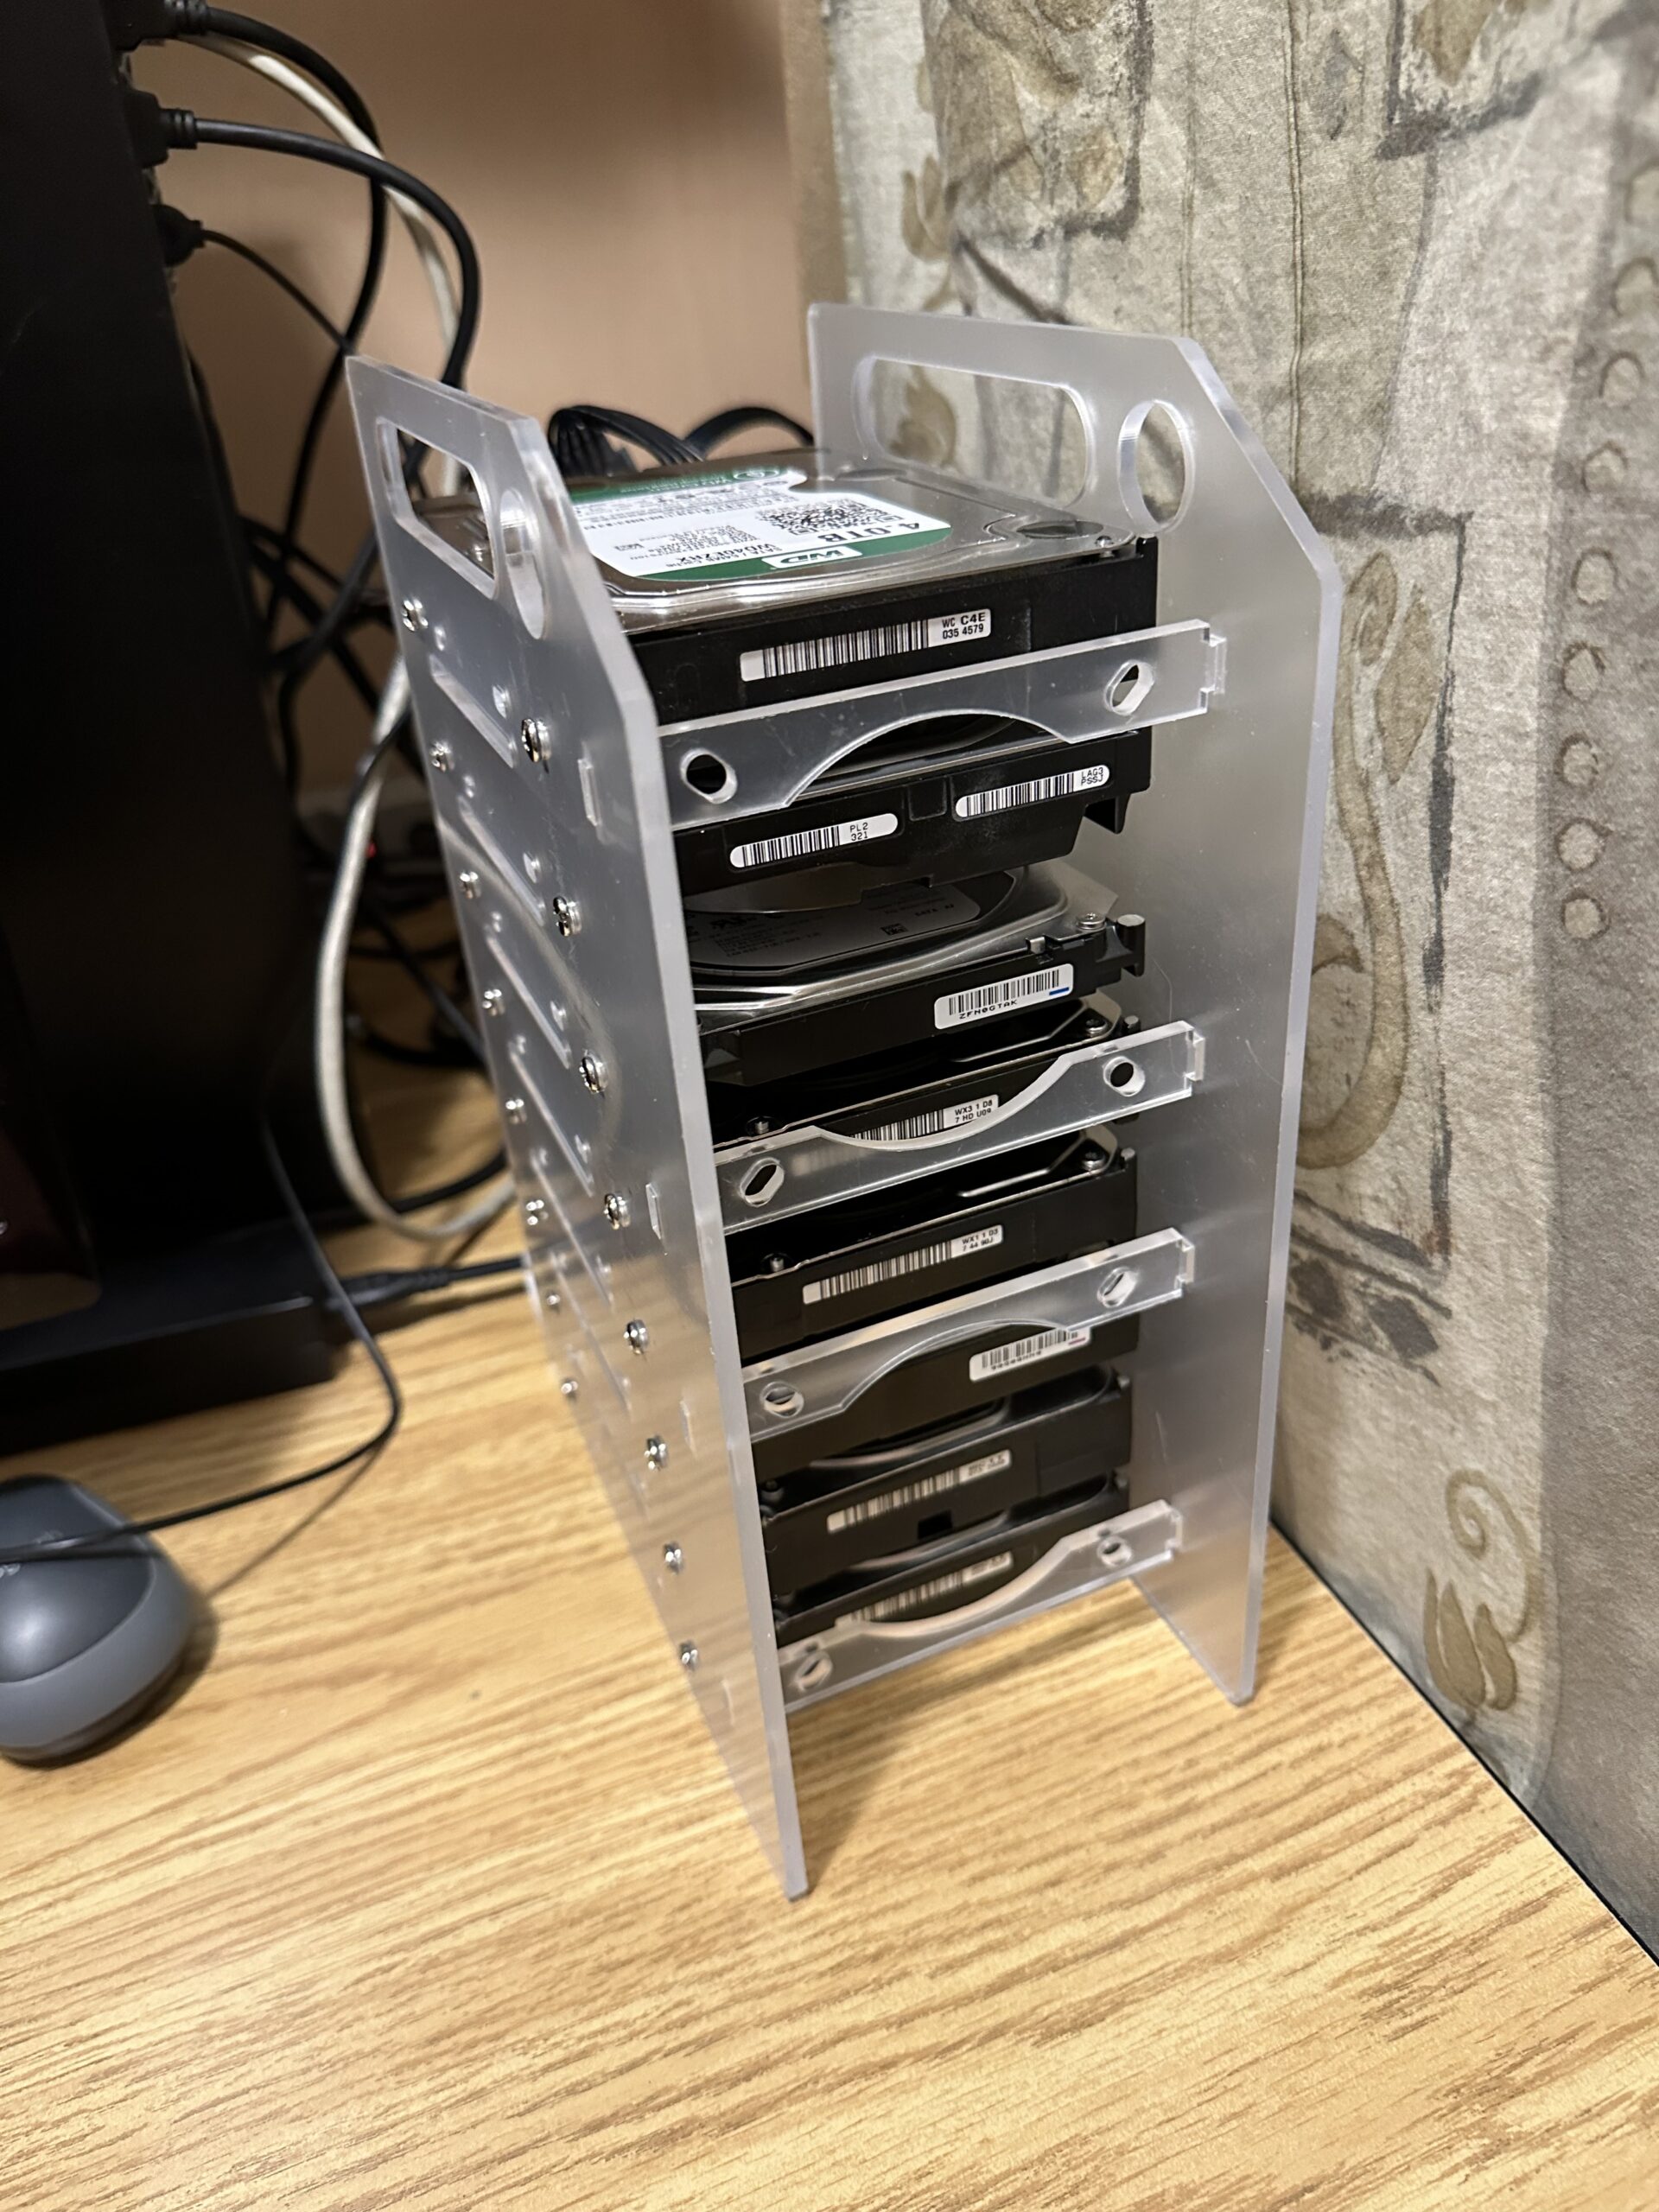
How do we store the additional hard drives with a full cabinet? I went to Amazon again and purchased a hard drive cage, Jaquiain 3.5 Inch HDD Hard Drive Cage 8X3.5 Inch HDD Cage. I did not have to buy any new hard drives yet, because I had plenty of old hard drives laying around. After I put together the cage with 8 really old and used hard drives, it looks something like this:
With this new additional storage, I am now able to backup the media content from my media server. However, before I do that there is one last thing that I need to do, and that is to experiment with an optimal ZFS pool configuration that will work with my content and usage. I will perform this experimentation with the additional storage before reconfiguring the old storage with ZFS. Please stay tuned for my findings.
After booting the system with 16 hard drives, I measured the power usage and it was hovering around 180W. This is not too bad, less than 2 traditional incandescent light bulbs.
Addendum:
During my setup, I had to spend hours deciphering an issue. My system did not recognize my old hard drives. After many trials, I finally narrowed down that the GLOTRENDS card is not compatible with an old 2TB Western Digital Enterprise Drive. This is the first time that I came across SATA incompatibilities.
There is another possibility that these drives were damaged by the usage of an incorrect modular power cable. I found that these drives also do not work with my USB3.0 HDD external dock as well. This gives additional credence that the physical drive has been damaged.
The troubled drive with the SATA card
All my other drives worked fine with the card.
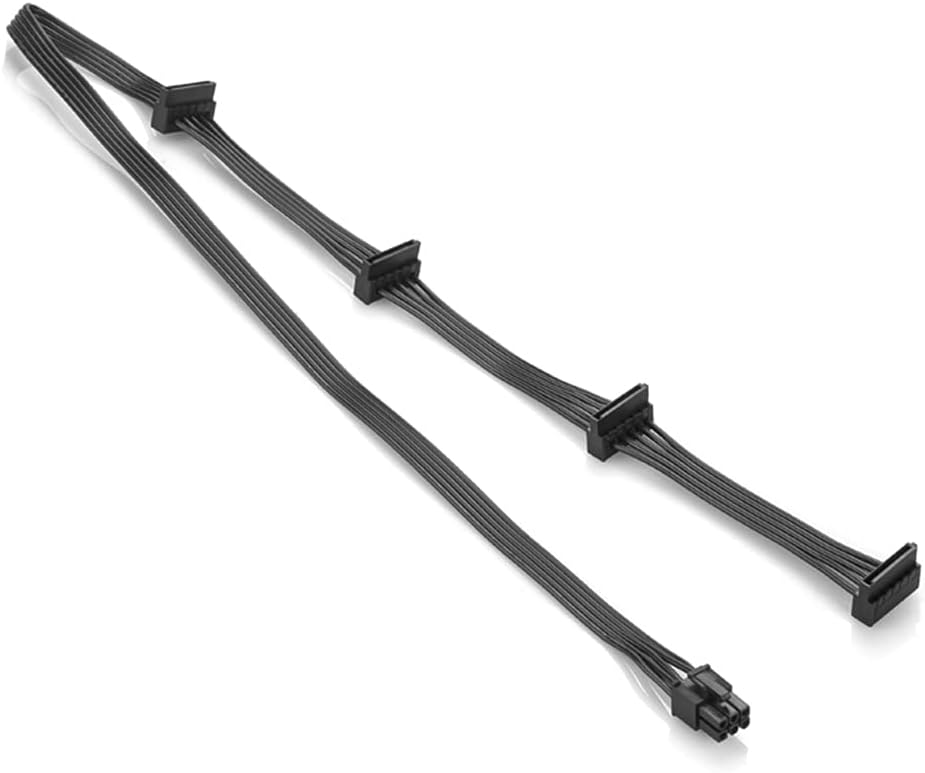
Another discovery is that not all modular power cables will work with my ASUS ROG STRIX 850W power supply. Initially, I thought I would use an 8-pin PCIe to 6-pin adapter along with a 6-pin to SATA power cable designed for Corsair power supplies.
PCIe Power Adapter from Amazon
OwlTree PCI-e 6 Pin Male to 4 SATA 1 to 4 SATA Female Power Supply Splitter Supply Cable for Corsair Modular RM650X RM750X RM850X RM1000X
Using the above cables will cause the power supply not to start. I had to hunt for the original cables that came with the STRIX power supply.
Learned a lot from rejigging this media server. My reward is to see my server boot up with 16 hard drives and 2 NVMe SSD drives recognized. I have never built a system with so many drives and storage before.
In my previous post, I replaced my NVME boot disk on our media server thinking that the disk was defective because the file system (EXT4-fs) was reporting numerous htree_dirblock_to_tree:1080 errors.
The errors continue to persist with the new disk, so I can eliminate the possibility of hardware as the cause of the issue.
I noticed that the htree_dirblock_to_tree:1080 errors were caused by the tar command and the time in which these errors occur coincided when the media server is being backed up. Apparently, the backup process is causing these errors with the tar command.
This backup process has remained unchanged for quite some time and has worked really well for us. I guess for some reason there is a bug in the kernel or in the tar command that is not quite compatible with NVME devices.
I had to resort to finding an alternative backup methodology. I ended up using the rsync method instead.
It looks like this method is faster and can perform incremental backup. However, instead of backing up to an archive file, which I later need to extract and prepare during the restoration process, I have to back it up to a dedicated backup device. Since the old NVME disk is perfectly fine, I reused it as my backup device. I have partitioned this backup device in the same layout as the current boot disk.
Device          Start        End    Sectors   Size Type
/dev/sdi1        2048    2203647    2201600     1G Microsoft basic data
/dev/sdi2     2203648 1921875967 1919672320 915.4G Linux filesystem
/dev/sdi3  1921875968 1953523711   31647744  15.1G Linux swap
The only exception is that the first partition is not marked as boot and esp, so during the restoration process I will have to mark that partition accordingly with the parted command by using the following commands:
set 1 boot on
set 1 esp on
The idea is that at 3am every night/morning, I will backup the root filesystem to the second partition of the backup drive. If anything happens with the current boot disk, the backup drive can act as an immediately available replacement, after a grub-install preparation as mentioned in the previous article.
Let us see how this new backup process works and hopefully, we can bid a final farewell to the htree_dirblock_to_tree:1080 errors!
Update: 2023-12-22
It looks like even with the rsync command, the htree_dirblock_to_tree:1080 errors still came back during the backup process. I decided to upgrade the kernel from vmlinuz-5.15.0-91-generic to vmlinuz-6.2.0-39-generic. Last night (2023-12-23 early morning) was the first backup after the kernel upgrade, and no errors were recorded. I hope this behavior persists and it is not a one-off.
A few months ago, the boot disk of our media server begin to incur some errors, such as the ones below:
Dec 17 03:01:35 avs kernel: [32515.068669] EXT4-fs error (device nvme1n1p2): htree_dirblock_to_tree:1080: inode #10354778: comm tar: Directory block failed checksum
Dec 17 03:02:35 avs kernel: [32575.183005] EXT4-fs error (device nvme1n1p2): htree_dirblock_to_tree:1080: inode #13500463: comm tar: Directory block failed checksum
Dec 17 03:02:35 avs kernel: [32575.183438] EXT4-fs error (device nvme1n1p2): htree_dirblock_to_tree:1080: inode #13500427: comm tar: Directory block failed checksum
The boot disk is a NVME device and I thought it may be due to over heating, so I purchased a heat sink and installed it. Unfortunately the errors persisted after the heat sink.
I decided to replace the boot disk with the exact same model which was the Samsung 980Pro 1TB. This should have been a pretty easy maintenance task. We clone the drive, and swap in the new drive. However, Murphy is sure to strike!
My usual goto cloning utility is Clonezilla, unfortunately this utility did not like cloning NVME drives. The utility resulted in a kernel panic after trying multiple versions. I am not sure what is the problem here. It could be Clonezilla or the USB 3.0 NVME enclosure that I was using for the new disk.
I resigned to using the dd command:
dd if=/dev/source of=/dev/target status=progress
Unfortunately this would have taken way too long something like 20+ hours, so I gave up with this approach.
I decided to do a good old restore of the nightly backup. I started by cloning the partition table:
sfdisk -d /dev/olddisk | sfdisk /dev/newdisk
I then proceeded with the restore of the nightly backup. Murphy strikes twice! The nightly backup was corrupted! I guess it is not surprising when the root directory’s integrity is in question. The whole reason why we are doing this exercise.
Without the nightly backup, I had to resort to a live backup. I booted system again, and performed:
sudo su -
mount /dev/new_disk_root_partition /mnt/newboot
cd /
tar -cvpf - --exclude=/tmp --exclude=/home/kang/log --exclude=/span --exclude="/var/lib/plexmediaserver/Library/Application Support/Plex Media Server/Cache" --one-file-system / | tar xvpzf - -C /mnt/newboot --numeric-owner
The above took about an hour. I then copy the /span directory manually, because this directory tends to change while the server is up and running.
With all the contents copied, I forgot how to install grub and had to re-teach myself again. I had to use a live copy Ubuntu USB and use that to boot up the machine, and then mount both the root and efi partitions respectively.
nvme1n1                              259:0    0 931.5G  0 disk
├─nvme1n1p1                          259:1    0     1G  0 part  /boot/efi
├─nvme1n1p2                          259:2    0 915.4G  0 part  /
└─nvme1n1p3                          259:3    0  15.1G  0 part  [SWAP]
And install GRUB.
sudo su -
mkdir /efi
mount /dev/nvme1n1p1 /efi
mount /dev/nvme1n1p2 /mnt
grub-install --efi-directory /efi --root-directory /mnt
I also have fix the /etc/fstab to ensure the root partition and /boot/efi partition are properly referenced by their corresponding, correct UUID. The blkid command came in handy to find the UUID. For the swap partition, I had to use the mkswap command before I get the UUID.
After I rebooted, I reinstalled GRUB one more time with the following as super user:
grub-install /dev/nvme1n1
I also updated the initramfs using:
update-initramfs -c -k all
For something that should have taken less than an hour, it took the majority of the day. The server is now running with the new NVME replacement disk. Hopefully this resolves the file system corruptions. We have to wait and see!
Update: The Day After
The same errors occurred again! I noticed that these corruptions occur when we do a system backup. How ironic! I later confirmed that performing the tar command on the root directory during the backup process can cause such an error. I now have to see why this is. I will disable the system backup for the next few days to see if the errors come back or not.
I have a membership with Audible and I sometimes also get other audio book sources. Recently I experimented with combining all of my audio books into a centralized place. Since I already have a Plex server running, I thought it would be a good place to do this.
I did a little research and came across a couple of very helpful articles:
I have a single folder to store all of my audio books. Inside the folder, each audio book is stored as an “m4b” file.
Ensure that audio books have a poster image and that its artist and album_artist tags are set to the author. Where appropriate, the audio book should also contain chapter metadata.
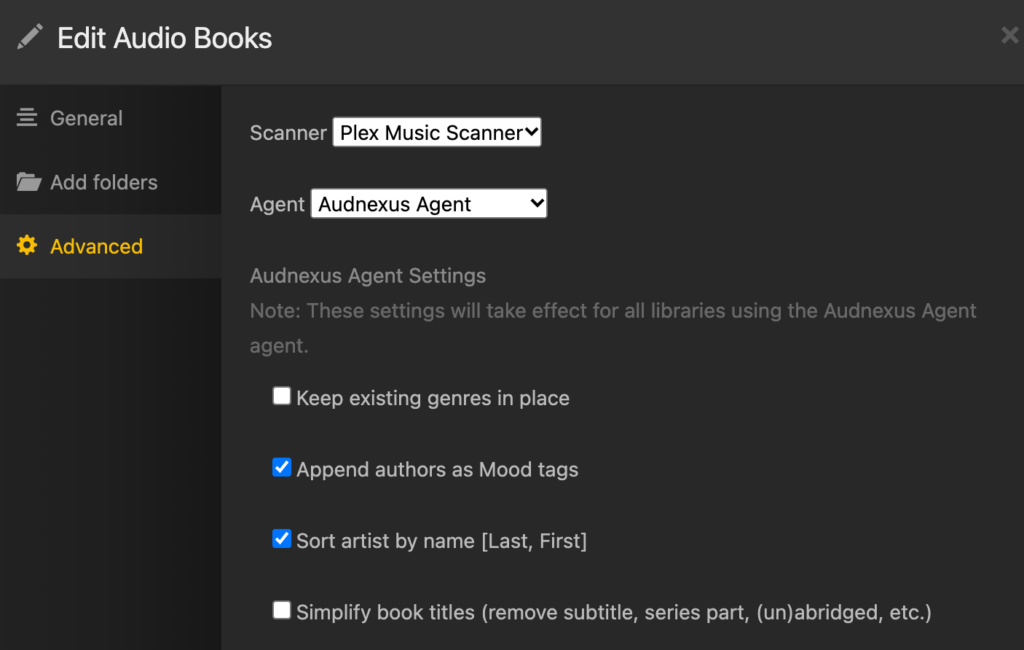
Create a music library on Plex by adding the audio book folder, and set the agent to Audnexus
Note the Agent setting
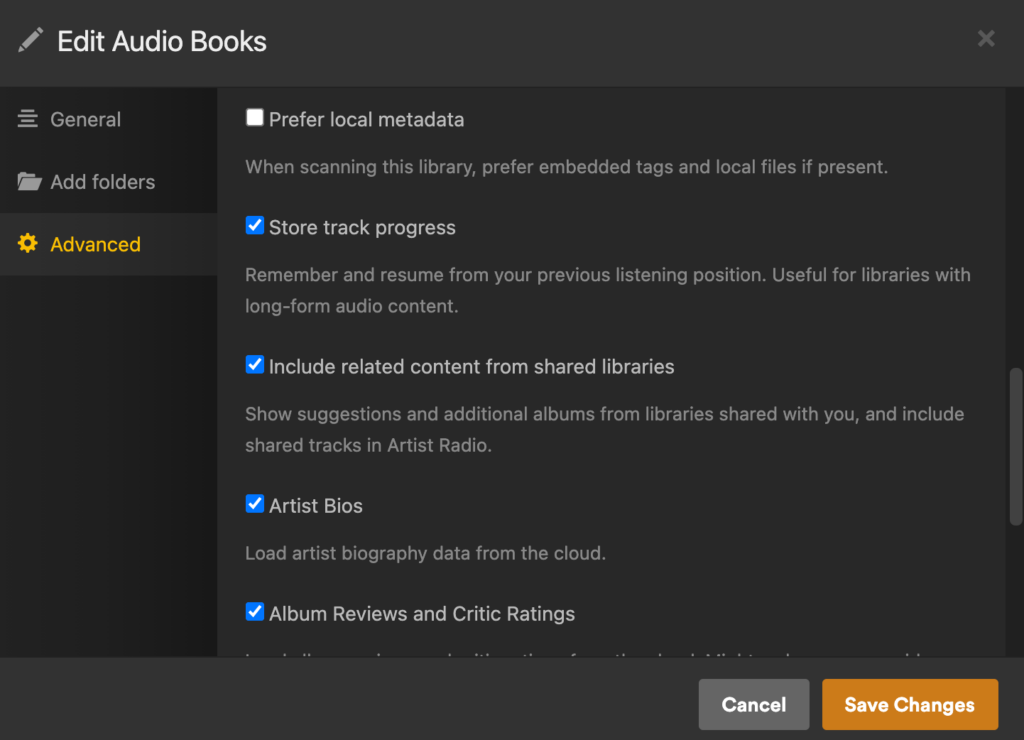
Ensure that the advanced option of “Store track progress” is checked.
Ensure that Store Track Progress is checked!
Each book in the library will be represented as an album, and the author will be mapped to album artist. Once the library is created, you can download and play the audio books from the desktop using the Plex app. However, the more common use case is to listen to the audio books while on the go.
Using Prologue to Play Audio Books
We first have to download the Prologue App. I did not get any of the In-App premium functionality, and just stayed with the free version.
Point the app to my Plex server’s URL, and all the audio books from the library should now be accessible and playable on the iPhone or iPad with chapter, bookmark, and last-left-position support.
This is a really neat solution, and I am impressed how Plex and Prologue together formed a dynamic duo in this manner.
In the first part of this post, I talked about making sure all the new hardware that I recently purchased works. Yesterday, upgrading from Ubuntu 20.04 LTS to 22.04 LTS was super simple. Unfortunately, that was the end of the easy part.
I thought I could just image by old boot drive and make a carbon copy of it on my new boot drive. My old boot drive is a simple SATA 512GB SSD, and my new boot drive is an NVMe M.2 1TB SSD plugged directly to the motherboard. The copying was pretty simple, but because the drives differ in size, I had to relayout the partition table with the new drive once the copy is completed. I did this with the parted command.
Unfortunately the new boot drive did not want to boot. At this point I had to do some research. The most helpful articles were:
Both of the above articles were an excellent refresher on how GRUB works. I have used GRUB since the beginning, but one gets super rusty when these types of tasks are only performed once every three or six years!
Instead of detailing what went wrong, I will just explain what I should have done. This way if I need it again in the future, it is here for my reference.
Step 1: Perform a backup of the old boot drive from a Live USB in shell mode. This is done on my server on a nightly basis. This method is clearly described on the Ubuntu Community Help Wiki.
Following this method I will end up with a compressed tar archive for my entire root directory, skipping some runtime and other unwanted directories.
Step 2: After installing a fresh install of the new Ubuntu LTS Server operating system on the new server and boot drive, I proceeded to backup the new boot with the same technique used in Step 1. I stored the backup of the new install on another external SSD drive that I have lying around. Also it is important that new boot drive partition layout of the new install contains a swap partition.
Step 3: I then restore the most recent backup (done in Step 1) of the old boot drive to the new boot drive. I then replaced the /boot/grub directory with the new contents from the new install which was backed up in Step 2. The new GRUB is already installed when we performed a brand new installation on the drive. We just want to make sure the boot partition matches the /boot/grub contents.
Step 4: We also need to fix up the /etc/fstab file because it contains references to drive devices from the old hardware. Paid special attention the main data partition and the swap partition. It should look something like this:
# /etc/fstab: static file system information.
#
# Use 'blkid' to print the universally unique identifier for a
# device; this may be used with UUID= as a more robust way to name devices
# that works even if disks are added and removed. See fstab(5).
#
# <file system> <mount point>   <type>  <options>       <dump>  <pass>
# / was on /dev/nvme1n1p2 during curtin installation
UUID=fc939be4-5292-4252-8120-7ef59b177e5b / ext4 defaults 0 1

# /boot/efi was on /dev/nvme0n1p1 during curtin installation
UUID=5187-A8C6 /boot/efi vfat defaults 0 1

# Swap partition
UUID=512d611e-6944-4a57-9748-ea68e9ec3fad	none	swap	sw	0	0

# /dev/mapper/airvideovg2-airvideo /mnt/airvideo ext4 rw,noatime 0 0
UUID=9e78425c-c1f3-4285-9fa1-96cac9114c55 /mnt/airvideo ext4 rw,noatime 0 0
Noticed that I also added the LVM logical volume for /mnt/airvideo, which is my RAID-1 array. The UUID can be obtained by the blkid command. Below is a sample output:
Step 4B (Potentially): If the system boots in the “grub>” prompt, then we will have persuade grub to manually boot by providing the following at the prompt:
grub> set root=(hd9,gpt2)
grub> linux /boot/vmlinuz root=/dev/nvme1n1p2
grub> initrd /boot/initrd.img
grub> boot
To find the root value on the first line, you have use the ls command which is explained in this article. The root parameter on the linux line references the partition which the root directory is mounted. In my case, it was /dev/nvme1n1p2.
After I rebooted, I reinstalled GRUB with the following as super user:
grub-install /dev/nvme1n1
It may also be required to update our initramfs using:
update-initramfs -c -k all
Step 5: At this point the system should reboot and all of the old server’s content should now be on the old hardware. Unfortunately we will need to fix the network interface.
First obtain the MAC address of the network interface using:
% sudo lshw -C network | grep serial
    serial: 04:42:1a:05:d3:c4
And then we will have to edit the /etc/netplan/00-installer-config.yaml file.
% cat /etc/netplan/00-installer-config.yaml
# This is the network config written by 'subiquity'
network:
  ethernets:
    enp6s0:
      dhcp4: true
      match:
        macaddress: 04:42:1a:05:d3:c4
      set-name: enp6s0
  version: 2
Ensuring the MAC address matches from lshw and that the name is the same as the old system. The name in this example is enp6s0. We then need to execute the following commands to generate the interface.
netplan generate
netplan apply
We need to ensure the name matches because many services on the server have configurations that references the interface name, such as:
Configurations in /var/network/interfaces
Samba (SMB) (/etc/samba/smb.conf)
Pihole (/etc/pihole/setupVars.conf)
Homebridge (/var/lib/homebridge/config.json)
Step 6: Fix the router provisioning DHCP IP addresses so that the new server has the same fixed IP address as the old server. This is important because there may be firewall rules referencing this IP address directly. The hostname should have been automatically restored when we restored the partition in Step 3.
Step 7: Our final step is to test the various services and ensure they are working properly. These include:
On May 15th, 2019 (more than three years ago), I performed a performance boost to my media server by upgrading its CPU, Motherboard, and Memory. You can read that experience in this post.
Today, I am going to be doing the same. It looks like we are on a cadence of every 3 years or so to do a spec bump. This time around we are also changing the same items, but will include the power supply as well in the swap. I also decided to swap the boot drive hardware from an old SSD drive to an NVME drive. All of this resulted in the following hardware acquisitions, all from Amazon, which I find them to have lower pricing (when factoring free shipping through Prime), than Newegg even during Black Friday and Cyber Monday offers.
The plan is to spend the time today to roughly test out all the new hardware.
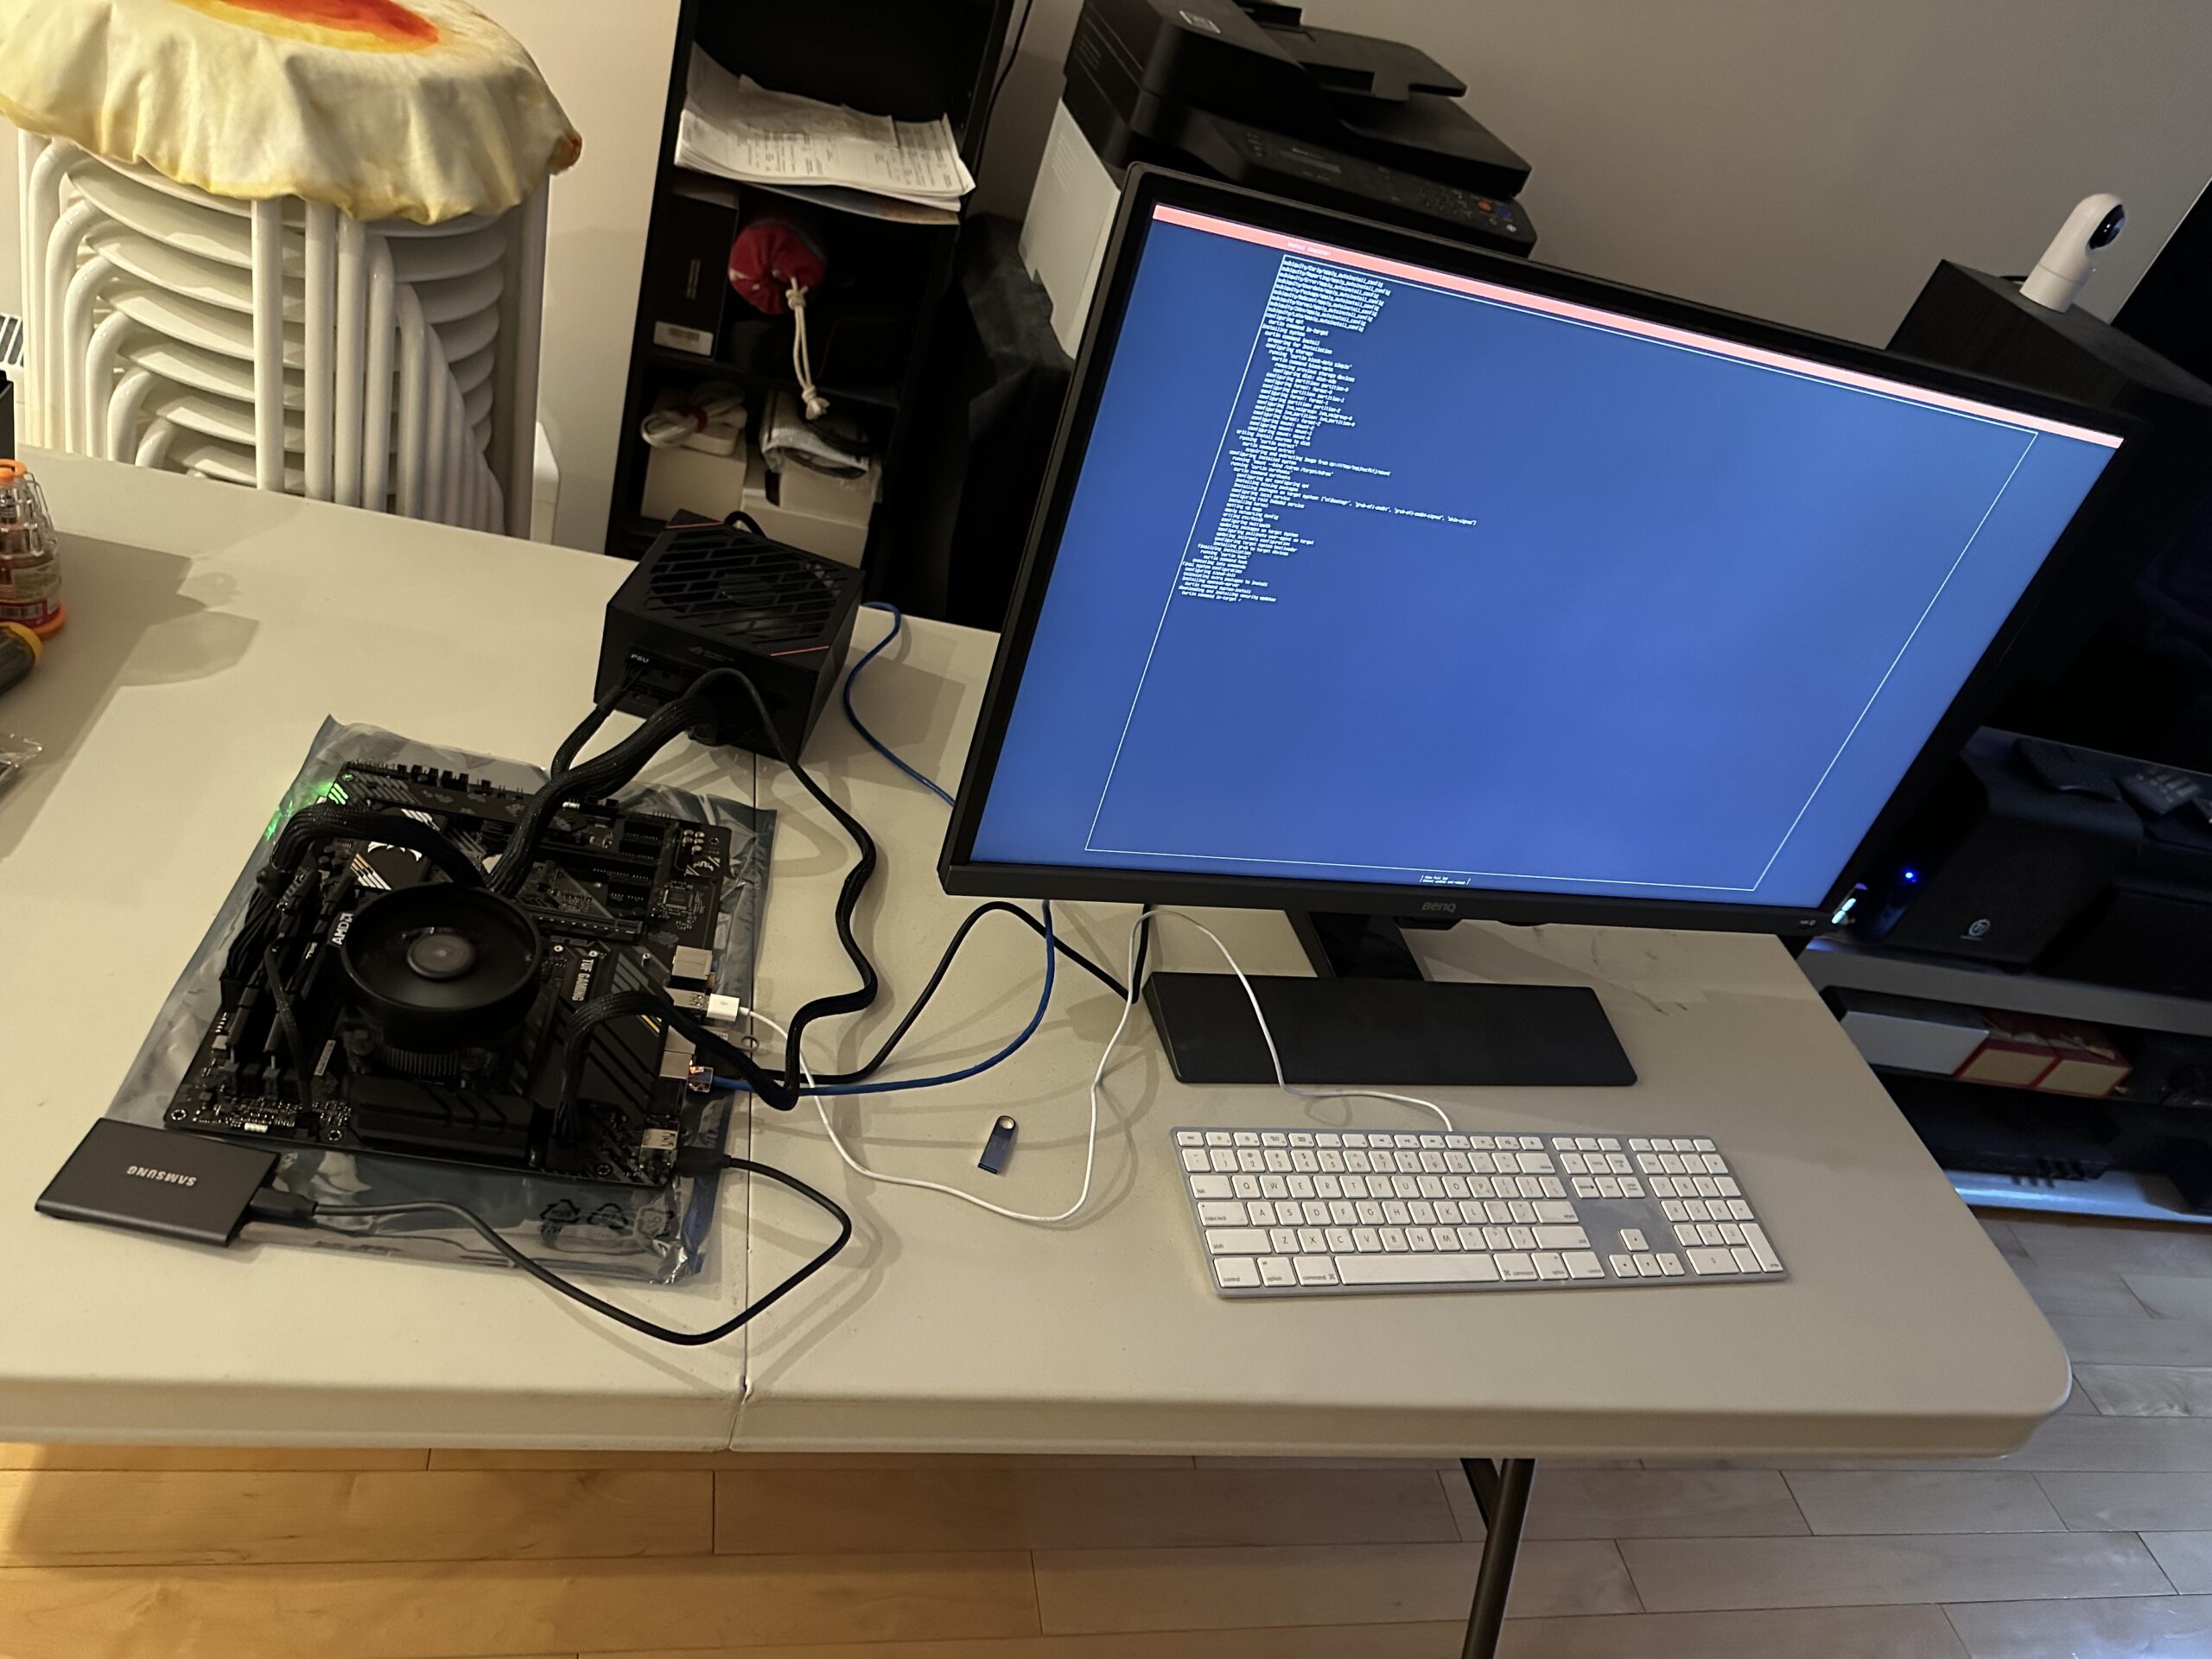
Test Setup
I quickly did a skeleton setup to make sure Ubuntu 22.04.01 Server Edition works with all hardware involved, especially the networking.
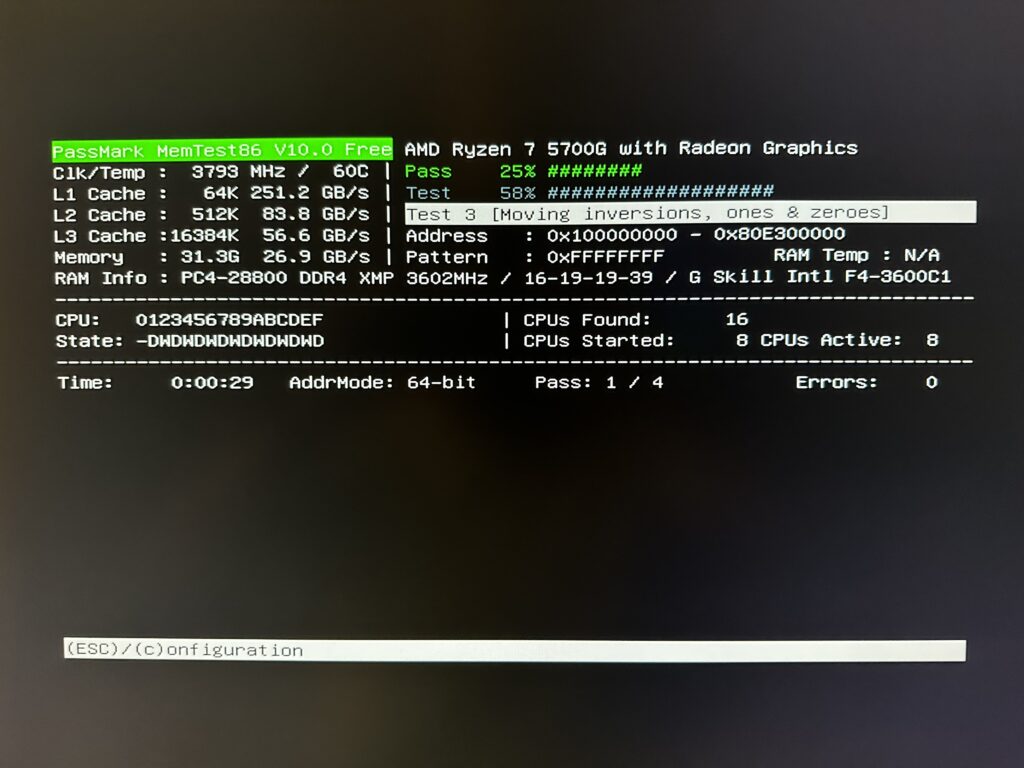
Memory Test
Once I know Ubuntu server is working good, I am now testing the server’s new 32GB DDR4 memory. This is running as I write this post and will let it run overnight.
The plan for tomorrow is to upgrade the current media server from Ubuntu 20.04.5 LTS to Ubuntu 22.04.1 LTS. Once this is done, I can then backup everything, and move the new hardware into the old casing and hope everything works.
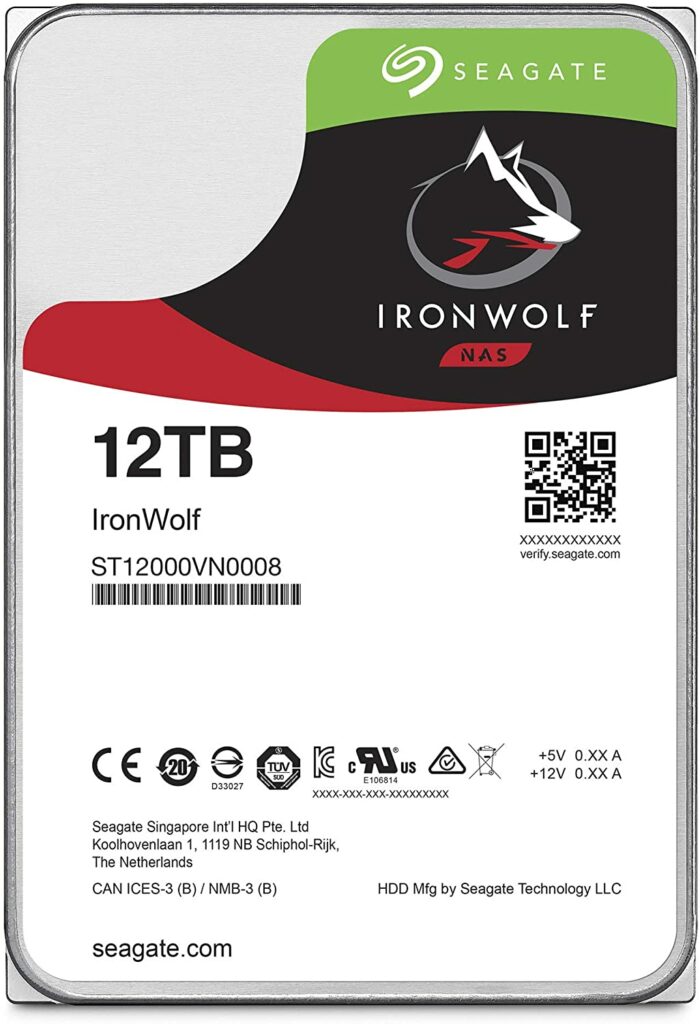
Our home Network Attached Storage (NAS) media server is going below 4 Terabytes of free space. The Seagate IronWolf 12TB hard drives were on sale with Amazon offering them below $300. I figure that I swap out two old 6TB drives with these new 12TB drives resulting in a net increase of a further 6TB of storage.
The last time this was done was around two years ago when I replaced 4TB and 6TB hard drives with 10TB hard drives.
So far the mdadm and LVM storage architecture has proven to be very flexible. I am able to mix drives of different sizes and able to grow our media storage volume over time.
Previously I had to make two swaps, each swap for each drive in the array. Effectively I am changing two 6TB drives for two 12TB drives because they are in a Raid 1 array. I cannot swap both at the same time, because I have to incrementally sync the data from the old drives to the new ones.
This has always been inconvenient because it means opening the physical server twice. However, this time I used my USB 3.0 HDD dock. I inserted one of two 12TB new drives into the dock, and then I temporarily created a three disks Raid 1 array. Once the sync is completed, which took 10+ hours, I remove one 6TB drive from the array configuration and I then physically replace both 6TB drives with both 12TB new drives in the server chassis, and place one old 6TB drive into the dock. The 6TB drive in the dock is the one that is still in the array configuration. I then add the second 12TB drive that is already in the server chassis to the three disk array. Once again, a sync is required to accommodate the second 12TB drive. This also took 10+ hours. Once the second sync is completed, I can finally remove the second 6TB drive in the dock from the array and have the array returned back to a two disk Raid 1 array.
The above description is probably quite confusing, but this technique allowed me to just have a single down time for the server instead of two when swapping hard drives in the server chassis.
There will be an additional downtime when I grow or resize the LVM volume and file system.
After this upgrade I should have the following Raid 1 (fully mirrored) arrays:
An array with 2 x 8TB
An array with 2 x 10TB
An array with 2 x 10TB
An array with 2 x 12TB
The above four arrays are combined into a logical volume using LVM that results in a total volume size of 40TB (fully mirrored) or a little over 36TiB of usable space (increasing from the old 31TiB).
I had to increase the size of my media LVM logical volume again. In a previous post, I provided the instructions. I have done this many times. However, this time around, I ran into a snag.
Apparently this is the first time I try to increase the logical volume after I implemented LVM caching, which I wrote about in this post.
The steps in the “Linux LVM Super Simple to Expand” post are the same right up to and including the step involving the resizing of the physical volume. Afterwards, in order to resize the logical volume, we first have to disable the cache temporarily.
Note that e2fsck and resize2fs will take some time, between thirty minutes to an hour each. Once the file system is resized, we can reattach the cache.
This past weekend my media NAS server was intolerably slow. When I investigated, I found out that one of the RAID-1 partitions is experiencing read errors and is timing out. I decided to risk a reboot and to my surprise the RAID-1 partition did not recover with one fail drive, but mdstat recorded with an inactive status, something like this:
md2 : inactive sdc1[0](S)
After some Google search, I found that I had to do the following to resurrect the md2 device.
This reactivated the md2 partition. I replaced the failed drive and re-added the new drive to the md2 device. The RAID-1 partition is now rebuilding.
The inactive state is a new experience for me, so this was a bit of a surprise.
During this exercise I also found out that the SATA connectors on my SATA add-on card were loose causing intermittent connections. I will have to find a way to address this in the future.
Two and half years ago, I performed a CPU and motherboard upgrade to my media server. You can read the account here.
Although the AMD Athlon 5350 APU was energy efficient, it proved to be under power for on demand video encoding when Plex wanted to transcode video for a player on a device that is not compatible with the playing video. For example, when an Apple TV (not 4K) wants to play 4K material from Plex on my media server, the server will have to transcode the 4K material to a compatible 1080p format. Unfortunately, this is very CPU intensive and if more than one person in the house hold is trying to do the same thing, which is not unheard of, this causes stuttered playback issues.
Given the choice between saving a few dollars a year versus usability, I choose usability. Therefore I started to research what I need for the upgrade. My goal is upgrade the system so that transcoding will not be an issue and I can also use the system for future video encoding of security camera footages. We can also use the system for background video encoding of family videos as well.
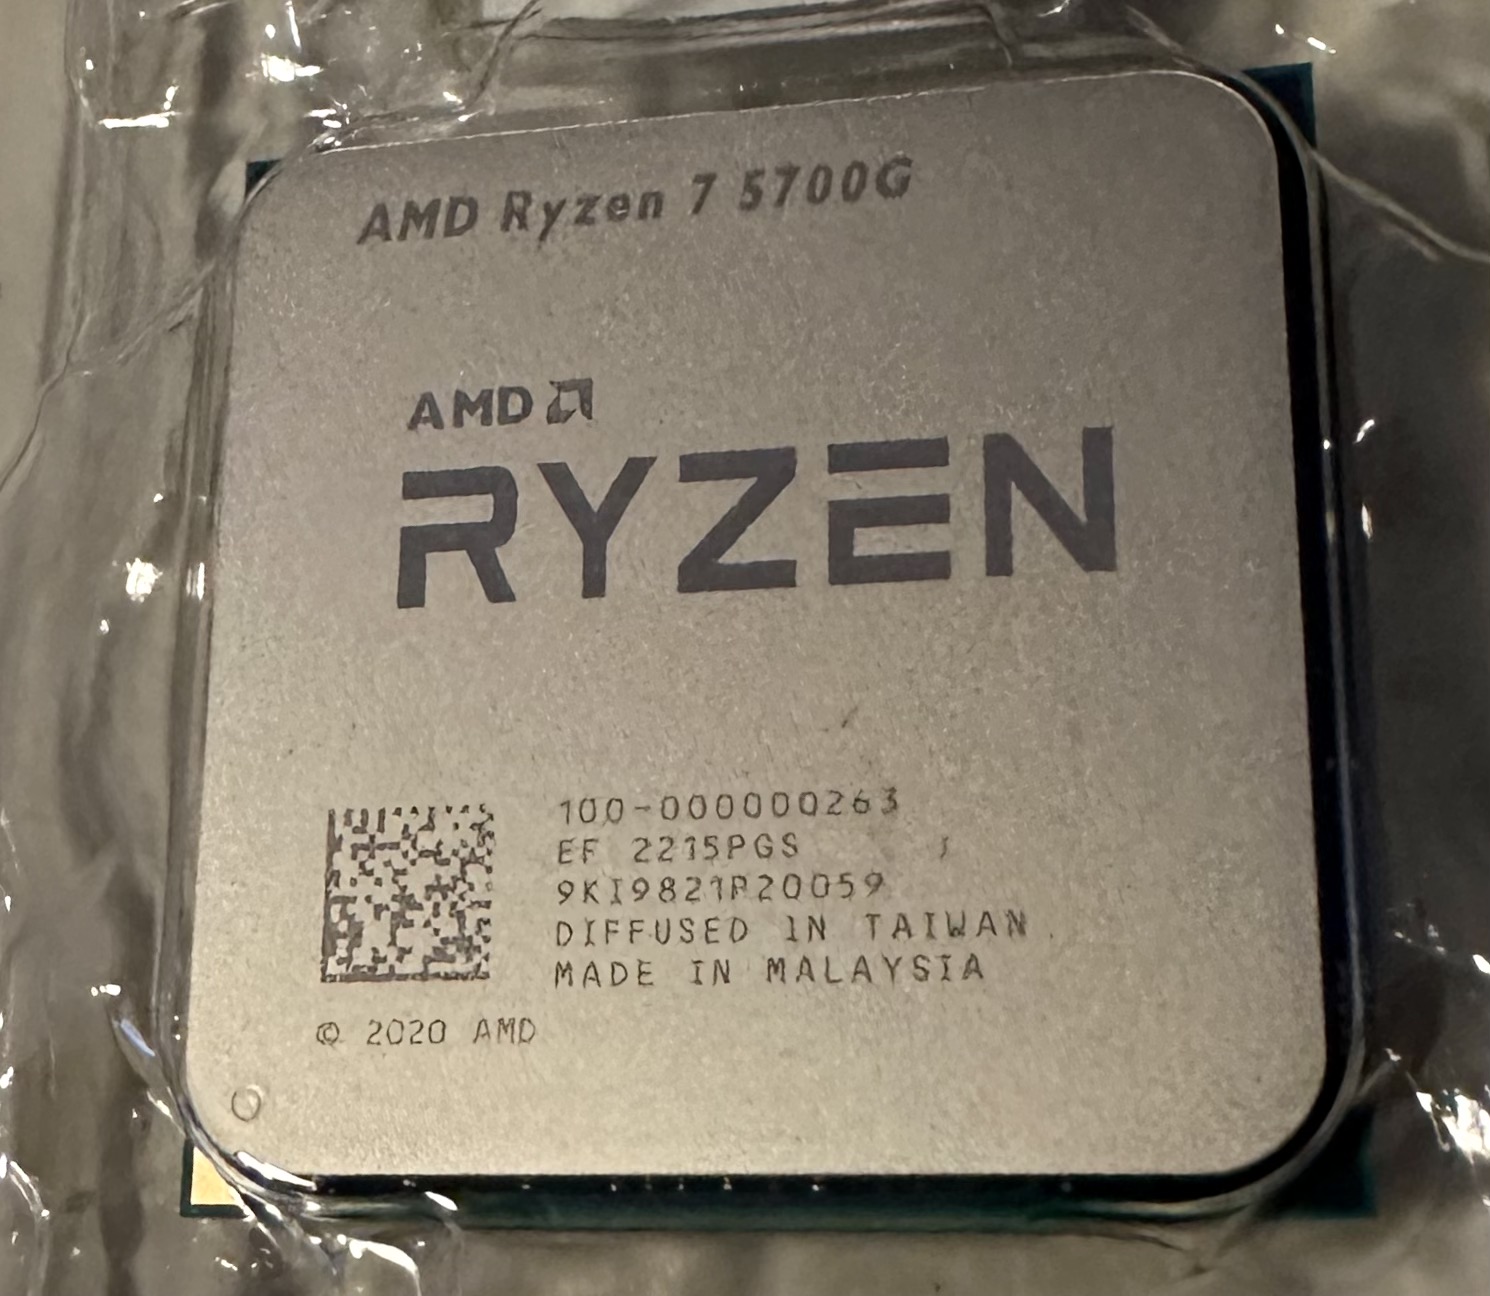
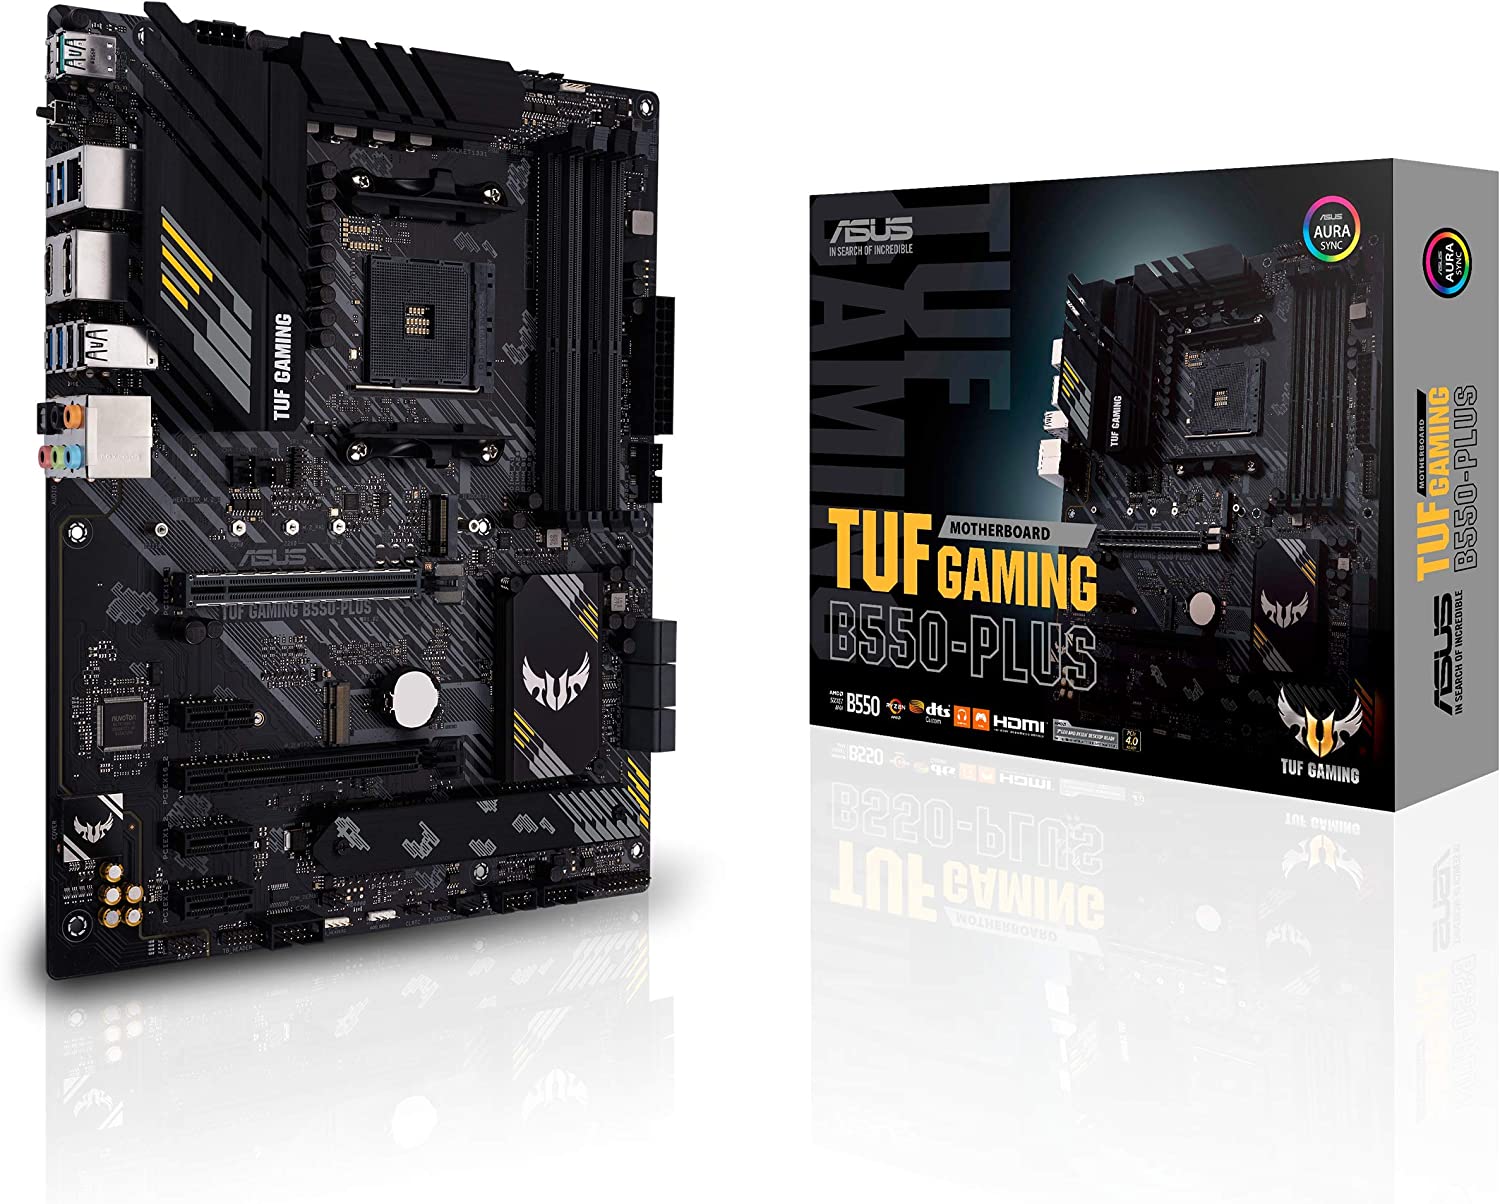
I continue to prefer the AMD brand, and decided on the following combo:
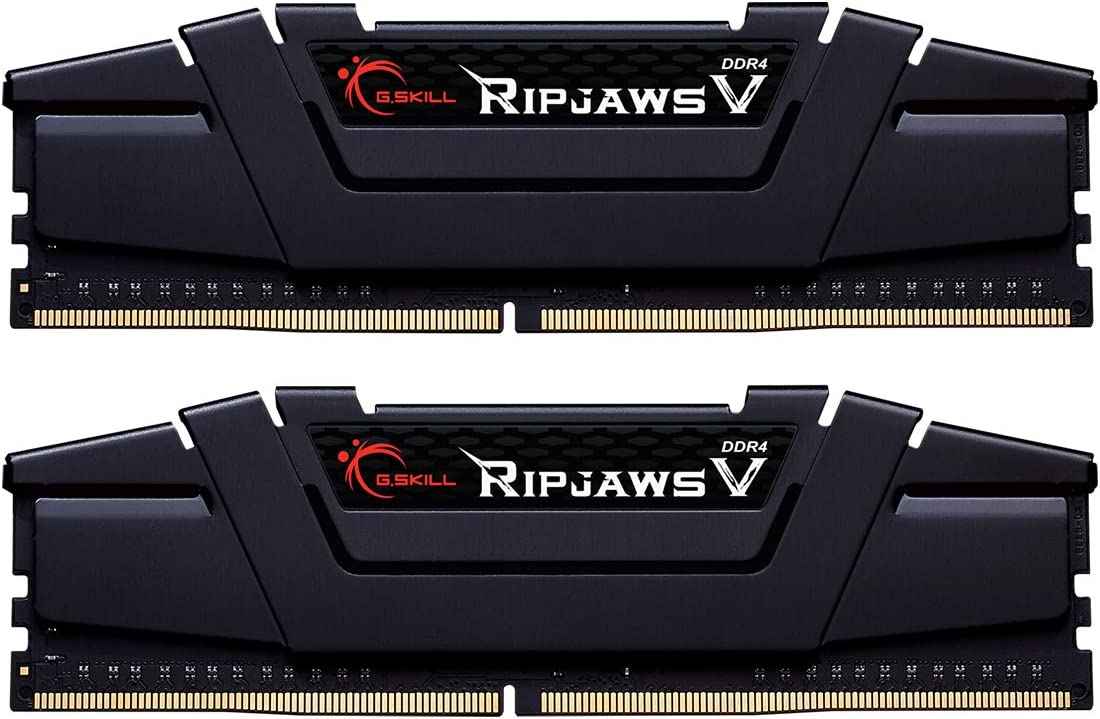
Corsair Vengeance LPX 16GB (2x8GB) DDR4 DRAM 2666MHz (CMK16GX4M2A2666C16)
The above were all purchased through Amazon and cost me a grand total of $473.24. The AMD CPU was the most expensive part costing almost $190.
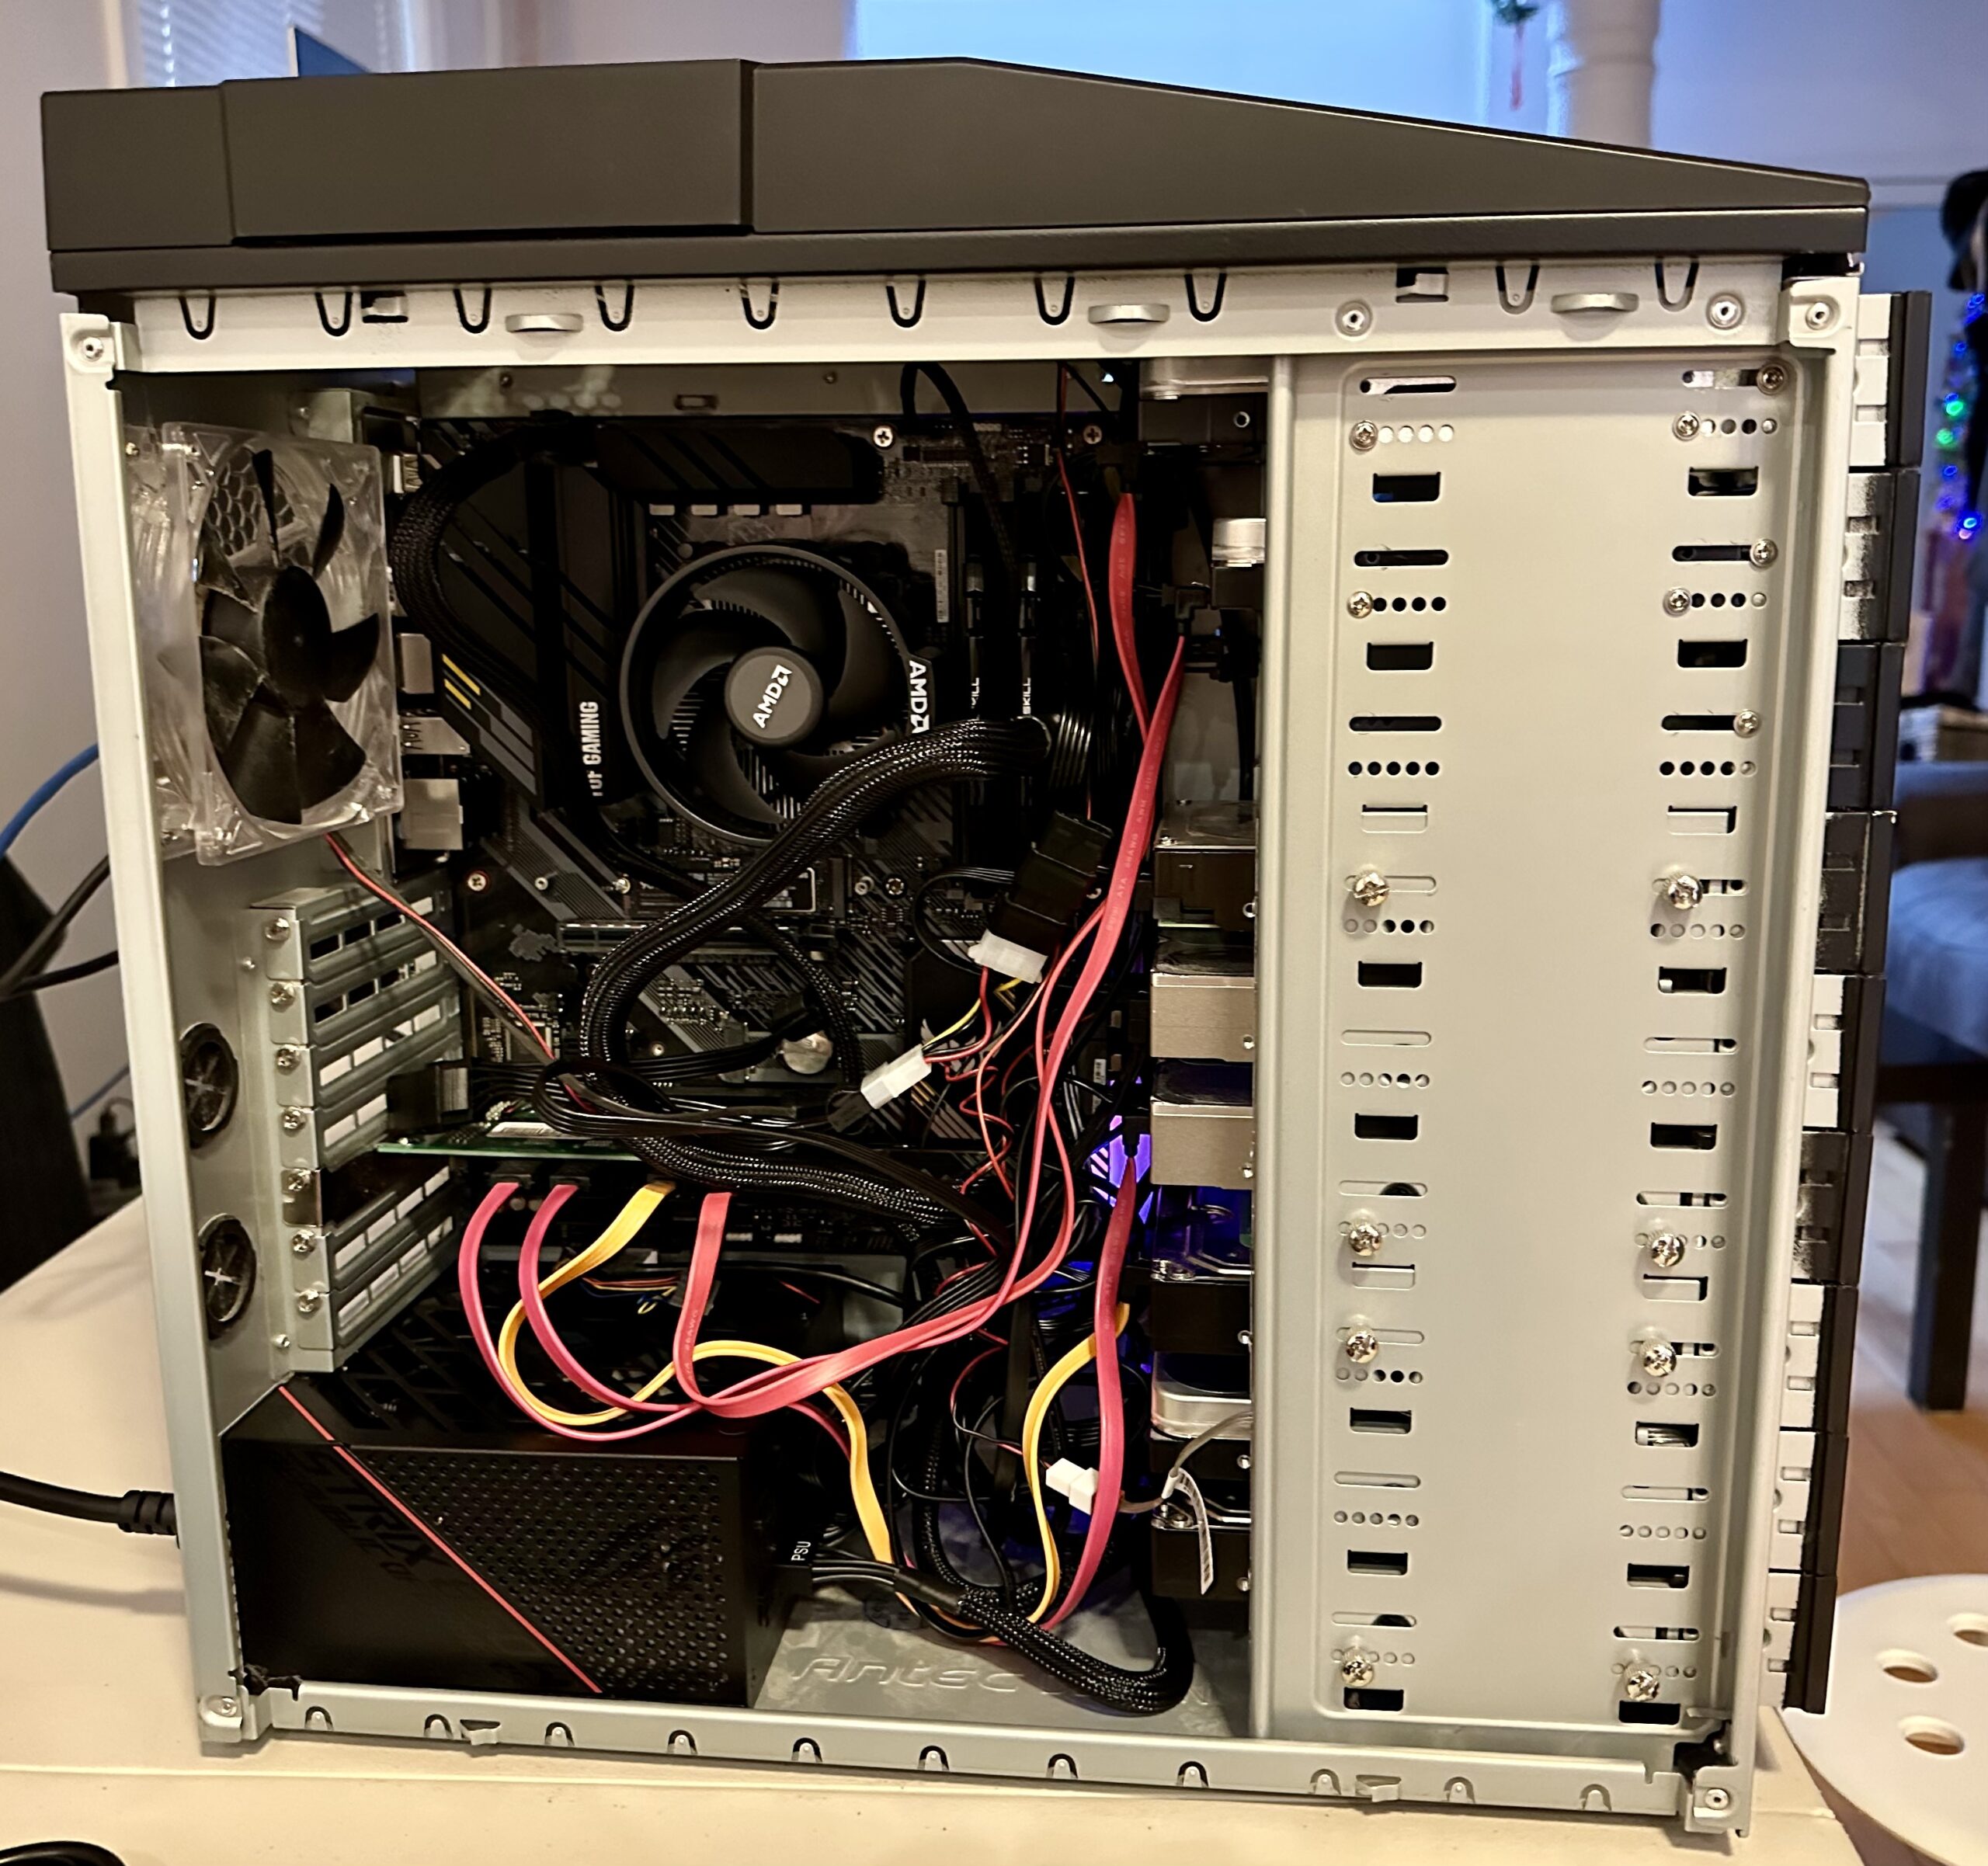
Taking out the old motherboard and CPU combo and replacing them with the new parts went smoothly. The side SATA connectors bucked against one of my HDD chassis so I opted not to use them, and decided to connect all of my RAID SATA connectors to the SATA accessory card that I purchased and discussed in this post.
Last time I did an upgrade like this, the Ubuntu operating system had no problems and booted without any issues. Unfortunately, this time is very different. After the machine posted, Ubuntu booted into a blank, black screen. After some research, I learned to reboot the Ubuntu kernel with the nomodeset option. I learned to press and hold the shift key so that I can select the desired kernel that I wanted via the GRUB menu, and I learned to press the ‘e’ key in the GRUB menu to modify the boot options. Finally pressing F10 to boot with the custom changes (effective for only one time).
The above trick got me a login prompt. After I gained access to the command prompt, I noticed that the kernel did not recognize any ethernet devices. I now have a machine that is not connected to the network. After some more Internet research I found out that the current 4.15 Linux Kernel that I have is insufficient to run on the Raven Ridge architecture, the AMD code name for the Zen CPU and Vega GPU combination on a single chip. I have to upgrade to the 4.18 Linux Kernel.
However I cannot upgrade through the Internet, because the machine is not on the Internet. I have to download the Debian packages on a USB stick with another machine and manually install them. At this point, I learned that you cannot simply download a single package for this. I had to decide whether to go with the Linux Mainline Kernel packages or go with the Ubuntu HWE (Hardware Enablement) packages. After reading through Ubuntu’s LTS Enablement Stack article, I decided to HWE packages. I found the linux-generic-hwe packages and their prerequisites on pkgs.org. This took several iterations as I did not get all the dependent packages on the first try.
Once all the packages were installed, the machine booted without the need for the nomodeset option. However, the internet interface device was still not there. I had to run the command netpath, to find out that new motherboard’s ethernet device’s logical name was em1. To register the new logical name, I had to edit /etc/network/interfaces file.
Finally, the machine booted with an active ethernet connection. As a sanity check, I executed:
Ensuring that my new media server has all the required kernel packages. We are still not done. The IP address of the server has changed, because we now have a different MAC address, so the DHCP server provisioned a different IP. I tried to change the Unifi Controller to provision a static IP address to this new server but I was unsuccessful. I suspect that the new server is also running the Unifi Controller may have something to do with it. Since the IP address has changed, I needed to update the following configurations:
Firewall rules
Unifi Controller name space configurations
Samba configurations because we only allow for local machines to share
All of this took from 4:30pm to 11:00pm last night, 6.5 hours worth of hardware assembly, research with Google, trial and error, and finally success. I cannot imagine if Google and the super helpful community forums did not existed. Fingers crossed that the new media server will run smoothly.