Media Server Upgrade 2022 (Part 2)

Part 1

In the first part of this post, I talked about making sure all the new hardware that I recently purchased works. Yesterday, upgrading from Ubuntu 20.04 LTS to 22.04 LTS was super simple. Unfortunately, that was the end of the easy part.

I thought I could just image by old boot drive and make a carbon copy of it on my new boot drive. My old boot drive is a simple SATA 512GB SSD, and my new boot drive is an NVMe M.2 1TB SSD plugged directly to the motherboard. The copying was pretty simple, but because the drives differ in size, I had to relayout the partition table with the new drive once the copy is completed. I did this with the parted command.

Unfortunately the new boot drive did not want to boot. At this point I had to do some research. The most helpful articles were:

Both of the above articles were an excellent refresher on how GRUB works. I have used GRUB since the beginning, but one gets super rusty when these types of tasks are only performed once every three or six years!

Instead of detailing what went wrong, I will just explain what I should have done. This way if I need it again in the future, it is here for my reference.

Step 1: Perform a backup of the old boot drive from a Live USB in shell mode. This is done on my server on a nightly basis. This method is clearly described on the Ubuntu Community Help Wiki.

Following this method I will end up with a compressed tar archive for my entire root directory, skipping some runtime and other unwanted directories.

Step 2: After installing a fresh install of the new Ubuntu LTS Server operating system on the new server and boot drive, I proceeded to backup the new boot with the same technique used in Step 1. I stored the backup of the new install on another external SSD drive that I have lying around. Also it is important that new boot drive partition layout of the new install contains a swap partition.

Step 3: I then restore the most recent backup (done in Step 1) of the old boot drive to the new boot drive. I then replaced the /boot/grub directory with the new contents from the new install which was backed up in Step 2. The new GRUB is already installed when we performed a brand new installation on the drive. We just want to make sure the boot partition matches the /boot/grub contents.

Step 4: We also need to fix up the /etc/fstab file because it contains references to drive devices from the old hardware. Paid special attention the main data partition and the swap partition. It should look something like this:

# /etc/fstab: static file system information.
#
# Use 'blkid' to print the universally unique identifier for a
# device; this may be used with UUID= as a more robust way to name devices
# that works even if disks are added and removed. See fstab(5).
#
# <file system> <mount point>   <type>  <options>       <dump>  <pass>
# / was on /dev/nvme1n1p2 during curtin installation
UUID=fc939be4-5292-4252-8120-7ef59b177e5b / ext4 defaults 0 1

# /boot/efi was on /dev/nvme0n1p1 during curtin installation
UUID=5187-A8C6 /boot/efi vfat defaults 0 1

# Swap partition
UUID=512d611e-6944-4a57-9748-ea68e9ec3fad	none	swap	sw	0	0

# /dev/mapper/airvideovg2-airvideo /mnt/airvideo ext4 rw,noatime 0 0
UUID=9e78425c-c1f3-4285-9fa1-96cac9114c55 /mnt/airvideo ext4 rw,noatime 0 0

Noticed that I also added the LVM logical volume for /mnt/airvideo, which is my RAID-1 array. The UUID can be obtained by the blkid command. Below is a sample output:

% blkid
/dev/sdf1: UUID="60024298-9915-3ad8-ae6c-ed7adc98ee62" UUID_SUB="fe08d23c-8e11-e02b-63f9-1bb806046db7" LABEL="avs:4" TYPE="linux_raid_member" PARTLABEL="primary" PARTUUID="552bdff7-182f-40f0-a378-844fdb549f07"
/dev/nvme0n1p1: UUID="r2rLMD-BEnc-wcza-yvro-chkB-1vB6-6Jtzgz" TYPE="LVM2_member" PARTLABEL="primary" PARTUUID="6c85af69-19a0-4720-9588-808bc0d818f7"
/dev/sdd1: UUID="34c6a19f-98ea-0188-bb3f-a5f5c3be238d" UUID_SUB="4174d106-cae4-d934-3ed4-5057531acb3c" LABEL="avs:3" TYPE="linux_raid_member" PARTLABEL="primary" PARTUUID="2fc4e9ad-be4b-48aa-8115-f32472e61005"
/dev/sdb1: UUID="ac438ac6-344a-656b-387f-017036b0fafa" UUID_SUB="0924dc67-cd3f-dec5-1814-ab46ebdf2fbe" LABEL="avs:1" TYPE="linux_raid_member" PARTUUID="29e7cfce-9e7b-4067-a0ca-453b39e0bd3d"
/dev/md4: UUID="gjbtdL-homY-wyRG-rUBw-lFgm-t0vZ-Gi8gSz" TYPE="LVM2_member"
/dev/md2: UUID="0Nky5e-52t6-b1uZ-GAIl-4Ior-XWTz-wFpHh1" TYPE="LVM2_member"
/dev/sdi1: UUID="5b483ac2-5b7f-4951-84b2-08adc602f705" BLOCK_SIZE="4096" TYPE="ext4" PARTLABEL="data" PARTUUID="e0515517-9fbb-4d8a-88ad-674622f20e00"
/dev/sdg1: UUID="3d1afb64-8785-74e6-f9be-b68600eebdd5" UUID_SUB="c146cd05-8ee8-5804-b921-6d87cdd4a092" LABEL="avs:2" TYPE="linux_raid_member" PARTLABEL="lvm" PARTUUID="2f25ec17-83c4-4c0b-8653-600283d58109"
/dev/sde1: UUID="34c6a19f-98ea-0188-bb3f-a5f5c3be238d" UUID_SUB="8aabfe5b-af16-6e07-17c2-3f3ceb1514e3" LABEL="avs:3" TYPE="linux_raid_member" PARTLABEL="primary" PARTUUID="2fc4e9ad-be4b-48aa-8115-f32472e61005"
/dev/sdc1: UUID="ac438ac6-344a-656b-387f-017036b0fafa" UUID_SUB="c188f680-01a8-d5b2-f8bc-9f1cc1fc3598" LABEL="avs:1" TYPE="linux_raid_member" PARTUUID="29e7cfce-9e7b-4067-a0ca-453b39e0bd3d"
/dev/nvme1n1p2: UUID="fc939be4-5292-4252-8120-7ef59b177e5b" BLOCK_SIZE="4096" TYPE="ext4" PARTUUID="912e805d-fe68-48f8-b845-9bba0e3e8c78"
/dev/nvme1n1p3: UUID="512d611e-6944-4a57-9748-ea68e9ec3fad" TYPE="swap" PARTLABEL="swap" PARTUUID="04ac46ff-74f3-499a-814d-32082f6596d2"
/dev/nvme1n1p1: UUID="5187-A8C6" BLOCK_SIZE="512" TYPE="vfat" PARTUUID="fe91a6b2-9cd3-46af-813a-b053a181af52"
/dev/sda1: UUID="3d1afb64-8785-74e6-f9be-b68600eebdd5" UUID_SUB="87fe80a1-4a79-67f3-273e-949e577dd5ee" LABEL="avs:2" TYPE="linux_raid_member" PARTUUID="c8dce45e-5134-4957-aee9-769fa9d11d1f"
/dev/md3: UUID="XEJI0m-PEmZ-VFiI-o4h0-bnQc-Y3Be-3QHB9n" TYPE="LVM2_member"
/dev/md1: UUID="usz0sA-yO01-tlPL-12j2-2C5r-Ukhc-9RLCaX" TYPE="LVM2_member"
/dev/mapper/airvideovg2-airvideo: UUID="9e78425c-c1f3-4285-9fa1-96cac9114c55" BLOCK_SIZE="4096" TYPE="ext4"
/dev/sdh1: UUID="60024298-9915-3ad8-ae6c-ed7adc98ee62" UUID_SUB="a1291844-6587-78b0-fcd1-65bc367068e5" LABEL="avs:4" TYPE="linux_raid_member" PARTLABEL="primary" PARTUUID="ed0274b9-21dc-49bf-bdda-566b2727ddc2"

Step 4B (Potentially): If the system boots in the “grub>” prompt, then we will have persuade grub to manually boot by providing the following at the prompt:

grub> set root=(hd9,gpt2)
grub> linux /boot/vmlinuz root=/dev/nvme1n1p2
grub> initrd /boot/initrd.img
grub> boot

To find the root value on the first line, you have use the ls command which is explained in this article. The root parameter on the linux line references the partition which the root directory is mounted. In my case, it was /dev/nvme1n1p2.

After I rebooted, I reinstalled GRUB with the following as super user:

grub-install /dev/nvme1n1

It may also be required to update our initramfs using:

update-initramfs -c -k all

Step 5: At this point the system should reboot and all of the old server’s content should now be on the old hardware. Unfortunately we will need to fix the network interface.

First obtain the MAC address of the network interface using:

% sudo lshw -C network | grep serial   
    serial: 04:42:1a:05:d3:c4

And then we will have to edit the /etc/netplan/00-installer-config.yaml file.

% cat /etc/netplan/00-installer-config.yaml 
# This is the network config written by 'subiquity'
network:
  ethernets:
    enp6s0:
      dhcp4: true
      match:
        macaddress: 04:42:1a:05:d3:c4
      set-name: enp6s0
  version: 2

Ensuring the MAC address matches from lshw and that the name is the same as the old system. The name in this example is enp6s0. We then need to execute the following commands to generate the interface.

netplan generate
netplan apply

We need to ensure the name matches because many services on the server have configurations that references the interface name, such as:

  • Configurations in /var/network/interfaces
  • Samba (SMB) (/etc/samba/smb.conf)
  • Pihole (/etc/pihole/setupVars.conf)
  • Homebridge (/var/lib/homebridge/config.json)

Step 6: Fix the router provisioning DHCP IP addresses so that the new server has the same fixed IP address as the old server. This is important because there may be firewall rules referencing this IP address directly. The hostname should have been automatically restored when we restored the partition in Step 3.

Step 7: Our final step is to test the various services and ensure they are working properly. These include:

  • Mail
  • Our web site lufamily.ca
  • Homebridge
  • Plex
  • Pihole (DNS server)
  • SMB (File sharing)

Finally the new system is completed!

New system all up and running!

Media Server Upgrade 2022

On May 15th, 2019 (more than three years ago), I performed a performance boost to my media server by upgrading its CPU, Motherboard, and Memory. You can read that experience in this post.

Today, I am going to be doing the same. It looks like we are on a cadence of every 3 years or so to do a spec bump. This time around we are also changing the same items, but will include the power supply as well in the swap. I also decided to swap the boot drive hardware from an old SSD drive to an NVME drive. All of this resulted in the following hardware acquisitions, all from Amazon, which I find them to have lower pricing (when factoring free shipping through Prime), than Newegg even during Black Friday and Cyber Monday offers.

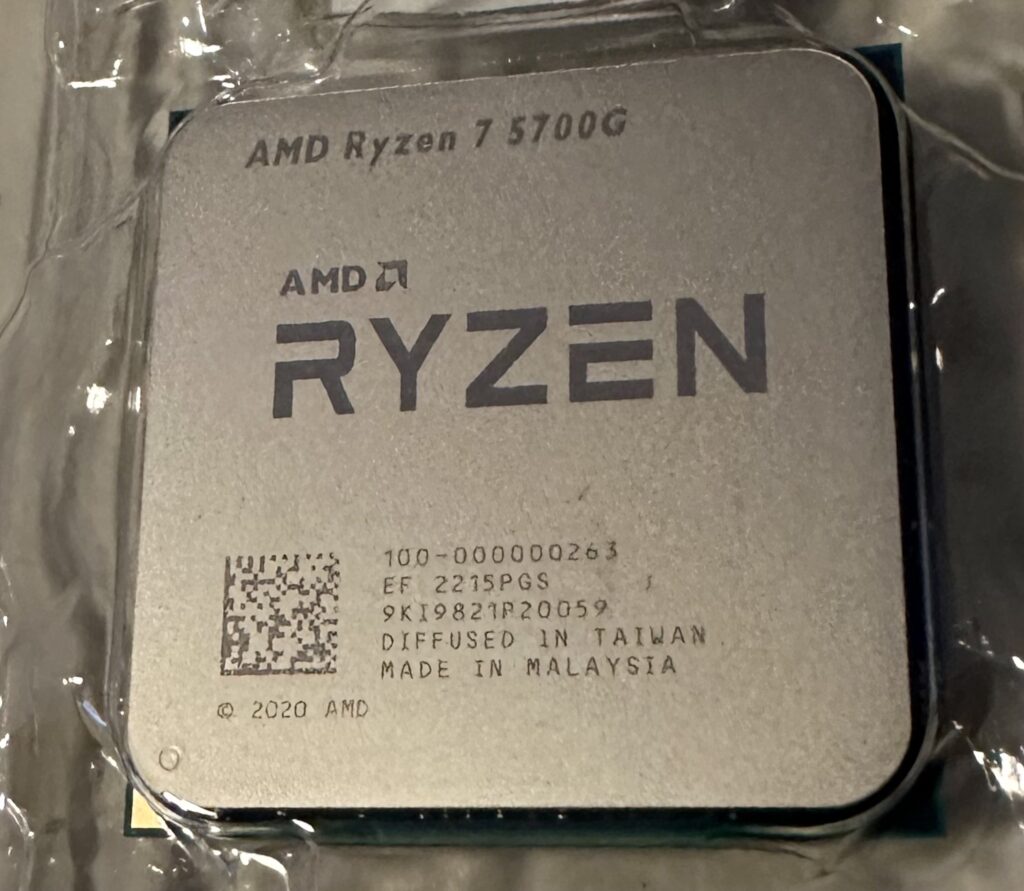
  • AMD Ryzen 7 5700G 8-Core, 16-Thread Unlocked Desktop Processor with Radeon Graphics
  • ASUS TUF GAMING B550-PLUS AMD AM4 (3rd Gen Ryzen™)
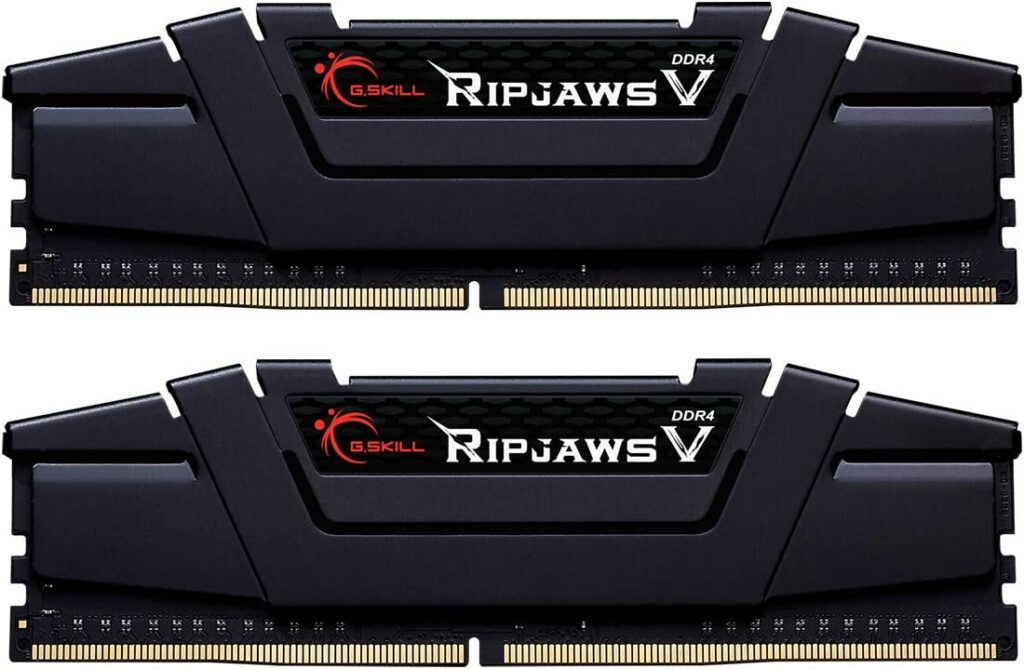
  • G.SKILL Ripjaws V Series DDR4 3600MHz 32GB(16GBx2) Memory Kit
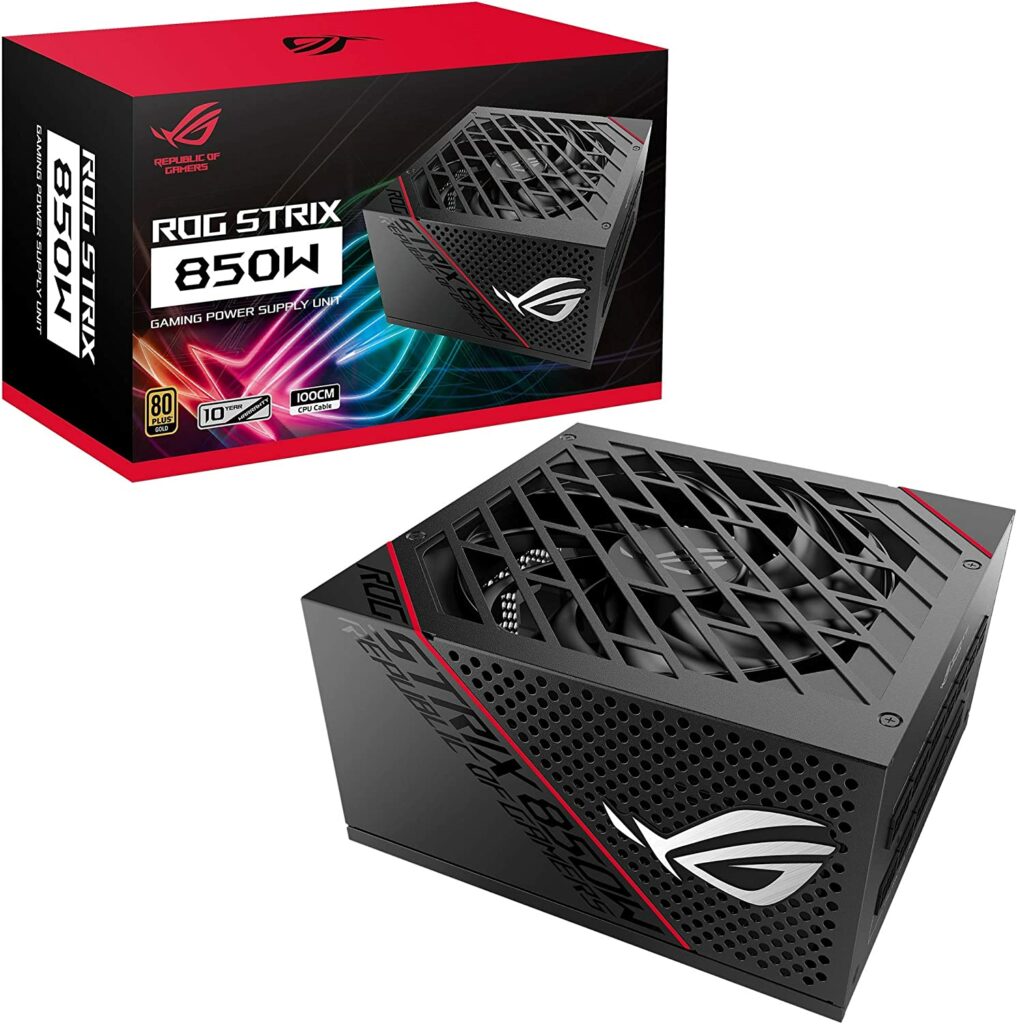
  • ASUS ROG Strix 850W Gold PSU
  • Samsung 980 PRO SSD 1TB – M.2 NVMe

The above totalled $1045.60 CAD.

The plan is to spend the time today to roughly test out all the new hardware.

Test Setup

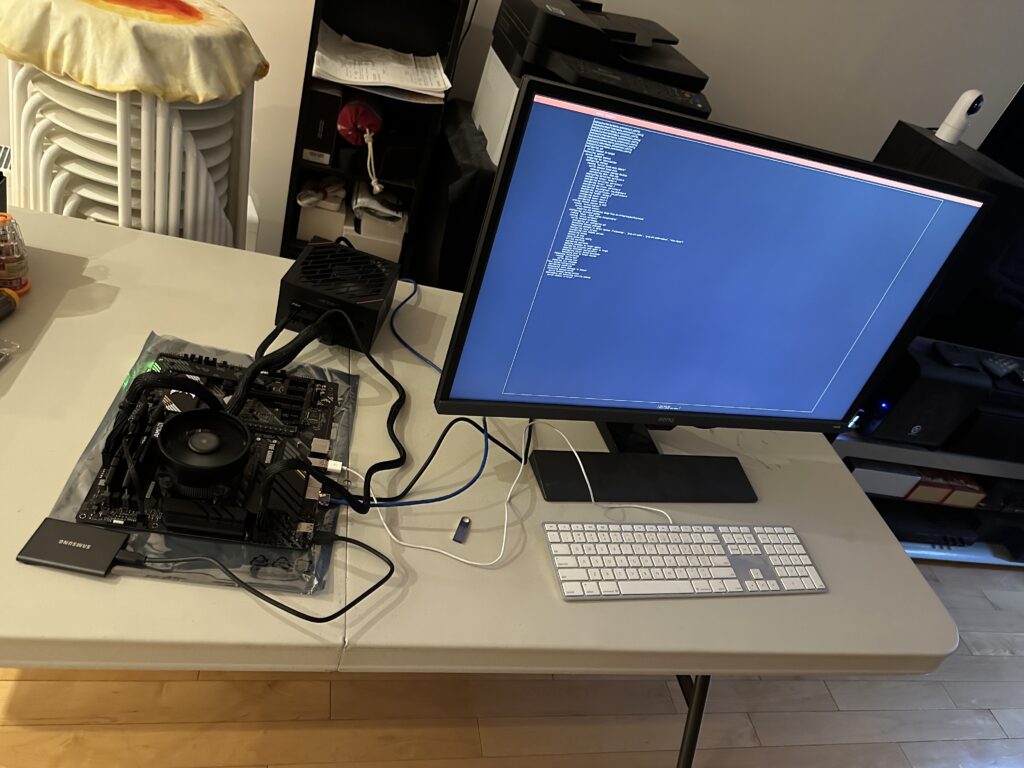
I quickly did a skeleton setup to make sure Ubuntu 22.04.01 Server Edition works with all hardware involved, especially the networking.

Memory Test

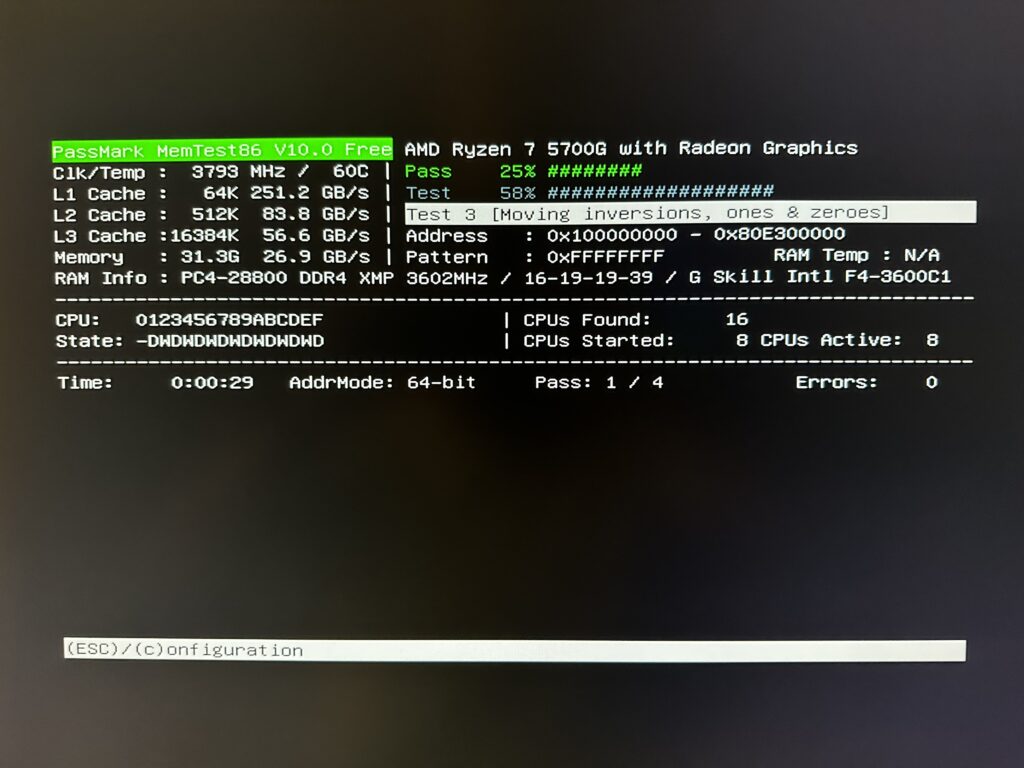
Once I know Ubuntu server is working good, I am now testing the server’s new 32GB DDR4 memory. This is running as I write this post and will let it run overnight.

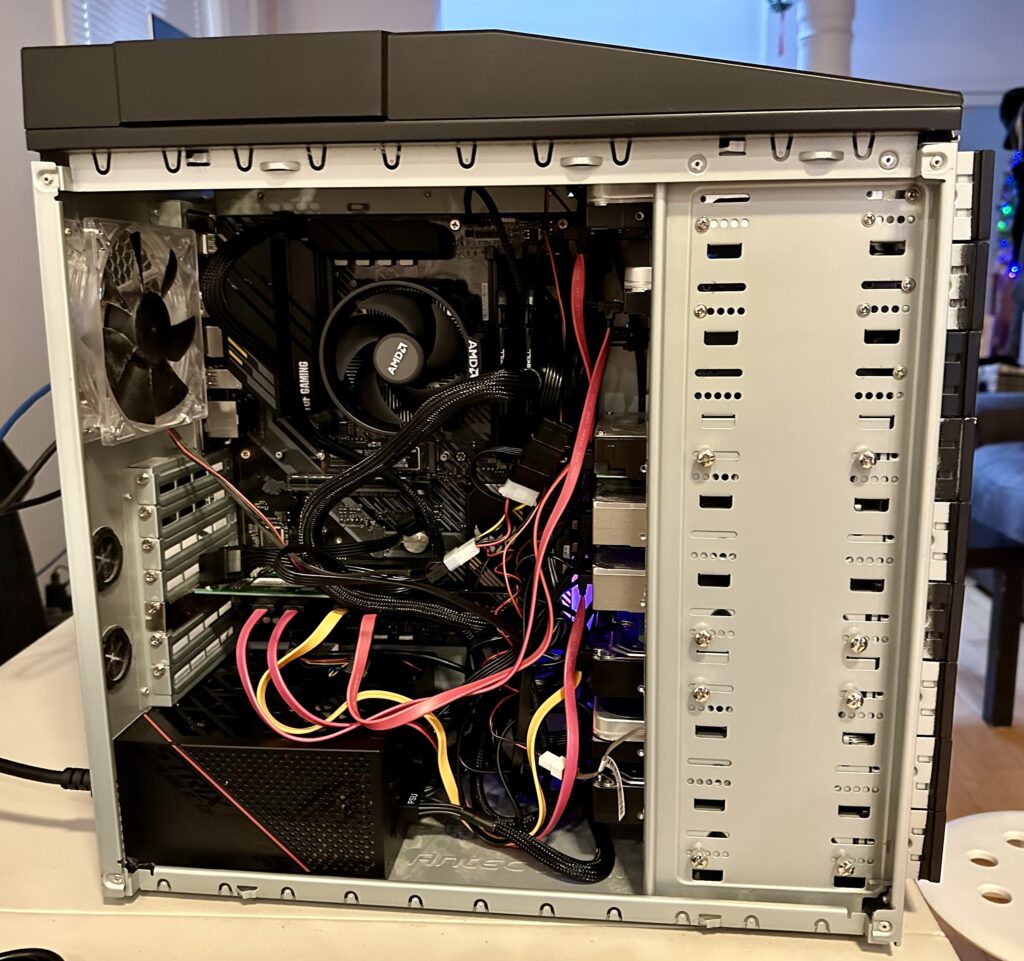
The plan for tomorrow is to upgrade the current media server from Ubuntu 20.04.5 LTS to Ubuntu 22.04.1 LTS. Once this is done, I can then backup everything, and move the new hardware into the old casing and hope everything works.

Part 2

Length of Days Throughout the Year

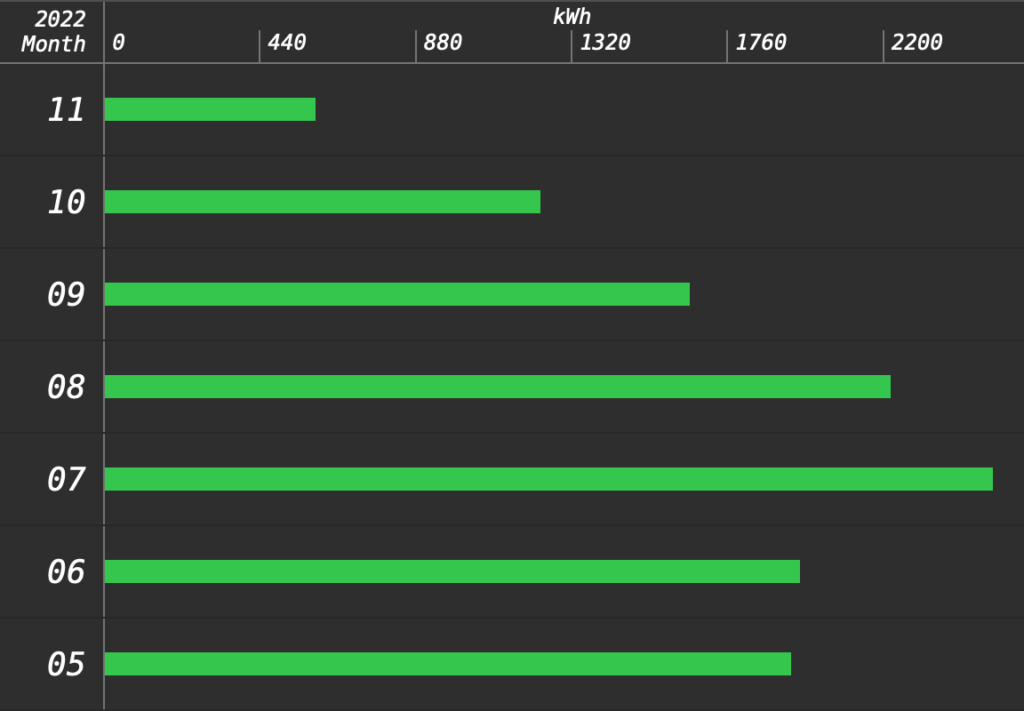
Winter has arrived, and our solar production is seeing a sizeable drop in production. Although the month of November is still incomplete, here is our current solar production history so far:

Historical monthly solar production

We were operating at 50% utilization when on of our SolarEdge inverters went down in June, and as pointed out earlier, November is only about 75% completed as of the time of the writing of this post.

Even with the above discrepancies in mind, we can see a gradual reduction in generation from the summer months. From a peak of over 2500 kWh in July to just around 1230 kWh in the month of October. That is half of our peak from July. Based on the November trend, we will have even less.

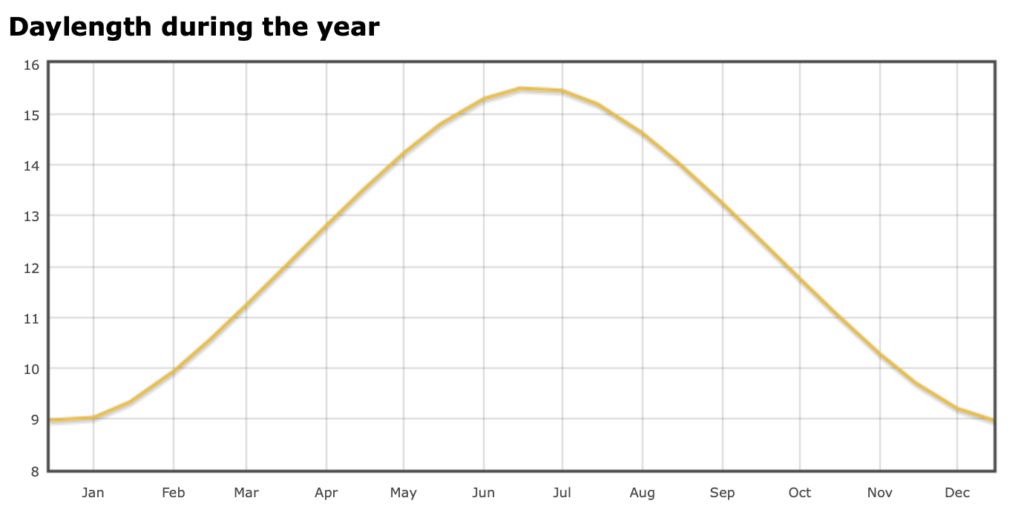
These reductions got me curious to the length of day variation through the year, and I found this handy chart:

Number of hours when the sun is out throughout the year

The above chart is customized by our home location of course. From trough to peak, there is a difference of about a 6.5 hours! I must say, I knew there is a difference between the longest and shortest days, but seeing number was a bit of a shock. These short days are made worst by lowest sun elevation on our Southern horizon during the winter months.

It will be interesting to see how much power we end up generating during December which will be our lowest generating month, per the above chart.

Solar with Snow

The past few days we have met our first signs of Canadian winter. Although winter has not officially arrived, we have received at least a couple of snow dustings that resulted in enough accumulation on the roof to cover the solar panels.

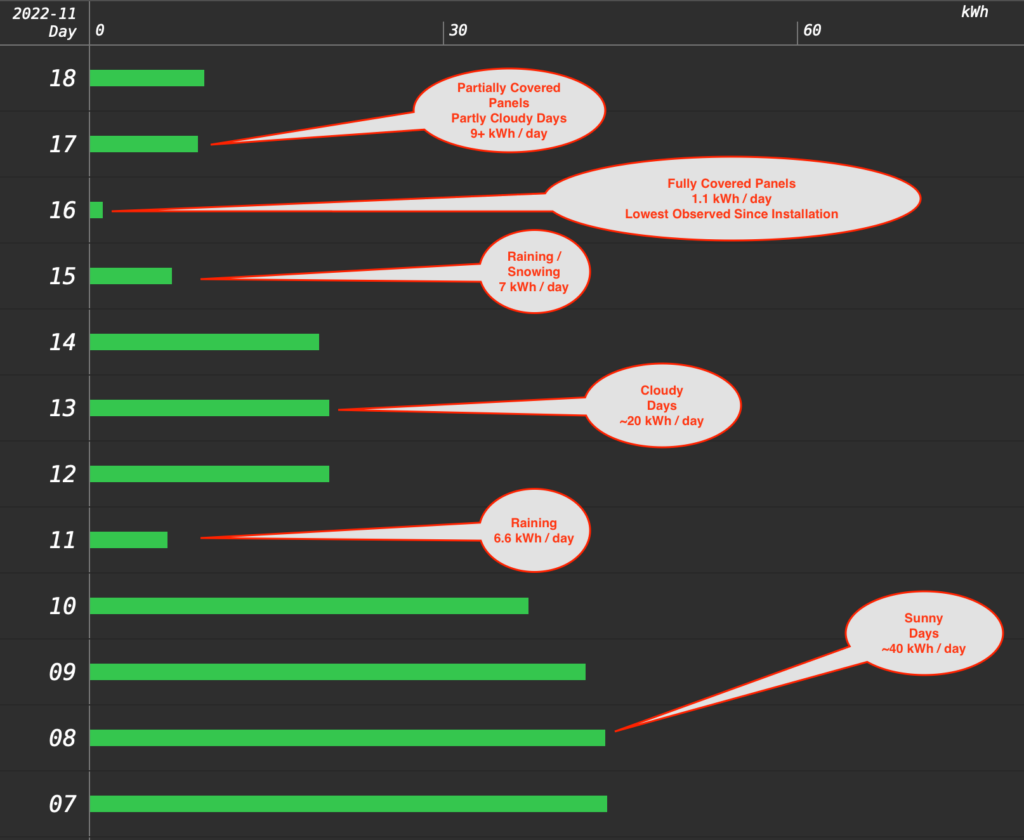
I wanted to record our observation with this “new” experience in terms of the impact to power generation. Below is a chart on solar power generation in the past few days with different weather conditions during the shorter days of our Canadian autumn.

Solar power generation from Nov. 07 to 18 with different weather

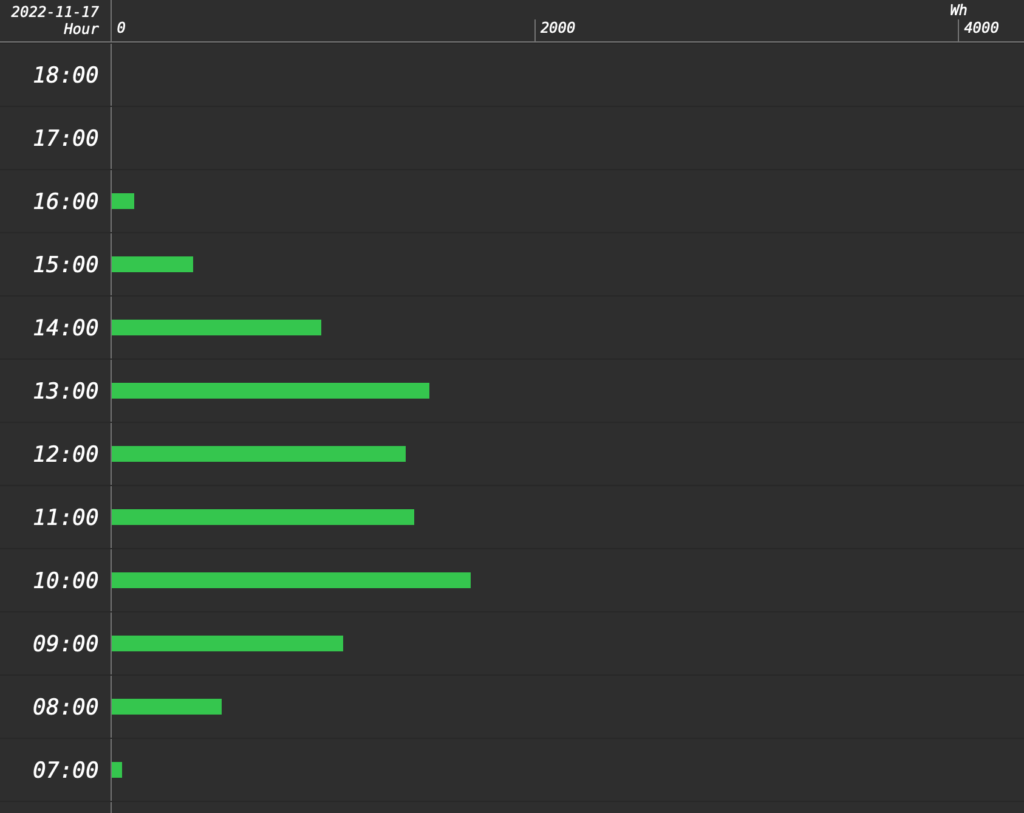
Our highest recorded power per day is around ~110 kWh during a nice sunny, long, summer day in June. We are now facing shorter days with the panels active from around 8am to a little after 3pm, as the chart below shows.

Solar generation through out the day during Nov. 17 (partially cloudy)

Below you will see what my roof looks like today on November the 18th. Click the video below to see the entire roof.

Partially covered roof on a cloudy November 18th (click to play)

You can see that we have some panels that are fully exposed, and some that are partially covered. The solar optimizers are optimizing away during these times, and when the sun comes out, we can still sometimes generate above 3500W of instantaneous solar power.

During these dark and short days, we are now definitely eating into our stored electrical credits from Alectra Utilities.

XWPro Configurations

This is going to be a fairly technical post on the topic of my Conext XWPro battery inverter configurations. I am writing this post primarily to document my experience and my current rationale, and for my future, forgetful self.

Previously I had my Grid Support SOC (State of Charge) and the Recharge SOC set to 40%. With these settings, the battery will be used (anytime during the day and night) until it discharged to 40%, which will initiate a charge cycle that will charge the battery back to 100%. Under normal circumstances, the battery will typically discharge during a very cloudy day, but mostly in the evenings and at night.

I had the above settings because I stupidly thought I should stay off the grid as much as possible. The intent is to try to charge the batteries in the evening during off peak hours, and not to use the grid at all during on peak hours. These settings certainly accomplish this, but at the expense of shortening battery life. Another big downside with this approach is that charging the battery through the Conext XWPro inverters only achieves around 83% efficiency. This observation is based on my real-time data observations from the actual inverters.

Yesterday I noticed that my batteries are reporting a State of Health (SOH) drop to 99% instead of 100%. This was a bit alarming given only 6 months of uses. I also realized from the Alectra invoices that Time of Use (ToU) is not a factor in Alectra’s billing calculations. All of this resulted in a shift in my thinking. We will now use the grid as our primary battery, and preserve our Lithium Ion as our backup batteries only. Time shifting of loads will no longer be my primary concern since it is no longer worth it with zero benefits.

To do this, I have set the Grid Support SOC to 90% and the Recharge SOC set to 85%. This way immediately after a charge cycle, the battery will be used a little bit to draw down from 100% to 90%. This has two benefits in my opinion. The first is to get some charge flow through the batteries, so it is not only sitting there. The second is that it leaves a 10% SOC gap. If we have a power failure during a sunny day, there is space for the excess solar production to go without tripping the solar inverters.

The 5% gap between Grid Support and Recharge is currently a guess. My thinking is that over time the charge on the Lithium batteries will leak and it will trigger a recharge cycle. Of course I did not want to set the Recharge the same as the Grid Support, because this will cause a constant recharge loop which defeats the purpose of preserving battery life. I do not know how long it will take to naturally draw down from 90% to 85%. This is why it is still a guess at this point. If there is no leakage, which is great news because it shows how good the batteries are, then I will have to trigger a recharge cycle at least once a month just to keep the charge flow within the battery’s chemistry.

For now I will live with the new settings and see how often the battery cycles. If it only cycles once every one or two months, then that is perfect. If it does not cycle through more than three months, then I may have to add the monthly charging cycle logic into my custom controller.

Electricity Bills & Natural Gas Rates

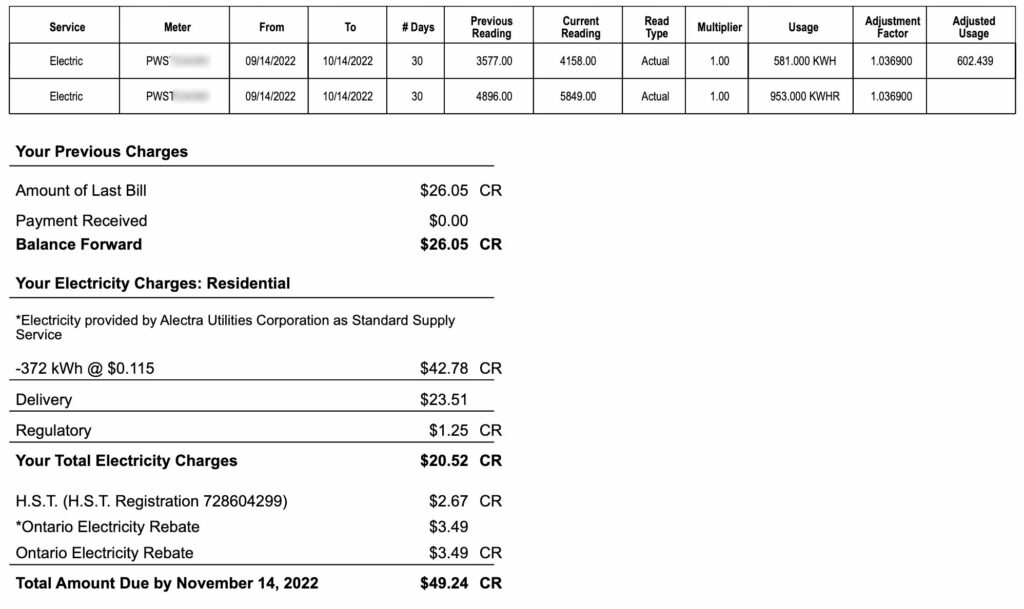
Since our solar installation, and our live commissioning of our net metering with Alectra Utilities, our last payment to Alectra was in May, 2022. Since then, we have not paid a dime to Alectra, but instead we are sitting on a nice credit as the attached snapshot of our bill showed:

October Alectra Bill

As the above bill indicates, we created 372 kWh during the 30 days of this last bill that we received. I was also surprised by the fact that during the summer months, we were still able to generate excess while running our AC without compromising our comfort requirements. The extended summer days and the higher angle of sun’s elevation were very conducive to solar production.

I also noticed our natural gas prices increased by 110% from the same time last year. Below is directly from the Ontario Energy Board (OEB):

Gas Prices

Our goal now is to try to switch our heating source from natural gas to electric, so that we can use our excess electricity for this winter’s heating needs. This makes total sense, since our electricity is almost free, while natural gas is not!

There are reports out there saying the rate increase is significantly less. This is because they are comparing against the July, 2022 rates and not the October, 2021 rates, so read carefully.

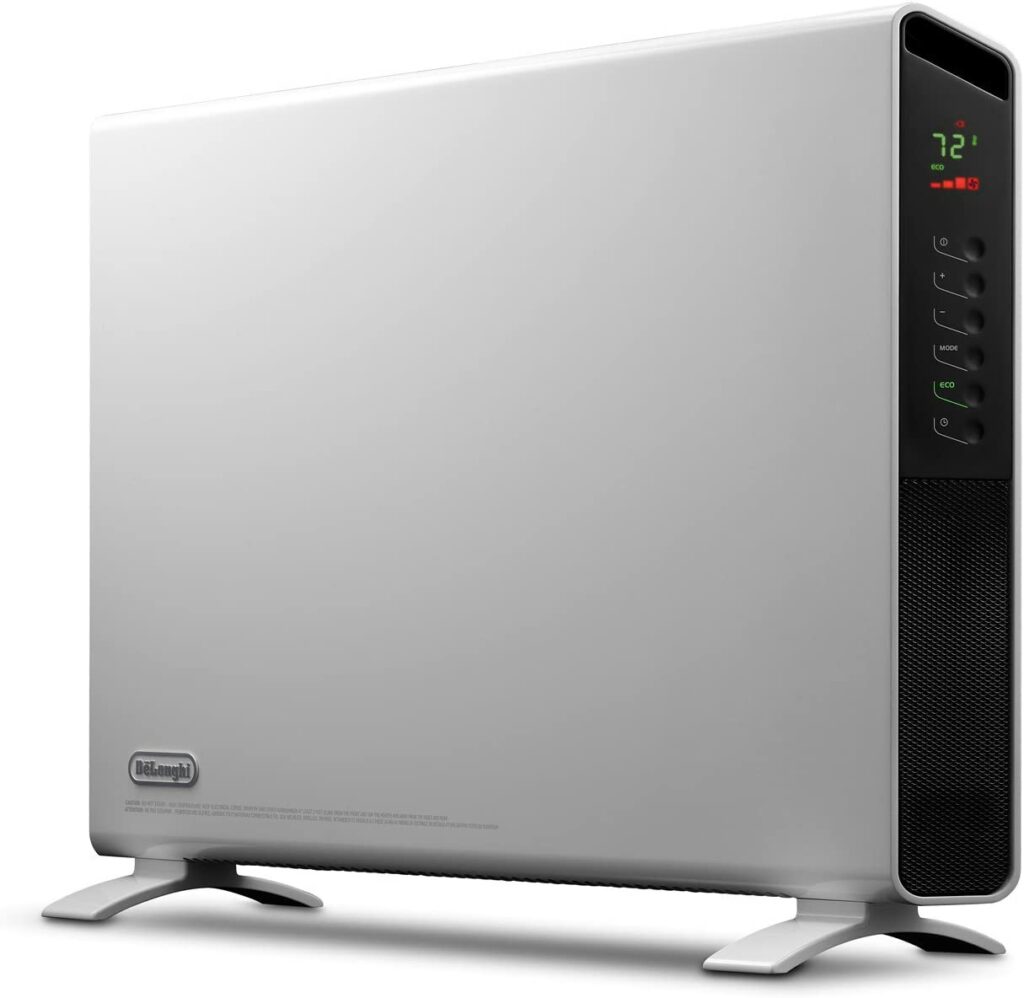
I went on Amazon and purchased three of these electric based heaters.

De’Longhi Slim Style HCX9115ECA Convector Panel Heater

At time of purchase, they were $219 CAD each. We tried the cheaper ones, but their fans were simply too loud. These ones are nice and quiet with a very user friendly interface.

The master plan is to set the house thermostat to 18ºC, so that it acts as a backup heating source. While these electric panels will try to heat the house during most of the winter days. We will see how this plan goes. I would consider this to be a win if we can reduce our natural gas consumption this winter by more than 50%, which will effectively normalize the rate increase. In the end, these electric heaters may not be enough. Time will tell.

I also investigated the possibility of installing a centralized heat pump, but current technology is limited to -20ºC outside temperature. I decided to table this for now until the technology matures a bit more. I want a solution that can transfer heat from -30ºC outside to indoors.

Our next plan is to research our water heating needs and to see if there are any electric based tankless solutions out there.

Wish us luck and I’ll keep everyone updated!

Update: November 14, 2022

Previously I got the rates from the Enbridge web site. Below is an actual excerpt from my Enbridge bills. However you compare, the increase is significant.

April vs July Gas Rates in 2022 from my invoices

Update: November 26, 2022

Found this CTV article.