Another NAS Storage Upgrade

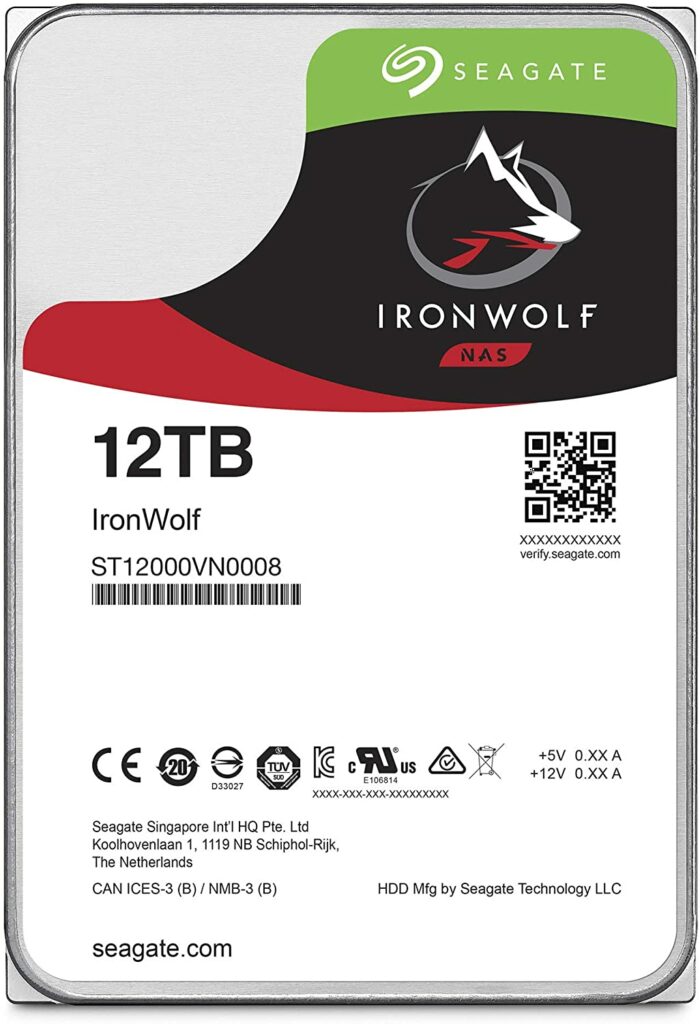
Our home Network Attached Storage (NAS) media server is going below 4 Terabytes of free space. The Seagate IronWolf 12TB hard drives were on sale with Amazon offering them below $300. I figure that I swap out two old 6TB drives with these new 12TB drives resulting in a net increase of a further 6TB of storage.

The last time this was done was around two years ago when I replaced 4TB and 6TB hard drives with 10TB hard drives.

So far the mdadm and LVM storage architecture has proven to be very flexible. I am able to mix drives of different sizes and able to grow our media storage volume over time.

Previously I had to make two swaps, each swap for each drive in the array. Effectively I am changing two 6TB drives for two 12TB drives because they are in a Raid 1 array. I cannot swap both at the same time, because I have to incrementally sync the data from the old drives to the new ones.

This has always been inconvenient because it means opening the physical server twice. However, this time I used my USB 3.0 HDD dock. I inserted one of two 12TB new drives into the dock, and then I temporarily created a three disks Raid 1 array. Once the sync is completed, which took 10+ hours, I remove one 6TB drive from the array configuration and I then physically replace both 6TB drives with both 12TB new drives in the server chassis, and place one old 6TB drive into the dock. The 6TB drive in the dock is the one that is still in the array configuration. I then add the second 12TB drive that is already in the server chassis to the three disk array. Once again, a sync is required to accommodate the second 12TB drive. This also took 10+ hours. Once the second sync is completed, I can finally remove the second 6TB drive in the dock from the array and have the array returned back to a two disk Raid 1 array.

The above description is probably quite confusing, but this technique allowed me to just have a single down time for the server instead of two when swapping hard drives in the server chassis.

There will be an additional downtime when I grow or resize the LVM volume and file system.

After this upgrade I should have the following Raid 1 (fully mirrored) arrays:

  • An array with 2 x 8TB
  • An array with 2 x 10TB
  • An array with 2 x 10TB
  • An array with 2 x 12TB

The above four arrays are combined into a logical volume using LVM that results in a total volume size of 40TB (fully mirrored) or a little over 36TiB of usable space (increasing from the old 31TiB).

% df -h
Filesystem                        Size  Used Avail Use% Mounted on
udev                              7.7G     0  7.7G   0% /dev
tmpfs                             1.6G  3.4M  1.6G   1% /run
/dev/sdj1                         454G   64G  367G  15% /
tmpfs                             7.7G   37M  7.7G   1% /dev/shm
tmpfs                             5.0M  4.0K  5.0M   1% /run/lock
tmpfs                             7.7G     0  7.7G   0% /sys/fs/cgroup
/dev/mapper/airvideovg2-airvideo   37T   26T  9.1T  74% /mnt/airvideo
tmpfs                             1.6G     0  1.6G   0% /run/user/997
tmpfs                             1.6G     0  1.6G   0% /run/user/1000
/dev/sda1                         5.5T  548G  4.7T  11% /mnt/6tb

As you can see from above, the /mnt/airvideo now has 9.1TiB free!

The NAS motherboard and CPU is now over three years old. I may give it a couple of more years before considering another hardware upgrade.

Upgrading USG to UDM Pro

As I indicated in a previous post, I wanted to upgrade my old USG firewall to the new UDM Pro. In that post, I have outlined my reasons, so I will not repeat them here.

I wanted to perform the upgrade with a minimum amount of downtime. With several household members who are online constantly for both school work as well as for entertainment, any perceived downtime will result in a typical earful, which I would rather avoid.

In preparation for the upgrade, I performed the required backups for both the Unifi Video and the Unifi Network Controller applications that are both previously running on my NAS server. I copy the backups to an old MacBook Air that I will use as my console to setup the UDM Pro. I wanted to make sure that I stop both the unifi and unifi-video services on my Ubuntu NAS. We do not want to risk some sort of conflicts when we plug in the UDM Pro.

I also configured the old USG LAN2 port so that it will provision a network that has a separate IP subnet different from all of my existing networks. In my case, it was 10.10.11.1. I did this so that I can connect the UDM Pro into the LAN2 port of the old USG, which mimics my Internet Service Provider (ISP). This way, while I configure and setup the UDM Pro, my existing home network can continue to function and provide the require services to my household.

Connections used for UDM Pro setup

The setup connection layout looks like the above diagram. After the UDM Pro booted up, I used Safari to point to 192.168.1.1, which hosted the UDM Pro’s web administration interface. Since I already had a Unifi account, I used that to login initially. Once logged in, I proceeded to upgrade both the Network and Protect applications on the device. The Network application was upgraded to 6.5.53, and the Protect application was upgraded to 1.20.0. I am not planning to use the Access and Talk applications, but upgraded those any ways in case of any outstanding security holes.

I then open the Network application and performed a restore from the backup that I previously copied on to the MacBook Air. This restore worked without a hitch. All of my configurations and network and WiFi settings were ported over. The UDM Pro also automatically created another user from my old restore, which I promptly switched over, and disabled the external access to the UDM Pro, call me paranoid. I did a restart of the device to make sure that it boots back up smoothly. Once I have confirmed that everything is still okay, then I proceeded to shutdown the UDM Pro.

Before I make the physical swap, replacing the USG with the UDM Pro, I ssh into each Unifi managed device, switches and access points to ensure that the inform URL is reachable. Once I was satisfied of this, I then proceeded with the swap. Now my network looks like this:

Post upgrade layout (click to enlarge)

My expectation was that once the UDM Pro boots up and the Network application comes online, all the Unifi networking devices will automatically be managed by the UDM Pro. The reality however was slightly different. On the plus side, the network is fully functional and the only down time was the time it took to perform the swap and the boot up process of the UDM Pro, no more than 5 minutes. However on the down side, when I inspected all the devices (not clients) within the Network application, only one of all the devices successfully registered with the new Network application. I was a bit puzzled and miffed.

After about an hour’s investigation, apparently some devices did not like the inform URL to be http://unifi:8080/inform. I specifically picked the hostname instead of the IP address because it was changing from my NAS server to the UDM Pro. Unfortunately for some unknown reason, only a single Unifi access point UAP-AC-Pro made the jump and was successfully adopted by the UDM Pro. All the other devices went into a state of a repeated adoption loop. Even rebooting the devices did not help.

To remedy the situation, I had to ssh into each of the remaining devices and manually performed the following command (twice):

set-inform http://192.168.168.1:8080/inform

I am uncertain why I had to do it twice, but the first time did not work with the Network application. Once all the devices were adopted, I then proceed to configure the Override Inform Host settings on the UDM Pro. See below:

Note that the above settings were only in the New UI and missing form the Class UI

I had to set the above and not the default, because the will ubnt did not work, perhaps this had something to do with my Pi-hole configuration. Also, although by this point all the devices were connected, there were two remaining access points complaining about a STUN issue. When I check their respective logs, the STUN URL was incorrect because it retained the old unifi hostname. It was at this point, I decided to let the Network controller to push out an IP address based inform URL for all the devices.

I perform another reboot of the UDM Pro just to make sure we have transition stability over a power outage, and everything seems to be running smoothly now.

The restore of my Unifi Video configuration with the new Unifi Protect application on the UDM Pro was way more smoother. I dear say flawless. However, there was a minor hiccup. I run Homebridge at home to connect my Unifi Protect G3 Flex cameras to my HomeKit environment. This relied on an RSTP stream that was previously supported by Unifi Video. However the new Protect application used RSTPS, which is an encrypted version of the stream. Long story short, I had to switch from the Camera FFmpeg to the Unifi Protect plugin. Not a big deal, but I was super glad that the Unifi Protect plugin existed for Homebridge.

Now our inside security footages are recorded (up to a month), and motion detection is a lot faster. The application to find and view the videos are now more convenient. On top of that, live previews are also available within my Home App on my iPhone, iPad, as well as the Apple TV.

A gallery view from my 4K TV using Apple TV and HomeKit

The outdoor footages are still using Kuna, but I plan to perform a future upgrade using Unifi G4 Bullet cameras for the outside as well.

The last configuration I did was finally turned on Unifi’s Threat Management. I set it to level 4 to begin with and we may adjust it in the future.

click to enlarge

Last and certainly not the least, my NAS server is now more of a NAS and less of a networking controller, since all networking related monitoring and control is now being performed by a dedicated UDM Pro device. The UDM Pro can also handle the threat management at my full ISP 1Gbps download speed.

I will continue to post my upgrades here. If anything else, keep my future self informed.

Resizing LVM Volume with Cache

I had to increase the size of my media LVM logical volume again. In a previous post, I provided the instructions. I have done this many times. However, this time around, I ran into a snag.

Apparently this is the first time I try to increase the logical volume after I implemented LVM caching, which I wrote about in this post.

The steps in the “Linux LVM Super Simple to Expand” post are the same right up to and including the step involving the resizing of the physical volume. Afterwards, in order to resize the logical volume, we first have to disable the cache temporarily.

sudo lvconvert --splitcache /dev/airvideovg2/airvideo

Once the logical volume is no longer cached, then we can proceed with the resizing.

sudo lvresize -l +100%FREE /dev/airvideovg2/airvideo

Once the resize is completed, we can unmount the volume and perform the required resizing of the filesystem.

sudo systemctl stop smbd.service

sudo systemctl stop mpd.service

sudo systemctl stop apache2.service

sudo umount /mnt/airvideo

sudo e2fsck -y -f /dev/airvideovg2/airvideo

sudo resize2fs -p /dev/airvideovg2/airvideo

Note that e2fsck and resize2fs will take some time, between thirty minutes to an hour each. Once the file system is resized, we can reattach the cache.

sudo lvconvert --type cache --cachepool airvideovg2/lv_cache airvideovg2/airvideo

Usually it is a good idea to reboot the server after this just to make sure it mounts properly.

This is a small snag and LVM is still super simple to expand.

NAS RAID-1 Fail

This past weekend my media NAS server was intolerably slow. When I investigated, I found out that one of the RAID-1 partitions is experiencing read errors and is timing out. I decided to risk a reboot and to my surprise the RAID-1 partition did not recover with one fail drive, but mdstat recorded with an inactive status, something like this:

md2 : inactive sdc1[0](S)

After some Google search, I found that I had to do the following to resurrect the md2 device.

madam --stop /dev/md2
mdadm --assemble --force /dev/md2

This reactivated the md2 partition. I replaced the failed drive and re-added the new drive to the md2 device. The RAID-1 partition is now rebuilding.

The inactive state is a new experience for me, so this was a bit of a surprise.

During this exercise I also found out that the SATA connectors on my SATA add-on card were loose causing intermittent connections. I will have to find a way to address this in the future.

Old Media Server with OpenVPN

I am in the process of building and configuring a media server for my parents. After my recent media server upgrade, I have extra gear lying around. By purchasing a power supply and a small case, I can cobble together another media server with my old processor and motherboard. I will call this my parent’s media server. The goal is to replace the current Raspberry PI unit that is currently running OSMC acting as their media server. Although the OSMC solution with Raspberry PI has been working really well, it is under powered to play any HEVC encoded video at full 1080p HD resolution.

I wanted to convert the majority of our video media to HEVC simply to save storage space. If I do this with my media library, I will not be able to share our media with them because of their under powered Raspberry PI.

To solve this issue, I installed Ubuntu 18.04 along with Kodi on my parent’s media server that I just created. I have been testing this solution for the past couple of weeks and both the hardware and media player works really well.

I also configured the box to auto mount USB disks, and installed SAMBA so that both videos and music files can be shared with other devices on the same network. The SAMBA is primarily used by my parents with their SONOS speakers.

With this media server at their location, I can also consider future upgrades such as replacing their WiFi network with a Ubiquiti solution, and even ponder on a site-to-site VPN solution with both of our networks.

Perhaps that is looking too far into the future. My immediate concern is how to remotely administer the box. With the Raspberry PI, I just had a simple SSH setup. However with the extra horse power, and a full blown Ubuntu distribution, I can now setup OpenVPN.

I followed these instructions on the DigitalOcean site, and it worked flawlessly. During the setup, I made a major error. I skipped the firewall (ufw) setup on the box, thinking that I don’t need a firewall because an external firewall already exists. However, OpenVPN will not route external traffic to the internal private network if IP masquerading (NAT) is not setup properly. Thanks to a coworker’s advice, I configured the firewall with IP forwarding NAT, but also change all default actions to ACCEPT so that the firewall only function as a NAT router. Lesson learned!

Since this VPN will only be used by me for remote management, I will not configure any HTTPS tunnelling or install and configure ObfsProxy. We will continue to use UDP and stick with the default 1194 port.

We will do some final testing before finally deploying it to my parent’s place.

NVMe SSD with LVM Cache

I have been a huge fan of Apple’s fusion drives. They are an excellent compromise for affordable mass storage while still able to give you SSD performance. The concept is simple pair a fast but small SSD drive with a large but slow and much affordable, mechanical HDD. You get good performance and have lots of storage without breaking the bank.

I have falsely assumed that this capability only existed with Apple’s macOS operating system. This week I was pleasantly surprised to have discovered that LVM Cache can do more or less the same thing on Linux. This new found knowledge along with an excellent deal on a 500GB NVMe Samsung 970 Evo Plus M.2 drive gave me the itch to experiment this weekend with my NAS media server.

The hardware was easy enough to install, but I had to move one of the existing SATA connection because the M.2 slot on the motherboard shared a PCIe bus with a pair of SATA connections. Luckily I bothered to check the motherboard manual, otherwise I would have been scratching my head while the server fail to boot.

The software configurations were a bit more involved. Before I purchased the NVMe card, I did some experimentation with two external USB drives, one SSD and one HDD. I found this article to be super helpful in configuring LVM Cache with my test drives. However, these configurations were not fully restored after a reboot. After many hours of research on the Internet, I found this article indicating that my Ubuntu Linux distribution was missing the thin-provisioning-tools package. I also had experimented between the two different cache modes that were available, writethrough and writeback. I found out that the write back mode was a bit buggy and did not sync the cache and the storage drive. Yet another article to the rescue.

lvchange --cachesettings migration_threshold=16384 vg/cacheLV

I preferred the write back mode due to its better write performance characteristics. Apparently to fix the issue, I have to increase the migration threshold to something larger than the default of 2048 because the chunk size was too large.

Here are the steps that I did to configure my existing logical volume (airvideovg2/airvideo) to be cached by the NVMe drive that I just purchased. I first have to partitioned the NVMe drive.

Model: Samsung SSD 970 EVO Plus 500GB (nvme)
 Disk /dev/nvme0n1: 500GB
 Sector size (logical/physical): 512B/512B
 Partition Table: gpt
 Disk Flags: 
 

 Number  Start   End    Size   File system  Name     Flags
  1      1049kB  500GB  500GB               primary

Create an LVM physical volume with the NVMe partition that was created previously /dev/nvme0n1p1 and add it to the existing airvideovg2 volume group.

sudo pvcreate /dev/nvme0n1p1


sudo vgextend airvideovg2 /dev/nvme0n1p1

Create a cache pool logical volume and set its cache mode to write back and establish the migration threshold setting.

sudo lvcreate --type cache-pool -l 100%FREE -n lv_cache airvideovg2 /dev/nvme0n1p1


sudo lvchange --cachesettings migration_threshold=16384 airvideovg2/lv_cache

sudo lvchange --cachemode writeback airvideovg2/lv_cache

Finally link the cache pool logical volume to our original logical volume.

sudo lvconvert --type cache --cachepool airvideovg2/lv_cache airvideovg2/airvideo

Now my original logical volume is cached and I have gained SSD performance economically on my 20TB RAID setup for less than $200. Below is my final volume listing.

$ sudo lvs -a
   LV               VG          Attr       LSize   Pool       Origin           Data%  Meta%  Move Log Cpy%Sync Convert
   airvideo         airvideovg2 Cwi-aoC---  20.01t [lv_cache] [airvideo_corig] 0.01   11.78           0.00            
   [airvideo_corig] airvideovg2 owi-aoC---  20.01t                                                                    
   [lv_cache]       airvideovg2 Cwi---C--- 465.62g                             0.01   11.78           0.00            
   [lv_cache_cdata] airvideovg2 Cwi-ao---- 465.62g                                                                    
   [lv_cache_cmeta] airvideovg2 ewi-ao----  64.00m                                                                    
   [lvol0_pmspare]  airvideovg2 ewi-------  64.00m      

We can also use the command below to get a more detail listing.

sudo lvs -a -o+name,cache_mode,cache_policy,cache_settings,chunk_size,cache_used_blocks,cache_dirty_blocks

Upgrade completed. We’ll see how stable it is in the future.

Media Server Upgrade

Two and half years ago, I performed a CPU and motherboard upgrade to my media server. You can read the account here.

Although the AMD Athlon 5350 APU was energy efficient, it proved to be under power for on demand video encoding when Plex wanted to transcode video for a player on a device that is not compatible with the playing video. For example, when an Apple TV (not 4K) wants to play 4K material from Plex on my media server, the server will have to transcode the 4K material to a compatible 1080p format. Unfortunately, this is very CPU intensive and if more than one person in the house hold is trying to do the same thing, which is not unheard of, this causes stuttered playback issues.

Given the choice between saving a few dollars a year versus usability, I choose usability. Therefore I started to research what I need for the upgrade. My goal is upgrade the system so that transcoding will not be an issue and I can also use the system for future video encoding of security camera footages. We can also use the system for background video encoding of family videos as well.

I continue to prefer the AMD brand, and decided on the following combo:

  • AMD Ryzen 5 2400G Processor with Radeon RX Vega 11 Graphics (YD2400C5FBBOX)
  • GIGABYTE B450 AORUS M Motherboard
  • Corsair Vengeance LPX 16GB (2x8GB) DDR4 DRAM 2666MHz (CMK16GX4M2A2666C16)

The above were all purchased through Amazon and cost me a grand total of $473.24. The AMD CPU was the most expensive part costing almost $190.

Taking out the old motherboard and CPU combo and replacing them with the new parts went smoothly. The side SATA connectors bucked against one of my HDD chassis so I opted not to use them, and decided to connect all of my RAID SATA connectors to the SATA accessory card that I purchased and discussed in this post.

Last time I did an upgrade like this, the Ubuntu operating system had no problems and booted without any issues. Unfortunately, this time is very different. After the machine posted, Ubuntu booted into a blank, black screen. After some research, I learned to reboot the Ubuntu kernel with the nomodeset option. I learned to press and hold the shift key so that I can select the desired kernel that I wanted via the GRUB menu, and I learned to press the ‘e’ key in the GRUB menu to modify the boot options. Finally pressing F10 to boot with the custom changes (effective for only one time).

The above trick got me a login prompt. After I gained access to the command prompt, I noticed that the kernel did not recognize any ethernet devices. I now have a machine that is not connected to the network. After some more Internet research I found out that the current 4.15 Linux Kernel that I have is insufficient to run on the Raven Ridge architecture, the AMD code name for the Zen CPU and Vega GPU combination on a single chip. I have to upgrade to the 4.18 Linux Kernel.

However I cannot upgrade through the Internet, because the machine is not on the Internet. I have to download the Debian packages on a USB stick with another machine and manually install them. At this point, I learned that you cannot simply download a single package for this. I had to decide whether to go with the Linux Mainline Kernel packages or go with the Ubuntu HWE (Hardware Enablement) packages. After reading through Ubuntu’s LTS Enablement Stack article, I decided to HWE packages. I found the linux-generic-hwe packages and their prerequisites on pkgs.org. This took several iterations as I did not get all the dependent packages on the first try.

Once all the packages were installed, the machine booted without the need for the nomodeset option. However, the internet interface device was still not there. I had to run the command netpath, to find out that new motherboard’s ethernet device’s logical name was em1. To register the new logical name, I had to edit /etc/network/interfaces file.

Finally, the machine booted with an active ethernet connection. As a sanity check, I executed:

sudo apt-get install --install-recommends linux-generic-hwe-18.04 

Ensuring that my new media server has all the required kernel packages. We are still not done. The IP address of the server has changed, because we now have a different MAC address, so the DHCP server provisioned a different IP. I tried to change the Unifi Controller to provision a static IP address to this new server but I was unsuccessful. I suspect that the new server is also running the Unifi Controller may have something to do with it. Since the IP address has changed, I needed to update the following configurations:

  • Firewall rules
  • Unifi Controller name space configurations
  • Samba configurations because we only allow for local machines to share

All of this took from 4:30pm to 11:00pm last night, 6.5 hours worth of hardware assembly, research with Google, trial and error, and finally success. I cannot imagine if Google and the super helpful community forums did not existed. Fingers crossed that the new media server will run smoothly.

More Home IT Upgrades

This past weekend I continued to upgrade our NAS server. Last weekend, I upgraded my raid array with an additional 8TB of mirrored storage. This yielded two old 4TB WD Blue HDD. I noticed that my case has a total of 9 internal storage bays. One was used by my 500GB SSD Boot Drive, and 6 were populated by HDD drives making up the current raid array. This means I have 2 more storage bays left. However these remaining bays were meant for 5.25″ storage devices like Optical Disc Players. For me to place my old 4TB WD Blue HDD into these bays, I will need a 5.25″ to 3.5″ bay converter. I had one, and purchased the other one on Amazon. I ended up buying the ORICO Aluminum 5.25 inch to 2.5 or 3.5 Inch Internal Hard Disk Drive Mounting Kit.

I also did not have enough SATA slots and purchased the IOCrest SI-PEX40071 SATA III 8 Port Controller Card. This card along with the 4 builtin SATA slots on the motherboard gave me enough SATA connections for my 9 drives.

Once I installed the old 4TB drives, I proceeded to create another md raid level 1 device and created a matching physical volume which I used to extend the current logical volume group. When the setup is completed, I ended up with a 20TB+ fully mirrored NAS server. I love LVM in combination of mdadm.

I figured while everything is fresh on my mind, I minus well proceed with the dreaded 16.04 to 18.04 Linux Ubuntu upgrade.

The upgrade was surprisingly very smooth. However the new version of OpenVPN caused some troubles. The new OpenVPN no longer works with my old PureVPN configuration files, because the certificate files that came from PureVPN used an outdated and deprecated hash algorithm. After getting the new configuration files from PureVPN, everything worked like a charm.

I also have to reinstall the Unifi Controller along with Let’s Encrypt certbot utility.

Super happy with the outcome and the upgrades should last another 2 to 3 years.

Two New 8TB Drive for Our NAS

Our NAS has run out of space again. I saw a deal that the Seagate IronWolf 8TB NAS Hard Drive was on sale at newegg for $309 CAD. I jumped at the chance and purchased two.

I am now following the same step as I outlined in this post. Replacing two old 4TB drives with these two new 8TB drives.

So far so good. Hopefully when all is said and done, my NAS will have a total of 18TB in a RAID 1 configuration of 6 hard drives in total. Two 4TB, two 6TB, and the two new 8TB.

I noticed that I could fit two more drives in my chassis and may decide to re-add the two old 4 TB back in, but first I’ll have to check if my power supply can handle the demand.

I really like this mdadm and LVM setup.

Update: After 2 mdadm syncs, each of which was around 8 hours, and a pvresize that also took another 5 hours. I had to convert the filesystem from 32 bits to 64 bits using these very helpful instructions. Only after I converted to 64 bits can I then expand the existing filesystem to more than 16TB. It was a learning and yet rewarding experience. Next step is to reuse the 2 old 4TB drives in the same chassis and add them to the logical volume.

Linux LVM Super Simple to Expand

During the Boxing Day sales event of 2017, I purchased a couple of Seagate Barracuda ST4000DM004 (4TB) hard drives. The intention is to expand our main home network storage, which is a network accessible / attached storage (NAS) managed by our Linux server using mdadm and Logical Volume Manager (LVM).

However I procrastinated until this weekend and finally performed the upgrade. The task went smoothly without any hiccups. I have to give due credit to the following site: https://raid.wiki.kernel.org/index.php/Growing. It really provided very detail information for me to follow. It was a great help.

One major concern I had was whether I can do this without any data loss, and a question of how much down time would this upgrade require.

I had a logical volume, named /dev/airvideovg2/airvideo, consisted of 100% usage of a volume group which was made up of three RAID-1 multiple devices (md). Since I ran out of physical drive bays, to perform the upgrade, I had to effectively replace 2 older drives which were 2TB in size with the newer 4TB drives. The old drives were Western Digital WDC WD20EZRX-00D8PB0 (2TB). I can use these old drives for other needs.

First I had to find the md containing the 2TB pair in RAID-1 (mirror) configuration. I did this with a combination of lsblk and mdadm commands. For example:

$ lsblk
NAME                       MAJ:MIN RM  SIZE RO TYPE  MOUNTPOINT
sdb                          8:0    0  1.8T  0 disk
└─sdb1                       8:1    0  1.8T  0 part
  └─md2                      9:3    0  1.8T  0 raid1
    └─airvideovg2-airvideo 252:0    0   10T  0 lvm   /mnt/airvideo

$ sudo mdadm --detail /dev/md2
/dev/md2:
        Version : 1.2
  Creation Time : Sat Nov 12 18:01:36 2016
     Raid Level : raid1
     Array Size : 1906885632 (1725.90 GiB 2000.65 GB)
  Used Dev Size : 1906885632 (1725.90 GiB 2000.65 GB)
   Raid Devices : 2
  Total Devices : 2
    Persistence : Superblock is persistent

  Intent Bitmap : Internal

    Update Time : Sun Mar 11 09:12:05 2018
          State : clean 
 Active Devices : 2
Working Devices : 2
 Failed Devices : 0
  Spare Devices : 0

           Name : avs:2  (local to host avs)
           UUID : 3d1afb64:878574e6:f9beb686:00eebdd5
         Events : 55191

    Number   Major   Minor   RaidDevice State
       2       8       81        0      active sync   /dev/sdf1
       3       8       17        1      active sync   /dev/sdb1

I found that I needed to replace /dev/md2 which consisted of two /dev/sdf1 and /dev/sdb1 partitions. These partitions belonged respectively to the old WD drives. I have 6 hard drives in the server chassis, so I needed to get the serial number of the drives to ensure that I was swapping the right one. I used the hdparm command to get serial number of /dev/sdb and /dev/sdf. For example:

$ sudo hdparm -i /dev/sdb

/dev/sdb:

 Model=WDC WD20EZRX-00D8PB0, FwRev=0001, SerialNo=WD-WCC4M4UDRZLD
 Config={ HardSect NotMFM HdSw>15uSec Fixed DTR>10Mbs RotSpdTol>.5% }
 RawCHS=16383/16/63, TrkSize=0, SectSize=0, ECCbytes=0
 BuffType=unknown, BuffSize=unknown, MaxMultSect=16, MultSect=off
 CurCHS=16383/16/63, CurSects=16514064, LBA=yes, LBAsects=7814037168
 IORDY=on/off, tPIO={min:120,w/IORDY:120}, tDMA={min:120,rec:120}
 PIO modes:  pio0 pio1 pio2 pio3 pio4 
 DMA modes:  mdma0 mdma1 mdma2 
 UDMA modes: udma0 udma1 udma2 udma3 udma4 udma5 *udma6 
 AdvancedPM=no WriteCache=enabled
 Drive conforms to: unknown:  ATA/ATAPI-4,5,6,7

 * signifies the current active mode

Before I physically replace the drives, I must first remove them from the md device by doing the following.

sudo mdadm -f /dev/md2 /dev/sdb1
sudo mdadm -r /dev/md2 /dev/sdb1

After swapping out only one of the drives, and replaced it with a new one, I rebooted the machine. I first have to partitioned the new drive using the parted command.

sudo parted /dev/sdb

Once within parted, execute the following commands to create a single partition using the whole drive.

mklabel gpt
mkpart primary 2048s 100%

I learned that I can only start at sector 2048 to achieve optimal alignment. Once I created the /dev/sdb1 partition, I have to add it back into the RAID.

sudo mdadm --add /dev/md2 /dev/sdb1

As soon as the new partition with the new drive was added into the RAID, a drive resynchronization begins automatically. The resync took more than 3 hours. Once the resync is completed, I did the same thing with the remaining old drive in the RAID, and performed another resync. This time from the first new drive to the second new drive. After another 3+ hours, we can now grow the RAID device.

sudo mdadm --grow /dev/md2 --bitmap none
sudo mdadm --grow /dev/md2 --size max
sudo mdadm --wait /dev/md2
sudo mdadm --grow /dev/md2 --bitmap internal

The third command (–wait) took another 3+ hours to complete. After a full day of RAID resync, we now have the same /dev/md2 that is 4TB instead of 2TB in size. However the corresponding physical volume of LVM still needed to be resized. We did this with:

sudo pvresize /dev/md2

Once the physical volume is resized, we can then extend the logical volume to use up the remaining free space that we just added.

lvresize -l +100%FREE /dev/airvideovg2/airvideo

This took a few minutes but at least it was not 3+ hours.

Aside from the down time that I had to use to swap the hard drives, the logical volume was usable throughout the resynchronization and resizing process. This was impressive. However, now I have to take the volume offline by first umount the volume and changing it to inactive status.

sudo lvchange -an /dev/airvideovg2/airvideo

Note that I had stop the smbd and other services that was using the volume before I can unmount it.

The last step is to resize the file system of the logical volume, but before I can do that I was forced to perform a file system check.

e2fsck -f /dev/airvideovg2/airvideo
resize2fs -p /dev/airvideovg2/airvideo

I rebooted the machine to ensure all the new configurations held, and voila I upgraded my 8TB network attached storage to 10TB! Okay it was not super simple, but the upgrade process was pretty simple and painless. The down time was minimal. The LVM and mdadm guys did a really good job here.