Linux LVM Super Simple to Expand

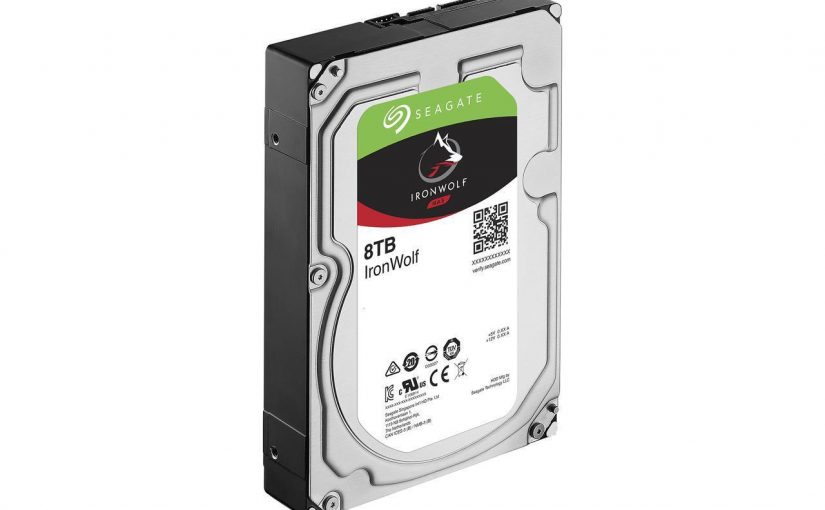
During the Boxing Day sales event of 2017, I purchased a couple of Seagate Barracuda ST4000DM004 (4TB) hard drives. The intention is to expand our main home network storage, which is a network accessible / attached storage (NAS) managed by our Linux server using mdadm and Logical Volume Manager (LVM).

However I procrastinated until this weekend and finally performed the upgrade. The task went smoothly without any hiccups. I have to give due credit to the following site: https://raid.wiki.kernel.org/index.php/Growing. It really provided very detail information for me to follow. It was a great help.

One major concern I had was whether I can do this without any data loss, and a question of how much down time would this upgrade require.

I had a logical volume, named /dev/airvideovg2/airvideo, consisted of 100% usage of a volume group which was made up of three RAID-1 multiple devices (md). Since I ran out of physical drive bays, to perform the upgrade, I had to effectively replace 2 older drives which were 2TB in size with the newer 4TB drives. The old drives were Western Digital WDC WD20EZRX-00D8PB0 (2TB). I can use these old drives for other needs.

First I had to find the md containing the 2TB pair in RAID-1 (mirror) configuration. I did this with a combination of lsblk and mdadm commands. For example:

$ lsblk
NAME                       MAJ:MIN RM  SIZE RO TYPE  MOUNTPOINT
sdb                          8:0    0  1.8T  0 disk
└─sdb1                       8:1    0  1.8T  0 part
  └─md2                      9:3    0  1.8T  0 raid1
    └─airvideovg2-airvideo 252:0    0   10T  0 lvm   /mnt/airvideo

$ sudo mdadm --detail /dev/md2
/dev/md2:
        Version : 1.2
  Creation Time : Sat Nov 12 18:01:36 2016
     Raid Level : raid1
     Array Size : 1906885632 (1725.90 GiB 2000.65 GB)
  Used Dev Size : 1906885632 (1725.90 GiB 2000.65 GB)
   Raid Devices : 2
  Total Devices : 2
    Persistence : Superblock is persistent

  Intent Bitmap : Internal

    Update Time : Sun Mar 11 09:12:05 2018
          State : clean 
 Active Devices : 2
Working Devices : 2
 Failed Devices : 0
  Spare Devices : 0

           Name : avs:2  (local to host avs)
           UUID : 3d1afb64:878574e6:f9beb686:00eebdd5
         Events : 55191

    Number   Major   Minor   RaidDevice State
       2       8       81        0      active sync   /dev/sdf1
       3       8       17        1      active sync   /dev/sdb1

I found that I needed to replace /dev/md2 which consisted of two /dev/sdf1 and /dev/sdb1 partitions. These partitions belonged respectively to the old WD drives. I have 6 hard drives in the server chassis, so I needed to get the serial number of the drives to ensure that I was swapping the right one. I used the hdparm command to get serial number of /dev/sdb and /dev/sdf. For example:

$ sudo hdparm -i /dev/sdb

/dev/sdb:

 Model=WDC WD20EZRX-00D8PB0, FwRev=0001, SerialNo=WD-WCC4M4UDRZLD
 Config={ HardSect NotMFM HdSw>15uSec Fixed DTR>10Mbs RotSpdTol>.5% }
 RawCHS=16383/16/63, TrkSize=0, SectSize=0, ECCbytes=0
 BuffType=unknown, BuffSize=unknown, MaxMultSect=16, MultSect=off
 CurCHS=16383/16/63, CurSects=16514064, LBA=yes, LBAsects=7814037168
 IORDY=on/off, tPIO={min:120,w/IORDY:120}, tDMA={min:120,rec:120}
 PIO modes:  pio0 pio1 pio2 pio3 pio4 
 DMA modes:  mdma0 mdma1 mdma2 
 UDMA modes: udma0 udma1 udma2 udma3 udma4 udma5 *udma6 
 AdvancedPM=no WriteCache=enabled
 Drive conforms to: unknown:  ATA/ATAPI-4,5,6,7

 * signifies the current active mode

Before I physically replace the drives, I must first remove them from the md device by doing the following.

sudo mdadm -f /dev/md2 /dev/sdb1
sudo mdadm -r /dev/md2 /dev/sdb1

After swapping out only one of the drives, and replaced it with a new one, I rebooted the machine. I first have to partitioned the new drive using the parted command.

sudo parted /dev/sdb

Once within parted, execute the following commands to create a single partition using the whole drive.

mklabel gpt
mkpart primary 2048s 100%

I learned that I can only start at sector 2048 to achieve optimal alignment. Once I created the /dev/sdb1 partition, I have to add it back into the RAID.

sudo mdadm --add /dev/md2 /dev/sdb1

As soon as the new partition with the new drive was added into the RAID, a drive resynchronization begins automatically. The resync took more than 3 hours. Once the resync is completed, I did the same thing with the remaining old drive in the RAID, and performed another resync. This time from the first new drive to the second new drive. After another 3+ hours, we can now grow the RAID device.

sudo mdadm --grow /dev/md2 --bitmap none
sudo mdadm --grow /dev/md2 --size max
sudo mdadm --wait /dev/md2
sudo mdadm --grow /dev/md2 --bitmap internal

The third command (–wait) took another 3+ hours to complete. After a full day of RAID resync, we now have the same /dev/md2 that is 4TB instead of 2TB in size. However the corresponding physical volume of LVM still needed to be resized. We did this with:

sudo pvresize /dev/md2

Once the physical volume is resized, we can then extend the logical volume to use up the remaining free space that we just added.

lvresize -l +100%FREE /dev/airvideovg2/airvideo

This took a few minutes but at least it was not 3+ hours.

Aside from the down time that I had to use to swap the hard drives, the logical volume was usable throughout the resynchronization and resizing process. This was impressive. However, now I have to take the volume offline by first umount the volume and changing it to inactive status.

sudo lvchange -an /dev/airvideovg2/airvideo

Note that I had stop the smbd and other services that was using the volume before I can unmount it.

The last step is to resize the file system of the logical volume, but before I can do that I was forced to perform a file system check.

e2fsck -f /dev/airvideovg2/airvideo
resize2fs -p /dev/airvideovg2/airvideo

I rebooted the machine to ensure all the new configurations held, and voila I upgraded my 8TB network attached storage to 10TB! Okay it was not super simple, but the upgrade process was pretty simple and painless. The down time was minimal. The LVM and mdadm guys did a really good job here.

Three Cheers for Software RAID

Last year, I built a NAS machine as referenced by my previous post here. This month, my media drive composed of an LVM logical volume of almost 5TB is almost filled.

This drive contains all purchased media and our home videos for Plex, as well as our time machine backups. To alleviate the storage shortage, I purchased two 4TB Western Digital WD40EFRX hard drives. This weekend I took the plunge and installed the two new drives into my NAS computer. In the spirit of the moment, without performing a backup, I proceeded to:

  • Use parted to partition the drives;
  • Use mdadm to create a RAID 1 device of the two drives;
  • Created a new LVM physical volume with the new RAID device;
  • Added the volume to the existing volume group;
  • Extend the logical volume to newly added 4TB;
  • and finally, Extend the ext4 file system to include the 4TB

In the end, I now have a near 9TB network drive that should last me for quite sometime.

In researching how to extend the logical volume, I also found out how I can upgrade my drives in my existing physical volumes to higher capacity drives without having to recopy everything to another drive first. This should come in handy in the future, because my NAS computer box has no more drive bays.

I know I probably should have taken a backup before this, but everything worked and I couldn’t be happier. Hurray, hurray, and hurray for software RAID.

Thank you Gigabyte and Western Digital

This morning I upgraded my media server. The server was running on a seven years old motherboard, Gigabyte GA-M61PME-S2P, and an AMD Athlon II X2 245 processor. The hard drive is the oldest, a Western Digital WDC WD800JB-00JJ 80GB hard drive that was released back in 2007. This makes the drive 9 years old! At the time of this update, all systems were nominal and operating without issues. Running Ubuntu 16.04.1 LTS (Xenial Xerus), next to my iMac, it was the lowest maintenance box I’ve ever put together.

The real reason for the upgrade is for me to reduce the power footprint of a box that is effectively running 7×24. Even when it was idling, the old components where clocking in at 100+ W of power usage.

I decided to replace the motherboard and cpu with an ASRock AM1H-ITX and a system on a chip AMD Athlon 5350 APU. I was able to get the system down to 55W. I also replaced the old WD800JB with a Seagate BarraCuda 7200.10 ST3500630AS 500GB hard drive, along with the existing 4 WD Green EZRX hard drives. A total of 5 traditional mechanical hard drives. Along with new Kingston HyperX Fury Black 8GB memory, this entire upgrade cost less than $220 CAD with taxes included.

I want to shoutout to Clonezilla. What an amazing job they did in creating a super simple piece of software to clone drives and partitions. Of course Linux is just so wonderful to work with. After changing the CPU and Motherboard, the original Ubuntu installation boot up and run without any major issues. The only wrinkle I had was the ethernet port that came with the new motherboard had a new logical name (enp3s0 vs eth0). Luckily, I know how to fix that. My LVM volume assembled without a hitch. Everything is now running fine with the new hardware and configuration.

My next step in the coming months is to shop for a 500GB SSD. Perhaps I can find one during Cyber Monday or Black Friday sales. This should further reduce my power footprint and also increase my performance.

Home IT Improvements

Ubuntu AirVideo Server with NAS

Some people use their weekend for home renovation projects, I however used this particular weekend to perform some home information technology (IT) upgrades. My replacement iMac 27" Late 2012 model arrived this week, so after setting up this monstrosity of a machine, I am left with an extra box. An old Windows PC running Windows 7 with a very old AMD Athlon™ II X2 245 Processor along with 3GB of memory. Unfortunately the PC’s motherboard, a Gigabyte M61PME-S2P, is a three and half years old motherboard. It doesn’t even have gigabit ethernet on the board. Instead of having it sit around, I figured that it would be a good idea to try my hands on building a Linux file and media server.

I could do FreeNAS, but I wanted flexibility to run some additional software on the box in addition to just perform as a file server. We have many iOS mobile devices in the house, so I also decided to install Air Video Server on the machine. If you are not familiar with AirVideo, you are missing out. Check them out at http://www.inmethod.com. I ended up running Ubuntu Desktop 12.10 release as an experiment.

Here is a quick to do list that I set for myself:

  • Installed Ubuntu;
  • Consolidate old hard drives into a single volume for media storage;
  • Install samba to share the volume, so I can copy media to it from other computers in the house;
  • Install AirVideo server and configure it to serve media from the above volume;
  • Ensure all of the above works when we reboot the box

Installing the operating system from a USB key was a piece of cake. This weekend project also gave me the opportunity to hunt for old hard drives that have been sitting around dormant in my home office. I wanted to place all my old hard drives into this box, reborn as my new Air Video Server (I named it AVS for short). To my disappointment the old motherboard only allowed for two SATA drives, and one was already taken. Therefore, I could only repurpose one of three old drives that I have found.

Adding drives to the AVS box, forced me to dust off the webs from my Linux knowledge base. I had to re-familiarize with myself on the topic of how to use lshw to find out the hardware that is being installed on the system, and using fdisk to partition the drives properly. I had two old drives. The first a 300GB SATA drive, and the other a 320GB drive. I created a single primary partition on each drive.

Once I’m happy with the partitioning, I’m ready to create a software RAID array or volume using the mdadm utility ( http://en.wikipedia.org/wiki/Mdadm ). I used mdadm to combined the two drives into a single volume of RAID-0 of 600GB. I didn’t care about redundancy or backup, so I chose RAID-0 instead of RAID-1. I am thoroughly impressed by mdadm in its ability to handle drives of different models to accomplish this.

Now that I have an array device created, I have to create a file system using mkfs.ext4. The last time I created a Linux file system, we only had ext2. I then have to brush up on my mounting procedures and configure the mount points with /etc/fstab. The mounting configuration was an optional step, but I wanted to rename the default mount point that mdadm gave me. After some more permission related configurations, and the installation and configuration of samba on Ubuntu to share the mount point, I have a Network Attached Storage (NAS) that I can copy videos to.

The installation of AirVideo Server was super easy. Kudos to Sergio Rubio. I literally downloaded the Debian install package from https://launchpad.net/~rubiojr/+archive/airvideo and I was done. After quickly configuring the server by editing the AirVideoServerLinux.properties in /opt/airvideo-server, I manually run the AirVideo Server on the command line to see if it works with my iPad. This was a good moment, but I am not finished.

I needed to ensure that all the services related to this new AirVideo Server comes up when the machine is rebooted. This launched another journey down memory lane in terms of /etc/init.d. Again to my amazement, I simply searched init.d and airvideo on Google, which lead me to a post ( http://www.inmethod.com/forum/posts/list/3485.page ) with a ready made /etc/init.d shell script. After some minor adjustments, I was off to the races with a completed AirVideo Server using my old computer and hard drives.

Although Ubuntu has made great strides in making Linux easier to use, I had to do most of the above on the command line as I find the user interface of Ubuntu is still thwarted with many bugs. Creating something like this is still not for the faint of heart.