Near the end of last year, we built an AI Server with two RTX3090 GPU card resulting in 48GB of VRAM. Back then we were running Qwen3 14B model locally on the machine.
Agentic coding 8 months ago was very instructional driven. We would have to concentrate on small tasks and explain the steps in the detail to the AI. There were also many mistakes. For every 5 tasks, there may be bugs based on duplication, syntax errors, misunderstanding, or simply incompetence on behalf of the AI.
How far have we come? Today using the same hardware, we are now running Qwen3.8 27B model. Things are moving very fast. I think since the initial creation of the machine, we have updated the LLM model more than three times, and the vLLM inference serving engine more than four times.
With this current model, we can truly give complex tasks. One major example is that we were unhappy with Perplexica. Its recent release does not perform very well with integrating web search results. We ended up asking the AI to create a new chat application from scratch using an architecture and technology platforms of its choosing. We collaborate with the user interface layout and design.
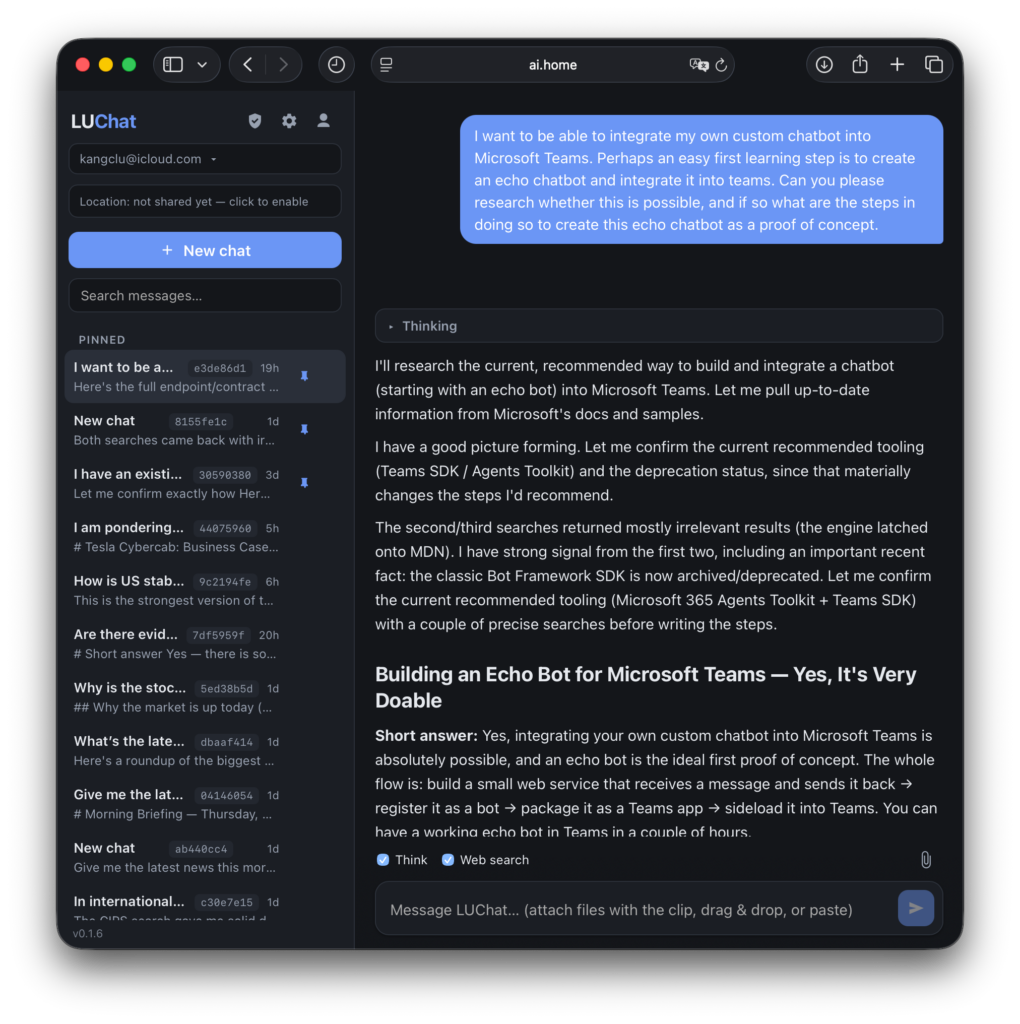
The final result is stunning. Below is a screenshot of our custom chat application.
LUChat: Custom Chat Application using Qwen3.8 27B model with integrated web searches and access to our corporate Intranet.
We used very similar steps to install vLLM (v0.28.0 as of this writing):
We also modified the systemd unit file so that vLLM starts with Qwen3.8 27B model when it boots. The contents of the /etc/systemd/system/vllm.service file is below:
[Unit]
Description=vLLM OpenAI Compatible Server
After=network.target

[Service]
# User and Group to run the service as (e.g., 'youruser', 'yourgroup')
User=kang
Group=kang

# Set the working directory
WorkingDirectory=/home/kang/py_vllm

Environment=CUDA_VISIBLE_DEVICES=0,1

# Need for vLLM 0.27.1
Environment=FLASHINFER_DISABLE_VERSION_CHECK=1

# New recommendation from lued/Qwen3.8-27B-INT8-W8A16-MTP
Environment NCCL_P2P_DISABLE=1
Environment NCCL_CUMEM_ENABLE=0
Environment VLLM_WORKER_MULTIPROC_METHOD=spawn
Environment OMP_NUM_THREADS=1
Environment VLLM_USE_FLASHINFER_SAMPLER=1
Environment PYTORCH_CUDA_ALLOC_CONF=expandable_segments:True,max_split_size_mb:512

# The command to start the vLLM server
# Qwen3.8 27B
ExecStart=/home/kang/py_vllm/.venv/bin/python -m vllm.entrypoints.openai.api_server --model lued/Qwen3.8-27B-INT8-W8A16-MTP \
  --served-model-name Qwen3.8-27B \
  --tensor-parallel-size 2 \
  --pipeline-parallel-size 1 \
  --dtype float16 \
  --performance-mode balanced \
  --max-model-len 262144 \
  --gpu-memory-utilization 0.93 \
  --max-num-seqs 4 \
  --max-num-batched-tokens 4096 \
  --kv-cache-dtype fp8_e4m3 \
  --enable-prefix-caching \
  --enable-chunked-prefill \
  --mamba-cache-mode align \
  --prefix-match-unit 16 \
  --enable-prompt-tokens-details \
  --reasoning-parser qwen3 \
  --tool-call-parser qwen3_xml \
  --enable-auto-tool-choice \
  --disable-custom-all-reduce \
  --trust-remote-code \
  --default-chat-template-kwargs '{"enable_thinking":true,"preserve_thinking":true}' \
  --override-generation-config '{"temperature":1.0,"top_p":0.95,"top_k":20,"min_p":0.0,"repetition_penalty":1.0,"presence_penalty":0.8}' \
  --speculative-config '{"method":"mtp","num_speculative_tokens":3}' --host 0.0.0.0 --port 8000 --api-key XXXXXXXX

# Restart the service if it fails
Restart=always

[Install]
WantedBy=multi-user.target
We used the opencode.ai harness to build the chat-bot. To configure the harness, below is the ~/.config/opencode/opencode.jsonc:
Back in 2017 (more than 9 years ago), I created my own home automation garage door opener using a Raspberry Pi Zero. I then wrote a homebridge plugin so that the garage door opener will work with Homebridge and HomeKit.
The times of change has caught up to us. The original version of the plugin that I wrote with Homebridge was designed and coded for version 1.0. As of May 4, 2026, Homebridge released version 2.0. As of this writing, they are now on version 2.2.1.
Unfortunately for me, this upgrade rendered my old plugin not workable with the latest version of Homebridge. I was going to read the migration guide and performed the changes myself, but of course I was too lazy to get around to it.
Today, I simply asked opencode.ai to tackle this problem. I have attached my opencode session at the end of this post.
I am super surprised that opencode using Qwen 3.6 27B LLM local model running on vLLM handled the changes in a single shot. This was truly a one-shot solution, no fuss, no muss.
I still have to learn that AI can do many things for us and not to short sell it for future potential jobs. Live and learn.
In a previous post, I commented on our AI server containing an old P40 GPU failed. We replaced our server with the following parts.
Component
Description
CPU
AMD Ryzen 9 9900X 4.4 GHz 12-Core Processor
CPU Cooler
Thermalright Peerless Assassin 120 SE 66.17 CFM CPU Cooler
Motherboard
Asus B650E MAX GAMING WIFI ATX AM5 Motherboard
Memory
Crucial Pro 64 GB (2 x 32 GB) DDR5-6000 CL40 Memory
Storage
Samsung 990 Pro 2 TB M.2-2280 PCle 4.0 X4 NVME Solid State Drive
GPU
2 x EVGA FTW3 ULTRA GAMING GeForce RTX 3090 24 GB Video Card (refurbished)
Case
Fractal Design Meshify 3 XL ATX Full Tower Case
Power Supply
SeaSonic PRIME TX-1600 ATX 3.1 1600 W 80+ Titanium Certified Fully Modular ATX Power Supply
I purchased all of our components at Amazon and the total (including shipping and taxes) came to to be $6,271.22. The most expensive parts were the GPU ($2,979.98), the power supply ($903.95), and then the memory ($843.19). All prices are quoted in Canadian dollars.
I had no issues in building the computer.
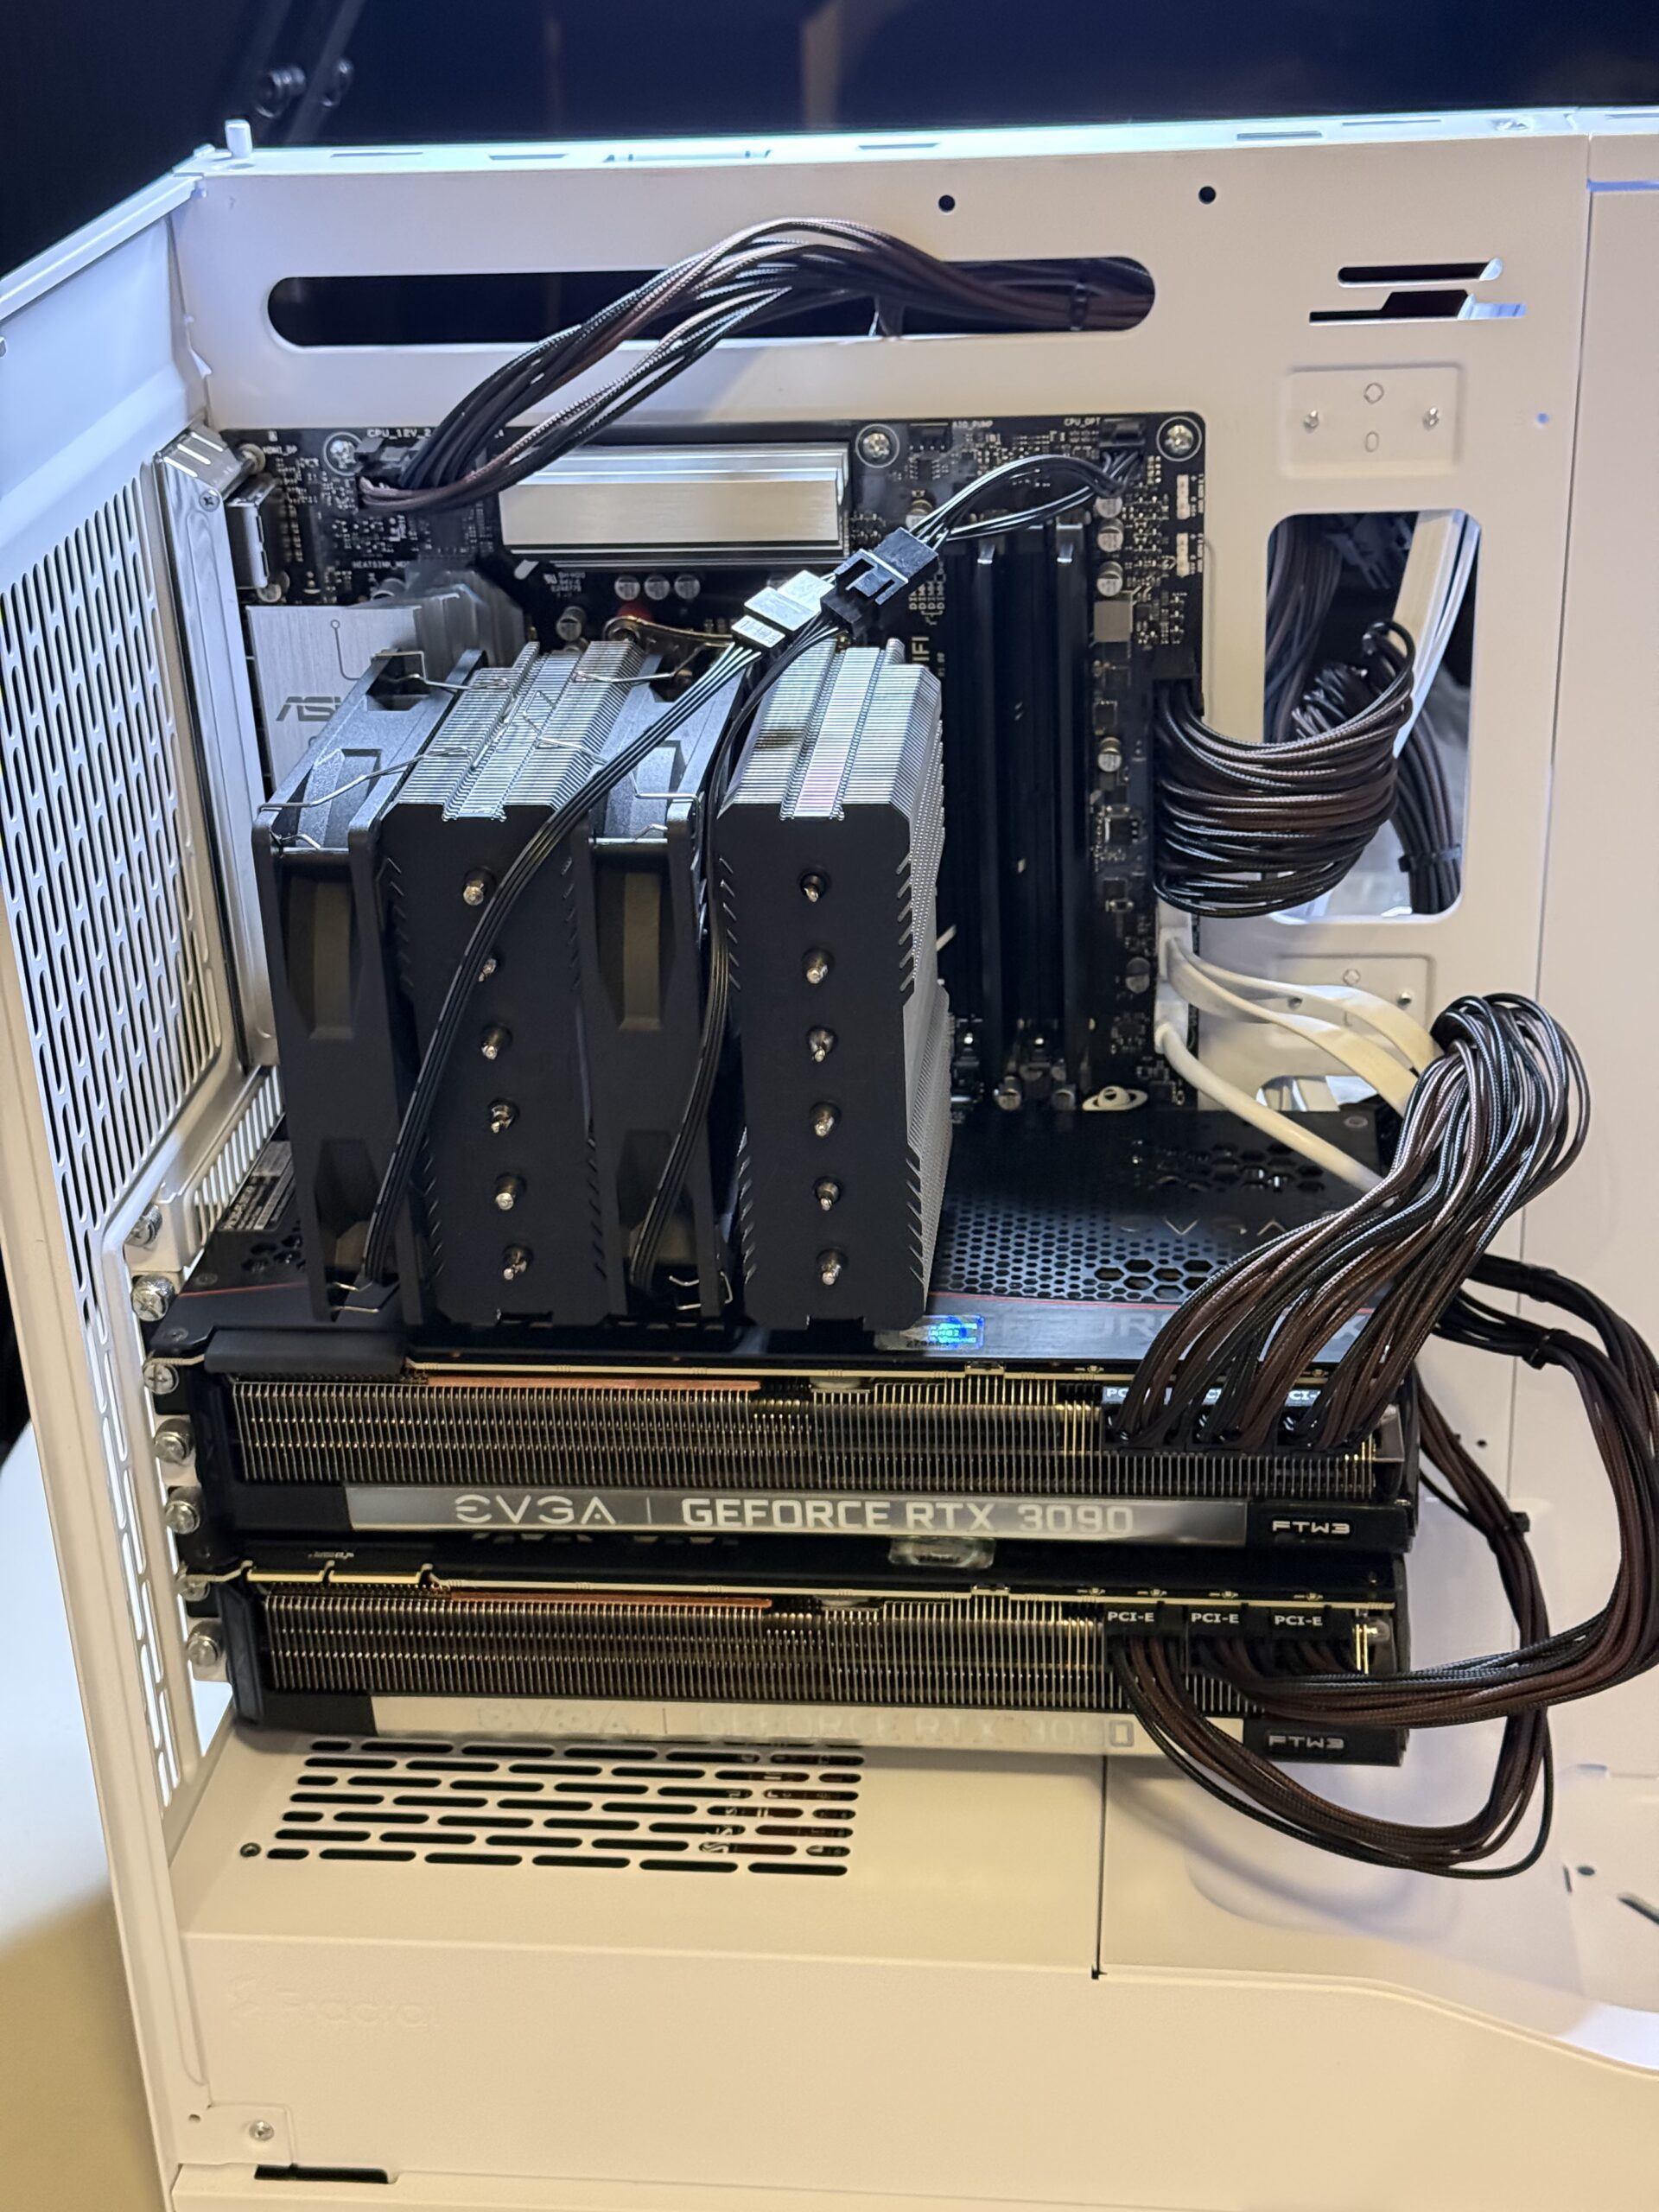
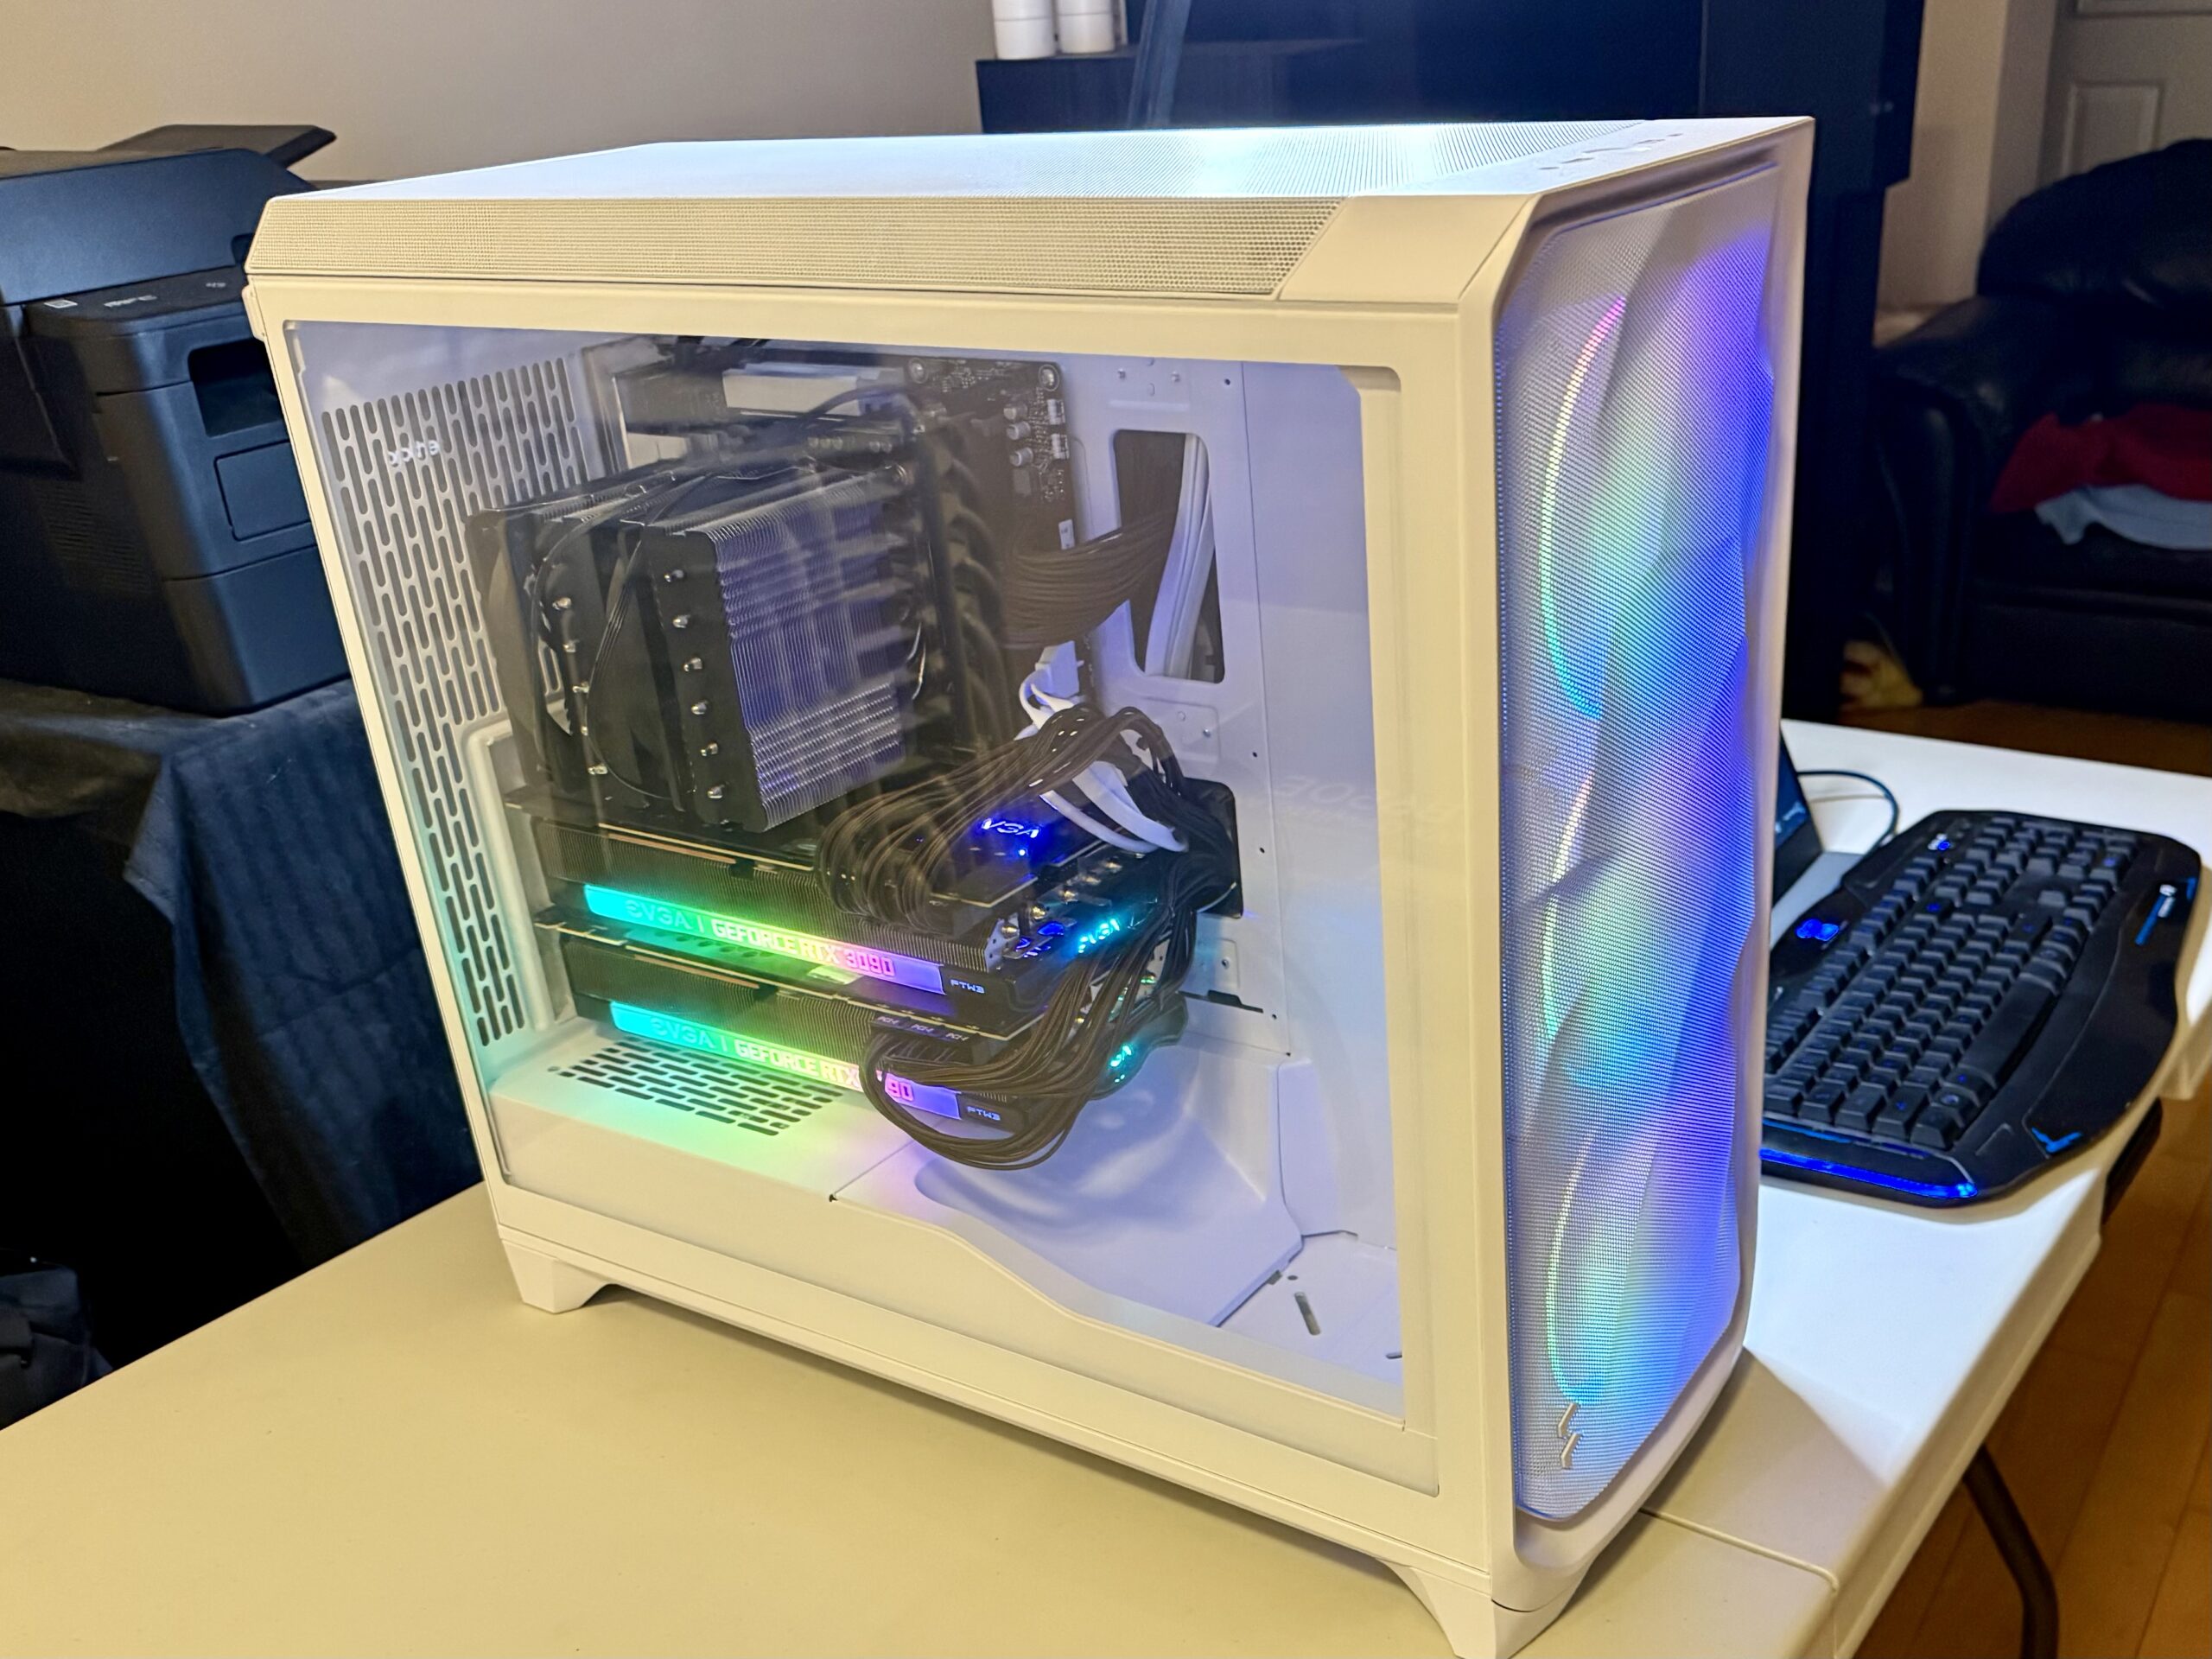
As you can see above, after the CPU cooler and the GPU’s were installed you can barely see the motherboard. Although there are still PCIe slots available, there is no more room to actually place new PCIe cards. We still have two more DIMM slots, so we can consider a future memory upgrade.
One of the main concerns I had was to plug this computer into an electrical socket that will not trip any of my breakers. The 1,600W power supply is awfully close to the maximum theoretical limit of a 15A breaker in our house, which would be around 1,800W. This server is too powerful for any of my current UPS units or power bars. It will have to be connected directly to a wall on a circuit that is not loaded by other appliances.
After testing the memory using MemTest, I installed Ubuntu Server 24.04.3 LTS. To prepare the machine for AI work load, I will then need to install Nvidia CUDA.
Installing CUDA
The first step that I did was to install the Nvidia CUDA. I followed the steps here for Ubuntu. I specifically follow the Network Repository Installation directions.
It took a minute or two to download the model and initialize the GPU’s. Once it is up and running, I verified that it was running by using a simple curl command.
❯ curl http://localhost:8000/v1/models | jq .
  % Total    % Received % Xferd  Average Speed   Time    Time     Time  Current
                                 Dload  Upload   Total   Spent    Left  Speed
100   463  100   463    0     0   615k      0 --:--:-- --:--:-- --:--:--  452k
{
  "object": "list",
  "data": [
    {
      "id": "Qwen/Qwen3-14B",
      "object": "model",
      "created": 1766511858,
      "owned_by": "vllm",
      "root": "Qwen/Qwen3-14B",
      "parent": null,
      "max_model_len": 40960,
      "permission": [
        {
          "id": "modelperm-bc2e247073d50d67",
          "object": "model_permission",
          "created": 1766511858,
          "allow_create_engine": false,
          "allow_sampling": true,
          "allow_logprobs": true,
          "allow_search_indices": false,
          "allow_view": true,
          "allow_fine_tuning": false,
          "organization": "*",
          "group": null,
          "is_blocking": false
        }
      ]
    }
  ]
}
To deploy a model, I created the following systemd unit file in /etc/systemd/system called vllm.service. This way vLLM will automatically start when the host is rebooted.
[Unit]
Description=vLLM OpenAI Compatible Server
After=network.target

[Service]
# User and Group to run the service as (e.g., 'youruser', 'yourgroup')
User=kang
Group=kang
# Set the working directory
WorkingDirectory=/home/kang/py_vllm
Environment=VLLM_USE_V1=1

# The command to start the vLLM server
# Use 'exec' to ensure systemd correctly manages the process
ExecStart=/home/kang/py_vllm/vllm_cuda13_env/bin/python -m vllm.entrypoints.openai.api_server --model Qwen/Qwen3-14B --host 0.0.0.0 --port 8000 --tensor-parallel-size 2 --enable-auto-tool-choice --tool-call-parser hermes

# Restart the service if it fails
Restart=always

[Install]
WantedBy=multi-user.target
I used 0.0.0.0 as the host so that any machine on the network can connect to the service. If you use 127.0.0.1, only local sessions can connect.
To enable the above service, I had to do the following:
I also enabled tooling for my Opencode.ai experiments. vLLM ended up using all of 48GB VRAM on both GPU’s for the Qwen LLM as well as for caching. Impressive!
Installing Podman and Prepare for Quadlets
For everyday chats, I also configured a version of Perplexica. I chose to use Podman to install this, specifically using Podman Quadlet. The idea is to run Perplexica under my user id (kang), instead of running it as root. Our first step is to install Podman and prepare our user account for quadlets.
Note aside from explicit sudo references all other commands are run as the user.
Install Podman:
sudo apt install podman
The container requires user and group ids so we need to map id spaces to my user account.
We need to have an active user session for the container after a reboot, so we need my account to linger around.
sudo loginctl enable-linger ${USER}
We need to proactively increase the kernel key size to avoid any exceeding quota situations like, “Disk quota exceeded: OCI runtime error”. Not just for this container, but also for any other future containers.
echo "kernel.keys.maxkeys=1000" | sudo tee -a /etc/sysctl.d/custom.conf
Lastly, we need to prepare two directories for the containers. The first will house the systemd unit definition of the container. The second is a directory that will act as local storage for the container.
If we have any previous containers running, we need to perform a system migrate. I did not perform this, because I ensure that I had no other Podman containers running. You also can enable the auto update feature for podman. I also did not do this, as I prefer to this manually.
podman system migrate
systemctl --user enable --now podman-auto-update
For a more control networking experience and behaviour, we want to create our own container network. This will also help with DNS resolution. We need to create the network definition in $HOME/.config/containers/systemd/${USER}.network be sure to replace ${USER} reference below with the actual user account name.
Note that the above commands are run with the user account and not with sudo or as root. Also note the --user option.
Once the service is running, you can get its logs by doing the following:
journalctl --user -u perplexica
You can also see all containers running as quadlets using:
systemctl --user status
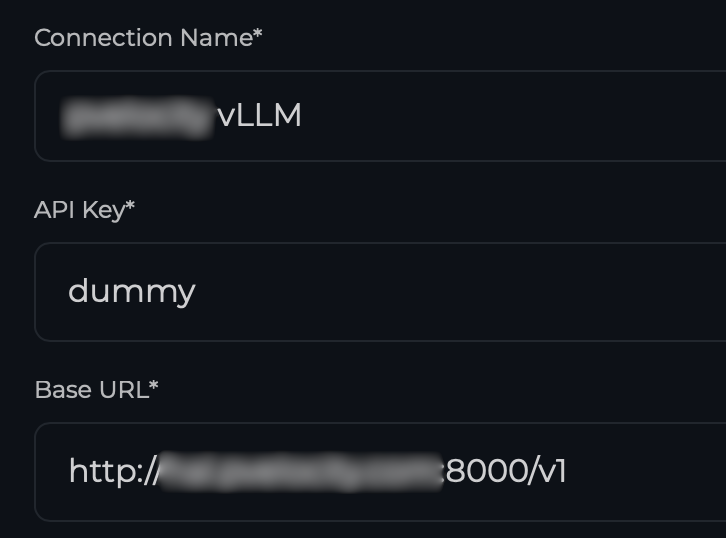
With Perplexica running, we can proceed to its Web UI (http://localhost:3000) using our browser and point to our vLLM instance by creating an OpenAI connection type.
Once the connection is established, you can proceed to add the Chat and Embedding Models. In our case I used Qwen/Qwen3-14B as the model key. This is the same as the model id that vLLM is currently serving. The model name can be anything you assign.
That is it! We now have a local chat service with Perplexica, and I can use the OpenAI compatible API with vLLM.
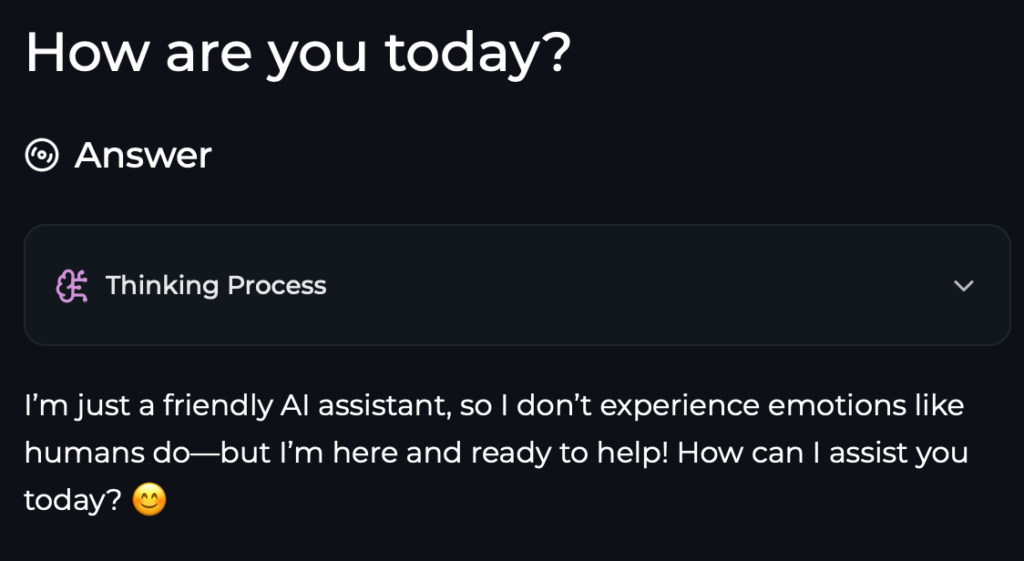
Here is an example of using CURL with the API:
❯ curl -X POST "http://localhost:8000/v1/responses" \
  -H "Content-Type: application/json" \
  -d '{
    "model": "Qwen/Qwen3-14B",
    "input": "How are you today?"
  }' | jq -r '.output[0].content[0].text'
  % Total    % Received % Xferd  Average Speed   Time    Time     Time  Current
                                 Dload  Upload   Total   Spent    Left  Speed
100  1791  100  1721  100    70    448     18  0:00:03  0:00:03 --:--:--   466
<think>
Okay, the user asked, "How are you today?" I need to respond appropriately. First, I should acknowledge their greeting and express that I'm doing well. Since I don't have feelings, I can't experience emotions, but I can simulate a friendly response. I should keep it positive and open-ended to encourage further conversation. Maybe add an emoji to keep it friendly. Also, I should invite them to ask questions or share something. Let me check if the response is natural and not too robotic. Avoid any technical jargon. Make sure it's concise but warm. Alright, that should work.
</think>

I'm doing great, thank you! I'm always ready to chat and help out. How about you? 😊 What's on your mind today?
The advent of the Large Language Model (LLM) is in full swing within the tech community since the debut of ChatGPT by openAI. Platforms such as Google Colab, and similar variants from Amazon and Facebook allows software developer to experiment with LLM’s. The hosted model of the data center based GPU’s makes training and refinement of LLM’s tolerable.
What about using LLM on a local computer away from the cloud?
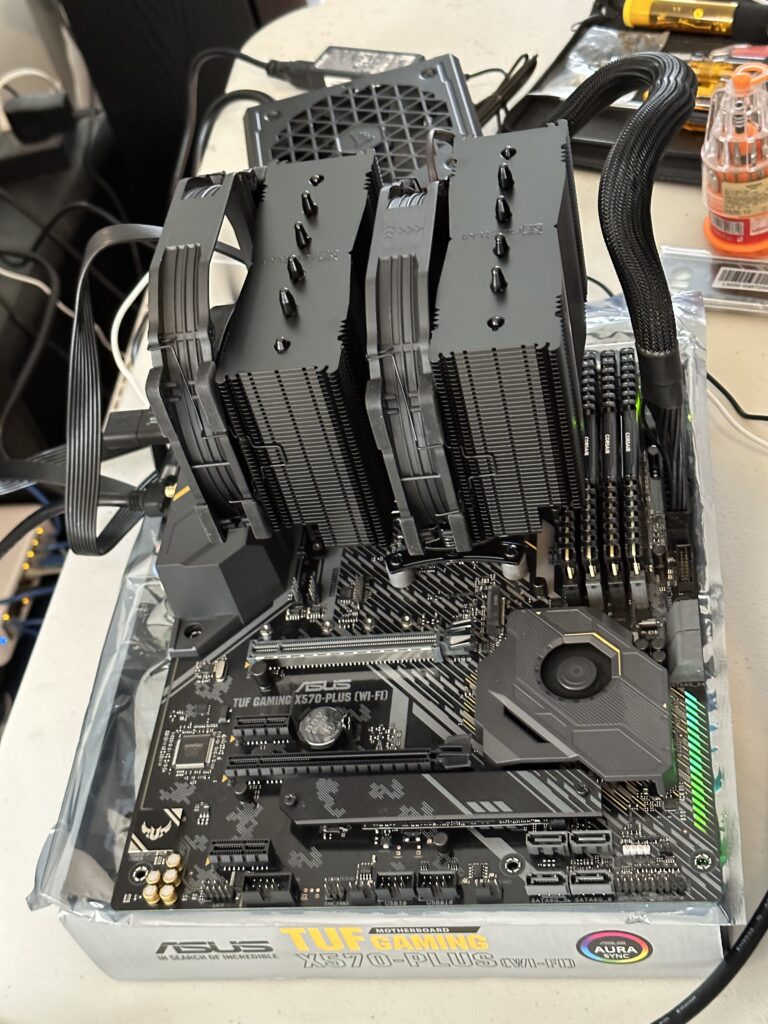
Projects such as llama.cpp by Georgi Gerganov makes it possible to run the Facebook open sourced Llama 2 model on a single MacBook. The existence of llama.cpp gives hope on creating a desktop that is powerful enough to some local development with LLM’s away from the cloud. This post documents an experimental procedure in building a desktop machine using parts readily available from the Internet to see if we can do some AI development with LLM’s.
Below is a list of sourced parts from EBay, Amazon and CanadaComputers, a local computer store. All prices are in Canadian dollars and includes relevant taxes.
GDSTIME 7530 75mm x 30mm 7cm 3in 12V DC Brushless Small Mini Blower Cooling Fan for Projector, Sleeve Bearing 2PIN (sourced from Amazon)
$16.94
CORSAIR Vengeance LPX 64GB (4 x 32GB) DDR4 3200 (PC4-25600) C16 1.35V Desktop Memory – Black (sourced from Amazon)
$350.28
AMD Ryzen 7 5700G 8-Core, 16-Thread Unlocked Desktop Processor with Radeon Graphics (sourced from Amazon)
$281.35
Noctua NH-D15 chromax.Black, Dual-Tower CPU Cooler (140mm, Black) (sourced from Amazon)
$158.14
Asus AM4 TUF Gaming X570-Plus (Wi-Fi) ATX motherboard with PCIe 4.0, dual M.2, 12+2 with Dr. MOS power stage, HDMI, DP, SATA 6Gb/s, USB 3.2 Gen 2 and Aura Sync RGB lighting (sourced from Amazon)
$305.09
Samsung 970 EVO Plus 2TB NVMe M.2 Internal SSD (MZ-V7S2T0B/AM) (sourced from Amazon)
Miscellaneous 120mm case fans and cables purchased from CanadaComputers
$63.17
The total cost of the above materials is $2,062.87 CAD.
The Nvidia Tesla P40 (Pascal Architecture) specializes for Inferencing limited to INT8 based operations and does not support any FP related operations, so it may not be optimal for machine learning. However recent claims have been made that INT8 / Q8_0 quantization can yield some promising results. Let us see what our experimentation will yield once the machine is built.
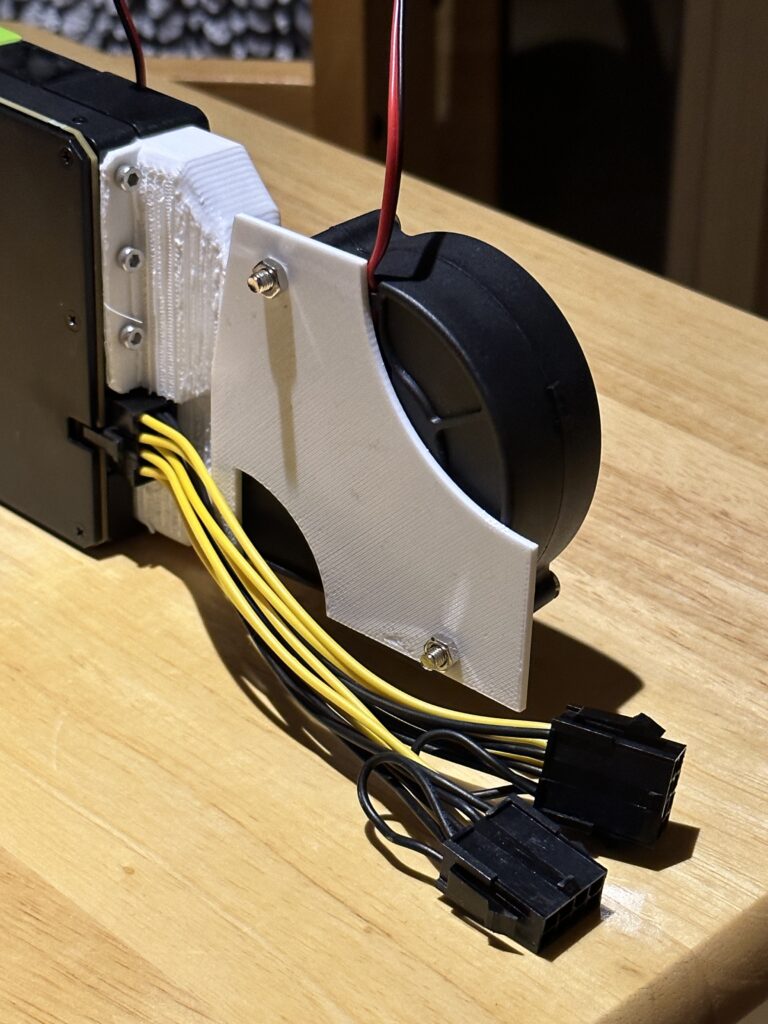
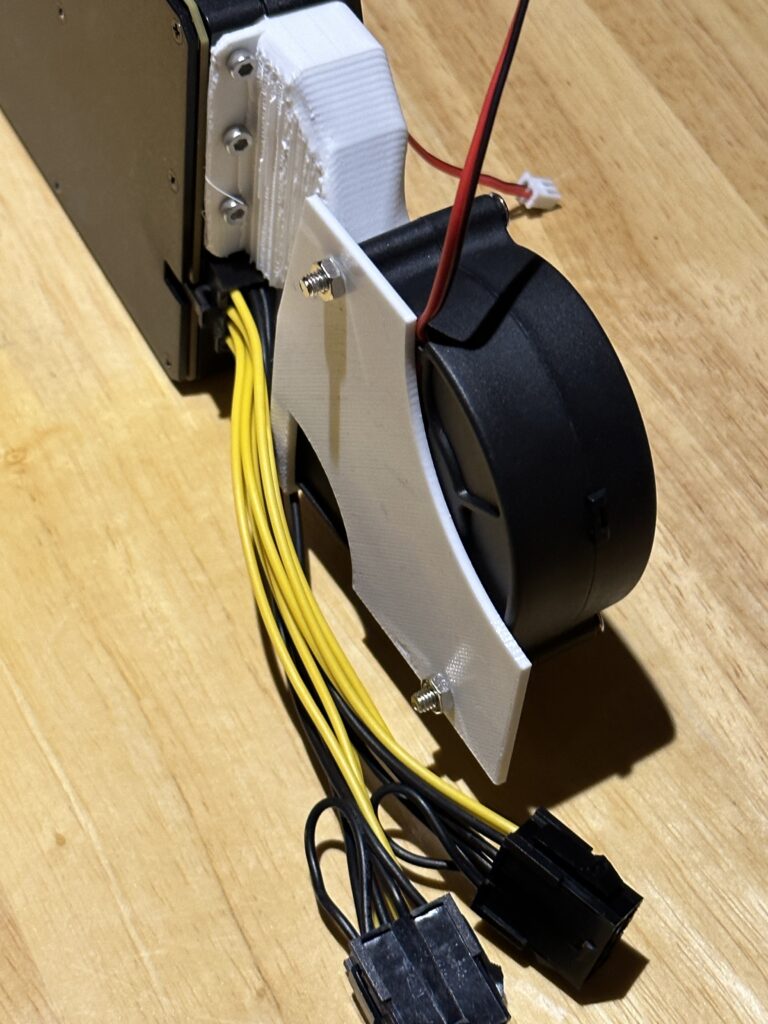
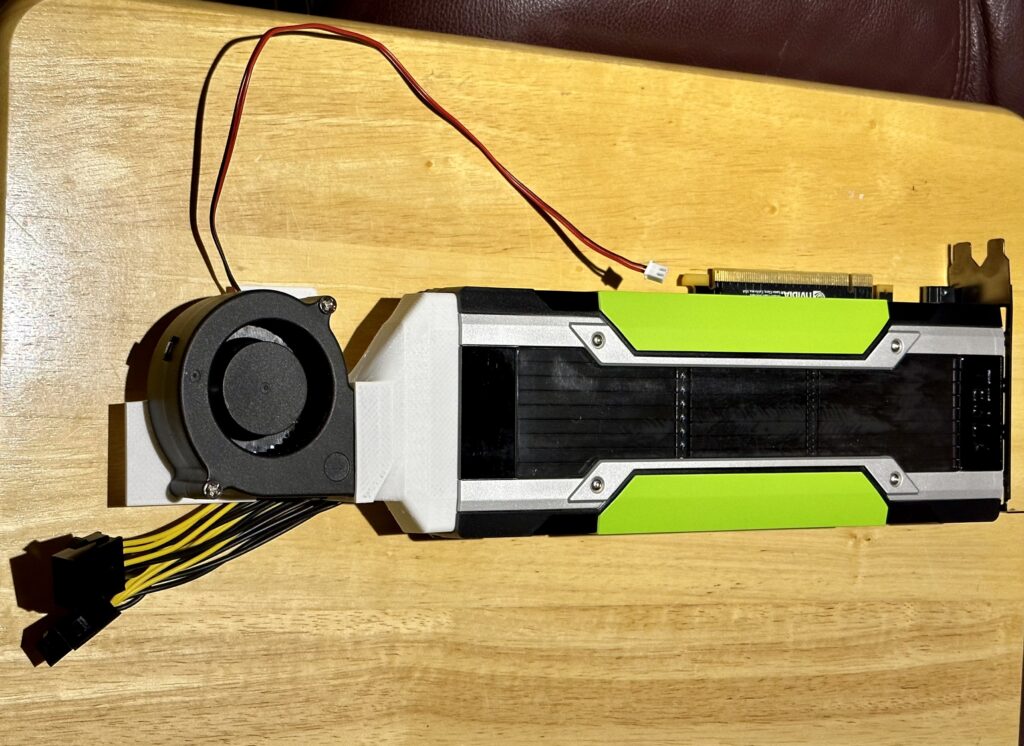
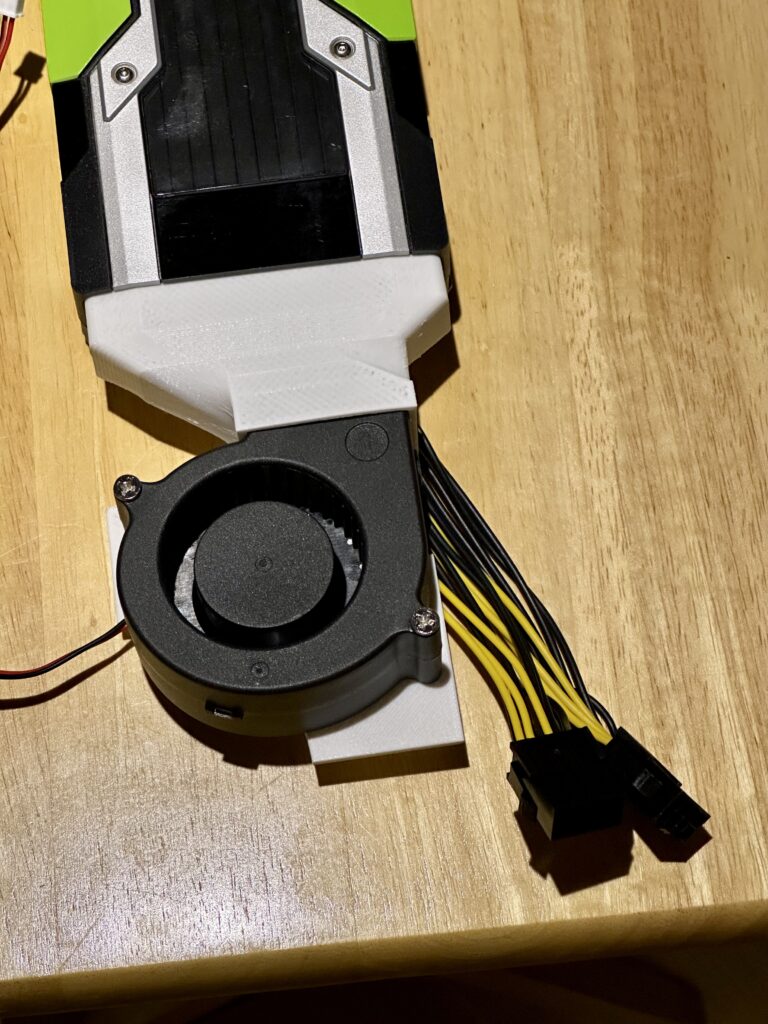
A custom design 3D fan shroud has to be designed and 3D printed because the P40 does not natively come with active cooling. The P40 is originally designed to operate in a data center so cooling is provided by the server chassis. The custom shroud design is posted on Thingiverse and some photos of the finished shroud is shown below.
Note that M3 screws were used to secure the shroud to the P40 GPU card. The GDSTIME fan came with the screws.
I also made a mistake by initially getting a 1000W ATX power supply that ended not fitting the case, because the case is built for SFX and SFX-L power supplies. Lesson learned!
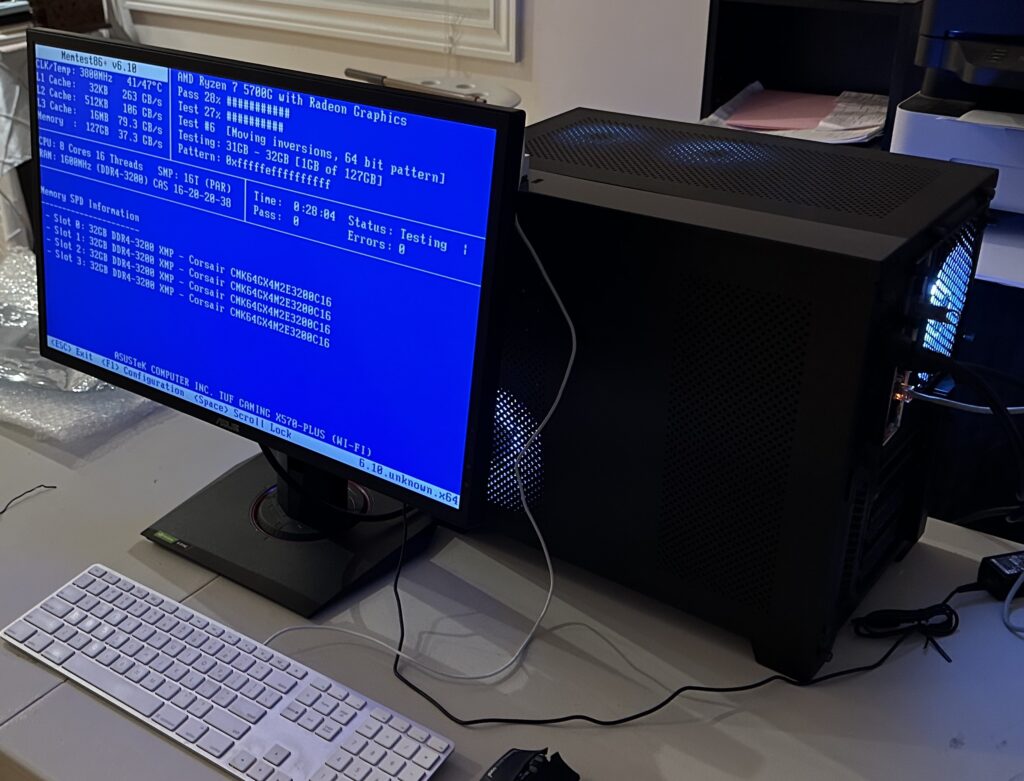
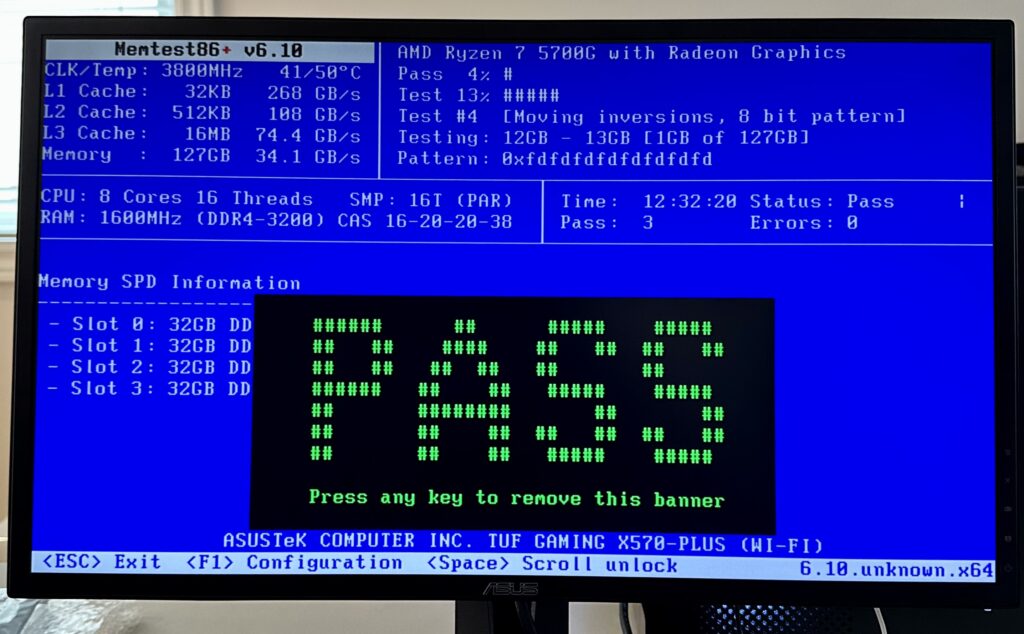
Once the machine is built I performed a 12 hours MemTest86+. It turned out that running the memory at the XMP profile was a bit unstable. I had to clock the memory back from its 3200MHz rating to 3000MHz.
After more than 12 hours with 3 passes.
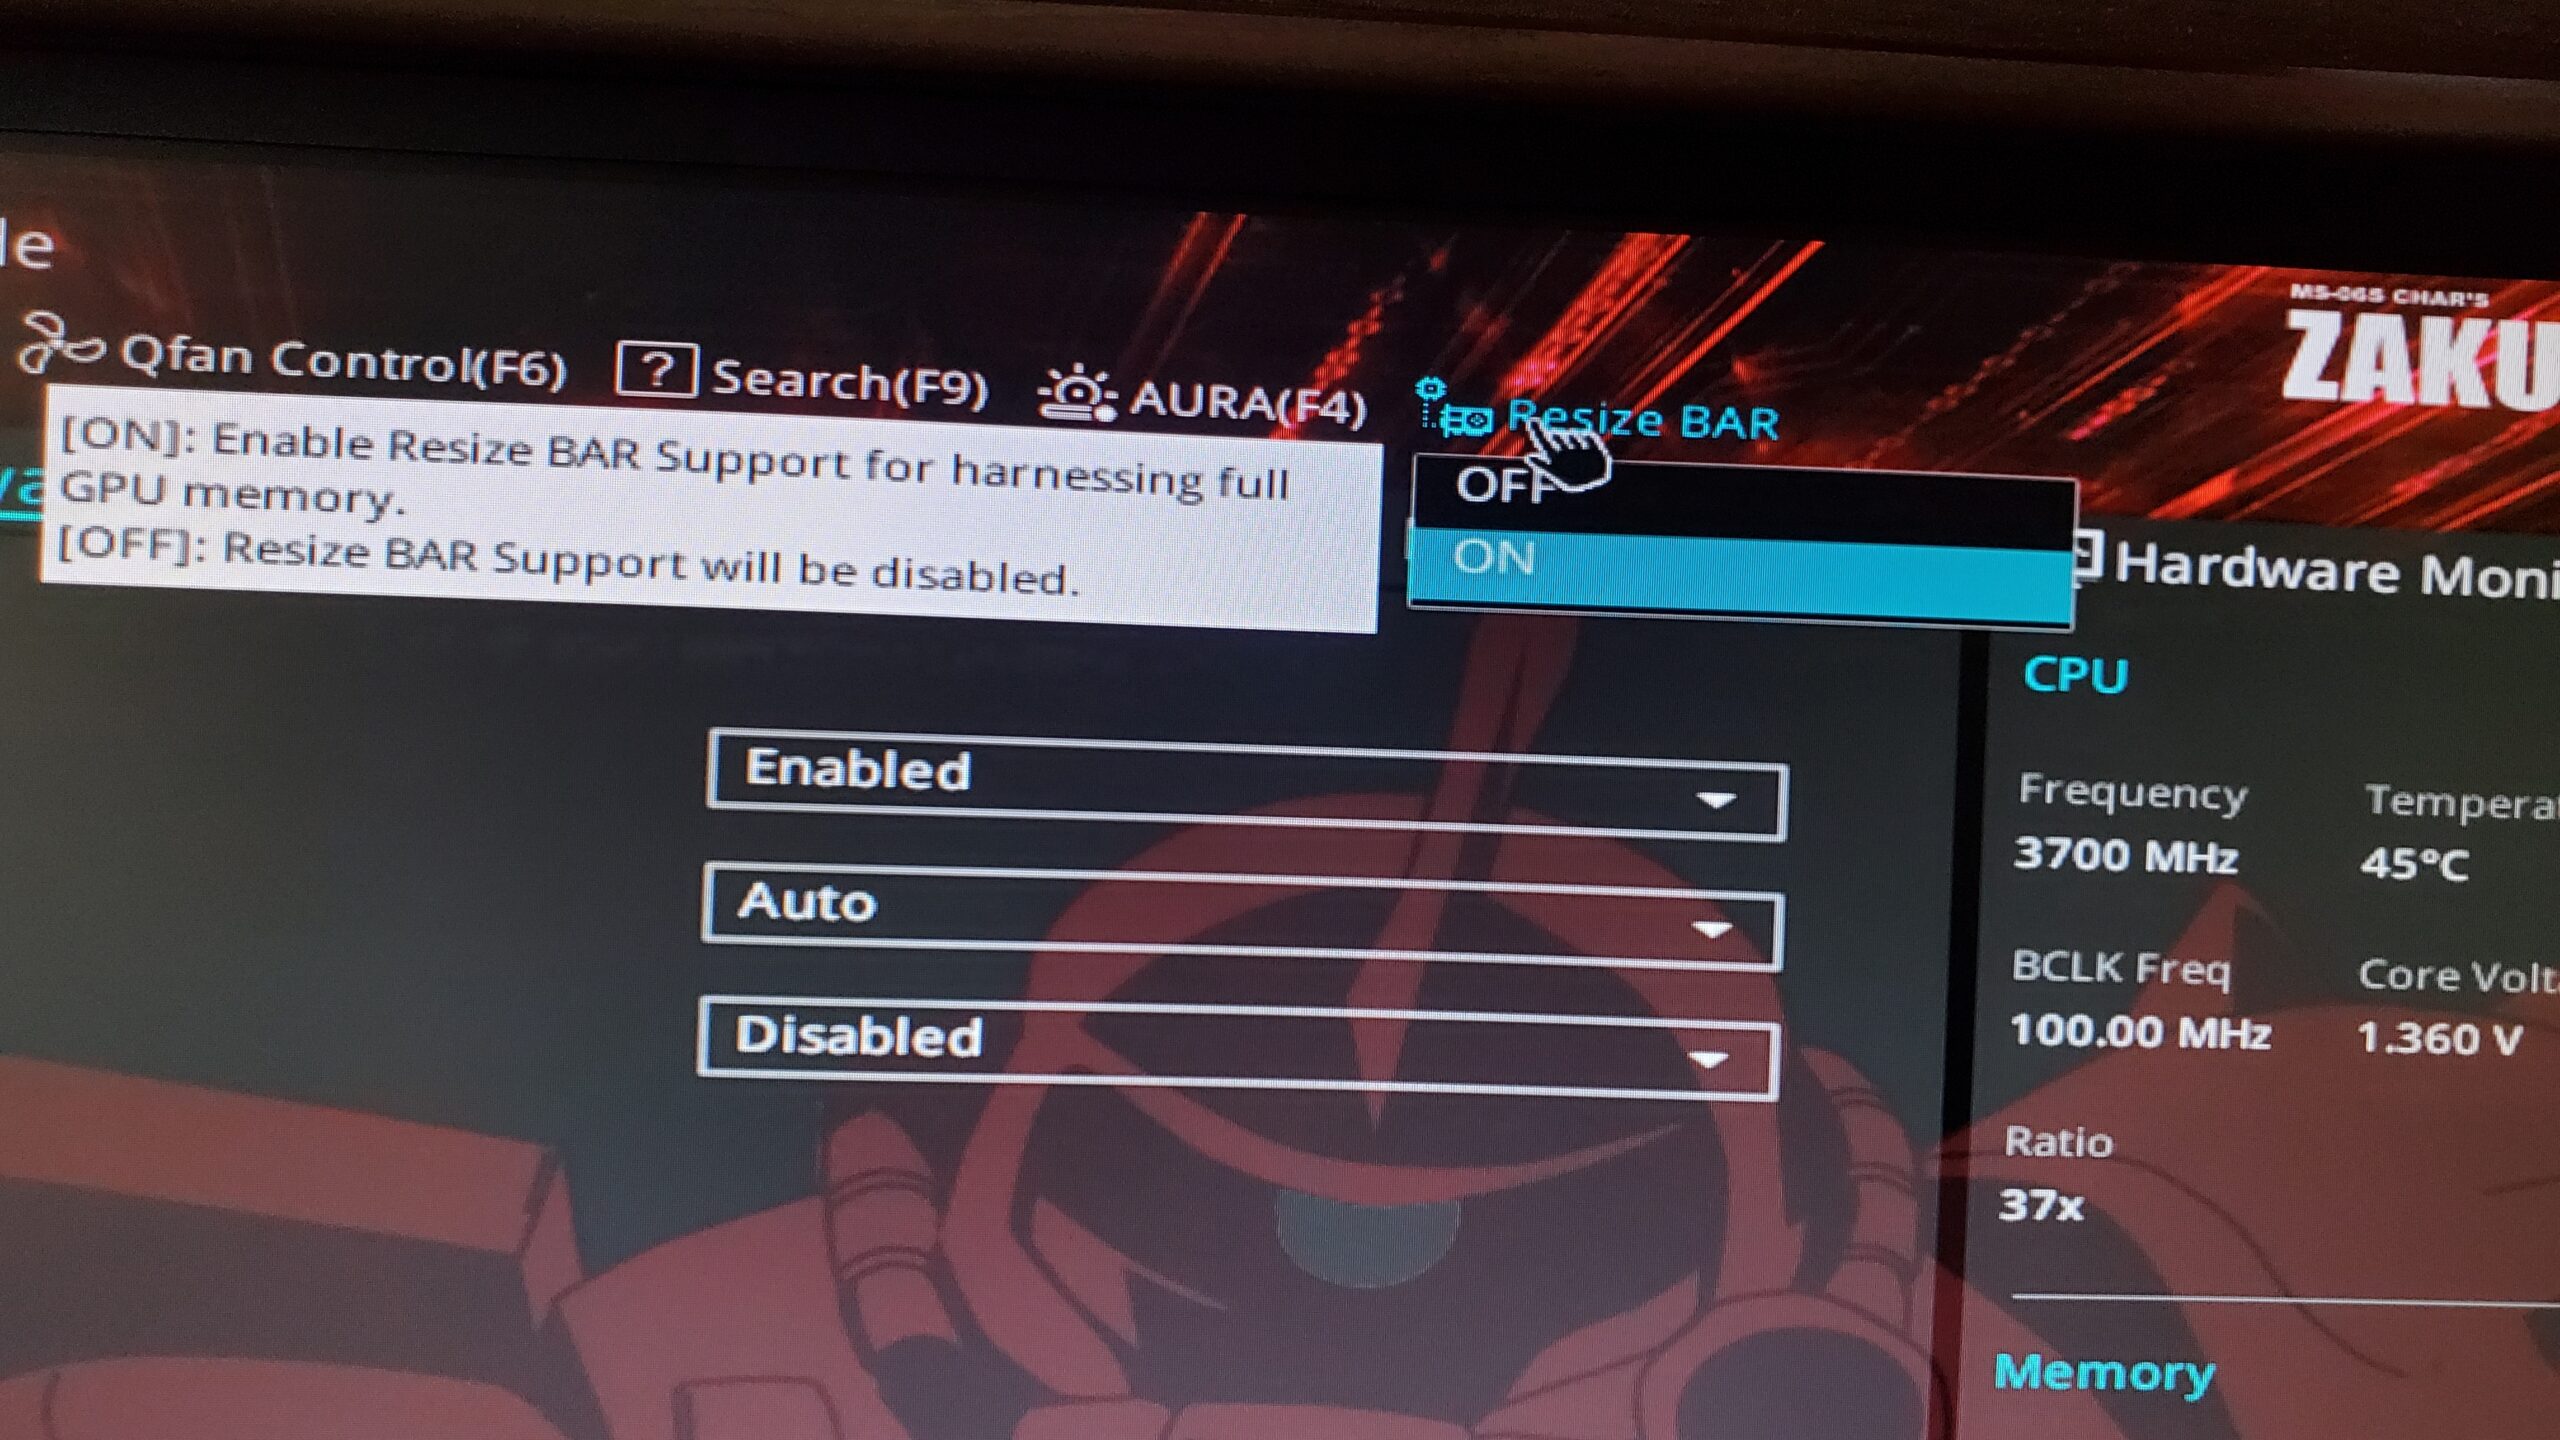
The BIOS settings had to be configured so that Resize BAR is ON. This is required for the P40 to function properly.
Turn on Resize BAR
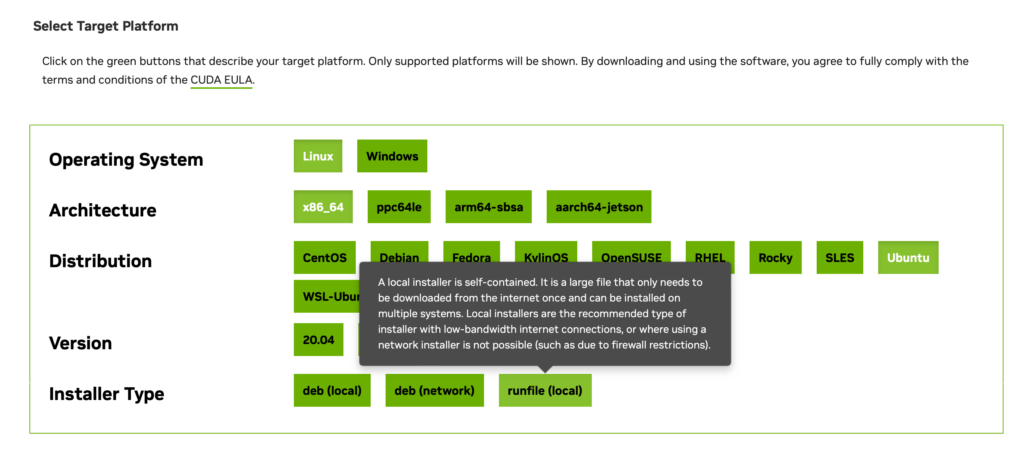
The next step is to install Ubuntu 22.04.3 LTS with Nvidia GPU and CUDA drivers. The latter was quite challenging. The traditional way of installing using the package manager did not work. The best way is to goto this site, and pick the run file like below:
Beside to use the runfile
The run file had to be run in recovery mode using the console because the installation will fail if an X11 window manager is running. Also all previous Nvidia drivers had to be removed and purged. The Ubuntu default installation process may have installed them.
A detail that was left out of the instructions is to set the appropriate shell paths once the installation is completed. The following changes were made with /etc/profile.d so that all users can benefit. If the login shell is using zsh, then /etc/zsh/zshenv has to be changed. Without this change, commands such as nvcc and other CUDA toolkit commands will not be found. The same is true for CUDA related share libraries.
$cat /etc/profile.d/cuda-path.sh

export CUDA_HOME="/usr/local/cuda"

if [[ ! ${PATH} =~ .*cuda/bin.* ]]
then
    export PATH="${PATH}:/usr/local/cuda/bin"
fi

if [[ ! ${LD_LIBRARY_PATH} =~ .*cuda/lib64.* ]]
then
    export LD_LIBRARY_PATH="${LD_LIBRARY_PATH}:/usr/local/cuda/lib64"
fi

if [[ ! ${LD_LIBRARY_PATH} =~ .*/usr/local/lib.* ]]
then
    export LD_LIBRARY_PATH="${LD_LIBRARY_PATH}:/usr/local/lib"
fi
In this hardware configuration the AMD CPU has integrated graphics, and the P40 does not have any HDMI or DisplayPort connections. We need to change the X11 configuration so that it will only use the AMD CPU while dedicating the P40 GPU for CUDA based computation. The following configurations have to be made in /etc/X11/xorg.conf:
The BusId can be obtained using the lspci command and be sure to change any hexadecimal notations to decimal in the configuration file. Without this xorg.conf configuration, the Ubuntu desktop will not start properly.
When everything is done properly, the command nvidia-smi should show the following:
Fri Aug 25 17:33:31 2023
+---------------------------------------------------------------------------------------+
| NVIDIA-SMI 535.86.10              Driver Version: 535.86.10    CUDA Version: 12.2     |
|-----------------------------------------+----------------------+----------------------+
| GPU  Name                 Persistence-M | Bus-Id        Disp.A | Volatile Uncorr. ECC |
| Fan  Temp   Perf          Pwr:Usage/Cap |         Memory-Usage | GPU-Util  Compute M. |
|                                         |                      |               MIG M. |
|=========================================+======================+======================|
|   0  Tesla P40                      Off | 00000000:01:00.0 Off |                  Off |
| N/A   22C    P8               9W / 250W |      0MiB / 24576MiB |      0%      Default |
|                                         |                      |                  N/A |
+-----------------------------------------+----------------------+----------------------+

+---------------------------------------------------------------------------------------+
| Processes:                                                                            |
|  GPU   GI   CI        PID   Type   Process name                            GPU Memory |
|        ID   ID                                                             Usage      |
|=======================================================================================|
|  No running processes found                                                           |
+---------------------------------------------------------------------------------------+
The machine is now ready for user account configurations.
A quick video encoding using ffmpeg with hardware acceleration and CUDA was performed to test the GPU usage. It was a bit of a challenge to compile ffmpeg with CUDA support. This is when I found out that I was missing the PATH configurations made above.
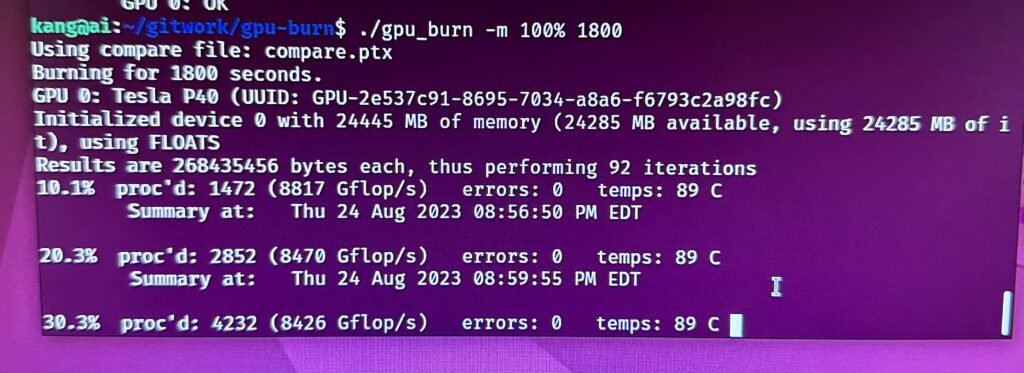
For good measure, gpu-burn was run for an hour to ensure that the GPU is functioning correctly.
Next step is to download and setup the tool chain for LLM development. We will save that for another posting.
Update: The runfile (local) method did not preserve through a system update using apt. I had to re-perform the installation with deb (local) methodology. I guess after not using the GPU for the desktop, we no longer have to run the operating system in recovery mode to install using the deb (local) method.