As of today, in Ontario, Canada, we are in the midst of reopening from a tight lockdown started in mid-March. The current rules are best explained in this article. While I love staying indoors enjoying my music, videos, and learning new stuff from watching tutorials on YouTube, to reading articles and books, I am certain others are feeling restless and having an innate urge to go out and enjoy the beautiful weather that is bestowed upon us in the middle of June. Part of this enjoyment, is to gather around with friends and family who we have not seen for so many weeks.
I too have been enjoying the blue skies and sunshine by riding my road bike. However, I have seen many people gathering around without practicing social distancing. Of course I am not here to tell people what to do, but I do want to take this opportunity to present my own risk assessment of the current situation. If anything else, many months or years from now I can look back to this post and re-read this assessment, hopefully in a lighter mood.
Currently Ontario is limiting to group gathering of sizes of up to 10 people, while practicing social distancing. The government also allowed the expansion of your household to connect to another household, so called double bubbling, as referred by the previously linked article. On the surface, these new rules seem to relax the isolation policies. However, my interpretation of these rules is that it will provide little opportunity for me to change my current behaviour. Personally, the double bubbling of your household is limited to one additional household, and this assumes the other household is only connected to yours, so the limitation is reciprocal. For us, this is still currently impractical. If you just include our parents (my wife and I), we have already exceeded the limit. As for the group gatherings of 10 people while practicing social distancing, this really means that the other 9 can be potentially asymptomatic carriers of the virus, and we should be wise to treat them as such. The personal risk of contraction really has not been reduced. The group size limitation is probably more for ease of enforcement than a reflection that you are now more safe.
So what is our risk of contraction versus when the lockdown began? I am not a doctor, but I can collect some data from the worldometer web site, and perform some amateur analysis. Here is what I found.
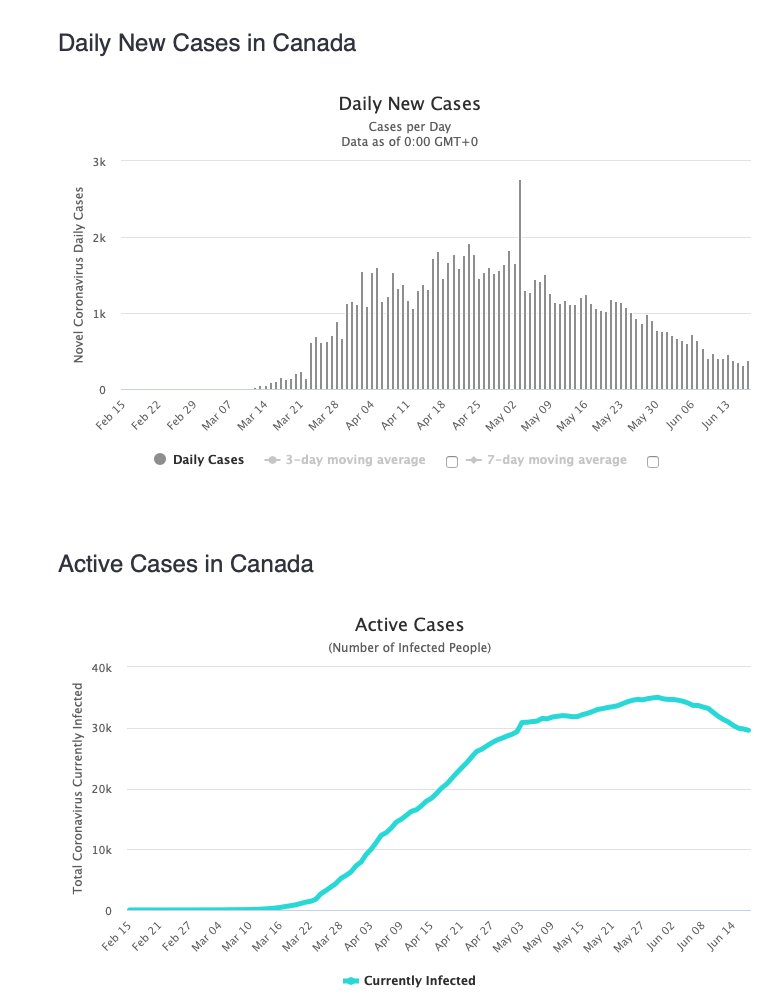
The above clearly shows that daily new cases within Canada is still much higher than before the lockdown (started in mid March). The current active cases are equally alarming. Although the trend is heading in the right direction, it does not appear to reach a state where we can say we are better off today. Granted that these are national numbers, but then I come across articles like this, where the CBC reported less than a day ago that a local Home Depot store (less than 10 km away from our house) has 14 of its employees tested positive for Covid-19.
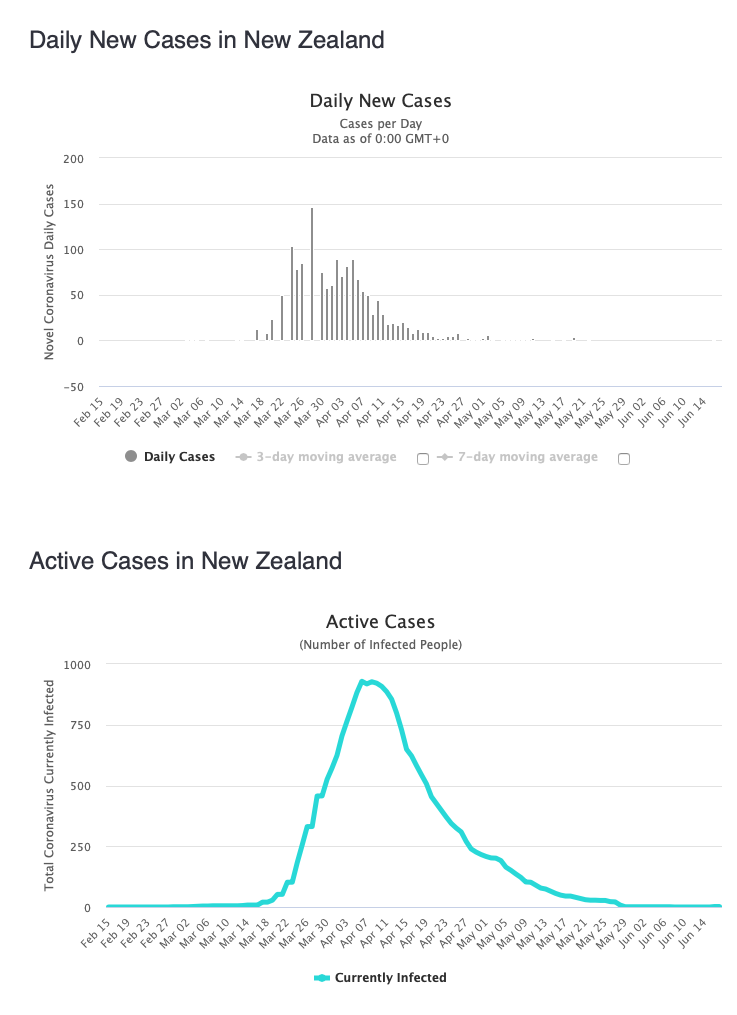
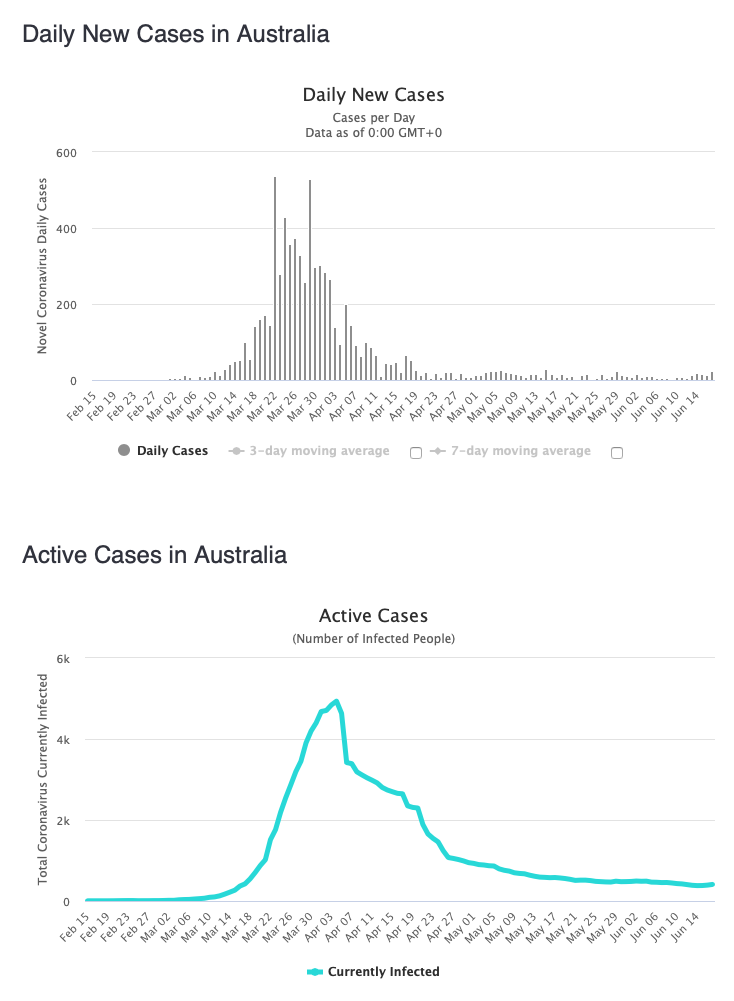
For contrast, I compare our Canadian numbers with two other countries. The first is New Zealand, who victoriously eradicated the virus, and the other is Australia, a country comparable to Canada in terms of population distribution and size.
As you can see that both countries are in much better shape than we are. My point is that Canada should at least be looking like Australia before we even think about re-opening, because our numbers are still 1 to 2 orders of magnitude away from Australia, where they are experiencing a tolerable flatten daily infection rate.
A couple of weeks ago I heard a horrible story. Someone contracted the virus and was asymptomatic and unbeknownst to them, gave it to their parents. The father passed away because of it, and the mother was hospitalized. Although this was second hand information, it was direct enough for me to treat this information to be real. The first thing that came to mind was that to be responsible for your own parent’s death is a burden and a regret that no one should bear. I for one certainly do not want to be in that position, when I can currently control my own behaviour in this current environment.
So in summary, I personally feel that Covid-19 in Ontario, Canada is still a clear and present danger. Any reopening policy should be taken into context and I will personally continue to behave as if everyone who I encounter is a possible carrier of the virus.
So am I paranoid, or do you feel the same after you process the data from above?
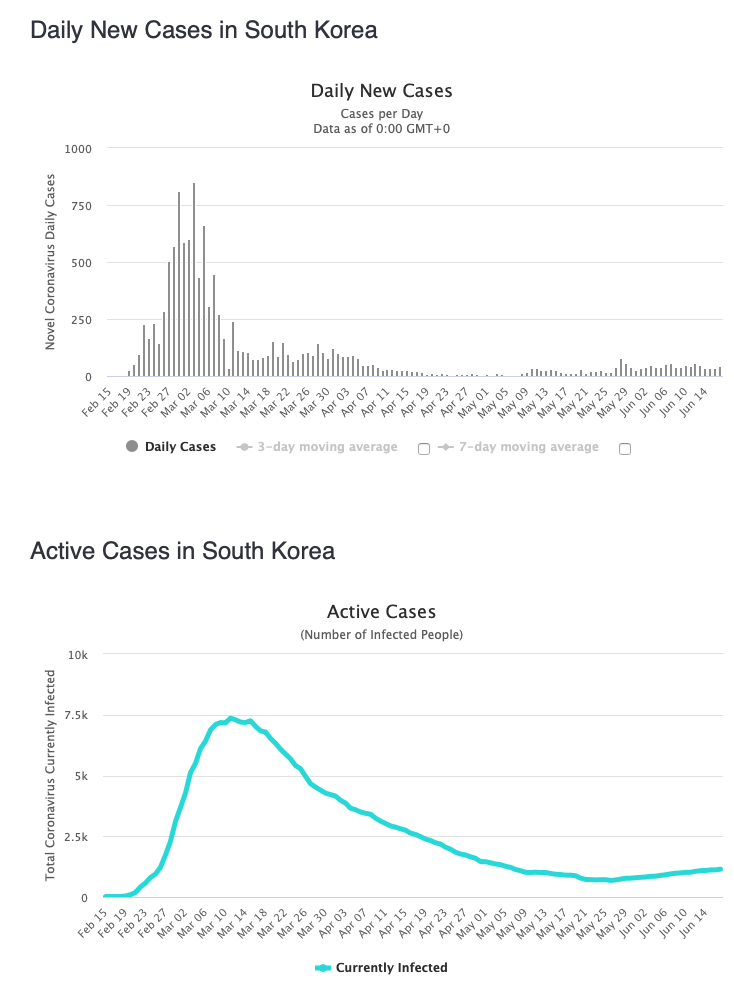
Updated: Added South Korea