
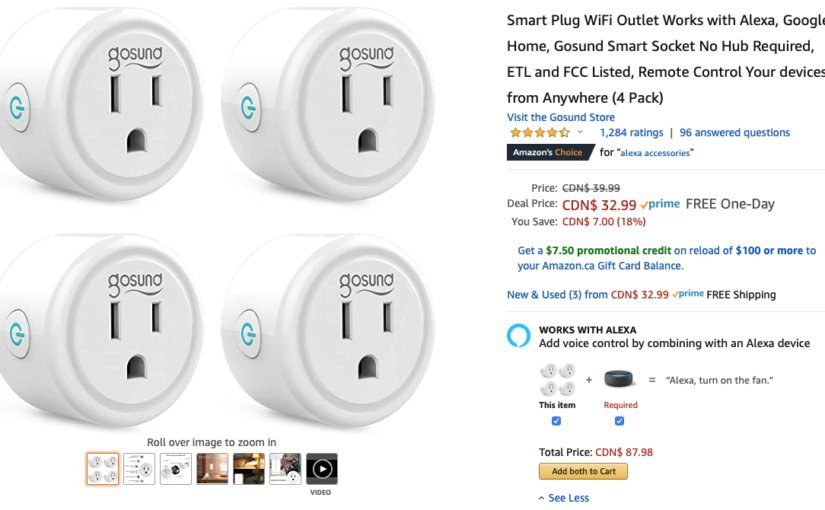
Recently I received an Amazon email, and I found the above Gosund Smart Socket promotion. Four smart plugs for $33 CAD. Unfortunately, it was not HomeKit compatible. I did not want to have any of my smart IoT devices connected to Amazon or Google so no thank you Alexa and Google Home.
A few years ago, I built my own smart garage door opener and hooked it up to the Homebridge server that is running on my NAS media server. The Homebridge server allows non-certified IoT devices to be connected to HomeKit. My garage door opener being one of them. I did a cursory search on Google and found that it should be possible to connect the Gosund outlets to HomeKit using Homebridge, so I took the plunge and made the purchase.
The plugs came and I downloaded the Gosund app and setup one of the outlet. It worked like a charm through the Gosund app. As I was setting up this single outlet with Homebridge, I found tuya-convert. This is an alternative to Homebridge. Instead of registering the device to Homebridge, tuya-convert claims that I can just flash the firmware and I can add the Gosund plug directly to HomeKit. Sounds attractive and I have to give it a shot. Long story short, I was successful with replacing the firmware, but when configuring the plug I provided wrong configuration data and as such I was locked out of the plug, effectively bricking the plug. Nothing ventured, nothing gained. While doing this exercise, I learned a lot about how to use esp-homekit-devices project to turn any ESP8266 chip set and make it HomeKit compatible. This could be very handy in a future project, but for now let’s go back to Homebridge.
I found that the version of homebridge on my NAS server was outdated, and so was the version of node. I backed up my existing homebridge configuration and proceed to uninstall homebridge.
I installed the latest stable version of node as of the writing of this blog, v12.19.0. I then followed these instructions and installed the latest version of Homebridge. This new version came with a web based UI as well. For convenience, this is what I did:
sudo npm install -g --unsafe-perm homebridge homebridge-config-ui-x
sudo hb-service install --user homebridge
I then reinstalled the Homebridge plugins that I previously had, which included homebridge-camera-ffmpeg, and my custom homebridge-kl-garage.
The Gosund plugs effectively uses the Tuya IoT Platform. So instead of using the Gosund App, I downloaded the TuyaSmart App from the App Store. The user interface is nearly identical to the Gosund App and I re-added the outlet with the TuyaSmart App.
Now I’m ready to install the homebridge-tuya plugin using the instructions here:
% sudo npm install -g --unsafe-perm homebridge-tuyaAs per the instructions, I watched the YouTube video and followed its steps using the QR-Code method.
However, I found the video to be incomplete and I ran into issues when running the tuya-cli command. Essentially I got an error indicating that I did not have permission to run the API.
Using the information I had from the video and after some more Google searches, here are the steps which I followed and they worked for me.
First, install the tuya-cli command:
sudo npm i @tuyapi/cli -gNext I had to create an account with iot.tuya.com. The sign-up process was a bit tricky because their email sending out the verification code seem to be slower than the allotted 60 seconds before the whole process timeout. It took me a couple of tries before I was able to create an account.
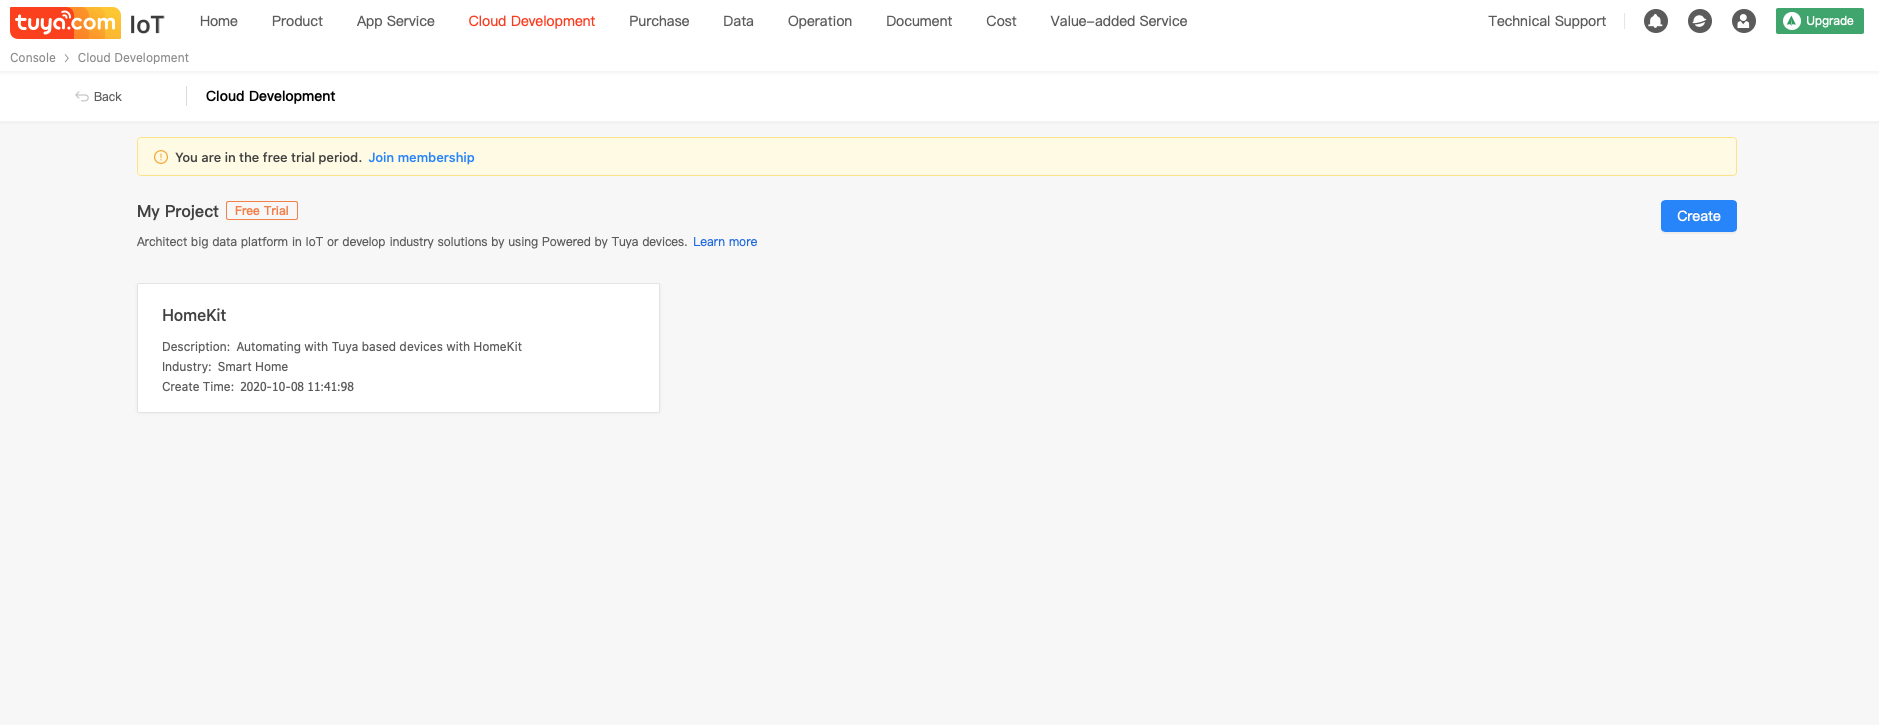
Once the account is created, I proceeded to create a project called HomeKit as part of Cloud Development. Below is a screenshot from the site.
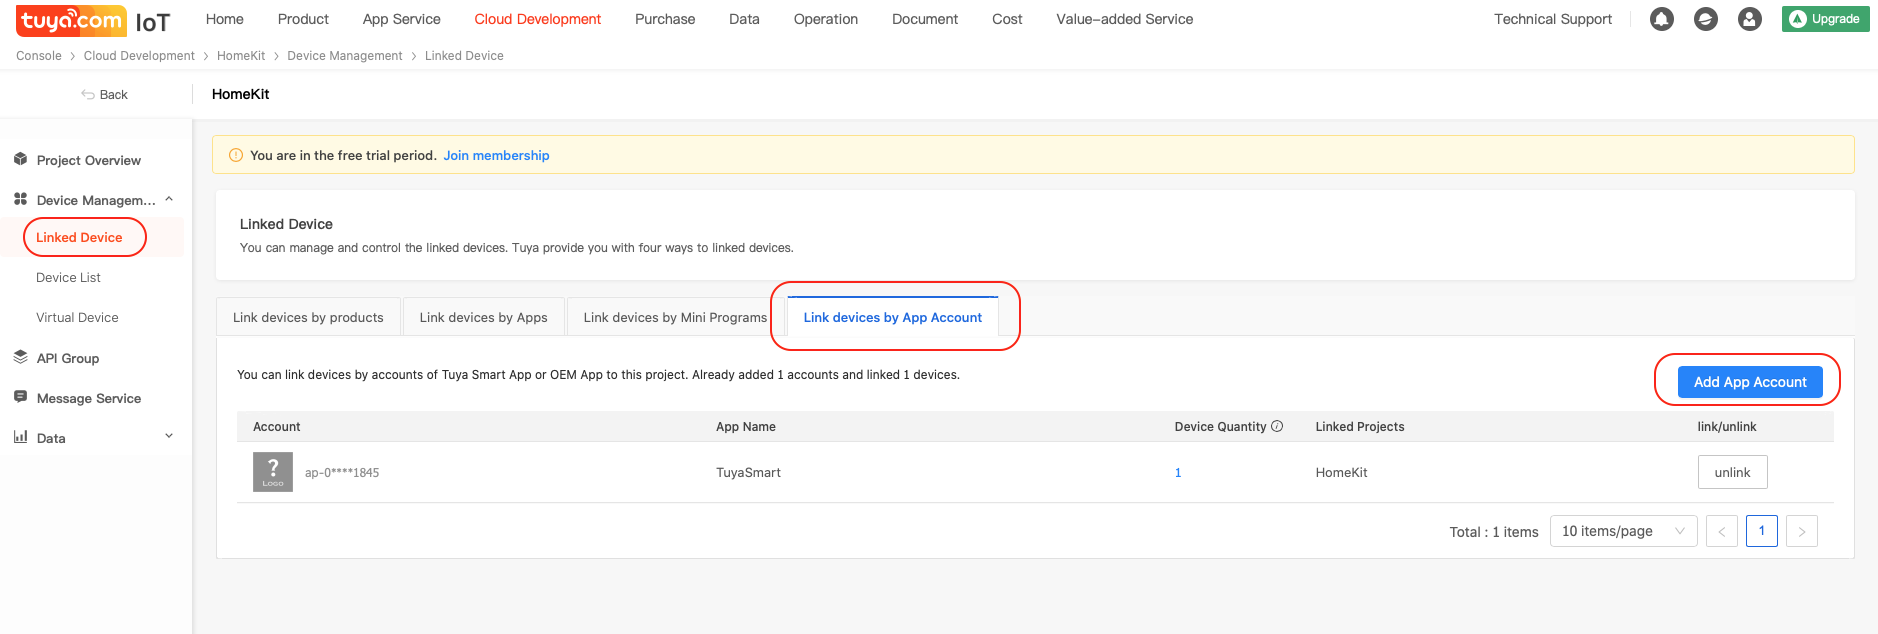
Click into the project and under Device Management, we need to link devices using the Link devices by App Account tab. When you click on the Add App Account, a QR-Code will be presented which needs to be scanned from the TuyaSmart App.
To scan the QR-Code, open the TuyaSmart App and select the Me tab at the bottom, and tap on the scan icon in the upper right hand corner.
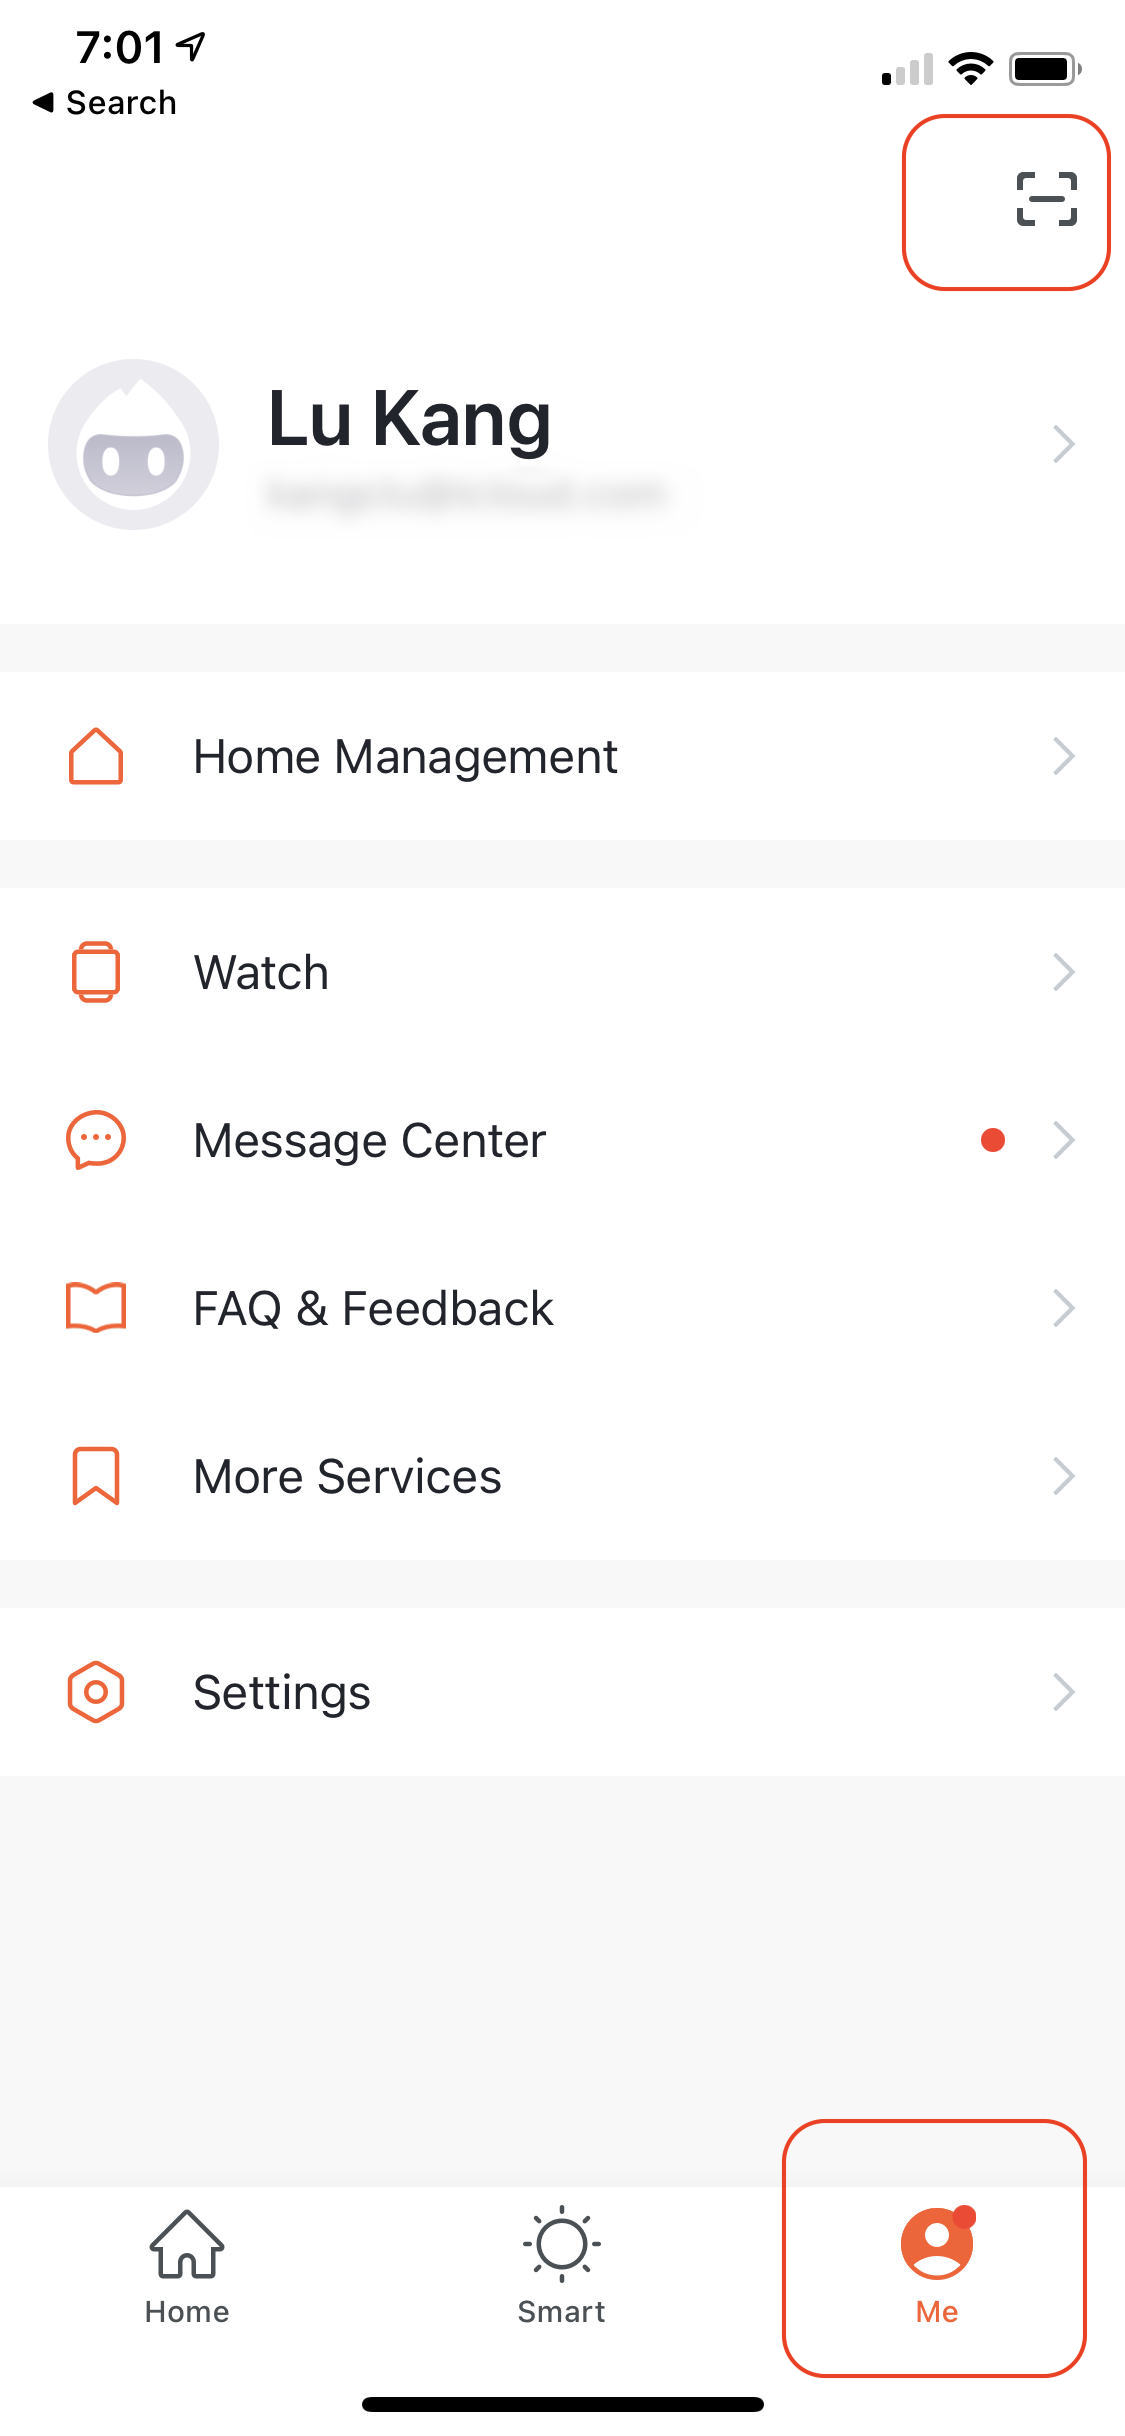
to Scan QR-Code
Once the TuyaSmart App scans the QR-Code, you will see the Account along with a device count that you previously linked to your App.
You should be able to list all the devices that you previously registered / paired with the TuyaSmart App. I had to select America before I see the devices. See below.

You will need the virtual id which is the identifier below the device name. Go back to Project Overview and take note of the client id and secret:

Once you have these three pieces of information, you can then find the keys for your devices that you will need to configure the homebridge-tuya plugin. To do this, execute the following (note that the API key and secret below are fake):
% DEBUG=* tuya-cli wizard
? The API key from tuya.com: akkopy4vox723px9kcb23
? The API secret from tuya.com 3hfjodfu672kfm08711kpsnbvzzuyerk
? Provide a 'virtual ID' of a device currently registered in the app: 46616355e09806ca6ba7
The above command should yield something like (again the key is fake):
[
  {
    name: 'Mini Smart Plug',
    id: '46616355e09806ca6ba7',
    key: '823a8ee651beefdead'
  }
]
Now that we have the id and key for the Gosund outlet, we can then configure Homebridge using the homebridge-tuya plugin. We use the Homebridge web interface to do this.

The configuration for the plugin looks something like:
{
    "platform": "TuyaLan",
    "name": "TuyaLan",
    "devices": [
        {
            "name": "Mini Smart Plug",
            "type": "Outlet",
            "manufacturer": "Gosund",
            "model": "WP3 Mini Smart Plug",
            "id": "46616355e09806ca6ba7",
            "key": "823a8ee651beefdead"
        }
    ]
}
Once I restarted Homebridge on my NAS server, my Home App on my iPhone showed the smart plugs all configured. Below is what it looks like once I configured three of the Gosund smart plugs.
The integration is pretty good. The plugs are pretty cheap that I decided to buy four more.
Update: I had to add the "encoderOptions": "-preset ultrafast" property in the videoConfig object, as well as ensure the "audio" property is set to false of the homebridge-camera-ffmpeg plug-in configuration to fix the HomeKit camera streaming. With the latest version 3.0.3, the picture freezes and only get audio if this encoder option was not provided. Below is a complete sample for one of the Unifi cameras:
"cameras": [
                {
                    "name": "Dining Room",
                    "videoConfig": {
                        "source": "-rtsp_transport http -re -i rtsp://192.168.168.198:7447/5e42fef4a8faffa2326b5d38_0",
                        "maxStreams": 4,
                        "maxWidth": 1280,
                        "maxHeight": 720,
                        "maxFPS": 15,
                        "maxBitrate": 600,
                        "vcodec": "h264",
                        "packetSize": 188,
                        "mapvideo": "0:1",
                        "mapaudio": "0:0",
                        "audio": false,
                        "encoderOptions": "-preset ultrafast",
                        "debug": false
                    }
                }
]
One thought on “Gosund (Tuya) Smart Outlet with HomeKit”