Mobile Phone in Mauritius

In an earlier post, I mentioned that we purchased the my.t tourist package. In this article, I will explain how to configure the iPhone when using the Dual SIM feature.

Fig. 1: All Configurations are in Cellular

In Canada I have the Koodo mobile service, and when I arrived in Mauritius I purchased the my.t tourist package. This package can be provisioned with an eSim. An eSim is an electronic SIM card. This is a digital, virtual SIM card residing in the secure memory of the phone instead of a physical SIM card. Any iPhone above an iPhone Xs has the ability to add one or more eSIM card. My Koodo service has an existing physical SIM card already within my iPhone. Both the eSIM card and the existing physical Koodo SIM card can coexist on the iPhone. In other words, the iPhone can access both networks at the same time. This is essentially the Dual SIM feature.

Fig. 2: Adding an eSIM

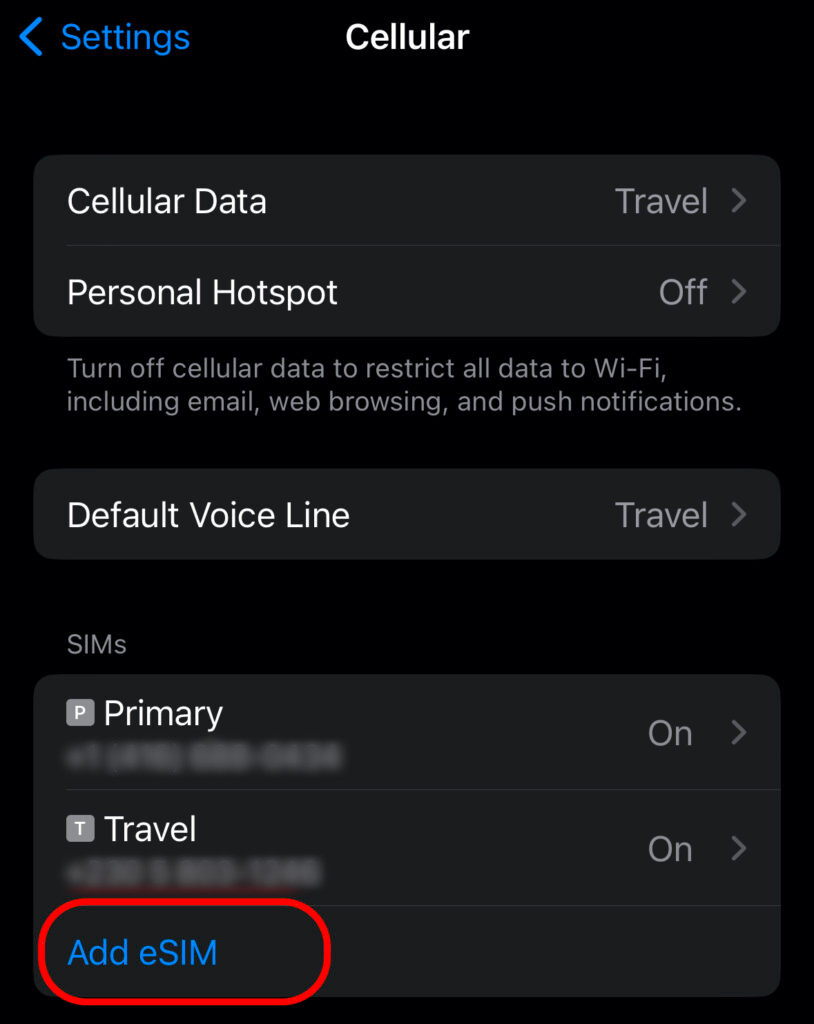
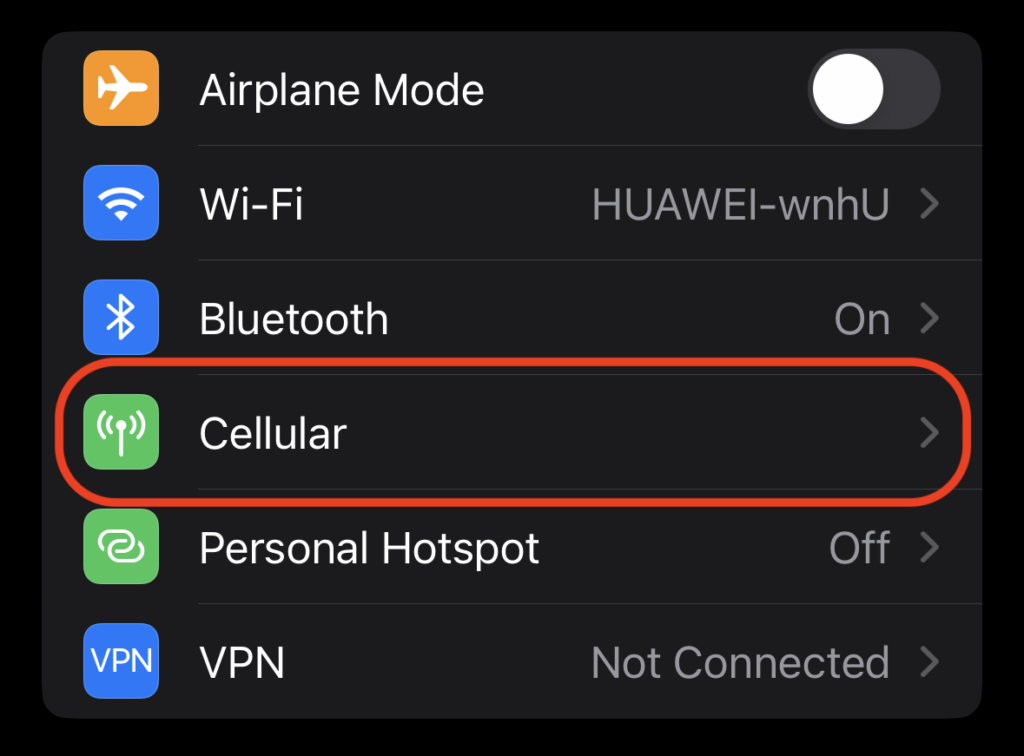
To add the eSIM, simply goto Cellular Settings and select Add eSIM. You will need to scan the QR code which is provided by the my.t provider. This is important. Remember that you must have WiFi service before you scan the QR code. We did this at the airport using the telecom kiosk WiFi. You can have eight or more eSIM installed but only two phone numbers active at the same time, so this is quite a handy feature if you frequently travel to many destinations.

Once the eSIM is activated, you should have my.t service in Mauritius. By default the iPhone labeled my existing Koodo service as Primary and my my.t service as Personal. I renamed the Personal to Travel as depicted in Fig. 2. I also make sure that Cellular Data and Default Voice Line is using the Travel (my.t) service.

Fig. 3: Ensure Data Roaming is OFF

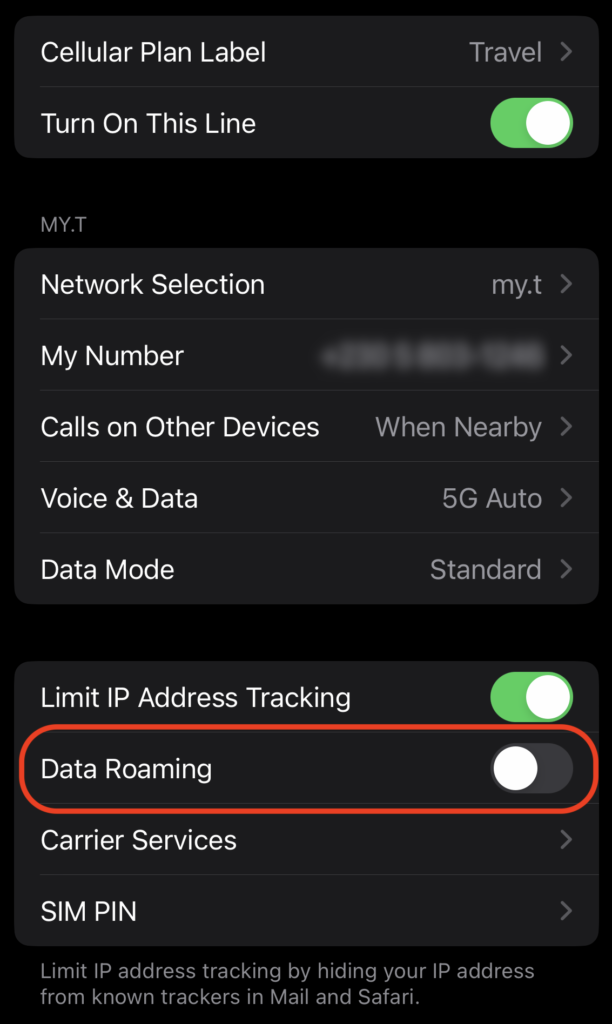
The other thing that I did was to ensure that Data Roaming is off. See Fig. 3. You can do this by tapping into the details of the SIM service. In my case, I tapped on “Travel”.

I also went online to Koodo self-service and activated Easy Roam® International. At this point, you are probably wondering why are you roaming with Koodo when you already have a local Mauritian eSIM? The answer is that I am simply enabling Koodo roaming services but will actually not be using it. The Koodo roaming needs to be enabled so that my existing Koodo phone number is “reachable” by voice and SMS from Canada and elsewhere.

Fig. 4: My Primary Service Configuration

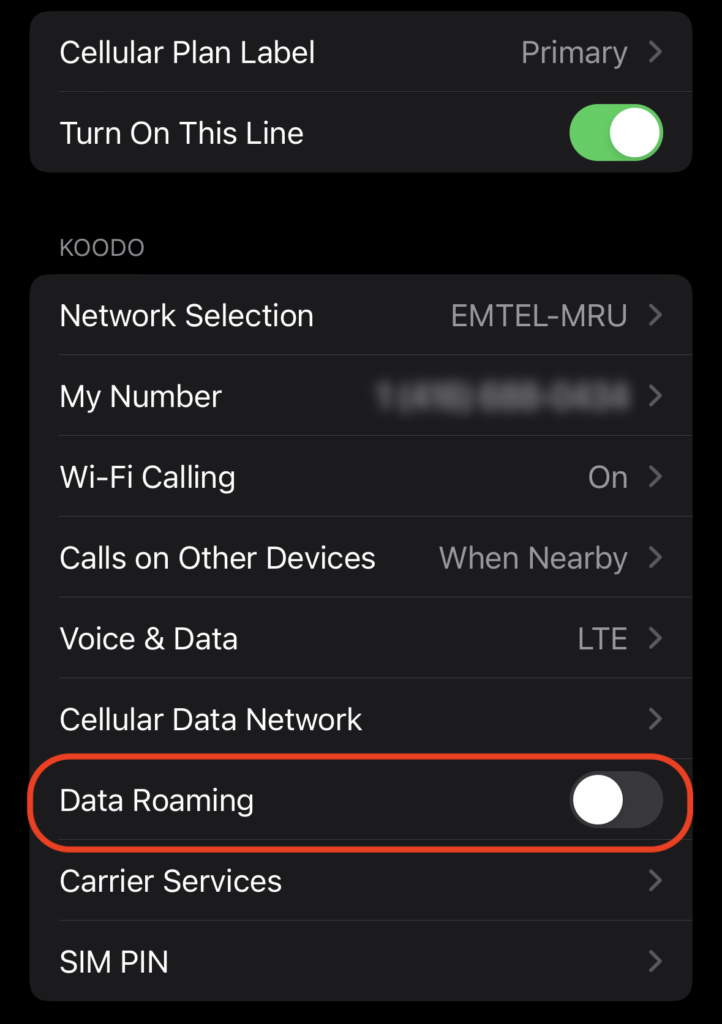
To ensure that I do not roam on the Koodo network, I then have to make sure that Data Roaming for my Primary service is also turned off, as depicted in Fig. 4. Notice that the “Network Selection” is EMTEL-MRU instead of Koodo, because Koodo is roaming under EMTEL.

So now while I’m in Mauritius when I use data and voice, by default it will use the my.t local Mauritian service. However, I am also reachable from Canada with my existing Koodo number. Koodo roaming is only activated if I accept an inbound call from Canada or other international countries other than Mauritius. Not to worry, receiving international SMS messages is free. This is especially handy for two factor authentications, like logging into a bank. You can even customize which service each contact should use, but I won’t go into that here.

Any apps that uses your primary number, like WhatsApp and WeChat will still be okay, because that number is still active, but those apps will use the local data service. You do not need to change your number that is associated with WhatsApp and WeChat.

If all goes well, your iPhone should report dual services.

Fig. 5: This is what your iPhone

Finally I turned on automatic Data Switching, so when I go back home to Canada, Koodo data will be used again.

Fig. 6: Turn on data switching

Hopefully you will find this useful.

Possible Future of the Connected Watch

On Tuesday of this week, Apple announced the Apple Watch Series 3 with the ability to connect to the LTE data network, allowing the watch to stay connected to the Internet without an accompanying iPhone. This greatly enhances its functionality and removes its original handicap and its requirement to always be tethered to the phone. You can now get notifications and listen to the plethora of songs on Apple Music while on the go without your phone. The future is here.

Ever since the Apple Watch was released in the spring of 2015, it has been thought of as a companion device to the phone. However, I always thought it should be the other way around. The phone and tablet should be the companion devices to the watch!

The watch should be the only device that has the mobile networking radios and should operate in an always on manner, while sharing a personal hotspot via its WiFi radios. The phone and tablets can then function as displays with WiFi connectivity to your watch. This will also simplify your cellular data plans. I just see this as a more convenient setup, and hopefully a cheaper way to go with your mobile carrier.

As memory capacity increases with the watch, personal identity, application data, and other confidential information can be stored on the watch akin to the secure enclave on the iPhone today. This way display centric devices slaved to the watch can restore your last working state from the watch. Imagine a world where display slates are near commodity devices sans your personal information. You can be working with a shared slate in the office. All the while, your data is being centralized and stored securely on the watch. When you travel offsite at the airport or in the hotel, you pickup another shared slate, and you continue to work where you left off.

It is also more difficult to lose your watch than your phone. When you do misplace your phone and cannot find it, then just pickup another, because your personal data is stored on your watch.

Power consumption is probably going to be a major challenge for the watch in this scenario. But if the power challenge can be solved, then imagine having only WiFi display slates of any size of your choosing, and your watch has the only mobile data radio you will need. Instead of the phone being your most personalized information device, it will be your watch. I hope Apple has this vision in mind. Do you believe this to be a better future?

iPhone 7 Manual Camera

Good morning! I woke up before the sun rise and was staring at my bedroom window when I suddenly became curious to how my phone’s camera will perform under these super low light condition.

I downloaded the Manual Camera app from the App Store, and adjusted the ISO, focus, white balance, and shutter speed, took the shot of my bedroom window. I wanted a balance of properly exposed picture but not too grainy. I then shot a picture with the standard camera app which is in full auto. 

Top is full auto and the bottom is with the Manual app

The auto version seemed over processed while the manual version looked more realistic in comparison to the real lighting condition at the time (prior to sunrise). The color of the sky in the manual version is also more true to reality. If you have a chance, play with the Manual app.

This is also the first post that I produced entirely on my iPhone while still in bed. Amazing what you can do with your smartphone these days!

New iPhone 7 with A Big Scare

I just received my new Black iPhone 7 today from the office. My first impression was that The Black (not Jet Black) is very nice. The black colour melds nicely with the antenna bands rendering them invisible. If the previous iPhone 6s had this colour scheme, I would have chosen it as well.

With every new iPhone, I do the ritual of backing up my old iPhone and restoring the backup on the new one. This time however, I ran into a glitch and nearly gave me a heart attack!

Right after choosing “Restore from iCloud”, the new iPhone 7 informed me that I should update to 10.0.1. I guessed it was shipped with 10.0.0. I did not think much of it, and of course proceed with the upgrade. The upgrade completed without any incidents. What really gave me a real unpleasant surprise, was that it did not perform the restore! Arghh!!!

I kept calmed and went to the iCloud settings and to my surprise I found that iCloud Backup was turned off. I said to myself, “No Big Deal”. I went ahead and turned on iCloud Backup. And then the dreaded words of “Last Backup: Never” came up. WHAT?!

These are the times when having more than one Apple devices really help. I went to my iMac through System Preferences I made sure that the backup that I just performed on my iPhone 6s was intact. Sure enough, it was there. Whew! I decided to erase the new iPhone 7 again, and restart from scratch. The second time around, it found the backup and is now restoring. Fingers crossed, let’s hope the restore goes well!

Another interesting thing is that I had two factor authentication turned on and my old iPhone 6s is the default secure device. While setting up the new iPhone 7, I had to use my iPad Air to authenticate. Yet another case for having multiple iDevices handy.

Okay, I am exaggerating the perils of the above situation. In the worst case, I still have my old iPhone 6s and I can plug it into iTunes and have it perform a backup. Any how, everything is restoring now. Awaiting my iPhone 7 to restore and start playing with my new toy!