Two years ago I started to tinker with the Arduino platform and created a simplistic garage door opener by coupling a fairly inexpensive Leonardo board with a even cheaper ESP8266 WiFi board. It took quite a bit of work, figuring out how to configure the WiFi with the ESP8266, and struggling with its unreliability. I also wrote a little iOS test app so that I can control the garage door opener with my iPhone.
After numerous hours and a total bill of materials for less than $20, here is a short video on the fruits of my labour about a couple of years ago:
I have been tracking the Raspberry Pi platform for quite sometime, but always found them to be comparably expensive to the Arduino boards, especially all I needed was something to get on my WiFi network, and be able to respond to a remote request to effectively flip the proverbial switch. So when I found out that you can get a Raspberry Pi Zero W for $13.45 CAD at CanaKit.com, I was pretty excited to give it a try.
I purchased the Pi Zero W as well as the Pi 3 Model B. Why not?
Spent a good chunk of yesterday to:
- Followed the instructions on raspberrypi.org to download and copy the image to a 16GB micro SD flash drive.
- I needed to ensure that there is an empty file named
"ssh", so that I can ssh to the board remotely from my Mac. I was too lazy to find the keyboard, mouse, and required cables. Thanks to Michael Smalley for providing this very helpful page.
- Configure the WiFi settings with the good instructions provided by David Maitland.
After the above, the Pi board just needs power and nothing else, and I was able to establish an ssh session from my Mac to continue on with the configurations.
- First I updated the environment.
sudo apt-get update

sudo apt-get dist-upgrade
- Then installed the Java Developer’s Kit
sudo apt-get install oracle-java8-jdk
- Installed Node.js along with Express and wrote a super simple Express app. The instructions by Yannick Loriot were really helpful. Did not try to use
apt-get to install node, because it ended up crashing the board with a kernel panic. That path led to many lost hours.
wget https://nodejs.org/dist/latest/node-v7.7.2-linux-armv7l.tar.gz

npm install express --save
Update 2017-03-14: The
armv7l apparently only worked for the Pi 3, but for the Pi Zero W, I had to get the
arm6l version.
- Installed Samba, so that I can use my editors on my Mac to edit code.
sudo apt-get install samba
Note that we had to use smbd to restart the service after configuration.
sudo systemctl restart smbd.service
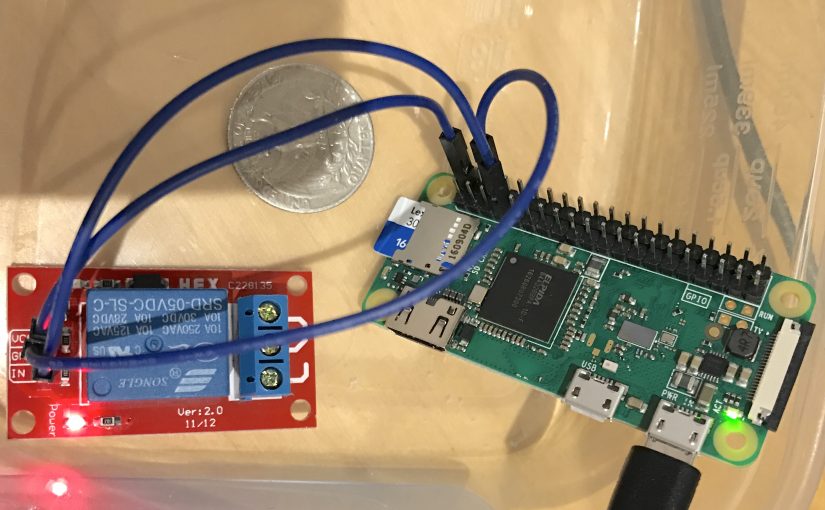
Once I have my development environment all setup and that all the networking stack is working properly. I can then start to play with the GPIO pins that came with the Pi. The idea is to provide a simple web service app powered by Node.js and Express to turn on or off or simply toggle a GPIO pin, acting as a switch, which I can hookup to a relay.
I first downloaded the wiringpi package.
sudo apt-get install wiringpi
I used the above package to get familiar with the GPIO mechanism and play around with it on the BASH command line.
Once I was comfortable with the concept, I wanted to hook it up with the Express app which I did with the onoff npm module. I spent this morning creating a simple Swift iOS app, and wired the Pi to the relay.
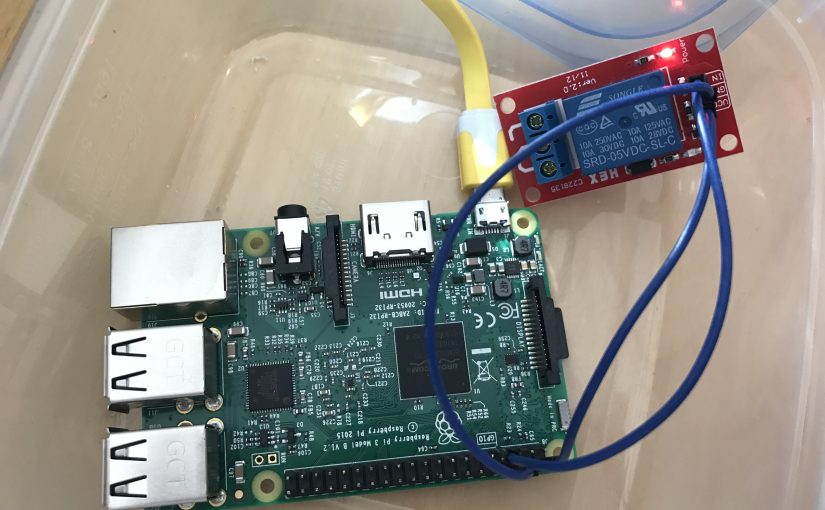
You can see it all working in the video below. When I press the button on my test app from my iPhone, you’ll see the red LED blinking denoting a pulse on the switch — think of this as you press the garage door opener. The yellow wire is the USB cable that is just feeding the board with power. Thrilling!
I am not finished yet. I still have to make the iOS app and web service more secure and switch from the Pi 3 to the Pi Zero, but not this weekend. However, my initial impression of the Raspberry Pi platform is much simpler for me, coming from a software background. My hardware skills are at best rusty from my university days. The micro controller environment of the Arduino platform is also very finicky and more difficult to debug. There is nothing like working with a real operating system with a mature development stack.
I also used my wattage meter to figure out how many watts the system was drawing, and it only peaked at less than 3W. That’s pretty good!