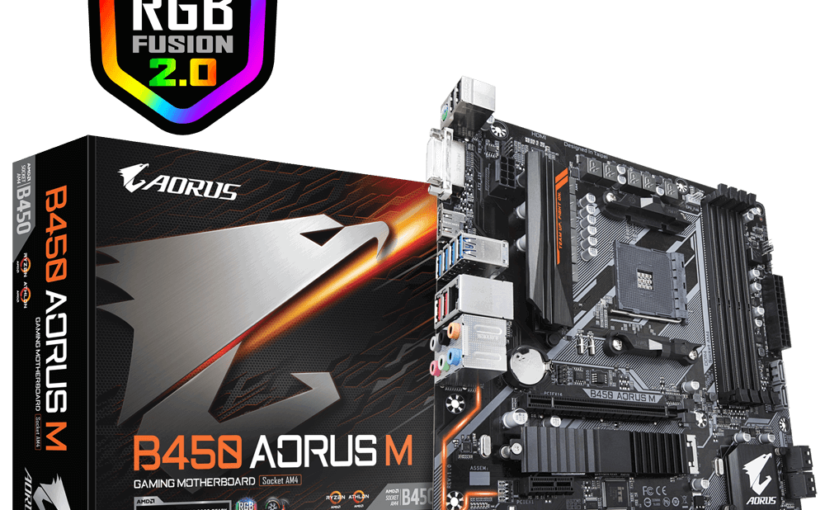
Two and half years ago, I performed a CPU and motherboard upgrade to my media server. You can read the account here.
Although the AMD Athlon 5350 APU was energy efficient, it proved to be under power for on demand video encoding when Plex wanted to transcode video for a player on a device that is not compatible with the playing video. For example, when an Apple TV (not 4K) wants to play 4K material from Plex on my media server, the server will have to transcode the 4K material to a compatible 1080p format. Unfortunately, this is very CPU intensive and if more than one person in the house hold is trying to do the same thing, which is not unheard of, this causes stuttered playback issues.
Given the choice between saving a few dollars a year versus usability, I choose usability. Therefore I started to research what I need for the upgrade. My goal is upgrade the system so that transcoding will not be an issue and I can also use the system for future video encoding of security camera footages. We can also use the system for background video encoding of family videos as well.
I continue to prefer the AMD brand, and decided on the following combo:
- AMD Ryzen 5 2400G Processor with Radeon RX Vega 11 Graphics (YD2400C5FBBOX)
- GIGABYTE B450 AORUS M Motherboard
- Corsair Vengeance LPX 16GB (2x8GB) DDR4 DRAM 2666MHz (CMK16GX4M2A2666C16)
The above were all purchased through Amazon and cost me a grand total of $473.24. The AMD CPU was the most expensive part costing almost $190.
Taking out the old motherboard and CPU combo and replacing them with the new parts went smoothly. The side SATA connectors bucked against one of my HDD chassis so I opted not to use them, and decided to connect all of my RAID SATA connectors to the SATA accessory card that I purchased and discussed in this post.
Last time I did an upgrade like this, the Ubuntu operating system had no problems and booted without any issues. Unfortunately, this time is very different. After the machine posted, Ubuntu booted into a blank, black screen. After some research, I learned to reboot the Ubuntu kernel with the nomodeset option. I learned to press and hold the shift key so that I can select the desired kernel that I wanted via the GRUB menu, and I learned to press the ‘e’ key in the GRUB menu to modify the boot options. Finally pressing F10 to boot with the custom changes (effective for only one time).
The above trick got me a login prompt. After I gained access to the command prompt, I noticed that the kernel did not recognize any ethernet devices. I now have a machine that is not connected to the network. After some more Internet research I found out that the current 4.15 Linux Kernel that I have is insufficient to run on the Raven Ridge architecture, the AMD code name for the Zen CPU and Vega GPU combination on a single chip. I have to upgrade to the 4.18 Linux Kernel.
However I cannot upgrade through the Internet, because the machine is not on the Internet. I have to download the Debian packages on a USB stick with another machine and manually install them. At this point, I learned that you cannot simply download a single package for this. I had to decide whether to go with the Linux Mainline Kernel packages or go with the Ubuntu HWE (Hardware Enablement) packages. After reading through Ubuntu’s LTS Enablement Stack article, I decided to HWE packages. I found the linux-generic-hwe packages and their prerequisites on pkgs.org. This took several iterations as I did not get all the dependent packages on the first try.
Once all the packages were installed, the machine booted without the need for the nomodeset option. However, the internet interface device was still not there. I had to run the command netpath, to find out that new motherboard’s ethernet device’s logical name was em1. To register the new logical name, I had to edit /etc/network/interfaces file.
Finally, the machine booted with an active ethernet connection. As a sanity check, I executed:
sudo apt-get install --install-recommends linux-generic-hwe-18.04 Ensuring that my new media server has all the required kernel packages. We are still not done. The IP address of the server has changed, because we now have a different MAC address, so the DHCP server provisioned a different IP. I tried to change the Unifi Controller to provision a static IP address to this new server but I was unsuccessful. I suspect that the new server is also running the Unifi Controller may have something to do with it. Since the IP address has changed, I needed to update the following configurations:
- Firewall rules
- Unifi Controller name space configurations
- Samba configurations because we only allow for local machines to share
All of this took from 4:30pm to 11:00pm last night, 6.5 hours worth of hardware assembly, research with Google, trial and error, and finally success. I cannot imagine if Google and the super helpful community forums did not existed. Fingers crossed that the new media server will run smoothly.


One thought on “Media Server Upgrade”