One of the many highlights of owning the new iPhone 12 Pro is the new Dolby Vision videos one can take. I took some footage of Darci our cat using the 4K 60FPS mode. The footage looked stunning on the iPhone itself. However, the small screen of the iPhone is less compelling than our 65″ LG OLED B7 TV that we have in the living room.
The question is, “What is the best way to get these new recordings on the TV and is our 3 year old TV compatible with the new Dolby Vision format?”
My first instinct is to slap it on to my Plex server and play it with the Apple TV 4K Plex App. This was terrible. It was like watching the video in slow motion.
Then I try the Plex App on the LG TV. This was better. The image was sharp, and the colour was vivid. However, the TV buffers every 5 to 7 seconds causing the video to pause or stutter. Not ideal!
I gave up on Plex, and went back to basics. I copied the video file to a NTFS formatted USB drive, that I previously AirDrop’ed from the iPhone to my Mac. The TV only understands FAT or NTFS, and FAT is pretty much useless because it has a file size limit of 4GB. I also tried exFAT but the TV did not like that format either. The video played flawlessly directly from the USB drive. So from this exercise, I knew the TV was compatible with the Dolby Digital format from the iPhone. Hurray!
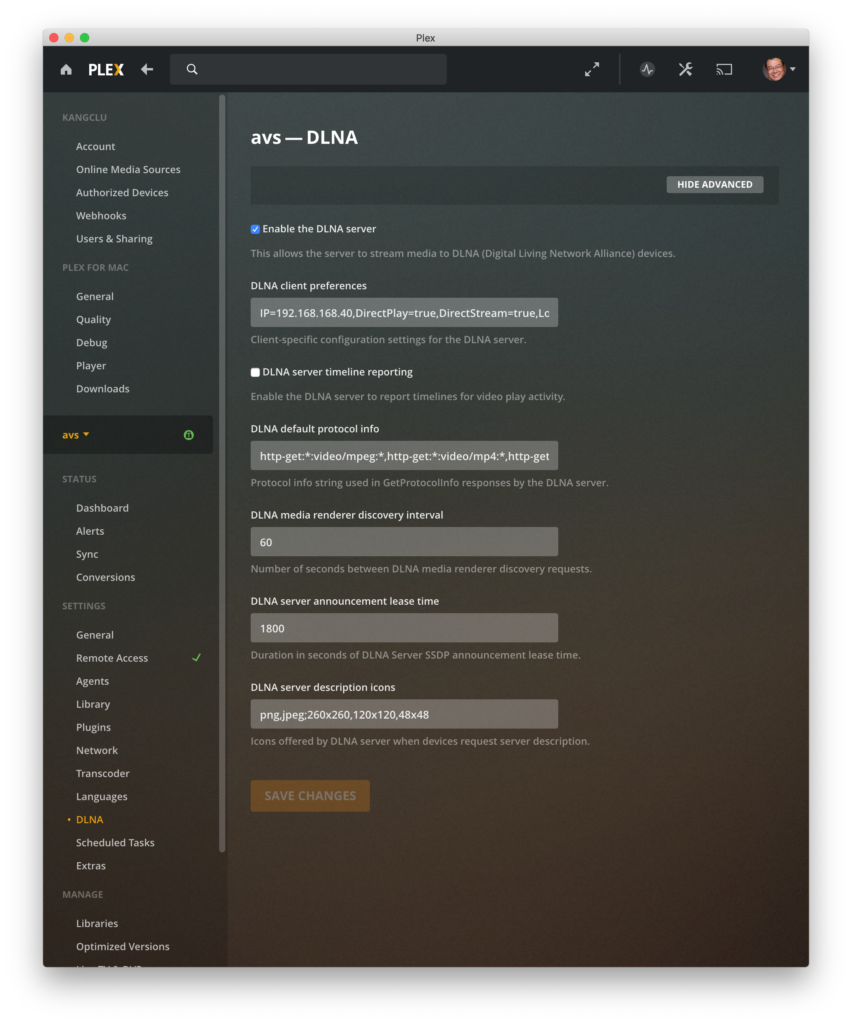
Now, is there a way to direct stream the video to the TV from our NAS storage that the Plex Media Server is referencing. The LG is DLNA compatible, so I enabled the DLNA feature on my Plex server and voila.
The Plex Server Setting Screen used to enable DLNA
Below is a video showing the steps that I took on the LG OLED TV.
It is too bad that the Plex App on both the TV and the Apple TV cannot make it work. I hope this will be remedy with a future release.
We are parents of a son who has opted for choosing the in-person learning format this fall in Richmond Green Secondary School. With the recent rises in Covid-19 cases in recent weeks, we have been monitoring new developments continuously. We attempt to monitor new information on regional news via mostly online resources.
However, recent school communication has gotten us pretty confused and frustrated which prompted me, admittedly, ranting about this here. I do hope to provide some constructive feedback, so let me set this up.
On October the 18th, we received the following form letter via an email from the principal.
From: Richmond Green SS xxxxx.yyyyyyy.zz@yrdsb.ca Subject: COVID-19 Notice of exposure – Richmond Green Secondary School Date: October 26, 2020 at 1:33 AM To: xxxxxxxxx@gmail.com
To: xxxxxxxxx@gmail.com
Dear Parents & Guardians
Please find attached a notification from York Region Public Health. We ask that you please read the attached letter carefully as it contains important information regarding COVID-19.
Sincerely
X. YYYYYY Principal
email: xxxxxx.yyyyy@yrdsb.ca
The attached notification PDF file is here. The last paragraph of the letter is:
If you have any questions or concerns, please visit york.ca/covid19 or contact York Region Public Health at 1-877-464-9675.
When you click on the above link, I had to do this (follow my navigation by viewing the video below):
So you can see from the above video, that it was not immediately apparent how to get to the information. It took some hunting and exploring. You almost wish that the link that they had will bring you directly to:
School Covid Information
Life would be so much simpler!
If you are trying to access the york.ca/covid19 site on your mobile phone, then the user experience is worse than using a desktop browser.
I understand that they are trying to reuse their existing dashboard information, but frankly speaking this is just throwing data into a big pile and asking people to go to the pile and hunt for the relevant needle that you want, and call it job done.
On top of this, we got the exactly the same email yesterday on October 27th. I am sorry, but now we are being spammed by our schools without net added information, which simply causes more confusion. These guys are responsible for the education of our kids, and yet their form of communication and distributing information is second rate to industry norms. It is sad to see.
I want to be clear that I am criticizing the system and the process, and not laying any blame to the principal who may simply be a conduit in all of this. I know we are in a pandemic and we are all under stress. However, we can use this as an excuse, or we can use this opportunity to bring out the best in us.
Maybe I’m simply being too picky. Let me know what you think.
Update 2020-10-27 8:20PM:
Our York Region, Dave Barrow, has provided an alternative link york.ca/covid19data, which actually work so much better on my mobile phone.
I think the team must have modified something. Kudos to a team for a rapid response.
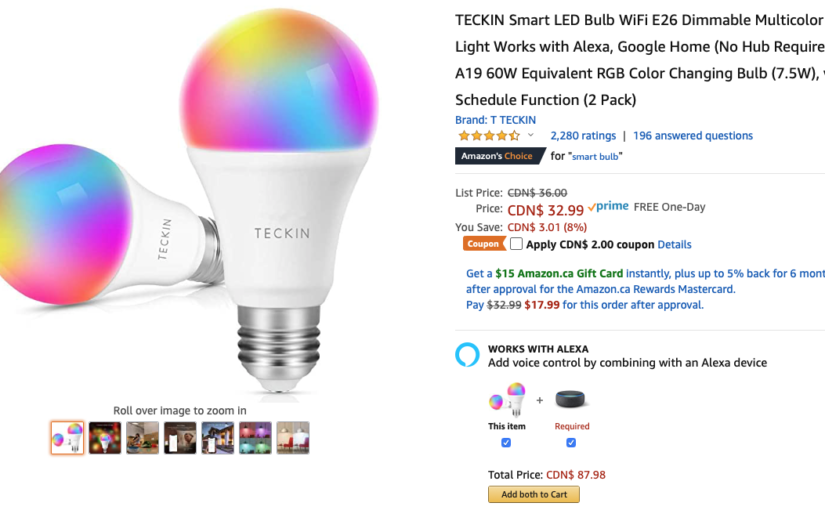
I found a pair of these on Amazon for around $30 CAD (after a $2 coupon saving). They look like fun to install. I figured that now that I know how to installed Tuya devices with the Homebridge, these would be great additions to the common areas of the house, should we need some colour added to our lives.
Amazon was extremely helpful and these bulbs came the next day. Amazon Prime is such a great service!
I proceeded to add these devices to the TuyaSmart app without any issues. Tested the lights using the app. I then logged into the Tuya developer site to ensure that the new devices were registered.
I provided the configuration into Homebridge using the following template from the homebridge-tuya-lan plugin page. Unfortunately, the provided sample template did not work, because the datapoint identifier, a terminology that represents a numerical id that uniquely identifies a specific device function, such as power on/off the device. My vague understanding is that the OEM, in this case Teckin, can pick and choose the datapoint identifier when creating their product, and map specific numerical values to the various functions of their devices. I gleaned this from Tuya’s developer documentation here.
Therefore, the provided sample of:
"dpPower": 1
was simply incorrect. The dpPower setting needs to have the correct numerical value that points to the power on/off functionality of the device. The default of 1 was not working, and I now have the challenge of finding the right value.
Through much research on Tuya’s site and Google, I found out that each device has a signature / schema. I found out that I can get the current status by executing the following command line (key and id has been replaced with fake ones):
I then guessed that the datapoint identifier started with 20 instead of 1. Also based on the value of 1000 for dps '22', I also deduced that I had to change the colorFunction from HEXHSB to HSB, because it was not using HEX to denote ranges. The last hint that I got was from this comment on a forum. Ultimately, consolidating all of the above knowledge, I arrived to the final configuration that looks like this:
The lights finally worked with Homebridge and therefore also worked with HomeKit. I thought adding these couple of bulbs would be done in a few minutes, but it took a little more effort than I thought.
I couldn’t be happier that they now work with Siri!
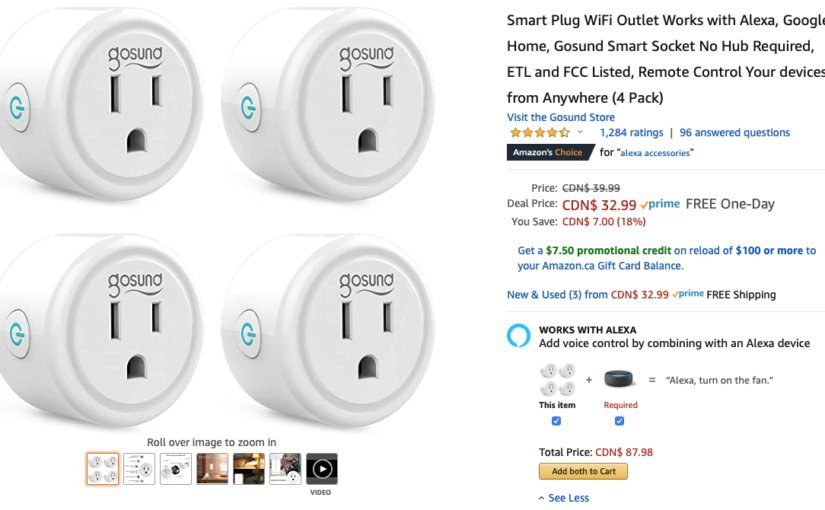
Recently I received an Amazon email, and I found the above Gosund Smart Socket promotion. Four smart plugs for $33 CAD. Unfortunately, it was not HomeKit compatible. I did not want to have any of my smart IoT devices connected to Amazon or Google so no thank you Alexa and Google Home.
A few years ago, I built my own smart garage door opener and hooked it up to the Homebridge server that is running on my NAS media server. The Homebridge server allows non-certified IoT devices to be connected to HomeKit. My garage door opener being one of them. I did a cursory search on Google and found that it should be possible to connect the Gosund outlets to HomeKit using Homebridge, so I took the plunge and made the purchase.
The plugs came and I downloaded the Gosund app and setup one of the outlet. It worked like a charm through the Gosund app. As I was setting up this single outlet with Homebridge, I found tuya-convert. This is an alternative to Homebridge. Instead of registering the device to Homebridge, tuya-convert claims that I can just flash the firmware and I can add the Gosund plug directly to HomeKit. Sounds attractive and I have to give it a shot. Long story short, I was successful with replacing the firmware, but when configuring the plug I provided wrong configuration data and as such I was locked out of the plug, effectively bricking the plug. Nothing ventured, nothing gained. While doing this exercise, I learned a lot about how to use esp-homekit-devices project to turn any ESP8266 chip set and make it HomeKit compatible. This could be very handy in a future project, but for now let’s go back to Homebridge.
I found that the version of homebridge on my NAS server was outdated, and so was the version of node. I backed up my existing homebridge configuration and proceed to uninstall homebridge.
I installed the latest stable version of node as of the writing of this blog, v12.19.0. I then followed these instructions and installed the latest version of Homebridge. This new version came with a web based UI as well. For convenience, this is what I did:
I then reinstalled the Homebridge plugins that I previously had, which included homebridge-camera-ffmpeg, and my custom homebridge-kl-garage.
The Gosund plugs effectively uses the Tuya IoT Platform. So instead of using the Gosund App, I downloaded the TuyaSmart App from the App Store. The user interface is nearly identical to the Gosund App and I re-added the outlet with the TuyaSmart App.
Now I’m ready to install the homebridge-tuya plugin using the instructions here:
As per the instructions, I watched the YouTube video and followed its steps using the QR-Code method.
However, I found the video to be incomplete and I ran into issues when running the tuya-cli command. Essentially I got an error indicating that I did not have permission to run the API.
Using the information I had from the video and after some more Google searches, here are the steps which I followed and they worked for me.
First, install the tuya-cli command:
sudo npm i @tuyapi/cli -g
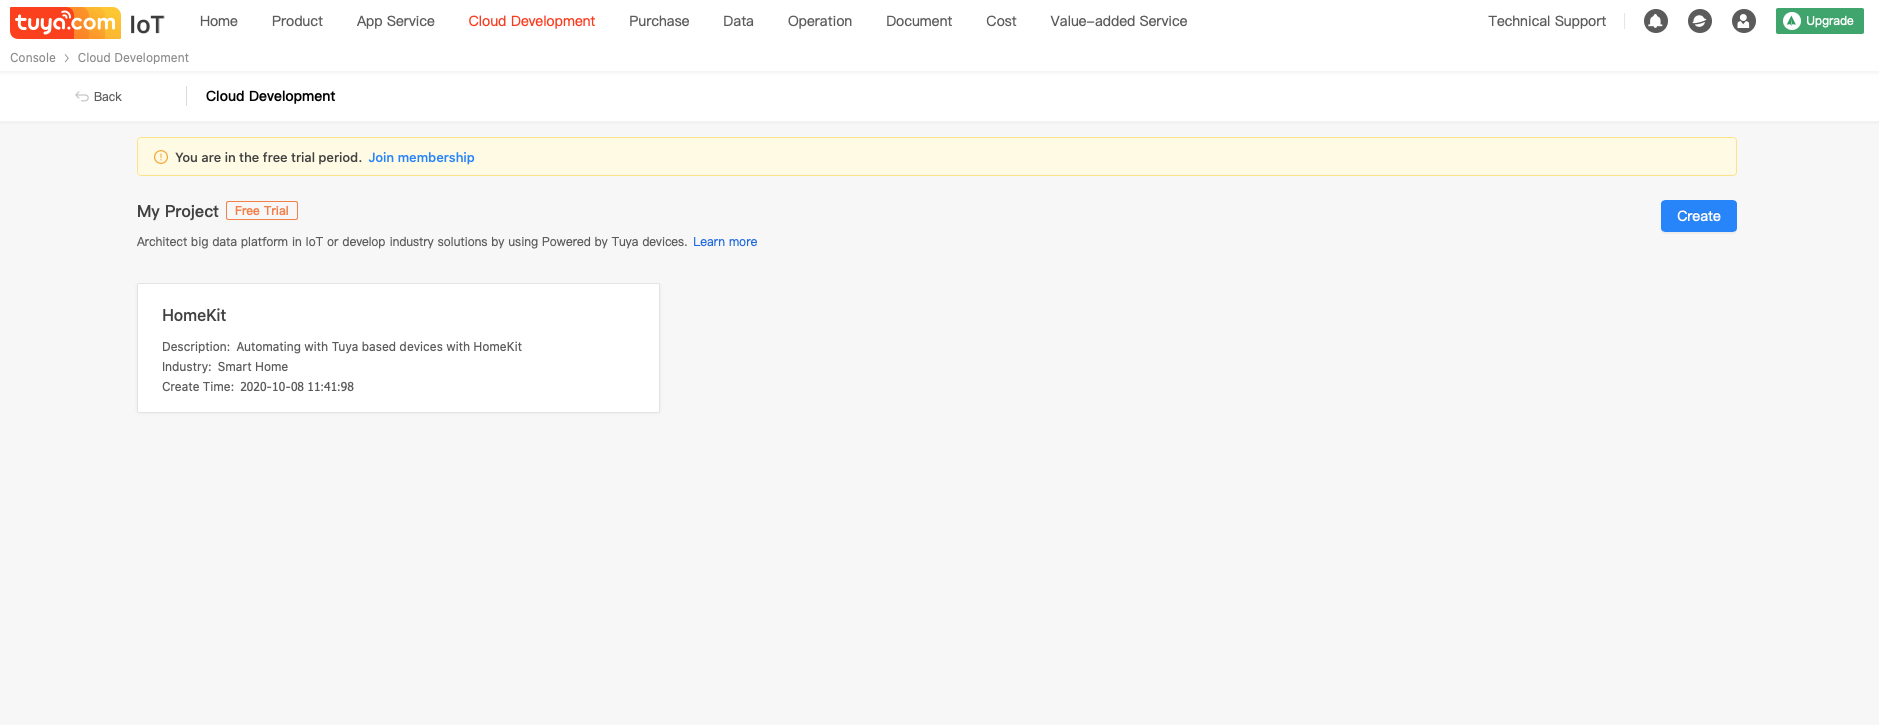
Next I had to create an account with iot.tuya.com. The sign-up process was a bit tricky because their email sending out the verification code seem to be slower than the allotted 60 seconds before the whole process timeout. It took me a couple of tries before I was able to create an account.
Once the account is created, I proceeded to create a project called HomeKit as part of Cloud Development. Below is a screenshot from the site.
After project creation
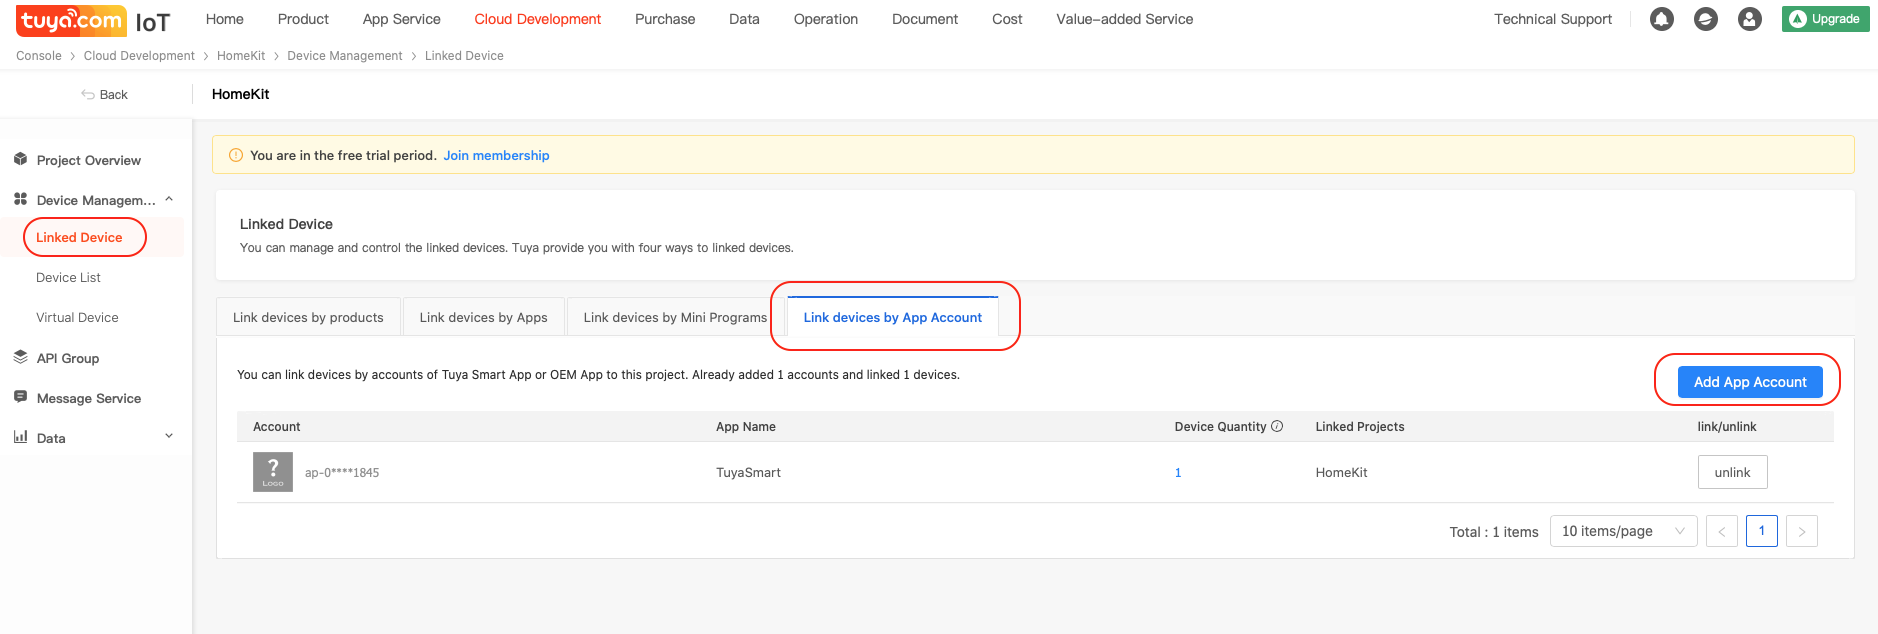
Click into the project and under Device Management, we need to link devices using the Link devices by App Account tab. When you click on the Add App Account, a QR-Code will be presented which needs to be scanned from the TuyaSmart App.
After linking the App account
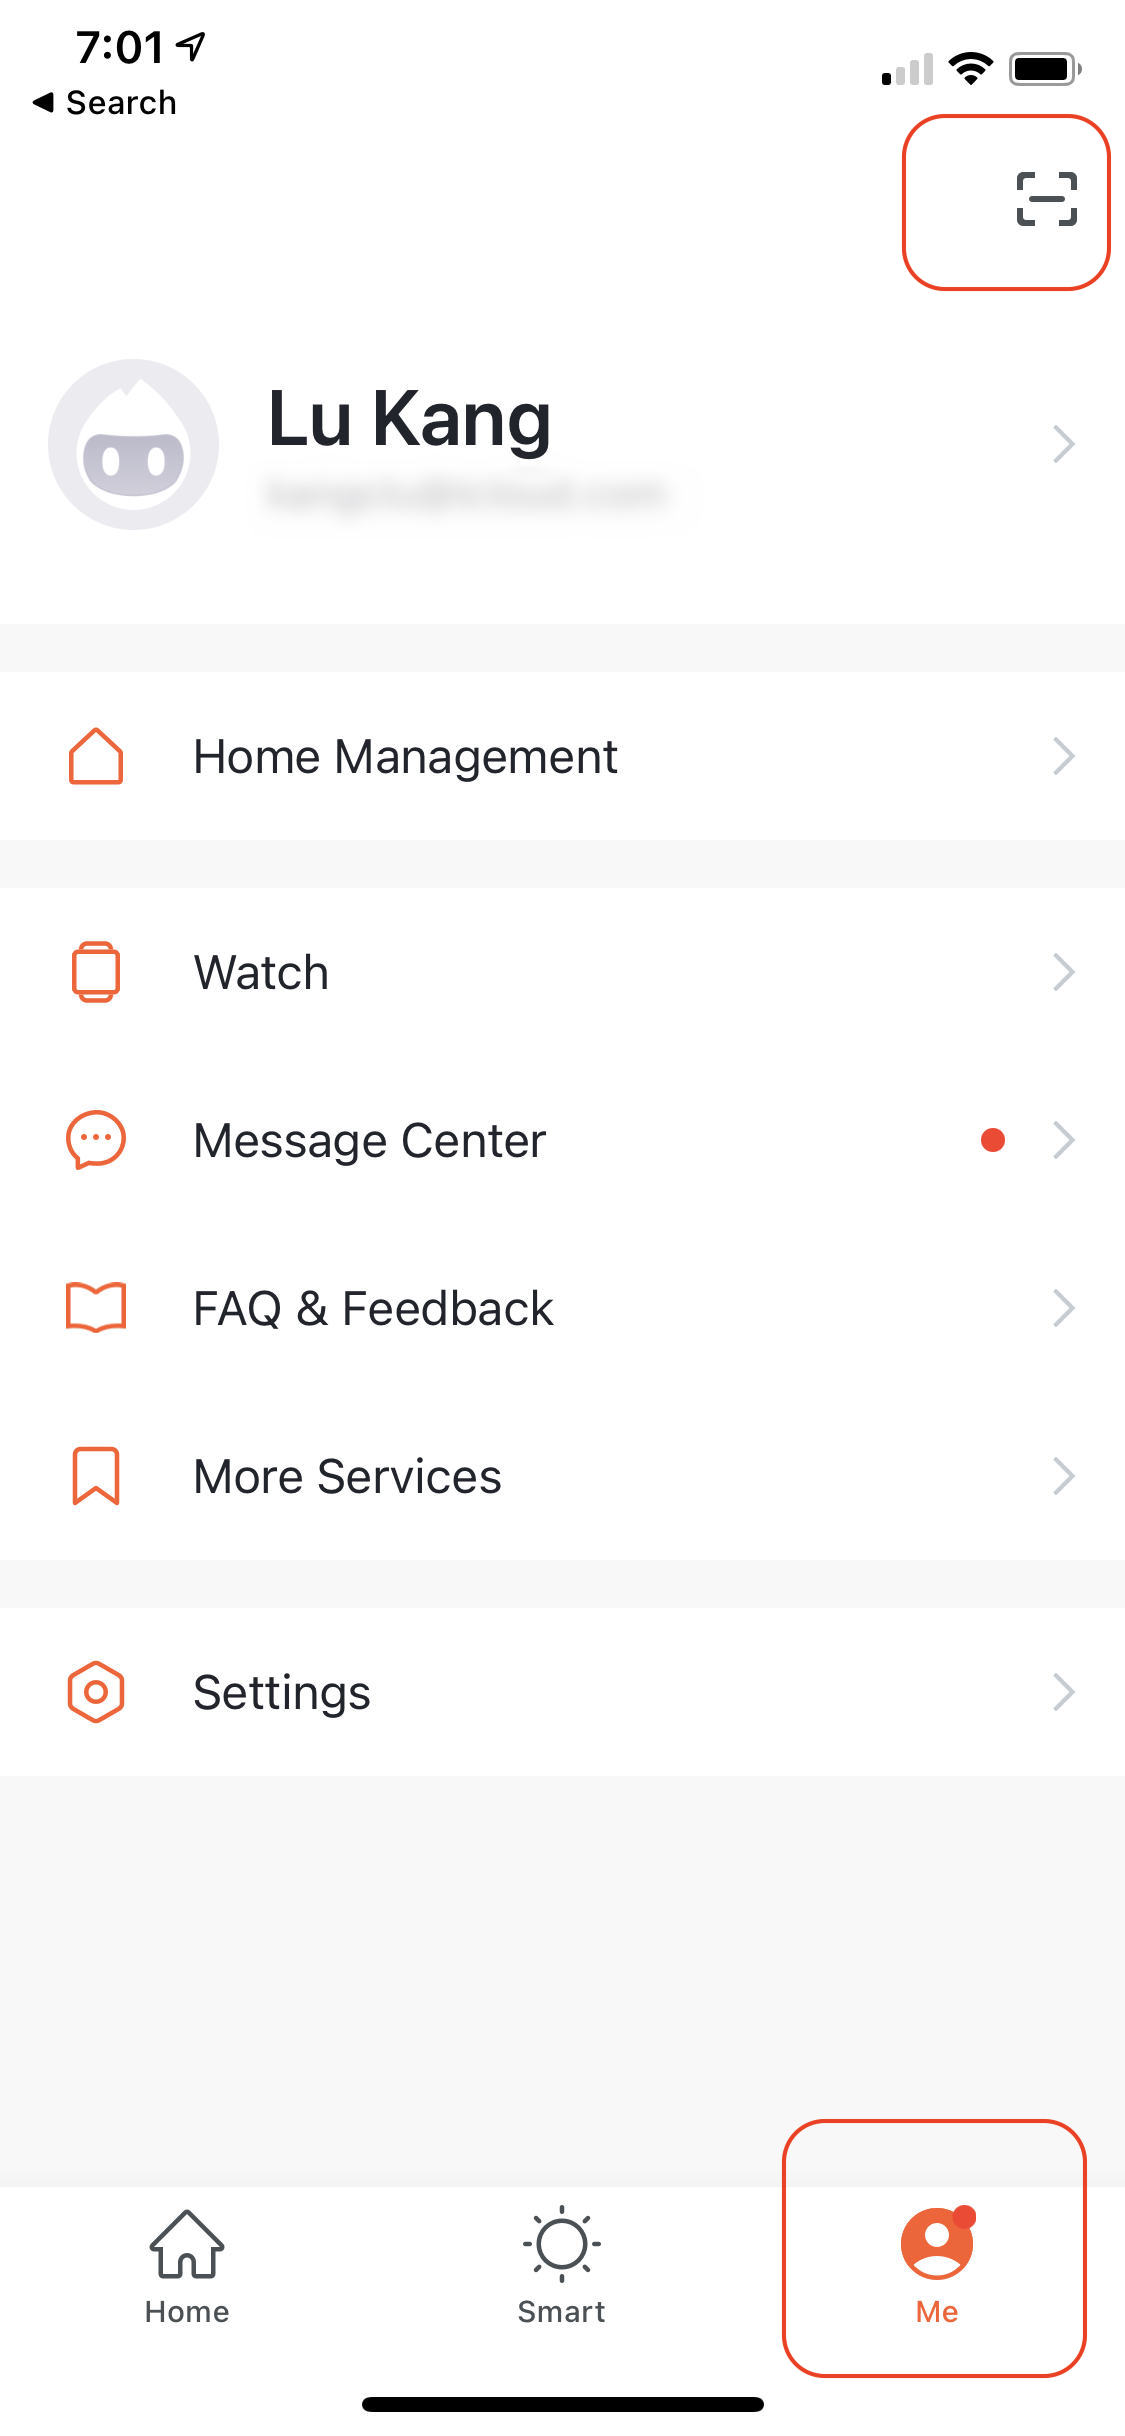
To scan the QR-Code, open the TuyaSmart App and select the Me tab at the bottom, and tap on the scan icon in the upper right hand corner.
Use TuyaSmart App to Scan QR-Code
Once the TuyaSmart App scans the QR-Code, you will see the Account along with a device count that you previously linked to your App.
You should be able to list all the devices that you previously registered / paired with the TuyaSmart App. I had to select America before I see the devices. See below.
Devices previously added to the TuyaSmart App will be displayed
You will need the virtual id which is the identifier below the device name. Go back to Project Overview and take note of the client id and secret:
The Client ID is the same as the API key for tuya-cli
Once you have these three pieces of information, you can then find the keys for your devices that you will need to configure the homebridge-tuya plugin. To do this, execute the following (note that the API key and secret below are fake):
% DEBUG=* tuya-cli wizard
? The API key from tuya.com: akkopy4vox723px9kcb23
? The API secret from tuya.com 3hfjodfu672kfm08711kpsnbvzzuyerk
? Provide a 'virtual ID' of a device currently registered in the app: 46616355e09806ca6ba7
The above command should yield something like (again the key is fake):
Now that we have the id and key for the Gosund outlet, we can then configure Homebridge using the homebridge-tuya plugin. We use the Homebridge web interface to do this.
Homebridge Web UI
The configuration for the plugin looks something like:
Once I restarted Homebridge on my NAS server, my Home App on my iPhone showed the smart plugs all configured. Below is what it looks like once I configured three of the Gosund smart plugs.
Home App
The integration is pretty good. The plugs are pretty cheap that I decided to buy four more.
Update: I had to add the "encoderOptions": "-preset ultrafast" property in the videoConfig object, as well as ensure the "audio" property is set to false of the homebridge-camera-ffmpeg plug-in configuration to fix the HomeKit camera streaming. With the latest version 3.0.3, the picture freezes and only get audio if this encoder option was not provided. Below is a complete sample for one of the Unifi cameras:
Before the Covid-19 pandemic we had booked travel to Mauritius for the entire month of July. The idea is to bring the kids to Mauritius for a very nice summer vacation in paradise. Of course this did not go as plan as the entire world went into lockdown in March and travel everywhere was curtailed.
Not seeing any end in sight for the pandemic, I decided to cancel our flights to Mauritius and seek a full refund in May. At first I was not sure whether we would be able to obtain a refund. As I read more and more articles regarding this topic, such as the CBC article linked here, I felt more empowered to seek a refund. I decided to take a dual prong approach. First I filed a travel insurance claim with TD Visa, and second I requested a refund with Expedia for TD.
I was very encouraged by the fact that Expedia for TD sent me an email in May indicating that my refund is being processed. However, I got heard from no one from May until August. When I look up Air France’s schedule, they have shown that our original flights have all been cancelled. I decided to call Expedia for TD and ask for an update on the matter.
Long story short, it took them until the end of August to refund 4 out of 5 tickets on the itinerary. The last ticket was recently refunded and it my credit card statement yesterday. I made a total of 7 calls to Expedia for TD, the shortest was about 20 minutes, but more often than not it was between 30 minutes to an hour. The good news is that the on hold time was less than 5 minutes for all the calls that I made from August. Here is a summary of all the calls that I’ve made:
August 4
August 14
August 26 (4 of 5 tickets were refunded at this time)
September 11
September 21
September 22
September 30 (last ticket acknowledged to be in processed)
Last refund hit my credit card on October 1
So you can see from above, that a fair bit of persistence is required to obtain your traveler’s rights during these times. If you are still in the midst of finalizing your travel situation that has been impacted by the pandemic, then I urge you to keep at it. It will pay off.
This afternoon I wanted to experiment with how I can connect the Gosund WiFi electrical sockets to HomeKit. Unfortunately while I was attempting to do so, I installed packages that corrupted my Linux kernel and removed my network interface.
This is of course a huge inconvenience. After a reboot, I found the media server to not have any networking. The only network interface that it recognized was lo (the loop back interface 127.0.0.1).
When I performed a:
sudo lshw -C network
The network card was recognized but was UNCLAIMED. This obviously raised alarm bells and indicated to me that the kernel was some how not recognizing the card.
I had to download a version of Ubuntu Desktop 18.04 LTS on a USB drive and proceeded to live boot from it. Luckily the live boot recognize the network card and I was able to get networking.
Before I can perform any rescue activities, I had to mount the old root file system and chroot to it by taking the following steps:
# Boot the Ubuntu Live CD.
# Press Ctrl-Alt-F1

sudo mount /dev/sda1 /mnt

sudo mount --bind /dev /mnt/dev

sudo mount --bind /proc /mnt/proc

sudo mount --bind /sys /mnt/sys

sudo chroot /mnt

# Add the following lines into /etc/resolv.conf after you use chroot:

nameserver 208.67.222.222
nameserver 208.67.220.220
I then needed to restore the kernel by executing the following:
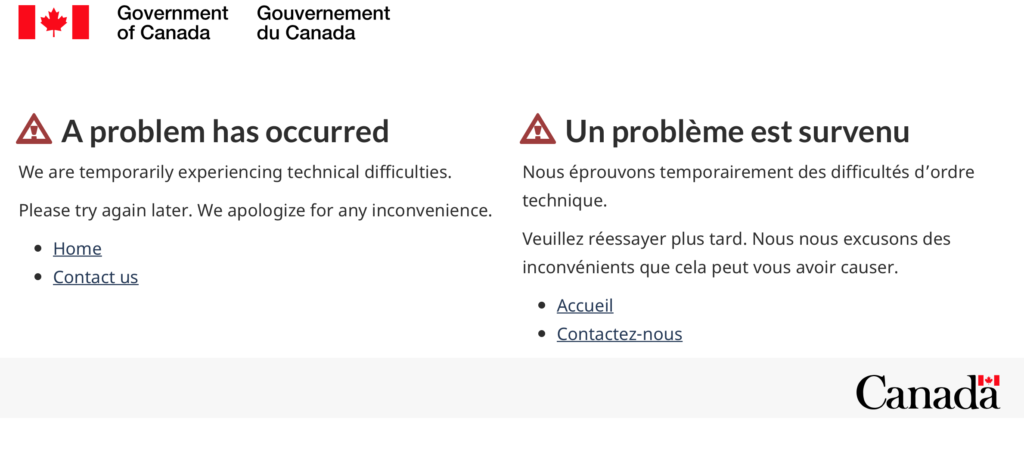
Normally one expects the base services especially those relating to government and financial services to be ironclad. However, I get something like this:
The above is what resulted today when I wanted to check my 2019 Notice of Assessment online. I suppose in times when even the government of Canada experiences security breaches, then the above should not be a surprise.
On this same day, we checked our TD Visa card online statements and found a very large discrepancy in our balance. I called up their support line and they told us it is a known issue and it will be fixed next week. I commented on why we have not received a notification if this is a known issue. The representative was speechless as expected.
Our threshold for good service is dropping. I hope these are not early signs of things to come.
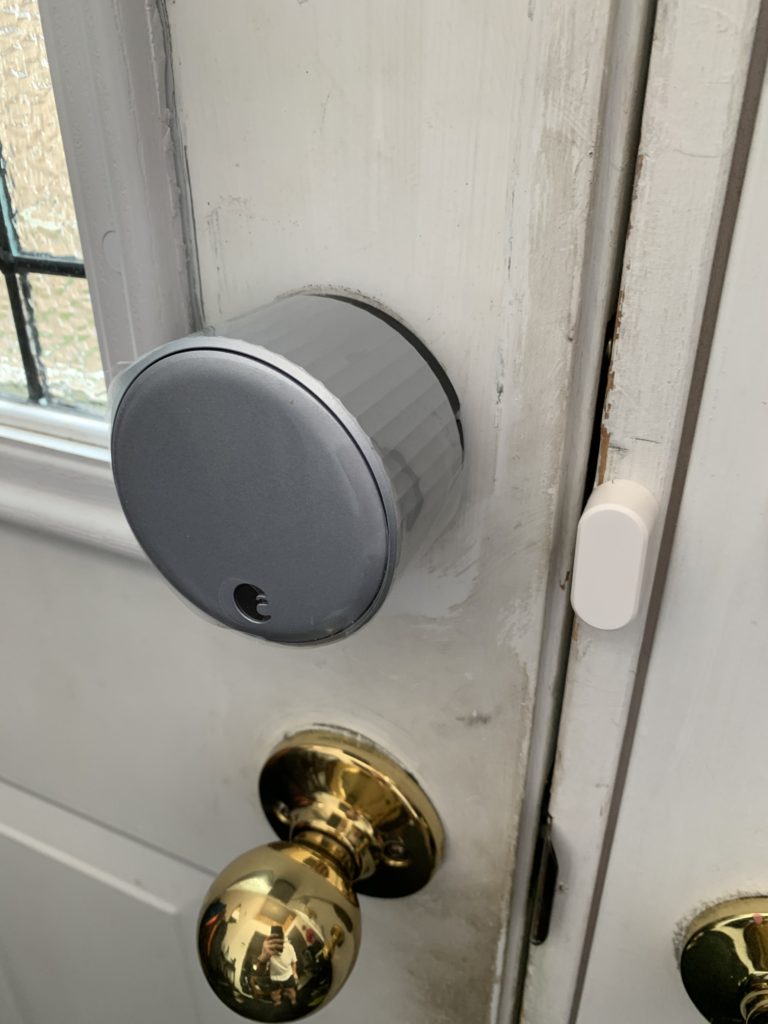
About two weeks ago the Kevo smart lock was becoming unresponsive. My kids were having problems unlocking it from the outside and it was difficult to lock it as well.
The old Kevo lock was bluetooth only and with recent iOS updates, the quality of the bluetooth connection has gradually degraded to the point it rarely works. Because it is a very old version, we have not received any firmware updates. We purchased the lock in 2013/14 period so we have gotten a good 6 years worth of use.
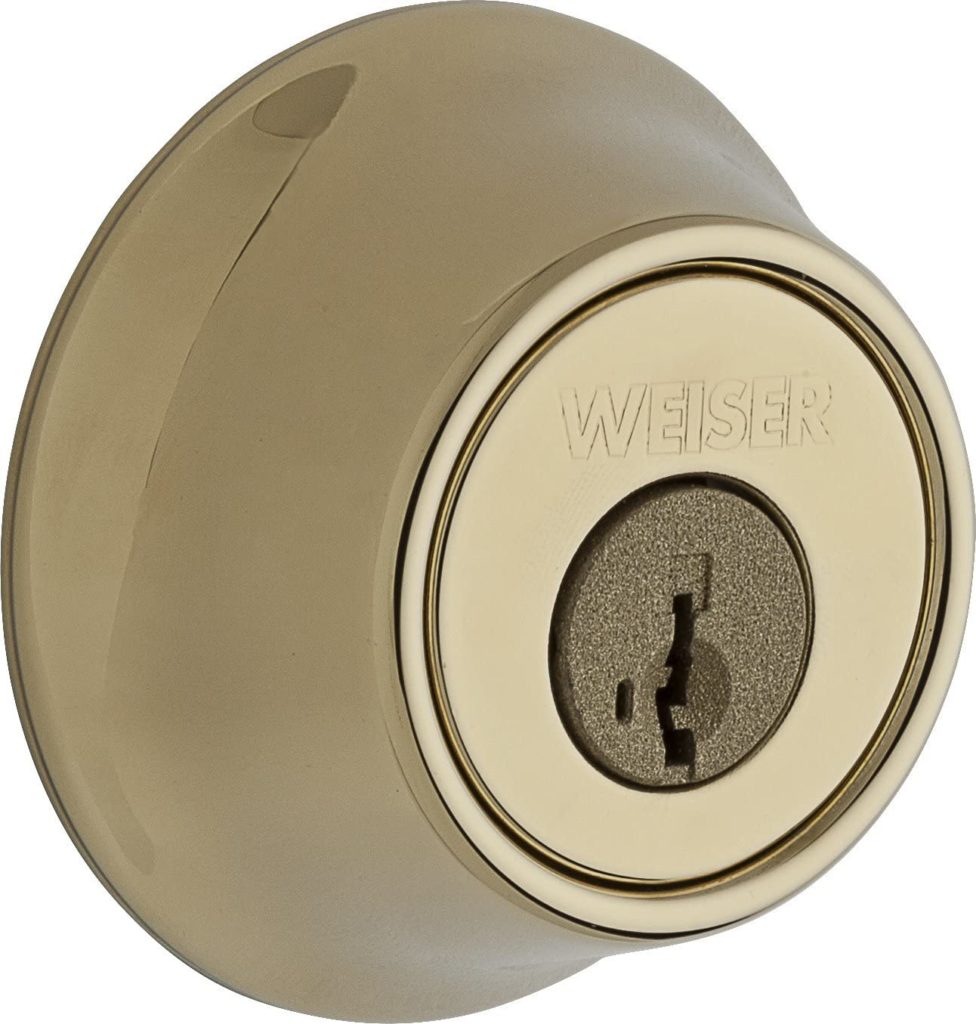
Weiser Round Deadbolt Featuring SmartKey, Exterior Door Lock, Brass (9GDC94710-061)
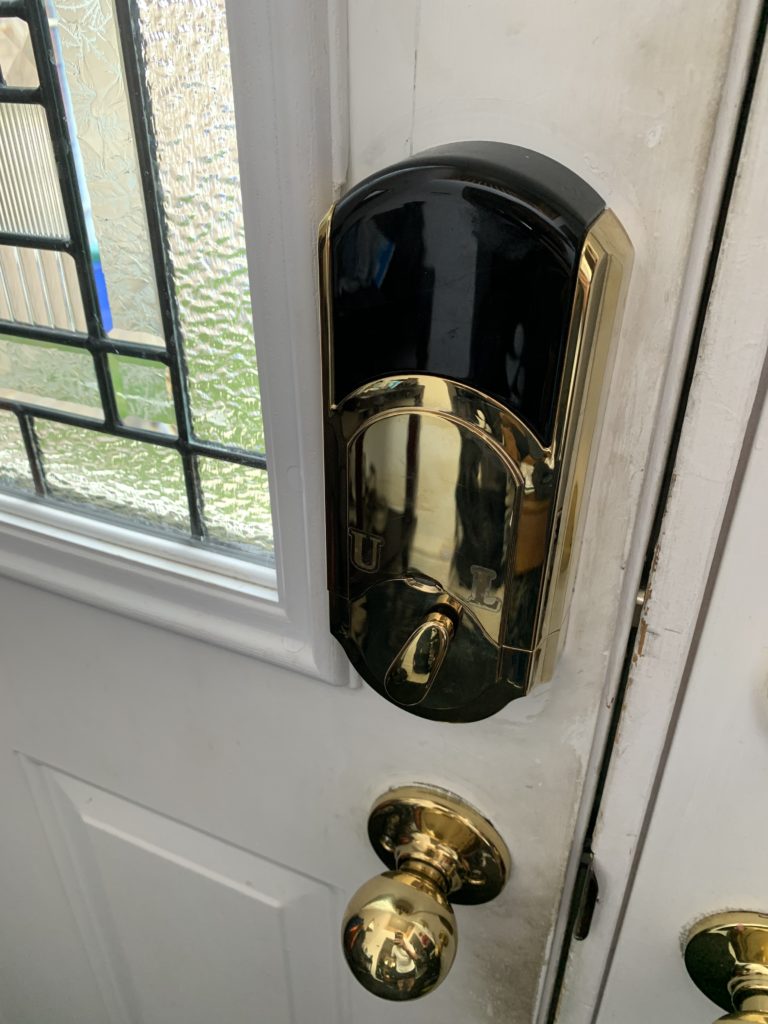
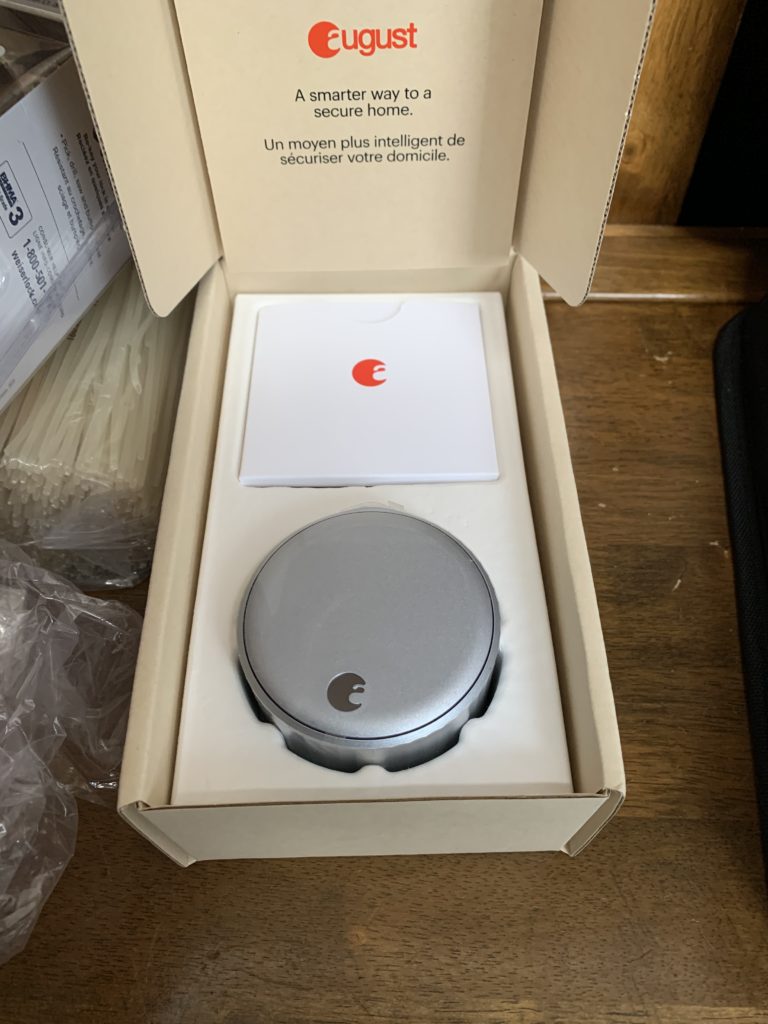
We decided to get the August WiFi Smart Lock, with the hope that its WiFi connectivity will enable us to use the lock with HomeKit. Along with the August, I also purchased the Weiser Round Deadbolt Featuring SmartKey. The SmartKey feature allows us to reprogram the lock with our old set of keys so that we don’t have to change the front door keys.
The uninstallation of the Kevo unit and the installation of August was pretty straight forward. However, the operation with HomeKit did not work fully. It registered fine, and HomeKit was able to detect whether the lock was engaged or not. However, HomeKit did not respond very well to locking and unlocking the lock. Things improved when I reset the unit to factory settings and repeat the procedure again.
The iOS August App worked fine. I learned from the App that it has a smart connectivity feature that automatically determines whether it will connect via bluetooth or WiFi. As a person in this profession, this immediately raised alarm bells. My theory is that to save power and battery life, August engineers have aggressively underpowered the WiFi functionality. This was partially confirmed when I noticed the very long latency pings to the unit. Here is a sample inspection:
$ ping 192.168.168.36
PING 192.168.168.36 (192.168.168.36) 56(84) bytes of data.
64 bytes from 192.168.168.36: icmp_req=1 ttl=255 time=381 ms
64 bytes from 192.168.168.36: icmp_req=2 ttl=255 time=10384 ms
64 bytes from 192.168.168.36: icmp_req=3 ttl=255 time=9377 ms
64 bytes from 192.168.168.36: icmp_req=4 ttl=255 time=8377 ms
64 bytes from 192.168.168.36: icmp_req=5 ttl=255 time=7377 ms
64 bytes from 192.168.168.36: icmp_req=6 ttl=255 time=6377 ms
64 bytes from 192.168.168.36: icmp_req=7 ttl=255 time=5377 ms
64 bytes from 192.168.168.36: icmp_req=8 ttl=255 time=4380 ms
64 bytes from 192.168.168.36: icmp_req=9 ttl=255 time=3370 ms
64 bytes from 192.168.168.36: icmp_req=10 ttl=255 time=2370 ms
64 bytes from 192.168.168.36: icmp_req=11 ttl=255 time=1360 ms
64 bytes from 192.168.168.36: icmp_req=12 ttl=255 time=359 ms
As you can see the latency is extremely long. The unresponsive aspect of the WiFi connection probably explains why HomeKit connectivity is largely craps shoot. If I was August, it was probably premature to market this product as WiFi capable, should have waited for or designed for better reliability.
In conclusion, the lock works fine with the App and mostly work with HomeKit (70/30 chance). I find that it works better with HomeKit if you are in close proximity with the lock and your iOS device. Can you lock/unlock when you are around the world? Once again, it mostly works depending on the connectivity, but I would not depend on it for emergencies.
If it was a normal year, my kids will be going to school tomorrow, the traditional first Tuesday after Labour Day long weekend. We all know 2020 is not a normal year. We are in the midst of a pandemic, and along with this crisis comes with special circumstances. Public schooling is no exception to special treatments. All of this is quite understandable and expected.
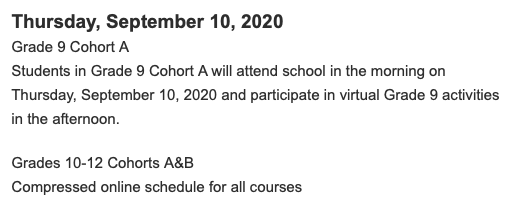
What is disappointing is that our school board and our government has had many months to prepare since March of this year, and yet as a parent of two secondary school students, I feel that our schools are woefully unprepared. Yes, they have provided emails, videos, and web resources filled with general information, along with “more information to come”, but nothing concrete and specific to my kids’ schedule. There are sample schedules to be sure, but the answers communicated so far raises more questions than answers. For example, as of the writing of this post, we still do not know:
When exactly is the first day of school (physically)?
Which cohort?
How does a student who opted for virtual learning register?
What are the details to synchronous virtual / online learning for those who have chosen in-person learning?
Will the above information come from a future email before school starts, or will they get it on the first day of school?
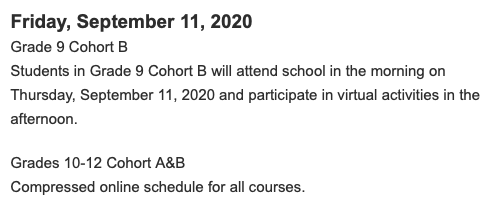
So if your child is going to grade 9, you currently do not know which cohort. If your child is not in grade 9, they currently do not have any information to attend the so called, “Compressed online schedule for all courses”.
The information for Thursday, Friday, and Monday could not be more cryptic for students who are in grades 10 to 12, because we were lead to believe from previous emails that the idea of cohorts is that the in-person sessions are staggered to be held on alternate days. The above Monday description seems a little contradictory to our previous expectation.
The school board is effectively launching a new service or product, and yet their communication for this new service is well below industry standard. Compare the board’s effort in launching this “re-opening” with product launches from Apple, Tesla, Samsung, and others. I think you will find the difference quite stark.
Is my expectation too high? Perhaps. However, these are the folks who bear the responsibility for teaching our next generation. Collectively as a decision making body, and the execution of this re-opening clearly show “they” do not fully comprehend how to launch something new. Think about this, as this is the example that your kids will be learning from!
Thankfully, the uncertainty does not affect our family too much, but I hate to be a parent of a grade 9 student who is standing on pins and needles as they try to comprehend how they are going to plan for this week and the next. I truly feel for them.
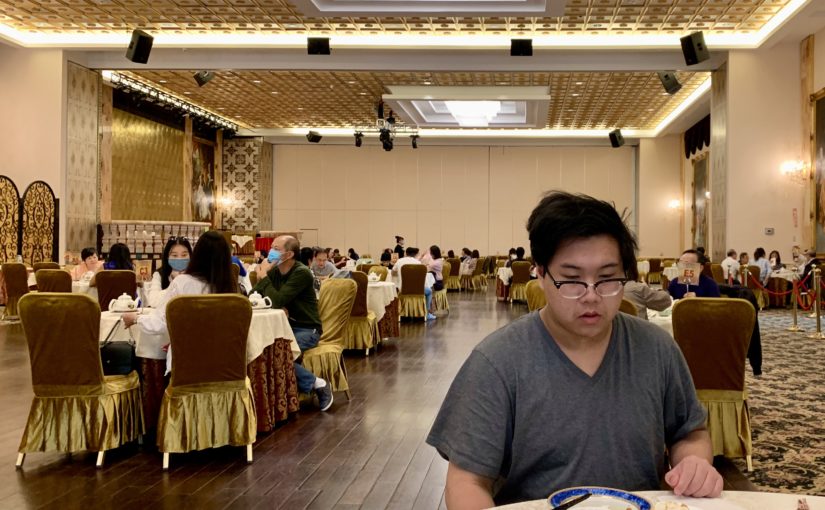
The protocol there was pretty impressive. The tables are spaced between 3 to 6 meters apart, very spacious. Along with the high ceiling, you do have the feeling of being “isolated”. All attending staff was wearing face masks and gloves. Face masks are mandatory when you are not at your table eating, and your temperature is checked before they allow you to enter the dining area.
So if you miss your dim sum dining experience during the pandemic, I think Premiere Ballroom provides a very nice compromise. They are also opened on Friday, Saturday and Sunday evening for dinner services.